
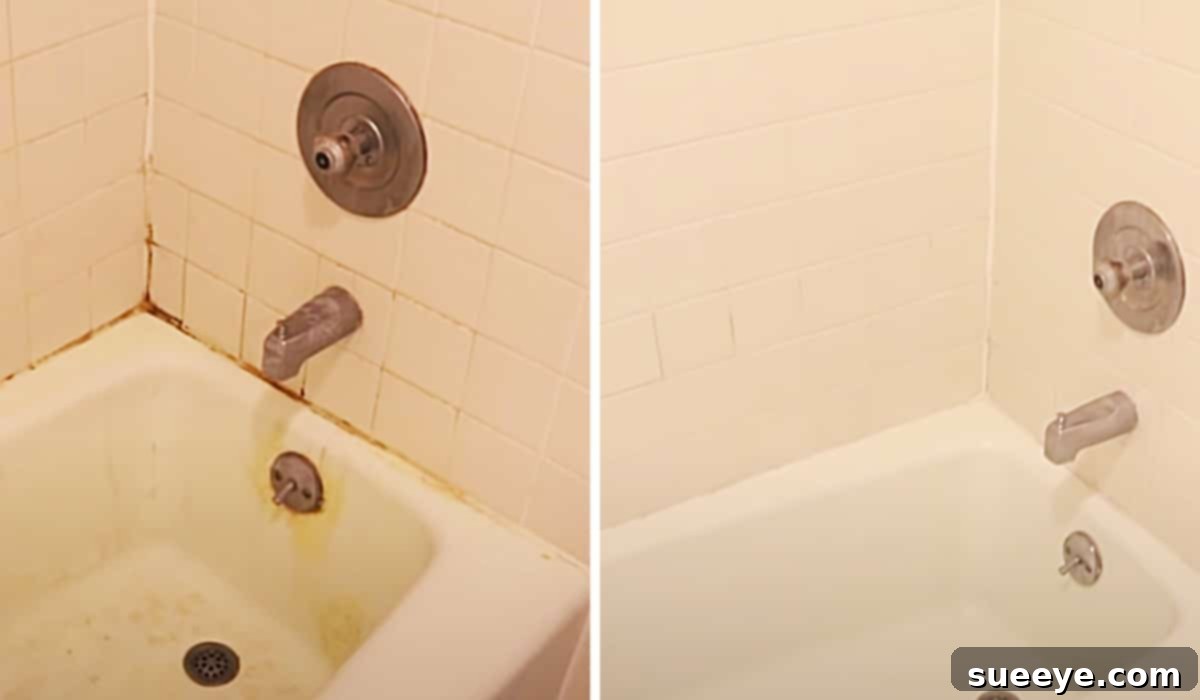
Showers are undeniably essential spaces in our homes, yet they are also prime breeding grounds for grime, soap scum, and the dreaded mold. That unsightly black, pink, or green growth clinging to your grout lines and shower corners isn’t just an aesthetic problem; it can also pose health risks and make your bathroom feel less hygienic. Cleaning mold, especially when it’s deeply embedded in porous grout, can seem like an insurmountable task, often requiring strenuous scrubbing and specialized products that don’t always deliver on their promises. Many homeowners find themselves battling stubborn mold year after year, frustrated by its relentless return and the constant effort required to keep it at bay.
However, what if there was a highly effective, yet surprisingly simple, method to not only eradicate existing mold but also significantly reduce the effort involved? Inspired by a brilliant video tutorial from Do It On A Dime on YouTube, which detailed ingenious approaches ranging from the everyday use of an affordable shower squeegee for prevention to deep scum loosening with cleaning vinegar, we discovered a powerful cleaning hack. This particular method, centered around a readily available clingy bleach mixture, stands out for its remarkable efficacy and minimal need for “elbow grease.” By allowing the powerful solution to sit and work its magic, baked-on scum and stubborn mold are loosened almost magically, transforming a once daunting chore into a straightforward process. This innovative approach promises not just a clean shower, but a truly revitalized and more hygienic bathroom space, making it one of the best cleaning discoveries we’ve encountered in a long time.
How to Effectively Clean a Moldy Shower and Prevent Future Growth
Tackling shower mold doesn’t have to be a Herculean effort. With the right technique, appropriate materials, and a bit of patience, you can restore your shower to its sparkling best. This comprehensive guide will walk you through a highly effective method for cleaning even the most stubbornly moldy showers, drawing inspiration from proven strategies that minimize scrubbing while maximizing results. We’ll cover everything from the essential materials to detailed step-by-step instructions, crucial safety tips when working with powerful cleaners, and invaluable advice for preventing mold from returning, ensuring your shower remains clean and fresh for longer.
The Problem: Why Showers Get Moldy and Why It’s So Stubborn
Before we dive into cleaning, understanding why mold thrives in your shower can greatly assist with prevention. Mold is a type of microscopic fungus that flourishes in damp, warm, and dark environments, making your shower and bathroom a perfect habitat. It feeds on organic matter such as soap scum, dead skin cells, shampoo residue, and mineral deposits from hard water that accumulate on surfaces. Poor ventilation, infrequent cleaning, and porous surfaces like grout lines and caulk create ideal conditions for airborne mold spores to settle and grow into visible colonies. Once established, mold can be incredibly tenacious, burrowing deep into grout and caulk, making it exceptionally challenging to remove with just a quick wipe or superficial cleaning. Its deep roots often mean that even if the surface appears clean, the mold can quickly resurface.
Understanding the Clingy Bleach Method: Science Behind the Clean
The core of this powerful cleaning strategy revolves around a simple yet ingenious concept: allowing a potent bleach solution to remain in direct contact with the mold for an extended period. Regular liquid bleach, while a highly effective disinfectant and stain remover, tends to run off vertical surfaces before it can fully penetrate and kill deep-seated mold spores. This is where “clingy bleach” or strategically using paper towels to hold the bleach in place comes in. By creating a saturated, adhering compress, the bleach has ample dwell time to work its magic. This prolonged contact allows the bleach’s active ingredient (sodium hypochlorite) to break down the mold’s cellular structure, effectively killing the fungi, disinfecting the surface, and bleaching away unsightly stains. This extended contact time is the key to achieving deep cleaning results without the need for excessive, back-breaking scrubbing, as the chemical mixture does most of the heavy lifting for you.
Essential Materials for Effective Mold Removal
Gathering all your supplies before you begin will make the cleaning process much smoother, more efficient, and significantly safer. Here’s a detailed list of what you’ll need, along with important considerations for each item:
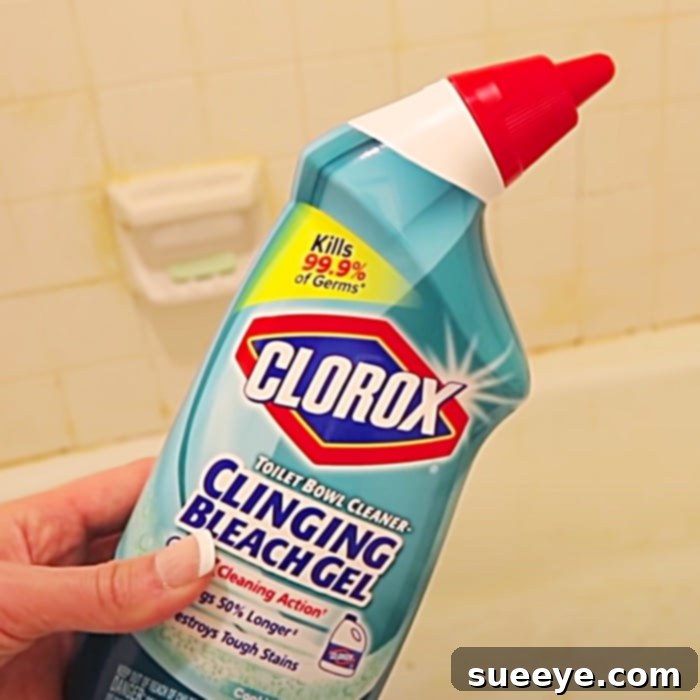
- Clingy Bleach or Bleach Gel Cleaner: This is the star of our show. You can purchase commercial bleach gel cleaners that are specifically designed to adhere to vertical surfaces and grout lines, or you can create your own “clingy” effect using regular liquid household bleach and paper towels (as detailed in the directions). Look for products specifically formulated for mold and mildew removal, ensuring it’s not an “all-purpose” cleaner with added ingredients that might react poorly with bleach. The thicker consistency or the paper towel method ensures maximum contact time.
- Roll of Absorbent Paper Towels: If you’re opting for regular liquid bleach, high-quality, absorbent paper towels are absolutely crucial. They act as a vehicle to hold the bleach directly against the moldy areas, preventing runoff and maximizing that critical contact time. You’ll need a sufficient quantity to cover all affected grout lines, seams, and corners.
- Stiff-Bristled Scrub Brush or Grout Brush: While this method significantly reduces the need for strenuous scrubbing, a good brush will still be necessary for a final light scrub to gently lift any loosened residue and ensure a thorough clean. A brush with a comfortable, ergonomic handle and durable nylon bristles is ideal. For precise cleaning of grout lines, a narrow brush designed specifically for grout works wonders.
- Heavy-Duty Rubber Gloves: Non-negotiable! Bleach is a strong, corrosive chemical that can irritate, burn, and damage skin. Always wear protective, chemical-resistant gloves to prevent any direct contact with your hands.
- Eye Protection (Safety Goggles): Also absolutely essential. Splashes can occur during application or rinsing, and bleach in the eyes can cause serious injury or even permanent damage. Always protect your vision.
- Good Ventilation System: Ensure the bathroom is exceptionally well-ventilated throughout the entire cleaning process. Open all windows, turn on the exhaust fan to its highest setting, or even use a portable fan to actively circulate air. Bleach fumes can be strong, irritating to the respiratory system, and potentially harmful if inhaled in large quantities.
- Old Rags or Sponges: Keep a few dedicated old rags or sponges handy for wiping down surfaces and for the final thorough rinsing after the bleach has done its job.
- Bucket of Clean Water: A bucket filled with clean water is useful for initial rinsing, diluting any accidental spills, and ensuring a final, thorough rinse of all surfaces.
- Shower Squeegee: (For prevention, as mentioned in the inspiration) While not for the deep clean itself, having a shower squeegee ready for daily use after cleaning is an excellent preventative tool.
Step-by-Step Guide: Cleaning Your Moldy Shower Like a Pro
Follow these detailed steps carefully to effectively clean and refresh even the most mold-ridden shower, ensuring safety and optimal results:
Preparation and Safety First: The Crucial Opening Steps
Before applying any cleaning agents, prioritize safety above all else. Ensure your bathroom is exceptionally well-ventilated by opening all windows wide and turning on the exhaust fan. Don your heavy-duty rubber gloves and eye protection (safety goggles). Clear any toiletries, loofahs, shampoo bottles, or decorative items from the shower area to provide an unobstructed, safe workspace. If you’re using regular liquid bleach with paper towels, have your paper towels ready to roll and place.
- Assess and Prepare the Area for Treatment: Take a moment to thoroughly assess all moldy areas. Pay very close attention to grout lines, silicone seals, corners, shower door tracks, and areas around fixtures. If the shower surface is visibly caked with excessive soap scum or loose dirt, a quick rinse with warm water and a light wipe might be beneficial, but it’s not strictly necessary as the bleach will tackle much of it.
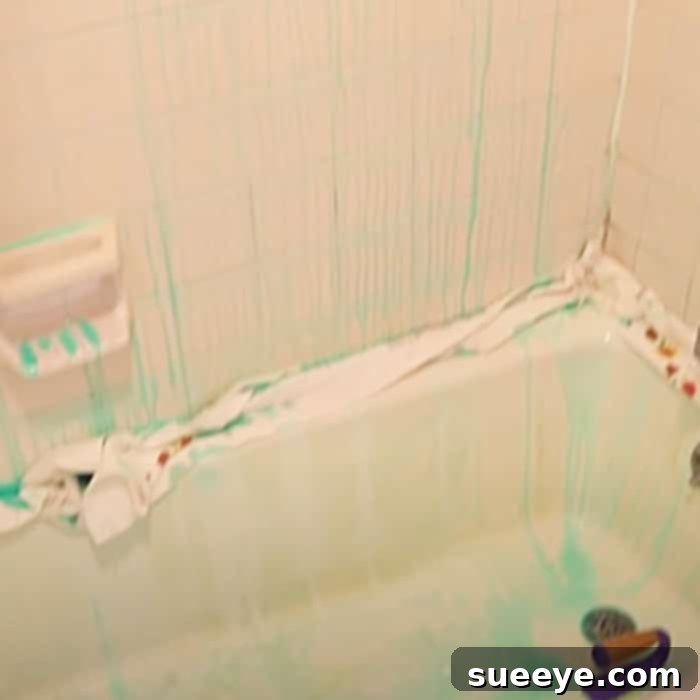
- Apply Paper Towels to Grout Lines (If Using Liquid Bleach): For this method to work its absolute magic, the bleach needs to stay put and cling to the mold. Roll up sections of absorbent paper towels into thin “ropes” or strips. Carefully lay these rolled paper towels directly over the moldy grout lines, seams, and any other areas where mold is visibly clinging. Ensure they are pressed firmly and continuously against the surface, creating a saturated barrier over the mold.
- Saturate with Clingy Bleach or Gel Cleaner: If you’re using a commercial bleach gel cleaner, apply it directly and generously to all moldy areas, ensuring full and thick coverage. If you’re using liquid bleach with paper towels, carefully pour or squirt the bleach directly onto the paper towel strips, thoroughly saturating them. The goal is for the paper towels to be completely drenched and clinging, but not excessively dripping. This ensures the bleach makes prolonged, direct contact with the mold for maximum effectiveness.
- Allow to Dwell: The Magic Happens Here: This is arguably the most crucial step. Let the bleach-soaked paper towels (or gel cleaner) sit undisturbed on the moldy surfaces for a minimum of 20 minutes. For heavily ingrained, stubborn, or long-standing mold, you might extend this dwell time to several hours, or even overnight if ventilation is excellent and the area is secured from children/pets. The longer the contact, the more effectively the bleach can penetrate and break down the mold. You will often observe the mold stains visibly lightening or completely disappearing during this powerful period.
- Gentle Scrub and Thorough Rinse: Once the designated dwell time is complete, carefully remove and immediately dispose of the bleach-soaked paper towels. Using your stiff-bristled scrub brush, give the treated areas a light, gentle scrub. You should find that any remaining mold or staining comes off with minimal effort, as the bleach has already done the hard work. Then, thoroughly rinse the entire shower area with plenty of clean water. Ensure all bleach residue is completely washed away from all surfaces, including fixtures, tiles, grout, and the shower floor, to prevent damage or lingering fumes.
- Dry the Shower Surfaces: After rinsing, it is highly beneficial to wipe down all shower surfaces with a clean, dry cloth or towel. Removing excess moisture immediately helps to prevent mold from returning quickly and minimizes unsightly water spots and streaks.
Crucial Safety Precautions When Using Bleach
While bleach is highly effective for killing mold and disinfecting, it’s a powerful chemical that requires extreme care and responsible handling. Always adhere to these essential safety guidelines to protect yourself and your home:
- Ventilation is Paramount: Always work in a very well-ventilated area. Open all windows, turn on your bathroom exhaust fan, or use a portable fan to actively move air and minimize the inhalation of strong fumes.
- Protect Your Skin and Eyes: Wear heavy-duty rubber gloves and full eye protection (safety goggles) at all times to prevent chemical burns, irritation, or serious injury from direct contact or splashes.
- NEVER Mix Bleach: This is a critical warning. Never, under any circumstances, mix bleach with other household cleaners, especially those containing ammonia (like some glass cleaners, window cleaners, or all-purpose cleaners) or acids (like vinegar, rust removers, or some toilet bowl cleaners). Mixing can produce highly toxic, deadly gases (chloramine or chlorine gas) that are extremely dangerous and potentially fatal.
- Test in an Inconspicuous Area: If you are unsure how bleach will affect a particular surface (e.g., colored grout, certain types of natural stone tile, or older finishes), always test a small, hidden spot first to check for any discoloration, etching, or damage.
- Keep Away from Children and Pets: Store bleach and all other cleaning chemicals securely out of reach and sight of children and pets in a locked cabinet or on a high shelf.
- Avoid Contact with Fabrics: Bleach will permanently discolor, lighten, or damage most fabrics. Be extremely careful not to splash it on towels, bathmats, shower curtains, clothing, or carpets.
Beyond Cleaning: Preventing Mold Recurrence is Key
Cleaning existing mold is only half the battle. To maintain a truly pristine and mold-free shower, proactive and consistent prevention is absolutely essential:
- Utilize a Shower Squeegee Daily: This simple, affordable tool, as highlighted in the Do It On A Dime tutorial, is an absolute game-changer for prevention. A quick squeegee of all tile and glass surfaces after every single shower removes water droplets and soap scum, which are primary food sources for mold and mildew.
- Improve and Maintain Excellent Ventilation: Run your bathroom exhaust fan for at least 15-20 minutes after every shower or bath to remove excess moisture from the air. If you don’t have a fan, open a window or leave the bathroom door ajar to allow maximum airflow and moisture to escape.
- Wipe Down Surfaces Regularly: A quick wipe-down of shower walls, fixtures, and doors with a dry towel after use can drastically reduce moisture buildup and prevent water spots.
- Wash Shower Curtains/Liners Frequently: If you use a fabric shower curtain, wash it regularly according to its care instructions. If using a vinyl liner, clean it frequently or replace it periodically, especially if mold spots appear.
- Implement Regular Light Cleaning: Incorporate regular, light cleaning into your weekly routine. A quick spray-and-wipe with an appropriate bathroom cleaner (non-bleach for general use) can prevent grime and mold from taking hold and becoming a major problem.
- Inspect for Leaks: Even small, hidden plumbing leaks or issues with grout and caulk can contribute significantly to persistent mold problems. Inspect plumbing and seals regularly and address any issues promptly.
- Consider Mold-Resistant Caulk: When it’s time to replace old caulk, opt for varieties that contain built-in mold inhibitors to provide an extra layer of long-lasting protection against fungal growth.
Alternative Cleaning Solutions for Different Needs and Preferences
While bleach is superb for killing and removing stubborn mold, other solutions can address different shower cleaning challenges or serve as alternatives for those who prefer not to use bleach:
- White Vinegar: Excellent for cutting through soap scum, hard water stains, and it acts as a mild disinfectant. It’s safe for many surfaces, but remember, NEVER mix it with bleach due to toxic gas formation. Use it for a general clean or after a thorough bleach treatment (and rinsing) specifically for limescale.
- Hydrogen Peroxide: A less harsh alternative to bleach for mold and mildew. Apply a 3% solution directly, let it sit for 10-15 minutes, then scrub and rinse. It’s generally considered safer than bleach but can still lighten colored fabrics or surfaces.
- Baking Soda Paste: Mix baking soda with a small amount of water to form a thick paste. This abrasive but gentle cleaner is highly effective for scrubbing away mild mildew, soap scum, and grime without scratching delicate surfaces.
- Commercial Mold & Mildew Removers (Bleach-Free): Many products are available on the market that use alternative chemicals to bleach for mold removal, often containing hydrogen peroxide or other powerful disinfectants. Always read labels carefully to understand ingredients and usage instructions.
Maintaining a Sparkling Shower: Long-Term Strategies
Once your shower is spotlessly clean, the overarching goal is to keep it that way with minimal ongoing effort. Beyond daily squeegeeing and ensuring excellent ventilation, consider incorporating a weekly spray of a dedicated shower cleaner that actively inhibits mold growth. Many products designed for daily shower cleaning can often be sprayed on and left without rinsing, forming a protective barrier against future soap scum buildup and mildew. Always address small spots of mold as soon as they appear, preventing them from spreading and becoming a larger, more entrenched problem. By consistently combining the effectiveness of this deep cleaning method with diligent preventative habits, your shower can remain a clean, fresh, hygienic, and inviting space for many years to come.
Cleaning a heavily moldy shower might initially seem like a daunting and unpleasant task, but with the powerful “clingy bleach” method, it becomes surprisingly manageable and incredibly effective. This innovative technique, by emphasizing extended contact time with the potent cleaning agent, drastically reduces the need for strenuous scrubbing and consistently delivers professional-level results. Remember to always prioritize your safety by ensuring proper ventilation and wearing all necessary protective gear when working with bleach. By integrating this powerful cleaning hack with diligent preventative habits like daily squeegeeing and maintaining good ventilation, you can confidently banish stubborn mold from your bathroom for good. Enjoy a cleaner, healthier, and more aesthetically pleasing shower experience that you’ll be proud of!