
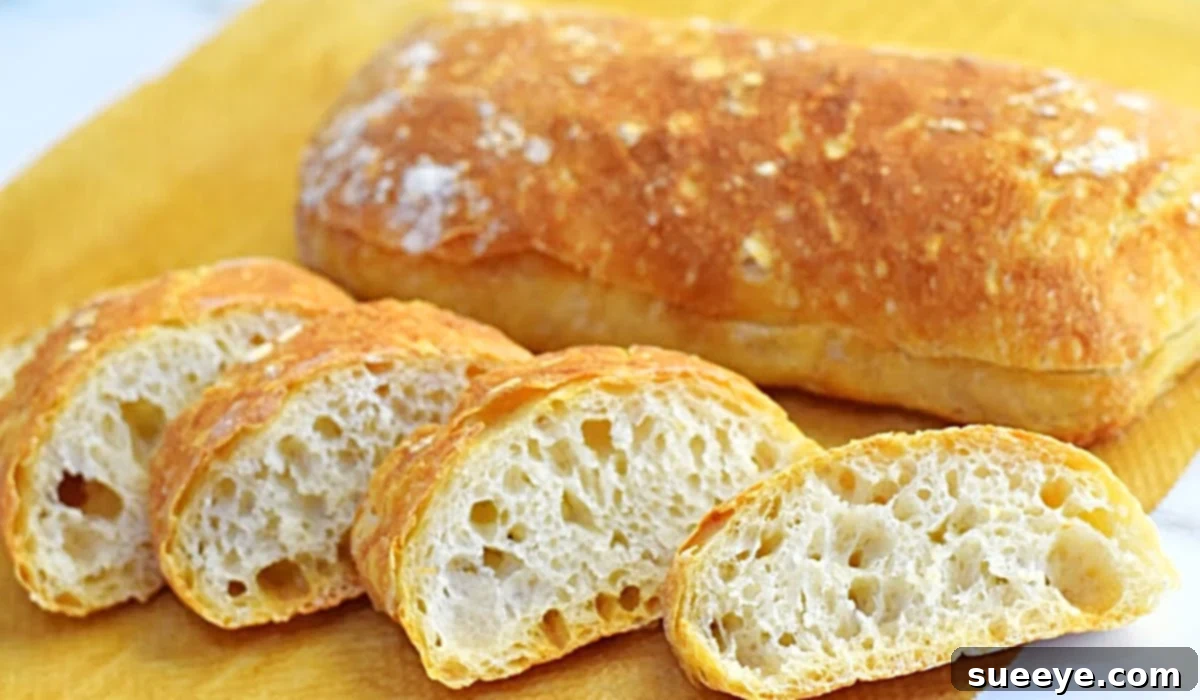
Easy Artisan Ciabatta Bread Recipe: Crafting the Perfect Loaf at Home
There are few aromas as comforting and inviting as that of freshly baked bread filling your home. It’s a scent that evokes memories of warmth, tradition, and simpler times. For many, the idea of baking homemade bread seems daunting, a task reserved for seasoned bakers. However, with the right guidance, anyone can master the art of artisan bread making. This journey into the world of homemade goodness begins wonderfully with a simple yet incredibly rewarding ciabatta bread recipe, inspired by the fantastic tutorial from Bincy Chris on YouTube.
Ciabatta, meaning “slipper” in Italian, is renowned for its distinctive oblong shape, beautifully open crumb, and wonderfully crisp crust. It’s a rustic Italian bread that effortlessly elevates any meal, whether it’s the star of a hearty sandwich, a humble accompaniment to soup, or simply enjoyed with a drizzle of extra virgin olive oil. This particular artisan ciabatta recipe is specifically designed with beginners in mind, proving that you don’t need years of baking experience to achieve professional-quality results. Bincy Chris breaks down the process into easily understandable steps, demystifying what many perceive as a complex culinary endeavor.
The beauty of this recipe lies in its minimalist approach. It requires only a handful of basic ingredients, yet it consistently yields perfectly formed, crispy loaves with a delightfully chewy interior. Forget complicated techniques or specialized equipment; this recipe emphasizes gentle handling and patience, allowing the natural fermentation process to do most of the work. By the end, you’ll not only have a batch of incredibly delicious ciabatta but also a newfound confidence in your baking abilities. Prepare to transform your kitchen into a comforting bakery and rediscover the simple pleasure of breaking bread, just like grandma used to make.
The Allure of Ciabatta: Why This Bread Stands Out
Ciabatta holds a special place in the pantheon of beloved breads. Its unique characteristics are what make it so appealing and versatile. Unlike denser loaves, ciabatta boasts a high hydration level, meaning it contains a larger proportion of water to flour. This high hydration is the secret behind its signature airy, open crumb structure, characterized by large, irregular holes that are perfect for soaking up olive oil, sauce, or the juices from a delicious sandwich filling.
The exterior of a well-made ciabatta is equally captivating – a beautiful, golden-brown crust that shatters delicately with each bite, giving way to the soft, chewy interior. This contrast in textures is a hallmark of truly great artisan bread. While some artisan breads demand extensive kneading, ciabatta often falls into the “no-knead” or “minimal-knead” category, making it surprisingly accessible for home bakers. The long fermentation process, rather than vigorous kneading, develops the gluten structure, contributing to its unique texture and depth of flavor. Whether you’re a connoisseur of fine European breads or simply seeking to expand your baking repertoire, mastering ciabatta is a profoundly satisfying achievement.
Minimal Ingredients, Maximum Flavor
One of the most appealing aspects of this easy artisan ciabatta bread recipe is its simplicity, both in method and in ingredients. You don’t need a pantry full of exotic flours or a multitude of leavening agents. The magic happens with just four fundamental components, each playing a crucial role in creating that perfect loaf. Understanding these ingredients helps appreciate the elegance of this recipe:
- 350 grams of all-purpose flour: While bread flour can be used for an even chewier crumb, good quality all-purpose flour works wonderfully, providing the necessary gluten structure. The careful measurement in grams ensures precision, which is key in baking.
- 280 grams of water: This is the hero of ciabatta, contributing to its high hydration. The significant amount of water is what gives ciabatta its characteristic open, airy texture and delicate crust. Using lukewarm water (around 95-105°F or 35-40°C) is ideal for activating the yeast without being too hot to kill it.
- 1 teaspoon of salt: More than just a flavor enhancer, salt plays a vital role in controlling yeast activity and strengthening the gluten network. It adds depth to the bread’s taste and prevents it from being bland.
- 1 teaspoon of instant yeast: This leavening agent is responsible for the bread’s rise. Instant yeast is convenient because it can be mixed directly with the dry ingredients without needing to be proofed separately in water, streamlining the process for beginners.
The beauty of these simple ingredients, when combined and allowed to ferment properly, is truly remarkable. They transform into something far greater than the sum of their parts, yielding a bread that is both rustic and refined.
Directions: Crafting Your Homemade Ciabatta
Embarking on the journey to bake your own artisan ciabatta is an incredibly rewarding experience, especially with Bincy Chris’s straightforward approach. This recipe minimizes complexity while maximizing delicious outcomes. Follow these simple steps to bring a taste of Italy into your kitchen:
Step 1: Preparing the Dough (The No-Fuss Mix)
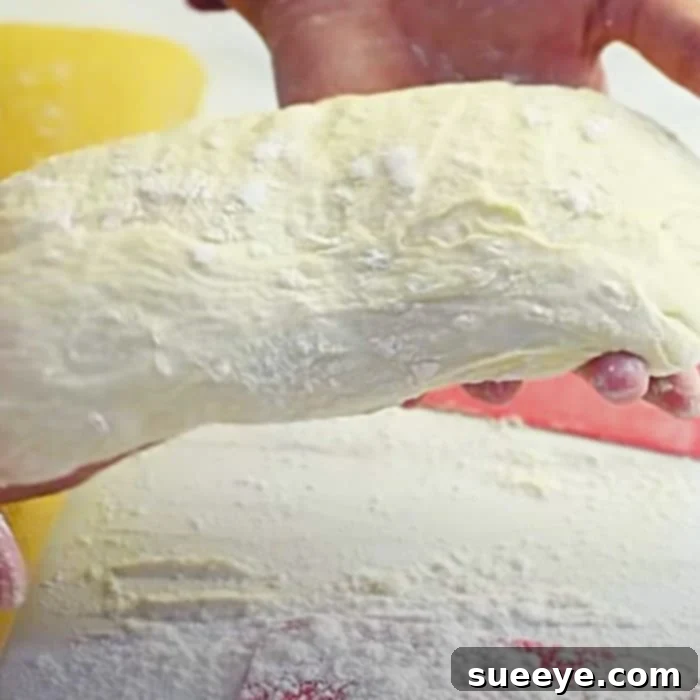
In a large mixing bowl, combine the flour, salt, and yeast. Give them a quick stir to ensure they are well distributed. Gradually add the water, mixing with a wooden spoon or your hand until all the flour is incorporated and you have a shaggy, wet, and very sticky dough. Do not be tempted to add more flour! This high hydration is essential for ciabatta’s unique texture. There’s no need for intense kneading; a simple mix until combined is all that’s required.
Step 2: The First Proof (Developing Flavor and Texture)
Cover the bowl with plastic wrap or a damp kitchen towel. Let the dough rest and rise at room temperature for approximately 2 hours. During this time, the yeast will work its magic, fermenting the sugars in the flour, developing incredible flavor, and creating air pockets that are characteristic of ciabatta. Look for the dough to significantly increase in volume and show visible bubbles on the surface, indicating active fermentation. A slightly warm spot in your kitchen (around 70-75°F or 21-24°C) is ideal for proofing.
Step 3: Shaping the Ciabatta (Gentle Handling is Key)
After the first proof, generously flour your work surface and your hands. Carefully scrape the very sticky dough out onto the floured surface. Avoid deflating it too much. Gently stretch or pat the dough into a rough rectangle. You can then cut the dough into two or three “slipper” shapes, or simply fold it gently a couple of times to create your desired ciabatta loaves. The key here is minimal handling to preserve the air bubbles that have formed. Lightly flour the tops of your shaped loaves.
Step 4: The Second Proof (A Quick Rest Before Baking)
Carefully transfer your shaped ciabatta loaves to a baking sheet lined with parchment paper. Leave ample space between them. You can optionally create ‘couches’ using floured kitchen towels to support their shape during this final proof. Cover loosely with plastic wrap or a light kitchen towel and let them rest for another 30-45 minutes. This brief second proof allows the dough to relax and lightly puff up again, preparing it for the oven’s heat.
Step 5: Baking Your Artisan Ciabatta (Achieving that Perfect Crust)
Preheat your oven to 400°F (200°C) with a baking stone or heavy baking sheet inside, if you have one. For an extra crispy crust, you can also place a metal pan on the bottom rack of your oven while preheating. Just before placing the bread in the oven, carefully pour about half a cup of hot water into the hot metal pan to create steam. This steam helps the crust stay soft initially, allowing for maximum oven spring before it crisps up beautifully.
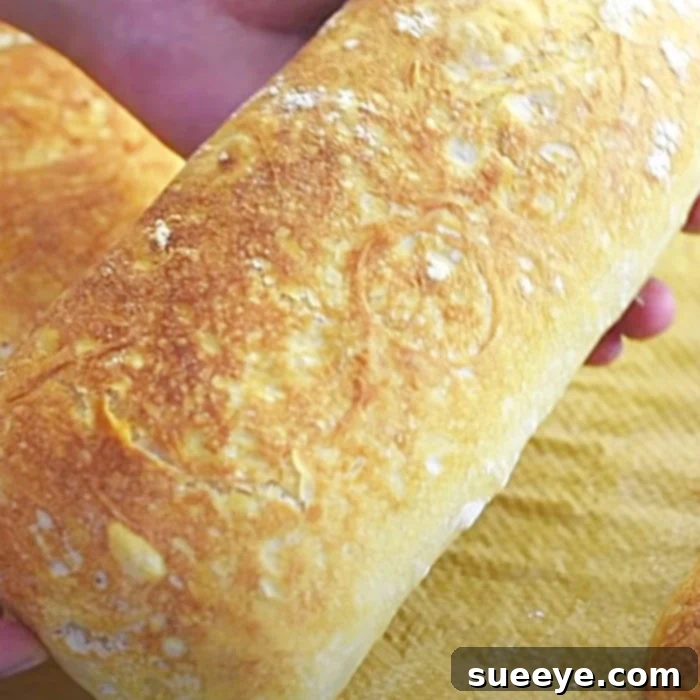
Carefully transfer your ciabatta loaves to the preheated baking sheet or stone. Bake at 400°F (200°C) for 10 minutes. After 10 minutes, continue baking the bread at 400°F (200°C) for an additional 12 to 15 minutes, or until the loaves are deep golden brown and sound hollow when tapped on the bottom. The total baking time will be approximately 22 to 25 minutes. If your oven has a convection setting, you can use it for the last 5-7 minutes for an even crisper crust.
Step 6: Cooling (The Crucial Final Step)
Once baked, immediately transfer the ciabatta loaves to a wire rack to cool completely. This step is crucial! Cooling allows the internal structure of the bread to set and the flavors to fully develop. Cutting into hot bread can result in a gummy texture. Patience will be rewarded with the best possible crumb and crust. Resist the temptation for at least 30-60 minutes.
Tips for Ciabatta Baking Success
Even though this recipe is designed to be simple, a few expert tips can ensure your ciabatta turns out perfect every time, boosting your confidence as an artisan bread baker:
- Embrace the Stickiness: High hydration doughs are inherently sticky. Don’t fight it by adding too much flour during handling. Instead, lightly flour your hands and your work surface, and use a bench scraper to help manage the dough.
- Gentle Handling: The key to ciabatta’s open crumb is preserving the air bubbles created during fermentation. Be as gentle as possible when transferring and shaping the dough. Avoid excessive pressing or squashing.
- Temperature Matters: Yeast is sensitive to temperature. Ensure your water is lukewarm for mixing and that your proofing environment is not too cold (which slows yeast) or too hot (which can over-proof the dough quickly and kill yeast).
- Creating Steam: For that signature crispy crust, steam in the oven is vital. Besides the hot water in a pan method, you can also spray the oven walls with water a couple of times during the first 5-10 minutes of baking. Be cautious when opening the hot oven.
- Don’t Rush Cooling: As mentioned, cooling on a wire rack allows steam to escape and prevents a soggy bottom while ensuring the internal texture and flavor fully develop.
- Experiment with Flour: While all-purpose flour works, trying bread flour can yield an even chewier crumb due to its higher protein content. Whole wheat flour can also be added for a nuttier flavor and denser texture, but start with small substitutions.
Serving Suggestions and Versatility
Once your beautiful ciabatta loaves are cooled, the possibilities for enjoyment are endless. This versatile Italian bread is much more than just a side dish; it can be the centerpiece of countless delicious meals:
- Classic Dipping: The simplest and often most satisfying way to enjoy ciabatta is torn into rustic pieces and dipped into high-quality extra virgin olive oil, perhaps seasoned with a pinch of sea salt, black pepper, and balsamic vinegar.
- Incredible Sandwiches: Its sturdy yet airy structure makes ciabatta perfect for sandwiches and paninis. Load it with fresh mozzarella, ripe tomatoes, basil, and a drizzle of pesto for a Caprese sandwich, or create a hearty deli-style masterpiece with roasted meats, cheeses, and fresh greens.
- Bruschetta Base: Slice it, toast it lightly, rub with a garlic clove, and top with diced tomatoes, basil, and olive oil for a quintessential bruschetta appetizer. Other toppings like tapenade, ricotta and honey, or roasted vegetables are also fantastic.
- Accompaniment to Meals: Ciabatta is excellent served alongside hearty Italian pasta dishes, rich stews, or fresh, crisp salads. Its crust and open crumb are ideal for soaking up flavorful sauces.
- Garlic Bread: Slice it horizontally, spread with garlic butter, and bake until golden for an irresistible side dish.
- Toast It Up: A simple slice of toasted ciabatta with butter and jam makes for a luxurious breakfast or snack.
Consider adding herbs like rosemary or dried oregano to the dough, or even olives and sun-dried tomatoes, to create flavored variations that will impress your family and friends.
The Joy of Homemade Bread: A Rewarding Experience
Baking homemade artisan ciabatta bread is an experience that transcends mere cooking; it’s a journey into sensory delight and personal satisfaction. From the simple act of combining basic ingredients to the comforting aroma that envelops your kitchen, and finally, to the triumphant moment of pulling a perfectly golden, crispy loaf from the oven, every step is a testament to the magic of baking. This easy ciabatta recipe, inspired by Bincy Chris, proves that artisan bread making is not an exclusive club but an accessible joy for everyone, especially beginners.
Beyond the delicious taste, there’s an immense satisfaction that comes from creating something so fundamental and nourishing with your own hands. It’s a connection to traditions, a practice of patience, and a wonderful way to bring warmth and comfort to your home. So, gather your simple ingredients, set aside a few hours, and embark on this delightful baking adventure. You’ll not only savor the incredible taste of fresh, homemade ciabatta but also cherish the memorable experience of bringing such a comforting food to life.