
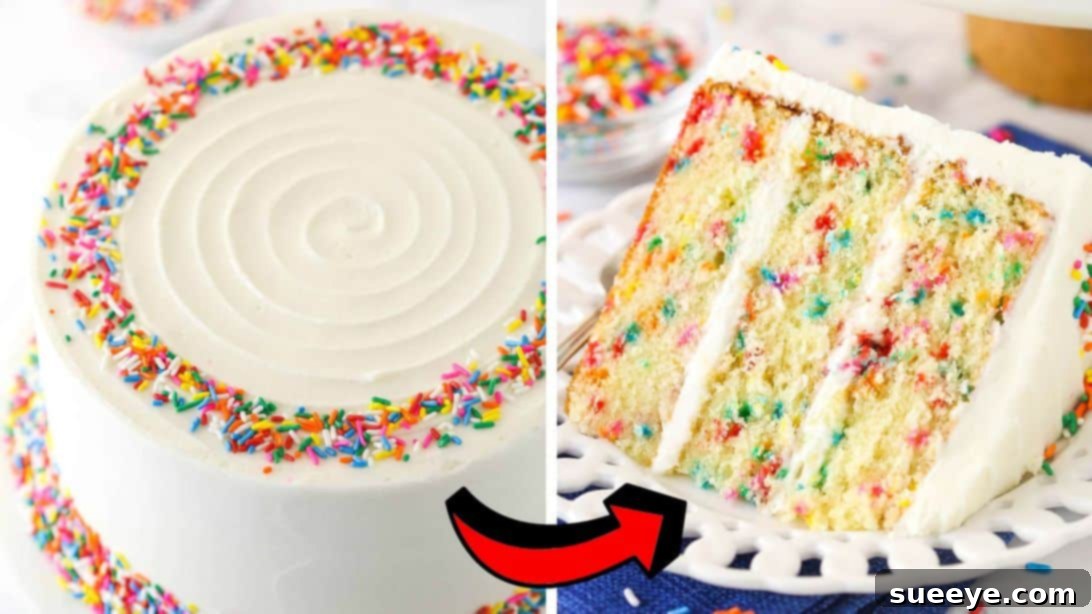
Bake the Ultimate Funfetti Layer Cake: Your Guide to a Joyful, Easy Homemade Delight
There’s something undeniably magical about a Funfetti cake. It’s not just a dessert; it’s a burst of joy, a sprinkle of happiness, and a vibrant celebration waiting to happen. Forget waiting for a birthday; this super easy recipe by Life, Love and Sugar on YouTube allows you to indulge in this delightful treat any day you crave a little extra color and sweetness. We adore Funfetti layer cakes not only for their incredible taste but also for their captivating, playful appearance that brightens any table.
Whether you’re hosting a grand party, celebrating a holiday, marking a special occasion, or simply want to add a splash of fun to an ordinary day, this homemade Funfetti cake is your perfect companion. This recipe guides you through a few simple steps to create a show-stopping dessert that tastes as fantastic as it looks. Plus, it’s wonderfully convenient; once baked and frosted, you can store your Funfetti masterpiece in the fridge for up to 3 to 4 days, allowing you to savor its charm over several days. Get ready to dive into the world of sprinkles and perfectly moist cake layers!
Why Choose a Homemade Funfetti Layer Cake?
In a world of store-bought convenience, crafting a homemade Funfetti cake stands out as a rewarding experience. The aroma of vanilla and baking butter filling your kitchen is just the beginning. A homemade cake offers unparalleled freshness, allowing you to control the quality of ingredients and tailor the sweetness to your preference. This particular Funfetti layer cake recipe is designed to deliver consistently moist, tender cake layers studded with colorful sprinkles, perfectly complemented by a rich, velvety vanilla buttercream. It’s a delightful project for bakers of all skill levels, promising a delicious outcome that will impress family and friends alike.
Beyond the taste, the visual appeal of a Funfetti cake is truly unique. Those cheerful rainbow sprinkles embedded within the cake and generously scattered over the frosting evoke a sense of childlike wonder and pure happiness. It’s a nostalgic treat that instantly transports you back to simpler, joyous times. This makes it an ideal choice for:
- Birthday Celebrations: The quintessential birthday cake that never goes out of style.
- Holiday Gatherings: A festive and colorful addition to any holiday spread.
- Everyday Indulgences: Why wait for a special occasion? Treat yourself!
- Potlucks and Picnics: A guaranteed crowd-pleaser that travels well.
- Cheering Up Friends: A thoughtful, edible gift that spreads cheer.
The beauty of this recipe lies in its simplicity and delicious results. With clear instructions and readily available ingredients, you’ll be able to create a professional-looking and tasting cake right in your own kitchen.
RELATED: Air Fryer Birthday Cake Recipe – Explore more unique cake ideas!
Essential Ingredients for Your Funfetti Layer Cake
Creating a truly spectacular Funfetti cake begins with understanding the role of each ingredient. Using quality components and having them at the correct temperature are crucial for achieving the perfect texture and flavor. Here’s a detailed look at what you’ll need:
For the Irresistible Funfetti Cake Layers:
- 3½ cups of all-purpose flour: The foundational structure of our cake. Sifting it ensures a lighter texture.
- 2½ tsp of baking powder: Provides the primary lift, creating a fluffy cake.
- ½ tsp of baking soda: Works with buttermilk to enhance leavening and tenderness.
- 1 tsp of salt: Balances the sweetness and enhances all the other flavors.
- 1 cup of unsalted butter, at room temperature: Crucial for creaming with sugar, adding richness and moisture. Room temperature butter emulsifies better.
- 2¼ cups of granulated sugar: Sweetens the cake and contributes to its moistness and tender crumb.
- ½ cup of vegetable oil: Adds extra moisture and helps keep the cake tender for longer.
- 1½ tbsp of vanilla extract: A generous amount for that classic, comforting cake flavor. Use good quality extract for the best taste.
- 5 large eggs, at room temperature: Bind the ingredients together and provide structure. Room temperature eggs blend more smoothly into the batter.
- 1½ cups of buttermilk: Its acidity tenderizes the cake crumb and activates the baking soda for a better rise.
- ¾ cup of rainbow jimmies sprinkles: The star of the show! Use good quality jimmies that won’t bleed their color into the batter during baking.
For the Silky Smooth Vanilla Buttercream:
No Funfetti cake is complete without a luscious vanilla buttercream frosting. This recipe ensures a stable, pipeable, and incredibly delicious frosting.
- 2½ cups of unsalted butter, at room temperature: The base of our buttercream. Ensure it’s softened but not melted for the best consistency.
- 10 cups of powdered sugar (confectioners’ sugar): Provides sweetness and structure to the frosting. Sift it to avoid lumps.
- 1 tbsp of vanilla extract: Adds depth and warmth to the buttercream.
- 6-8 tbsp of heavy cream (or milk/water): Adjusts the consistency, making the buttercream smooth and spreadable.
- A pinch of salt: Cuts through the sweetness and enhances the vanilla flavor.
- Sprinkles, for decorating: To adorn your beautiful cake!
How to Master the Funfetti Layer Cake: Step-by-Step Guide
Follow these detailed steps carefully, and you’ll be on your way to baking a perfect Funfetti layer cake that’s both beautiful and incredibly tasty.
Step 1: Prepare Your Pans and Dry Ingredients
Begin by preheating your oven to 350°F (175°C). Proper oven temperature is vital for even baking. Next, take three 9-inch round cake pans. Line the bottom of each pan with a circle of parchment paper, which prevents sticking and makes unmolding much easier. Then, lightly grease the sides of the pans with butter or baking spray. In a large mixing bowl, combine the all-purpose flour, baking powder, baking soda, and salt. Whisk these dry ingredients together thoroughly for about 30 seconds to ensure they are well combined and evenly distributed. This step prevents pockets of leavening agents in your batter. Set this mixture aside for now.
Step 2: Cream Butter and Sugar
In the bowl of a stand mixer fitted with a paddle attachment, or using a large mixing bowl with an electric hand mixer, add your softened unsalted butter and granulated sugar. Beat them together on medium speed for about 2 to 3 minutes. You’re looking for a mixture that becomes light in color, fluffy in texture, and significantly increased in volume. This creaming process incorporates air into the butter, which is crucial for a light and tender cake crumb. Next, pour in the vegetable oil and vanilla extract. Continue beating until these liquid ingredients are fully incorporated into the butter and sugar mixture, ensuring a smooth and homogenous base for your cake batter.
Step 3: Incorporate Eggs and Alternate Wet and Dry Ingredients
With your mixer still running on medium-low speed, add the eggs one at a time, beating well after each addition. This allows each egg to fully emulsify into the batter, preventing curdling and creating a stronger structure. Once all eggs are in, add half of your reserved dry ingredients to the wet mixture. Mix on low speed until they are mostly combined, being careful not to overmix at this stage. Slowly pour in the buttermilk, mixing until just combined. Finally, add the remaining dry ingredients and continue to mix until the batter is smooth and well combined. Scrape down the sides of the bowl with a spatula to ensure all ingredients are thoroughly incorporated, but stop mixing as soon as no streaks of flour remain to prevent developing too much gluten, which can lead to a tough cake.
Step 4: Fold in Sprinkles and Bake
Now for the fun part! Gently add the rainbow jimmies sprinkles to your prepared cake batter. Using a spatula, fold them in carefully until they are evenly incorporated throughout the batter. It’s important not to overmix at this stage, as excessive mixing can cause the colors of the sprinkles to bleed into the batter, losing their vibrant definition. Scrape the sides and bottom of the bowl to ensure uniform distribution. Divide the batter evenly among your three prepared cake pans. You can use a kitchen scale for precision if you want perfectly even layers. Place the pans in your preheated oven and bake for approximately 25 to 30 minutes. The cakes are done when a toothpick inserted into the center of a cake comes out with a few moist crumbs attached, but not wet batter. Avoid opening the oven door too frequently during baking to prevent the cakes from sinking.
Step 5: Cool Cakes and Start Buttercream Base
Once your cakes are beautifully baked, remove them from the oven. Allow them to cool in their pans for about 10-15 minutes. This cooling period helps the cakes firm up, making them easier to handle. After this initial cooling, carefully unmold the cakes onto wire cooling racks. It’s crucial to let them cool down completely to room temperature before frosting. Attempting to frost warm cakes will result in melted, messy frosting. While the cakes are cooling, begin preparing your vanilla buttercream. In a clean mixing bowl, add the softened butter. Beat it on medium speed until it is smooth and creamy, taking about 2-3 minutes. Then, add half of the sifted powdered sugar and mix on low speed until fully incorporated and smooth. This step prevents a cloud of sugar from erupting in your kitchen!
Step 6: Finish the Vanilla Buttercream
To the buttercream base, add the vanilla extract, 6-8 tablespoons of heavy cream (start with 6 and add more if needed for consistency), and a pinch of salt. Mix on low speed until smooth. Gradually add the remaining powdered sugar, mixing slowly until all the sugar is incorporated. Once it’s all in, increase the mixer speed to medium-high and beat the buttercream for another 3-5 minutes until it becomes light, fluffy, and perfectly smooth. If the buttercream seems too thick, add more heavy cream, one tablespoon at a time, until you reach your desired spreadable consistency. If it’s too thin, you can add a little more powdered sugar. This ensures a perfect, pipeable consistency for decorating your cake.
Step 7: Assemble, Frost, and Decorate Your Funfetti Masterpiece
Now it’s time to bring your Funfetti cake to life! Place the first cooled cake layer on your serving platter or cake stand. Spread a generous amount – a bit more than 1 cup – of vanilla buttercream evenly over the top, making sure to spread it right to the edges. Gently place the second cake layer on top, aligning it carefully. Repeat the frosting process with another layer of buttercream. Finally, add the third cake layer. Use the remaining buttercream to frost the outside of the entire cake, applying a crumb coat first if desired for a super smooth finish, then applying the final layer. Once frosted, decorate the cake generously with extra sprinkles, pressing them gently into the frosting. For optimal freshness, store your decorated cake in an airtight container. It can be left at room temperature for up to 24 hours if your environment is cool, then transfer it to the fridge. Allow it to come to room temperature for about 30 minutes before serving for the best flavor and texture. Enjoy every colorful, delicious slice!
Tips for Funfetti Cake Baking Success
Even with a straightforward recipe, a few expert tips can elevate your baking experience and ensure a flawless Funfetti cake every time:
- Room Temperature Ingredients: This cannot be stressed enough! Butter, eggs, and buttermilk at room temperature emulsify better, creating a smoother, more uniform batter and a finer crumb.
- Measure Accurately: Baking is a science. Use proper measuring cups for dry ingredients (leveling with a straight edge) and liquid measuring cups for wet ingredients. For ultimate precision, especially with flour, use a kitchen scale.
- Don’t Overmix: Overmixing develops gluten, which can lead to a tough, dense cake. Mix only until ingredients are just combined, especially after adding flour.
- Quality Sprinkles: Not all sprinkles are created equal. Choose “jimmies” or rod-shaped sprinkles as they tend to hold their color better and are less likely to bleed into the cake batter compared to nonpareils.
- Even Cake Layers: To ensure your cake layers bake evenly, consider weighing the batter in each pan to distribute it equally.
- Oven Temperature: Ovens can vary. An oven thermometer can help you verify that your oven is truly at the set temperature.
- Cool Completely: Patience is key! Frosting a warm cake is a recipe for disaster. Ensure your cake layers are completely cool before applying any buttercream.
- Crumb Coat: For a super smooth finish, apply a thin “crumb coat” of frosting over the entire cake first. Chill it for 15-20 minutes to set, then apply your final layer of frosting. This traps any loose crumbs.
- Storage: Store the cake in an airtight container to keep it fresh. At room temperature, it lasts about a day. Refrigerated, it can last 3-4 days. Bring it to room temperature before serving for the best texture.
Variations to Personalize Your Funfetti Cake
While the classic Funfetti layer cake is perfect as is, you can always put your own spin on it:
- Flavor Extracts: Experiment with almond extract, lemon extract, or even a hint of mint in the buttercream for a different flavor profile.
- Food Coloring: Add a touch of gel food coloring to the buttercream to match a specific party theme.
- Different Sprinkles: Use themed sprinkles for holidays (e.g., red and green for Christmas, pastels for Easter) or metallic sprinkles for an elegant touch.
- Chocolate Funfetti: Replace a small portion of the flour with cocoa powder for a chocolate Funfetti cake.
- Cupcakes: This recipe can easily be adapted for Funfetti cupcakes! Simply divide the batter among cupcake liners and adjust baking time.
No matter how you choose to make it, this Easy Funfetti Layer Cake Recipe for Beginners is a guaranteed hit. It’s more than just a cake; it’s a vehicle for happiness, a centerpiece for celebration, and a testament to the simple joys of homemade baking. So grab your apron, gather your ingredients, and prepare to bake a little magic!
*All these images are credited to Life, Love and Sugar via YouTube. Give her channel a visit and subscribe for more delightful baking tutorials!