
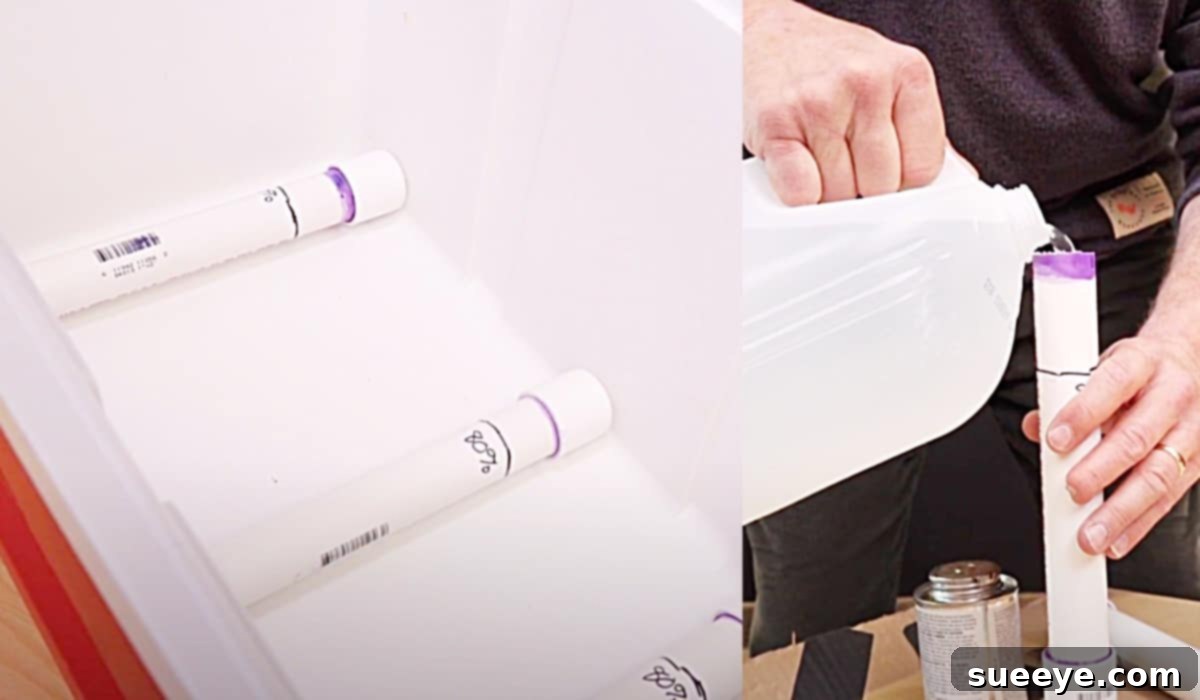
Super-Charged Polar Bear Tubes For An Ice Chest: The Ultimate DIY Cooler Hack
Imagine enjoying a refreshing drink or a perfectly chilled meal on a sweltering summer day, without the annoyance of soggy food or rapidly melting ice. The dream of a truly long-lasting, mess-free cooler experience is now a reality thanks to an ingenious DIY solution: Super-Charged Polar Bear Tubes. This brilliant concept, brought to life through a fantastic video tutorial by 50 Campfires on YouTube, offers a revolutionary way to keep your ice chest colder for longer, eliminating the common frustrations associated with traditional ice.
For anyone who loves outdoor adventures – be it a beach trip, a camping excursion, a tailgate party, or simply a backyard barbecue – the struggle is real. Standard ice melts quickly, turning your cooler into a watery swamp and potentially ruining food packaging. These “Polar Bear Tubes” leverage the power of science by using PVC pipes filled with a super-charged salt and water solution. This solution freezes at a lower temperature than plain water, allowing it to absorb more heat and maintain colder temperatures within your ice chest for significantly extended periods. Say goodbye to constantly replenishing ice bags and hello to uninterrupted enjoyment!
Why Opt for Super-Charged Polar Bear Tubes? Unveiling the Benefits
The advantages of integrating these DIY cooling tubes into your outdoor setup are numerous and compelling:
- Extended Cooling Performance: The secret lies in the salt solution. Unlike pure water, saltwater freezes at a lower temperature (below 32°F or 0°C). When it thaws, it does so at this lower temperature, actively drawing more heat from its surroundings. This means your cooler stays colder for much longer, sometimes even twice as long as with regular ice.
- No More Watery Mess: This is arguably the biggest game-changer. Since the salt solution is sealed inside PVC pipes, there’s no melted water sloshing around your cooler. Your sandwiches, snacks, and beverages remain dry and pristine, free from any watery contamination.
- Reusable and Economical: Once made, these tubes are good to go for countless adventures. Simply refreeze them after each use. This eliminates the recurring cost and hassle of buying bags of ice, saving you money and time in the long run.
- Food Safety Enhancement: Maintaining consistently low temperatures is crucial for food safety, especially during warmer months. The prolonged cooling power of polar bear tubes helps keep perishable items safely chilled, reducing the risk of spoilage.
- Space Efficiency: PVC tubes can be strategically placed and stacked within your cooler, often fitting more efficiently than irregularly shaped ice bags or loose cubes. Their cylindrical shape allows for better organization.
- Environmentally Friendly: By ditching disposable ice bags, you contribute to reducing plastic waste, making your outdoor activities a little greener.
- Versatility for Any Occasion: Whether you’re heading to a lake, a picnic in the park, a long road trip, or a multi-day camping trip, these tubes are your ultimate cooling companions.
Materials You’ll Need for Your DIY Cooler Tubes
Creating your own set of Super-Charged Polar Bear Tubes is a straightforward process, requiring just a few readily available materials. Here’s what you’ll need to gather:
- PVC Pipe: The backbone of your cooling tubes. The diameter (e.g., 1.5-inch, 2-inch) depends on the size of your cooler and how much space you want them to occupy. Schedule 40 PVC is generally recommended for its durability. You’ll cut these into lengths that comfortably fit inside your ice chest.
- PVC Caps: You’ll need two caps for each length of PVC pipe. Ensure they are the correct size to fit snugly over the ends of your chosen PVC pipe. Slip-on (or solvent weld) caps are ideal.
- PVC Cement and Primer: Essential for creating a strong, watertight seal between the caps and the pipes. Primer cleans and prepares the PVC surface, ensuring maximum adhesion for the cement.
- Water: Plain tap water will work perfectly as the base for your cooling solution.
- Salt: This is the “super-charge” ingredient. Common table salt, rock salt, or pickling salt will all work. The goal is to create a concentrated brine solution.
- Measuring Tape and Marker: For accurately measuring and marking your PVC pipes for cutting.
- Hacksaw or PVC Pipe Cutter: To cut the PVC pipes to the desired lengths. A PVC pipe cutter offers cleaner, quicker cuts.
- Sandpaper or Deburring Tool: To smooth out any rough edges after cutting, ensuring a safer and more professional finish.
- Funnel: Very helpful for pouring the salt solution into the PVC pipes without spills.
- Large Mixing Container and Stirring Utensil: To prepare your salt and water solution.
Step-by-Step Directions: Crafting Your Super-Charged Cooler Tubes
The process of making these incredibly effective cooling tubes is surprisingly simple and can be completed in just a few easy steps. Follow these detailed instructions, inspired by the practical wisdom of the 50 Campfires tutorial, to create your own long-lasting ice alternative.
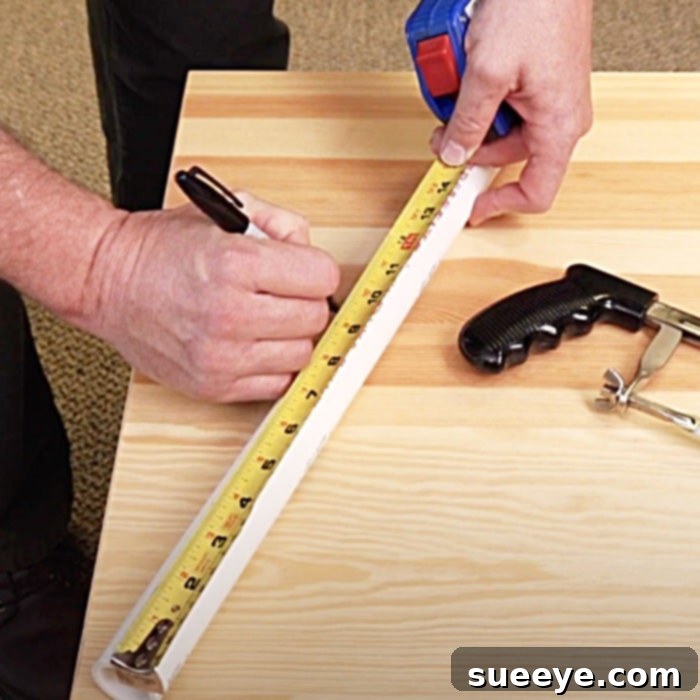
Step 1: Measure and Cut Your PVC Pipes
First, measure the interior dimensions of your ice chest. You want the PVC tubes to fit comfortably without obstructing the lid from closing. Consider cutting multiple tubes of varying lengths if your cooler has internal contours or different sections. Aim for a length that allows you to easily place and remove them. Once measured, mark the cutting points on your PVC pipe. Using a hacksaw or a dedicated PVC pipe cutter, carefully cut the pipes. After cutting, use sandpaper or a deburring tool to smooth any rough edges or burrs to prevent injury and ensure a good seal with the caps.
Step 2: Attach the First Set of Caps
With your pipes cut and smoothed, it’s time to seal one end of each tube. Apply PVC primer to the inside of one cap and to one end of a PVC pipe. Allow it to sit for a few seconds as per the primer’s instructions. Then, apply a generous, even layer of PVC cement to both the primed cap interior and the pipe end. Firmly twist and push the cap onto the pipe, holding it in place for about 15-30 seconds to ensure a secure bond. Repeat this for all your tubes, sealing one end of each. Allow ample time for the cement to cure completely according to the manufacturer’s guidelines, typically 30 minutes to a few hours, before proceeding.
Step 3: Prepare the Super-Charged Saltwater Solution
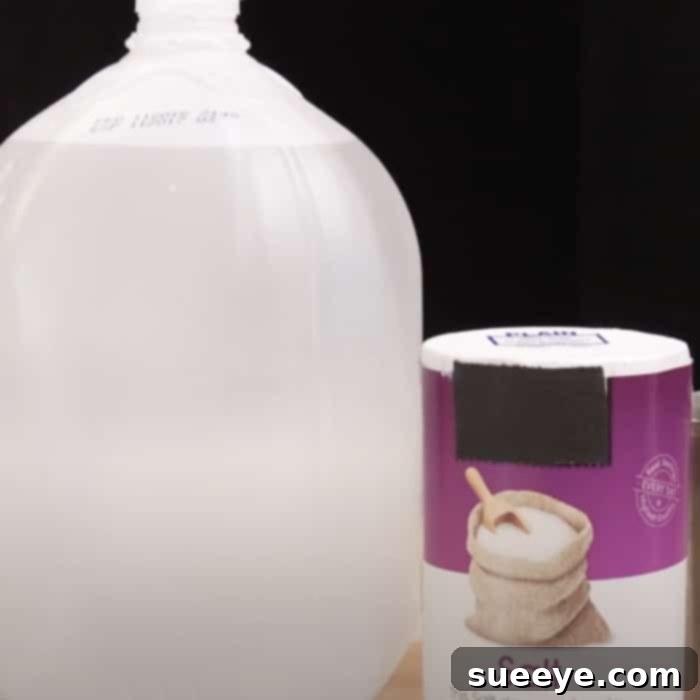
This is where the magic happens! In a large mixing container, combine water and salt. A common and effective ratio is roughly 1 cup of salt for every 2-3 cups of water. The more salt you dissolve, the lower the freezing point of the solution will be, leading to colder and longer-lasting cooling. Stir the mixture thoroughly until the salt is completely dissolved. You might notice the water becoming slightly cloudy. It’s crucial that no undissolved salt remains, as this could lead to inconsistent freezing.
Step 4: Fill the PVC Tubes
Using a funnel, carefully pour the prepared saltwater solution into each PVC pipe. Do not fill the tubes to the very brim. Leave a small air gap at the top – about an inch or two – to allow for the expansion of the water when it freezes. Overfilling could put stress on the caps and potentially lead to leaks or burst pipes. If you’re using different diameter tubes, adjust the amount of solution accordingly.
Step 5: Seal the Remaining Caps
Once all tubes are filled, it’s time to seal the second end. Just like in Step 2, apply PVC primer and then PVC cement to the inside of the remaining caps and the open ends of the filled pipes. Firmly attach the caps, twisting them slightly to ensure an even spread of cement and a secure, watertight seal. Hold each cap in place until it sets. Again, allow sufficient time for the cement to fully cure before freezing. A perfect seal is paramount to prevent any leakage of the saltwater solution.
Step 6: Freeze Your Polar Bear Tubes
Place your newly constructed and sealed Polar Bear Tubes into a freezer. Arrange them in a way that allows them to freeze evenly. For optimal performance, allow them to freeze solid for at least 24-48 hours, especially if they are larger in diameter. The colder and more thoroughly frozen they are, the longer they will keep your cooler chilled.
Step 7: Deploy in Your Ice Chest
When you’re ready for your adventure, remove the frozen tubes from the freezer. For best results, pre-chill your ice chest by leaving the tubes inside for an hour or two before adding your food and drinks. Arrange the tubes strategically throughout your cooler. Placing some at the bottom, layering with your items, and adding more on top will provide comprehensive cooling. The beauty of these tubes is their consistent shape, allowing for efficient packing.
Maximizing the Performance of Your Polar Bear Tubes
To get the absolute best cooling performance from your Super-Charged Polar Bear Tubes, consider these additional tips:
- Pre-Chill Your Cooler: Before packing, place your empty cooler in a cool environment or add a frozen Polar Bear Tube for an hour or two. A pre-chilled cooler will maintain cold temperatures much longer.
- Pack Efficiently: Arrange your items tightly, leaving as little air space as possible. Air gaps allow warm air to circulate. Use the tubes to create ‘cold zones’ around your most critical items.
- Minimize Opening: Every time you open the cooler, warm air rushes in. Try to plan what you need before opening and close the lid quickly.
- Top-Down Cooling: Cold air sinks. Placing some tubes on top of your contents can help drive cold air downwards, keeping everything colder.
- Insulate from the Sun: Keep your cooler out of direct sunlight. If unavoidable, cover it with a towel or blanket for added insulation.
- Experiment with Salt Concentrations: While 1 cup salt to 2-3 cups water is a good starting point, you can experiment with slightly higher salt concentrations for even lower freezing points, ideal for extremely hot conditions or longer trips.
Safety and Maintenance Considerations
While these tubes are generally safe and easy to use, always remember a few points:
- PVC Cement Fumes: Use PVC primer and cement in a well-ventilated area to avoid inhaling fumes.
- Sharp Edges: Be careful when cutting PVC pipes and always deburr the edges.
- Watertight Seal: Ensure caps are perfectly sealed to prevent leaks. The saltwater solution is non-toxic but can be corrosive to some metals or surfaces if it leaks repeatedly.
- Not for Consumption: The saltwater solution inside the tubes is not potable and should not be consumed.
- Cleaning: After each use, wipe down the tubes if they get dirty. They are durable and designed for repeated freezing and thawing cycles.
- Storage: Store the tubes in your freezer so they are always ready for your next adventure, or in a cool, dry place if you prefer to freeze them only when needed.
This is such a fantastic and practical idea that will transform your outdoor experiences. I am personally making several of these polar bear cooling tubes as soon as possible, and I encourage you to do the same. Get ready to enjoy perfectly chilled refreshments and food, without the mess or the constant need for more ice!
Enjoy your mess-free, super-chilled adventures!