
Unlock Your Creativity: A Comprehensive Guide to Watercolor Lettering with Masking Fluid
Are you looking for a captivating and rewarding creative project that allows for boundless self-expression? Look no further! This detailed guide will walk you through the delightful process of combining vibrant watercolors with the magic of masking fluid to create breathtaking lettering art. Whether you’re a seasoned artist or just beginning your creative journey, this technique is accessible, fun, and yields stunning results that you’ll be proud to display or share.
Watercolor holds a special place in the art world for its ethereal beauty and fluid nature. When paired with the precise barrier that masking fluid provides, you can achieve crisp, defined lettering or intricate designs against a dreamy watercolor backdrop. It’s a simple concept with endless possibilities, allowing you to personalize messages, immortalize quotes, or design unique gifts that truly speak from the heart.
What is Masking Fluid and Why Use It with Watercolor?
Masking fluid, often referred to as liquid frisket, is a removable liquid latex or rubber-based medium designed to block out areas of your paper, protecting them from watercolor paint. Once dry, it forms a waterproof barrier. After your watercolor has been applied and dried, the masking fluid can be gently removed, revealing the pristine paper underneath. This creates sharp, unpainted areas that contrast beautifully with the painted sections.
For lettering projects, masking fluid is an absolute game-changer. It allows you to “write” with paint, ensuring your letters remain perfectly white and crisp, even as you wash bold, flowing colors over them. This technique eliminates the need for careful painting around intricate letterforms, freeing you up to experiment with expressive washes and gradients without worrying about precision within your text.
Essential Materials You’ll Need for Your Watercolor Lettering Project
Gathering the right supplies is the first step to a successful and enjoyable art experience. Here’s a comprehensive list of what you’ll need:
- Watercolor Paper: Opt for high-quality watercolor paper, at least 140 lb (300 gsm), cold press for a textured finish, or hot press for a smoother surface. This weight prevents buckling and ensures your colors sing.
- Watercolor Paints: A basic set of pan or tube watercolors will suffice. Experiment with vibrant hues that complement your chosen words or theme.
- Art Masking Fluid (Liquid Frisket): Choose a reputable brand. Ensure it’s fresh; older masking fluid can become clumpy or difficult to remove.
- Small Paint Brush for Masking Fluid: It’s recommended to use an old brush or a silicone “color shaper” tool for applying masking fluid, as it can be very tough on natural bristles. Clean immediately after use!
- Watercolor Brushes: A few different sizes for applying your paint, including a larger wash brush and smaller detail brushes.
- Pencil and Eraser: For light initial sketches or guidelines if preferred.
- Light Source for Tracing: A window, a dedicated light box, or even a tilted computer screen can serve this purpose perfectly.
- Printed Lettering/Design: Your chosen quote or word art, printed in the desired font and size.
- Water Containers: Two containers are ideal – one for rinsing brushes, one for clean water.
- Paper Towels or a Rag: For blotting brushes and cleaning up spills.
- Optional: Masking Tape or Artist’s Tape: To secure your paper to your work surface, preventing warping.
- Optional: Rubber Cement Pick-Up Eraser: Specifically designed for removing masking fluid gently.
Step-by-Step Tutorial: Creating Your Watercolor Lettering Masterpiece
Follow these detailed steps to bring your vision to life:
Step 1: Design Your Lettering or Artwork
This is where your creative expression truly begins! Decide on the words or quote you want to feature. Consider the sentiment you wish to convey. Next, select a font that reflects the mood of your message. You can find countless free fonts online or use one of your computer’s built-in options. Print your chosen text onto regular paper, ensuring the size is exactly how you’d like it to appear on your watercolor paper. Remember to leave ample space around the lettering for your watercolor washes.
Step 2: Prepare Your Workspace and Transfer Your Design
Find a comfortable, well-lit space. If you’re using a window as your light source, secure your printed lettering to the window pane with tape. Then, carefully align your watercolor paper over your printed design, securing it with tape as well, so both layers are stable. If using a lightbox, simply place your printed design on the lightbox, then your watercolor paper on top. For a computer screen, gently tilt your monitor back, place your printed text on the screen, and then tape your watercolor paper directly over it. The light shining through will make your printed words visible through the watercolor paper, ready for tracing.
Step 3: Apply the Masking Fluid with Precision
Now for the careful part! Grab your small, dedicated masking fluid brush (or silicone tool) and your bottle of art masking fluid. Gently shake the masking fluid bottle if instructed, then pour a small amount into a disposable dish or directly dip your brush. Carefully trace over your printed lettering with the masking fluid. The goal is to be as precise as possible, ensuring crisp, clean lines for your letters. Avoid thick puddles of fluid, as these can be harder to remove later. Work steadily and deliberately. Immediately after you finish, rinse your brush thoroughly with soap and water to prevent the masking fluid from drying and ruining the bristles.
Step 4: Let the Masking Fluid Dry Completely
Patience is paramount at this stage! The art masking fluid must be completely dry and cured before you apply any watercolor. If it’s not fully dry, the watercolor paint can seep underneath, ruining your crisp lines, or the fluid itself might smear. Depending on the brand, humidity, and thickness of application, this can take anywhere from a few hours to a full 24 hours. The fluid should feel completely non-tacky and firm to the touch when ready. Resist the urge to rush this step.
Step 5: Unleash Your Colors: Applying Watercolor Washes
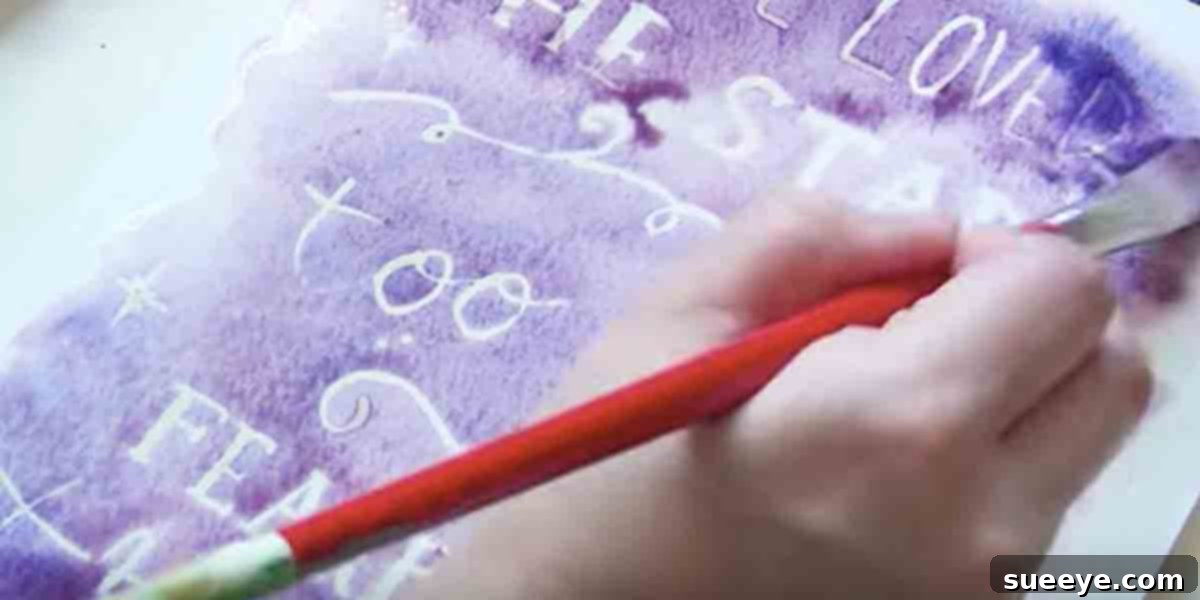
Once your masking fluid is bone dry, it’s time for the fun part – adding color! This is where you can truly let your creativity flow. Using your watercolor brushes, apply washes of color over the entire surface of your paper, including directly over the dried masking fluid. Experiment with different watercolor techniques:
- Wet-on-Wet: Apply clean water to an area first, then drop in colors for soft, blended effects.
- Wet-on-Dry: Apply paint directly to dry paper for more controlled, vibrant colors.
- Gradients: Blend colors seamlessly from one hue to another, or from dark to light.
- Layering: Apply translucent layers of color, allowing the previous layers to show through.
Play with various color palettes – warm tones, cool tones, complementary colors, or even a monochromatic scheme. Don’t be afraid to experiment! The masking fluid will protect your lettering, allowing you to paint freely and expressively over the entire surface.
Step 6: Allow Watercolor to Dry
Just as with the masking fluid, it is crucial that your watercolor paint is completely dry before moving to the next step. If you attempt to remove the masking fluid while the paint is still damp, you risk smudging your beautiful colors or tearing your paper. Give your artwork plenty of time to air dry naturally, or use a hairdryer on a cool setting for a faster process.
Step 7: Reveal Your Masterpiece: Removing the Masking Fluid
The moment of truth! Once both the masking fluid and the watercolor paint are completely dry, it’s time to reveal your crisp lettering. Gently rub the dried masking fluid with your finger, a clean rubber eraser, or a specialized rubber cement pick-up tool. The masking fluid will lift away, leaving behind the untouched, white paper in the shape of your precise letters. Be careful not to rub too aggressively, as this could damage the paper surface or the surrounding watercolor. Take your time and enjoy watching your design come to life!
Step 8: Final Touches (Optional)
Once the masking fluid is removed, you can add any final details with a fine-tipped brush, such as subtle shadows or highlights, if desired. You might also consider framing your artwork to protect it and display it proudly. This personalized piece makes a wonderful gift or a unique addition to your home decor.
Pro Tips for Success in Your Watercolor Lettering Projects
- Practice Makes Perfect: If you’re new to masking fluid, do a few practice runs on scrap paper to get a feel for its consistency and application before working on your final piece.
- Test Your Masking Fluid: Always test a small dab of masking fluid on a corner of your watercolor paper to ensure it removes cleanly without tearing the paper or leaving residue.
- Clean Brushes Immediately: Never let masking fluid dry on your brushes. Have a cup of soapy water ready for immediate cleaning.
- Work in a Well-Ventilated Area: Some masking fluids have a strong ammonia smell, so ensure good airflow.
- Patience is Key: Rushing any step, especially drying times, can lead to less-than-perfect results. Embrace the process!
- Experiment with Colors and Textures: Don’t be afraid to try different watercolor techniques, color combinations, or even add salt or alcohol to your wet washes for unique textual effects.
Beyond Lettering: Other Creative Uses for Masking Fluid
While this tutorial focuses on lettering, masking fluid is incredibly versatile. You can use it to create crisp stars in a night sky, preserve delicate flower stamens, create fine outlines, or protect any intricate details you want to keep white against a painted background. Once you master the technique, your creative options are truly limitless.
The Joy of Handmade Art and Self-Expression
There’s immense satisfaction in creating something beautiful with your own hands. This watercolor lettering project is not just about making art; it’s about the process of slowing down, focusing your energy, and expressing a message that resonates with you. Each piece you create will be unique, infused with your personal touch, making it a truly special keepsake or gift.
So, gather your materials, choose your favorite quote, and embark on this wonderful artistic adventure. The combination of watercolor and masking fluid is a delightful duo that promises both creative challenge and deeply rewarding results. Dive in, experiment, and most importantly, enjoy the journey of creating something truly magnificent!