
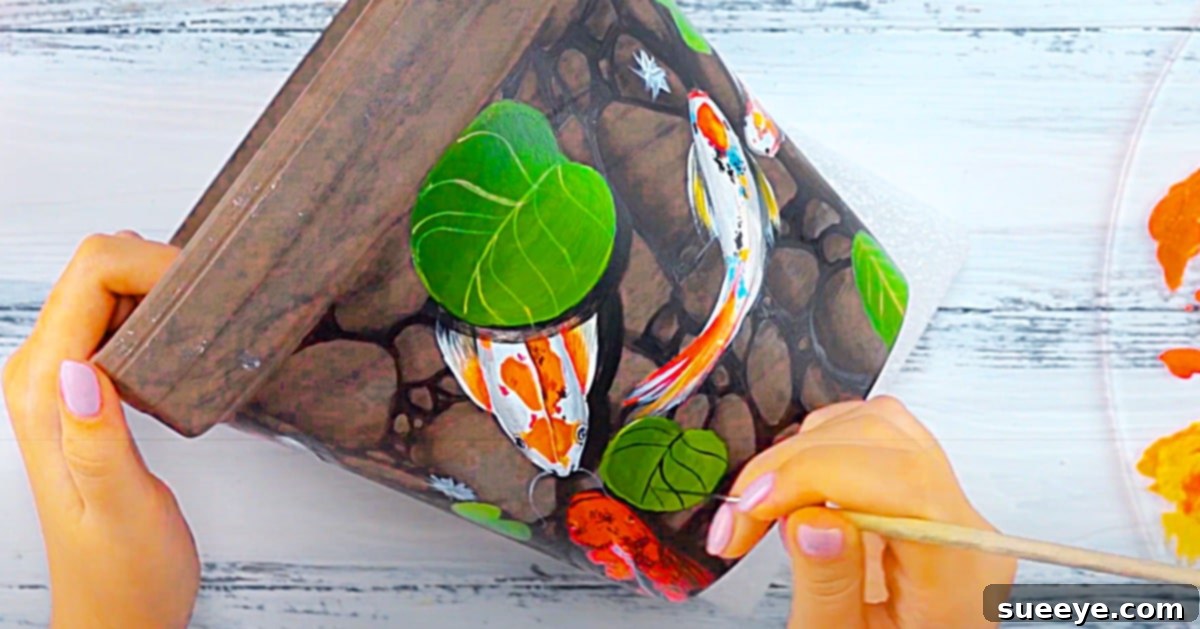
Transform Your Garden: The Ultimate Guide to Hand-Painting Terracotta Pots with Acrylics
There’s something uniquely satisfying about adding a personal touch to your home decor, especially when it comes to bringing life to your garden or indoor plant collection. Hand-painted terracotta pots are not just functional; they are miniature canvases that allow you to express your creativity, adding a pop of color and personality to any space. Whether you’re a seasoned crafter or just starting your DIY journey, decorating a simple clay pot can be a surprisingly rewarding and enjoyable experience.
My own recent dive into this delightful craft was inspired by a captivating terracotta pot painting video tutorial by Arteza on YouTube. The moment I saw the charming koi fish pattern demonstrated, I knew I had found my next project. For a while, I had been admiring similar hand-painted clay pots on Pinterest, always on the lookout for the perfect design to try. The Arteza tutorial offered not only an adorable pattern but also clear, easy-to-follow instructions that made the entire process seem incredibly approachable. What’s more, discovering that all the necessary materials could be sourced affordably, even from places like Dollar Tree, made this project even more appealing. This craft truly checks all the boxes: it’s easy to understand, simple to execute, and promises a stunningly beautiful outcome. I’m so excited to create these painted clay pots, and if they turn out as wonderfully as I anticipate, I’m already planning to make several more as thoughtful Christmas presents. Why not get a head start on holiday gifting, right?
Why Choose Terracotta Pots for Your Art?
Terracotta pots have been a staple in gardening for centuries, and for good reason. Made from baked clay, they possess a rustic charm and porous nature that’s beneficial for plant health, allowing roots to breathe and preventing waterlogging. This natural, earthy surface also makes them an excellent canvas for painting. Their slightly rough texture helps paint adhere well, and their affordability means you can experiment with various designs without a significant investment. However, their porosity also means a crucial step is involved in ensuring your painted design lasts: sealing, which we’ll cover later in this guide.
Essential Materials for Your Painted Clay Pot Project:
Gathering your supplies is the first exciting step in any creative endeavor. For this project, you’ll find that most items are readily available at craft stores, discount stores, or even online. Here’s what you’ll need, along with a few recommendations to help you get started:
- A Terracotta Clay Pot: Choose a size that suits your plant or display needs. Smaller pots (4-6 inches) are great for beginners, while larger ones offer more space for intricate designs. Ensure it’s clean and free of dirt or dust before you begin.
- A Pencil (HB or 2B recommended): For sketching your design onto the pot. A lighter lead pencil allows for easy erasing of mistakes without leaving deep indentations.
- Acrylic Craft Paints: These are ideal for terracotta due to their quick drying time, vibrant colors, and water resistance once cured. Arteza, the brand that inspired this project, offers high-quality acrylics in a vast array of colors. Opt for a variety of colors that fit your chosen design – for the koi fish, think oranges, reds, whites, blacks, and blues for water elements.
- A Paintbrush Set: You’ll likely need a range of brushes. A larger flat brush is great for applying base coats or filling in larger areas, while fine-tipped brushes (like a round or liner brush) are essential for intricate details, outlines, and adding personality to your design.
- Optional but Recommended:
- Primer (Acrylic Gesso or Outdoor Primer): Applying a primer before painting can help seal the porous terracotta, making your paint colors more vibrant and ensuring better adhesion and longevity, especially for outdoor pots.
- Clear Acrylic Sealer (Spray or Brush-on, Matte or Glossy): This is crucial for protecting your painted design from the elements, moisture, and general wear and tear. Choose an outdoor-safe sealer if your pot will live outside.
- Palette: A simple plastic palette, an old plate, or even a piece of wax paper works perfectly for mixing paints.
- Water Container and Paper Towels: For rinsing brushes and cleaning up spills.
- Painter’s Tape: Useful for creating crisp, straight lines or masking off areas if you plan for geometric patterns.
- Tracing Paper or Carbon Paper: If you’re not confident in freehand sketching, these can help transfer complex designs accurately.
Step-by-Step Directions for Painting Your Terracotta Pot:
Following the clear guidance from Arteza’s terracotta pot painting tutorial, here’s a detailed breakdown of how to bring your chosen design, like the captivating koi fish, to life. Remember to work in a well-ventilated area and allow sufficient drying time between each step.
Step 1: Prepare Your Terracotta Pot
Before any paint touches your pot, ensure it’s clean and ready. Wipe down the entire surface with a damp cloth to remove any dust or dirt. Let it dry completely. If you opt to use a primer, now is the time to apply it. Paint a thin, even coat of acrylic gesso or an outdoor-specific primer over the areas you intend to paint. This step helps seal the terracotta’s porosity, ensuring your paint colors appear more vibrant and adhere better. Let the primer dry thoroughly according to the manufacturer’s instructions, which might take a few hours.
Step 2: Sketch Your Design
This is where your vision begins to take shape. Using your pencil, lightly sketch your chosen design onto the primed surface of the pot. For the popular koi fish pattern, start by outlining the main body shapes of the fish, their fins, and the gentle curves of their tails. Add details like their eyes and the flowing lines representing water or reeds. Don’t press too hard; light lines are easier to erase and adjust. If you’re using tracing paper, position your design, tape it in place, and trace over the lines with your pencil to transfer the image.
Step 3: Begin Painting with Base Coats
Once your sketch is complete, it’s time for paint! Start by applying the base colors for your design. For the koi fish, this might mean painting the bodies of the fish in their primary colors (orange, white, red) and filling in the background elements, such as blue for water or green for lily pads. Use a larger brush for these broader areas to ensure smooth, even coverage. Acrylic paints dry relatively quickly, but it’s still important to allow each layer to dry completely before applying the next. This prevents colors from blending unintentionally and helps build opacity.
Step 4: Add Details and Definition
With your base colors dry, switch to smaller, finer brushes to add the intricate details that bring your design to life. For the koi fish, this includes painting the distinctive scales, defining the fins with delicate strokes, and adding the pupils and highlights to their eyes. Use black or a darker shade for outlines and shadows to give depth, and a lighter shade or white for highlights to create dimension and a sense of movement. This step is like “painting by numbers” where you fill in the smaller, more precise areas of your sketch, gradually refining your artwork.
Step 5: Apply the Finishing Touches and Sealer
Once all the paint layers are dry and you are satisfied with your masterpiece, the final and most crucial step for durability is applying a clear acrylic sealer. This protects your artwork from moisture, UV rays (if placed outdoors), and general wear. Choose a sealer specifically designed for outdoor use if the pot will be exposed to the elements. Apply 2-3 thin, even coats, allowing each coat to dry completely before applying the next. You can choose between a matte, satin, or glossy finish based on your preference. Allow the sealer to cure fully for at least 24-72 hours before placing plants or exposing the pot to water.
Tips for a Perfectly Painted Pot:
- Cleanliness is Key: Always start with a clean pot to ensure optimal paint adhesion.
- Thin Coats are Better: Several thin coats of paint or sealer are always better than one thick coat, which can become tacky or peel.
- Patience with Drying: Don’t rush the drying process. Humidity can affect drying times, so always check if the paint is dry to the touch before proceeding.
- Practice Makes Perfect: If you’re trying a new technique or design, consider practicing on a scrap piece of cardboard or an inexpensive smaller pot first.
- Consider the Inside: It’s generally not recommended to paint the inside of a terracotta pot if you plan to plant directly in it, as it can interfere with the pot’s natural porosity and drainage. If you want to paint the inside, consider using a plastic liner for your plant.
- Experiment with Colors: Don’t be afraid to mix custom colors or try different palettes. Your pot, your rules!
Creative Design Ideas Beyond Koi Fish:
While the koi fish design is undeniably charming, the possibilities for painting terracotta pots are truly endless. Let your imagination soar with these additional ideas:
- Geometric Patterns: Use painter’s tape to create crisp lines for stripes, chevrons, or abstract geometric designs.
- Floral Fantasies: Paint vibrant flowers, delicate vines, or lush foliage to complement your plants.
- Abstract Art: Drip, splatter, or blend colors for a unique, modern artistic statement.
- Ombre Effects: Create a gradual transition of colors from the top to the bottom of the pot.
- Stenciled Designs: Use stencils for repeating patterns, monograms, or intricate lace-like motifs.
- Personalized Messages: Add names, inspirational quotes, or dates for a truly customized gift.
- Theme Pots: Create a collection of pots with a unified theme, like celestial bodies, whimsical creatures, or seasonal decorations.
Caring for Your Hand-Painted Terracotta Pot:
To ensure your beautifully painted pot remains a vibrant part of your decor for years to come, a little care goes a long way. If the pot is outdoors, bring it inside during extreme weather conditions, such as freezing temperatures or prolonged heavy rain, even if sealed. When cleaning, gently wipe the surface with a soft, damp cloth. Avoid harsh abrasive cleaners or scrubbing, which could damage the paint or sealer. With proper care, your hand-painted terracotta pot will continue to bring joy and beauty to your space.
FAQ About Painting Clay Pots:
Q: Can I use any type of paint on terracotta pots?
A: While you technically can, acrylic craft paints are highly recommended because they are water-based, non-toxic, dry quickly, offer vibrant colors, and become water-resistant once dry, especially when sealed. Oil-based paints can also be used but have longer drying times and require specific thinners for cleanup. Watercolor or tempera paints are not suitable for durability.
Q: Is priming the pot absolutely necessary?
A: Priming is highly recommended, especially for outdoor pots or if you want your colors to appear more vibrant and consistent. Terracotta is porous, and primer helps to seal it, preventing the pot from absorbing too much paint and enhancing adhesion. For indoor pots, you might skip it, but results may vary.
Q: How do I make my painted pot waterproof for outdoor use?
A: The key to making your painted pot durable for outdoor use is applying a high-quality, clear acrylic sealer specifically designed for outdoor projects. Look for sealers that offer UV protection to prevent colors from fading over time.
Q: Can I paint the inside of the pot?
A: It’s generally advised not to paint the inside of terracotta pots, especially if you plan to plant directly into them. Painting the interior can block the pot’s natural porosity, which is vital for proper drainage and aeration for plant roots. If you wish to paint the inside for aesthetic reasons, consider using a plastic pot liner for your plant.
Q: How long does the paint last on terracotta?
A: The longevity of your painted pot depends largely on the quality of materials used (paint and sealer) and whether it’s kept indoors or outdoors. With proper priming, good acrylic paints, and a suitable outdoor sealer, a painted pot can last for many years, even outdoors.
My enthusiasm for this project is through the roof! The idea of crafting a series of these adorable, personalized pots for Christmas gifts truly excites me. This craft proves that you don’t need to be an expert artist to create something beautiful and meaningful. It’s a fantastic way to unwind, express your creativity, and bring a touch of handmade charm into your home or the homes of loved ones. So, grab your brushes, choose your favorite colors, and get ready to transform a simple terracotta pot into a stunning piece of art. Don’t forget to check out the original Arteza tutorial for a visual guide, and share your own wonderful creations!