
Craft Your Own Enchanting Flying Bird Mobile: A Joyful DIY Project for Your Home
Prepare to embark on a truly delightful and rewarding DIY journey! There’s something incredibly special about creating decorative pieces with your own hands, and this project, in particular, stands out as a charming endeavor that yields a beautiful and whimsical result. Making your own flying bird mobile is not only surprisingly easy but also guarantees a fantastic conversation starter and a truly cool addition to any space in your home. For those who adore unique, handcrafted items that infuse personality and warmth into their surroundings, this project is an absolute must-try!
The inspiration for this captivating craft sprang from a beloved family heirloom. My mother-in-law proudly displays a gorgeous bird mobile hanging above the bed my daughter sleeps in during her visits. This mobile has captivated my daughter’s imagination for years, sparking a deep affection for its gentle, soaring movements. Witnessing her fascination ignited a desire within me to recreate that magic – to craft our very own 3-D flying bird mobile at home. After a little research, I stumbled upon an excellent tutorial, and we eagerly dove into the creative process, eager to bring our own flock of flying wonders to life.
Why a Flying Bird Mobile? The Allure of Gentle, Perpetual Flight
Imagine a delicate wooden bird, seemingly suspended in time, never tiring of its perpetual flight. With the slightest breeze, it gracefully sways and soars, mimicking the effortless glide of real birds. Alternatively, with a gentle tug of a string, you can actively set its wings in motion, bringing it to life with an engaging flutter. These enchanting mobiles possess a versatile charm, capable of transforming both indoor and outdoor environments. Whether gracing a cozy nursery, adding character to a vibrant living room, becoming a serene focal point above a bed, or even animating an outdoor patio, their presence introduces a serene, artistic, and often interactive touch. They are more than just static decorations; they are kinetic sculptures that evoke a sense of calm, wonder, and playful elegance.
A Touch of Whimsy for Every Corner of Your Life
The beauty of a flying bird mobile lies in its universal appeal and adaptability. Consider just a few places where your handcrafted creation can truly shine:
- Nursery Charm: Create a soothing and visually stimulating environment for infants and toddlers with the gentle, rhythmic movement of flying birds. Their soft motion can be incredibly calming and captivating.
- Living Room Focal Point: Add an artistic and unique element that instantly sparks curiosity and conversation among guests. It’s a guaranteed icebreaker!
- Outdoor Oasis: When crafted with weather-resistant materials, these mobiles can bring life and movement to your patio, porch, garden, or balcony, dancing harmoniously with the natural breeze.
- Personalized Gifts: Handcrafted mobiles make incredibly thoughtful and memorable presents for baby showers, housewarmings, birthdays, or any special occasion, showing a personal touch that store-bought items simply can’t match.
- Educational Fun: A wonderful project for children and adults alike, fostering creativity, patience, and fine motor skills. It’s a fantastic way to introduce basic principles of balance and physics.
- Calming Home Office Decor: A gentle, moving mobile can provide a subtle, non-distracting visual interest that helps reduce stress and inspire creativity in a workspace.
Unleashing Your Creativity: A World of Bird Designs and Materials
The beauty of this DIY project lies in its boundless potential for personalization and creative expression. A quick scroll through platforms like Pinterest, Instagram, or Etsy reveals an astonishing array of flying bird mobile designs. From the vibrant hues of pink flamingos and exotic parrots to the familiar charm of ducks and seagulls, and even majestic storks, the possibilities are truly endless. Each bird offers a unique silhouette, character, and color palette, allowing you to choose one that perfectly matches your aesthetic, a specific room’s decor, or the recipient’s preference. Don’t feel limited to realistic birds either; you could design fantastical creatures or stylized avian forms.
Consider the myriad of materials you can use: while a classic wooden bird offers a sturdy, natural appeal and a timeless aesthetic, you could also experiment with layered cardstock for a lighter, more intricate design, perfect for delicate nursery mobiles. Felt or fabric birds offer a softer, tactile, and often more child-friendly version. You could even incorporate elements like wire frames covered in paper or fabric, or utilize recycled plastics for an eco-conscious approach. Imagine a flock of elegant cranes, a playful group of hummingbirds, or even a fantastical, mythical bird of your own creation, perhaps adorned with glitter or iridescent paint! The only true limit is your imagination and the materials you choose to explore.
From Inspiration to Innovation: Beyond Personal Enjoyment
During my search for inspiration, I even stumbled upon a beautifully crafted Canadian Duck mobile on Etsy, priced at $54.50. This really highlighted the commercial potential and perceived value of such handcrafted items! If you find yourself truly enjoying the process, developing a knack for intricate details, and producing high-quality pieces, making these flying bird mobiles could even evolve into a fantastic side hustle or a new source of income. It’s a wonderful way to turn a passion into profit, sharing your handcrafted creations with others who appreciate unique, artisan goods and are willing to invest in pieces made with care and skill.
The DIY Advantage: Crafting vs. Buying
In a world saturated with mass-produced items, there’s an immense and deeply satisfying pleasure in crafting something unique with your own hands. Opting for a DIY flying bird mobile offers several compelling advantages over simply purchasing a pre-made one:
- Unparalleled Personalization: You have complete control over every aspect – the design, colors, materials, size, and overall aesthetic. This ensures your mobile perfectly complements your space, matches a specific theme, or caters to the exact tastes of a gift recipient, creating a truly one-of-a-kind piece.
- Significant Cost-Effectiveness: While some specialized materials might require an initial investment, crafting a mobile yourself is often significantly more affordable than buying a high-quality, artisan-made version. You save on labor and markup costs.
- Profound Sense of Accomplishment: There’s an undeniable joy, pride, and boosted self-esteem that comes with successfully creating something beautiful and functional from scratch. It’s a tangible representation of your effort and creativity.
- Valuable Skill Development: Each project helps you hone a variety of crafting skills, from precision cutting and shaping to delicate assembly, painting, and problem-solving (especially with balancing!). These skills are transferable to many other DIY endeavors.
- A Unique Story: Your handmade mobile will carry a unique story – a memory of the creative process, the challenges overcome, and the joy of completion. This makes it far more meaningful and cherished than any store-bought item, transforming it into a personal keepsake.
- Therapeutic Benefits: Engaging in creative crafts like this can be incredibly therapeutic, providing a mindful escape from daily stresses, fostering focus, and promoting relaxation.
Essential Materials and Tools for Your Flying Bird Mobile
Before you begin your creative journey, gathering the right materials and tools will make the crafting process smooth, efficient, and ultimately more enjoyable. While specific items might vary slightly depending on your chosen design and primary material (whether you opt for wood, paper, felt, or a combination), here’s a comprehensive list of what you’ll generally need to bring your flying bird mobile to life:
Key Materials:
- For Wooden Birds: Thin plywood or balsa wood sheets (balsa is lighter and easier to cut), medium to fine grit sandpaper for smoothing edges.
- For Paper/Cardstock Birds: Heavy cardstock (100-110 lb or 200-300 gsm recommended for durability), watercolor paper, or thick craft paper. Patterned paper can add extra flair.
- For Felt Birds: Craft felt sheets in various colors, embroidery floss in coordinating colors, and a small amount of stuffing (e.g., polyester fiberfill) if making 3D plush birds.
- Decorative Elements: Acrylic paints, spray paint (ensure good ventilation), paint pens or fine-tip markers, glitter, small beads or googly eyes for expressive faces, craft feathers (optional for tails or wings), clear sealant or varnish (especially for outdoor mobiles).
- Assembly Adhesives: Strong craft glue (e.g., Tacky Glue), wood glue (for wooden birds), super glue for small, precise attachments, or a hot glue gun with glue sticks for quick bonds.
- Hanging & Flying Mechanism: Clear fishing line or strong, thin thread (e.g., upholstery thread or waxed linen thread) for virtually invisible hanging. Small hooks or eye screws for attaching to the bird and the main hanging structure. Small weights (e.g., beads, small nuts, washers, fishing weights) for balancing the bird, and possibly a thin metal rod, wooden dowel, or sturdy twig for the mobile’s armature.
Essential Tools:
- Cutting Tools: A very sharp craft knife (X-Acto knife) with a supply of fresh, sharp blades, a self-healing cutting mat to protect your work surface, sharp scissors (both large and small for detail work), a coping saw or scroll saw (for intricate wooden cuts if using wood).
- Shaping & Smoothing Tools: A sanding block or small electric sander (for wooden birds).
- Measuring & Marking Tools: A sturdy ruler (metal is best for cutting with a craft knife), a pencil (mechanical pencil for fine lines), templates (either printed from online sources or drawn freehand).
- Drilling/Punching Tools: A small hand drill or a Dremel rotary tool with tiny drill bits (for creating precise holes for hanging strings), a sharp needle or awl for punching holes in paper or felt.
- Miscellaneous: Small pliers (needle-nose pliers are useful for handling small hooks or wire), various paintbrushes (different sizes for details and broader strokes), protective gloves and safety glasses (especially when using saws, spray paint, or strong adhesives).
- Workspace Protection: Newspaper or drop cloth to protect your work area from paint and glue.
Your Step-by-Step Journey to a Flying Masterpiece
While I highly recommend seeking out a detailed video tutorial, like the excellent one by Maria Amora (which truly walks you through each stage with visual clarity), here’s a comprehensive general outline of the steps involved in crafting your own flying bird mobile. This will give you a solid idea of the process and what to expect, helping you prepare for each phase of creation:
- Choose Your Design & Gather Inspiration: Start by deciding what kind of bird (or birds) you want to create. Search online for templates, bird silhouettes, or examples of existing flying bird mobiles. Consider the style (realistic, whimsical, geometric) and the overall aesthetic you want to achieve. Print out or draw your chosen bird template(s), ensuring it includes all necessary separate pieces for the body, wings, tail, and any other distinctive features if applicable.
- Prepare Your Materials: Lay out all your chosen materials and tools on a clean, protected work surface. If working with wood, ensure it’s clean, dry, and free of defects. If using paper, ensure it’s flat and ready for precise cutting. Organize your paints, glues, and hanging supplies.
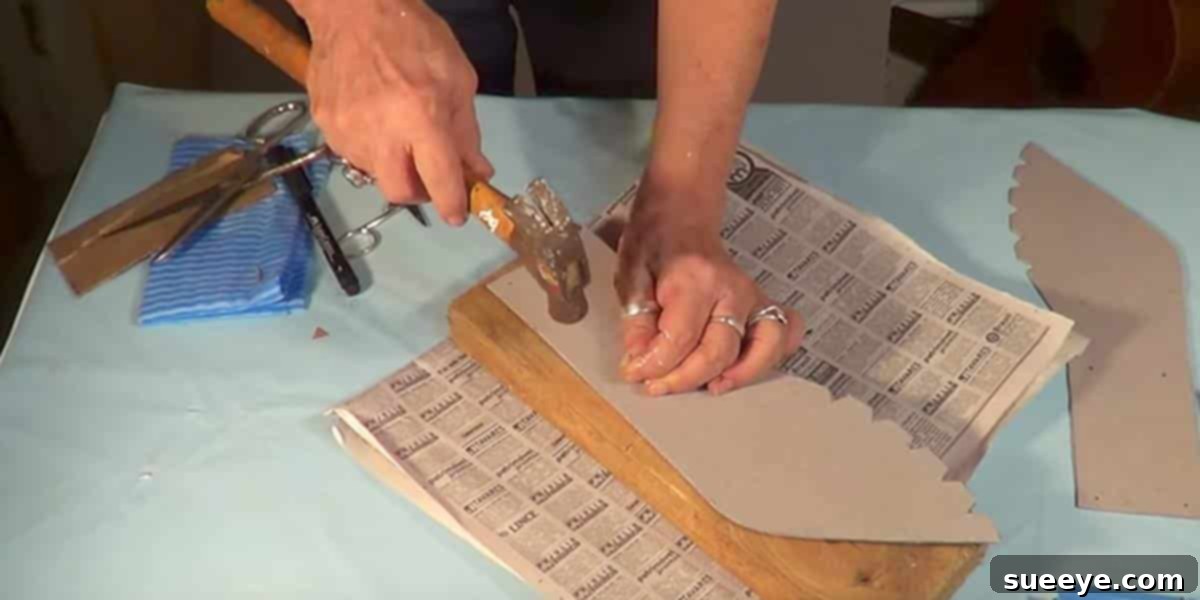
- Transfer & Cut the Pieces: Carefully transfer your bird template(s) onto your chosen material. For wood, trace the outline clearly. For paper, you might print the template directly onto the cardstock or meticulously trace it. Using your craft knife, scissors, or saw (depending on material), meticulously cut out all the individual parts of your bird. Precision here is paramount, as clean cuts will significantly impact the final assembly and appearance. Take your time to achieve smooth, accurate edges.
- Shape and Refine (if applicable): If using wood, gently sand the edges of your cut pieces to smooth them out, remove any splinters, and give them a more finished look. If using paper or felt, you might gently curve the wings or other parts to give them a more three-dimensional, dynamic look, using a dull pencil or a bone folder.
- Assemble the Bird’s Body: This is where the magic starts to take shape! Carefully glue the main body parts together according to your design. For 3-D birds, this might involve attaching wings to a central body core, creating layered effects for depth, or folding and gluing paper sections to form a volumetric shape. For felt birds, you might sew pieces together and lightly stuff them. Allow ample drying time for the glue before proceeding to the next step, ensuring a strong, lasting bond.
- Decorate Your Bird: Now comes the fun part – bringing your bird to life with color and detail! Paint your bird using acrylics, markers, or even decoupage with patterned paper. Add expressive eyes, intricate feather details, patterns, or any other embellishments you desire. Consider adding a clear protective sealant if the mobile will be exposed to humidity or sunlight, especially if for outdoor use. Let your creativity soar and make each bird truly unique!
- Create the Flying Mechanism: This is crucial for your bird’s graceful movement and requires careful balancing. You’ll typically need to drill tiny holes (or use a sharp needle for paper/felt) at specific balance points on the bird’s back or wings. These points are usually where the bird naturally balances when held. Attach strong fishing line or thread through these holes. The key is to find the perfect equilibrium so the bird hangs level and can pivot freely with minimal effort. You might need to experiment with counterweights (small beads, washers, or tiny lead fishing weights) attached to different parts of the string or the bird itself to achieve the desired flight dynamic and stable hang. This step often requires patience and fine-tuning.
- Add the Pull String (Optional): If you desire a pull-string mechanism for active, flapping flight, attach a longer, separate piece of string to a specific point on the bird (often near the tail or the base of the wings) that, when gently pulled, makes the bird flap or “fly.” This string should be distinct from the main hanging mechanism. Ensure it’s long enough to reach comfortably from where the mobile will hang.
- Test and Balance Thoroughly: Before final hanging, meticulously test your bird! Hold the main hanging line from various angles and observe how it moves. Adjust the string lengths, attachment points, and counterweights until you achieve a graceful, balanced flight that pleases you. This phase can be the most challenging but also the most rewarding, as it dictates the mobile’s lifelike quality.
- Hang Your Masterpiece: Once perfectly balanced and ready for display, find the ideal spot for your mobile. Securely attach the main hanging line to a ceiling hook, a mobile armature, a sturdy branch, or a well-placed beam. Step back and admire your handcrafted flying bird! Watch it sway and dance, bringing joy and a touch of whimsical nature to your chosen space.
Tips for a Successful and Enjoyable Crafting Experience
To ensure your DIY flying bird mobile project is as enjoyable and successful as possible, transforming it into a cherished piece of decor, keep these helpful tips in mind:
- Start Simple, Build Confidence: If you’re new to crafting or this specific type of project, choose a straightforward bird silhouette and an easy-to-work-with material like heavy cardstock for your first mobile. You can always tackle more complex designs and materials once you’ve gained confidence and honed your skills.
- Patience is Key: Crafting is a process that benefits from a calm and patient approach. Don’t rush through the steps, especially when cutting intricate details, waiting for glue to dry completely, or meticulously balancing the bird. Haste can lead to mistakes and frustration.
- Safety First, Always: Always use sharp tools carefully and with respect. A craft knife is excellent for precision but can be dangerous if not handled properly. Always use a self-healing cutting mat, cut away from your body, and keep fingers well clear of the blade. If using a saw, wear appropriate eye protection and gloves.
- Embrace Experimentation with Balance: Achieving the perfect “flight” often requires a bit of trial and error. Don’t be afraid to adjust string lengths, shift attachment points, or add tiny weights to different parts of the bird or strings until you achieve the graceful, balanced movement you desire. It’s part of the creative challenge.
- Personalize Everything: This is your creation, a reflection of your unique style! Don’t feel strictly limited by existing templates or color schemes. Change colors, add unique patterns, experiment with textures, or even design your own fantastical creature. Make it truly yours.
- Learn from Visual Tutorials: Video tutorials are invaluable resources. They offer visual guidance that written instructions sometimes can’t fully convey, especially for intricate steps like cutting techniques, assembly methods, or the subtle art of balancing. Watching someone perform the steps can demystify the process.
- Recycle and Upcycle Materials: Be resourceful! Look around your home for materials that can be repurposed, like old cereal boxes or cardboard for sturdy cardstock, interesting twigs or driftwood for hanging structures, or even leftover fabric scraps for decorative elements.
- Work in a Well-Lit Area: Good lighting is essential for precision work, especially when dealing with small details, fine cuts, and intricate gluing.
Where to Display Your Enchanting Creation
One of the ultimate joys of making a flying bird mobile is finding the perfect spot for it to enchant and captivate. Their versatile nature means they can enhance almost any environment, adding a touch of personalized whimsy and kinetic art:
- Children’s Rooms or Nurseries: The gentle movement and whimsical designs are incredibly captivating for babies and toddlers, fostering visual tracking and sparking imagination.
- Living Rooms and Dens: As an artistic accent, they add character, a unique focal point, and an instant conversation starter, reflecting your personality and creative flair.
- Home Offices or Studios: A calming and subtly moving presence that can inspire creativity, provide a gentle visual break, and reduce stress during periods of focused work.
- Covered Patios or Porches: When made with weather-resistant materials and sealants, they can add charm, movement, and a touch of nature to outdoor living spaces, dancing beautifully with the breeze.
- Entryways or Hallways: Greet guests with a touch of handmade wonder and a sense of inviting movement as they enter your home.
- Above a Desk or Workspace: A subtle reminder of nature, freedom, and creativity to keep you company and inspire you as you work or study.
- As a Party or Event Decoration: Hang several birds for a themed party or celebration, adding a festive, unique, and memorable touch that will delight attendees.
- Sunrooms or Conservatories: These spaces, with their abundant light and often gentle air circulation, are ideal for showcasing the delicate movement of a mobile.
Embrace the Joy of Handcrafting and Share Your Story
Creating a flying bird mobile is far more than just a craft project; it’s an immersive experience that offers a wonderful escape, a tangible chance to express your unique creativity, and the immense satisfaction of producing something truly beautiful and kinetic with your own hands. The finished mobile isn’t just a decoration; it’s a testament to your patience, ingenuity, artistic spirit, and the time you’ve invested. Each flutter and sway tells a story – your story of conception, creation, and accomplishment.
So, whether you’re looking for a delightful new piece of bespoke home decor, a deeply personalized and heartfelt gift for someone special, or simply a fun and engaging activity to enjoy on a quiet afternoon, this flying bird mobile project is an excellent choice. It promises not only a stunning end product but also a rewarding journey of creation. Don’t hesitate to gather your materials and dive in!
Ready to bring these graceful aviators to life in your own home? For comprehensive visual guidance, watch how Maria Amora expertly crafts this flying bird in her detailed step-by-step tutorial. Her clear instructions and visual demonstrations will provide all the cues and confidence you need to make your own stunning mobile a reality. Happy crafting!