
DIY Rustic Mason Jar Wall Decor: Craft Your Own Charming Farmhouse Accent
Are you looking to infuse your living space with a touch of rustic charm or farmhouse elegance without emptying your wallet? Look no further! This delightful DIY project offers an incredibly cute and clever way to create stunning mason jar wall decor that looks professionally crafted but costs a fraction of the price. While browsing online marketplaces, you might encounter similar handmade pieces fetching upwards of $40, often featuring reclaimed wood and beautifully distressed finishes. The good news? With this comprehensive tutorial, you can easily replicate – and even surpass – those designs right in your own home, making it a truly rewarding and budget-friendly endeavor.
This rustic mason jar sign is more than just a piece of decor; it’s a statement. It embodies the warmth and simplicity of country living, providing the perfect focal point for any room. The beauty of this project lies in its immense versatility. You have complete creative freedom to customize every aspect, from the type and color of flowers to the finish of the wood board, ensuring your creation perfectly complements your existing decor and personal style. Imagine vibrant spring blooms, earthy burlap accents, or subtle, dried florals – the possibilities are endless.
Why DIY Your Mason Jar Wall Decor?
Opting for a DIY approach to home decor offers numerous benefits beyond simple cost savings. Here’s why crafting your own rustic mason jar sign is a fantastic choice:
- Significant Cost Savings: As mentioned, ready-made versions can be expensive. By sourcing materials yourself, you dramatically reduce the cost, often creating multiple pieces for the price of one store-bought item.
- Personal Touch and Uniqueness: Your DIY project will be truly one-of-a-kind, reflecting your taste and creativity. Unlike mass-produced items, your handmade piece carries a unique story and personal connection.
- Customization to Perfection: Store-bought decor might almost fit your vision, but DIY allows for exact color matching, material selection, and stylistic choices that flawlessly integrate with your home’s aesthetic.
- The Joy of Creation: There’s immense satisfaction in seeing a project through from start to finish and displaying something you’ve crafted with your own hands. It’s a wonderful way to express yourself and relieve stress.
- Skill Development: Each DIY project helps you hone new skills, from painting techniques to creative arrangement, making future projects even easier and more enjoyable.
The Allure of Farmhouse and Rustic Style
Farmhouse and rustic aesthetics have captured the hearts of homeowners worldwide, celebrated for their inviting, comfortable, and timeless appeal. These styles evoke a sense of history, authenticity, and connection to nature, creating spaces that feel both elegant and lived-in. Elements like natural wood, distressed finishes, antique-inspired items, and simple, functional designs are hallmarks of this trend. Our DIY mason jar wall decor fits seamlessly into this popular decor movement, bringing a piece of that charming, cozy vibe into your home. It’s a versatile piece that can enhance a modern farmhouse kitchen, a rustic living room, a tranquil bedroom, or even a welcoming entryway.
Project Overview: What You’ll Be Creating
At its core, this project involves painting a realistic-looking mason jar silhouette onto a wooden board, then adorning it with lifelike faux flowers to give it a charming three-dimensional effect. While some similar concepts might involve painting flowers directly onto a canvas, the use of actual faux florals in this tutorial adds a tactile richness and depth that truly makes the piece pop. The process is surprisingly straightforward, relying on a clever chalk transfer method to get your jar outline just right, followed by simple painting and embellishment.
Materials You’ll Need for Your Rustic Mason Jar Sign
Gathering your supplies is the first exciting step! Most of these items can be found at local craft stores, hardware stores, or even recycled from around your home.
- Wood Board: Approximately 10×14 inches or similar dimensions. You can use reclaimed wood for an authentic rustic feel, a smooth pine board, plywood, or even a pre-cut wooden plaque.
- Mason Jar Template: Print out a clear image of a mason jar in your desired size. Ensure the lines are distinct.
- Chalk or Graphite Transfer Paper: White chalk for dark wood, or a specialized graphite transfer paper for lighter surfaces.
- Pencil or Stylus: For tracing the jar outline.
- Acrylic Paints:
- Various shades of blue, green, or grey for the glass jar effect.
- White, cream, or a light neutral color for the background (if desired).
- Darker colors (e.g., brown, black) for distressing or lettering.
- Paint Brushes: A flat brush for larger areas, a fine-tipped brush for details and outlines.
- Hot Glue Gun and Glue Sticks: For attaching the flowers securely.
- Faux Flowers/Floral Picks: Select your favorite colors and types! Consider mixing textures like burlap flowers, silk roses, lavender sprigs, or artificial succulents.
- Sandpaper (Optional): Medium-grit (120-180) for smoothing wood, fine-grit (220+) for distressing paint.
- Wood Sealer/Varnish (Optional but Recommended): A matte or satin finish spray sealer to protect your painted design.
- Picture Hanger/Sawtooth Hanger: For easy wall mounting.
- Ruler and Measuring Tape: For centering and sizing.
- Clean Cloth or Paper Towels: For cleanup.
Step-by-Step Tutorial: Crafting Your Mason Jar Masterpiece
Follow these easy steps to bring your rustic mason jar sign to life. Patience and allowing proper drying times are key to a beautiful finish!
Step 1: Preparing Your Wood Board
- Clean and Sand: If using reclaimed wood, ensure it’s clean and free of splinters. For any wood, lightly sand all surfaces and edges with medium-grit sandpaper (120-180) to create a smooth canvas. Wipe away any dust with a clean, damp cloth and let it dry completely.
- Optional Base Coat: If you want a uniform background color or plan to distress later, apply a base coat of paint (e.g., white, cream, light grey) to your entire board. Allow it to dry thoroughly according to paint instructions (usually 1-2 hours). You might need two coats for opaque coverage.
Step 2: Transferring the Mason Jar Design
- Prepare Template: Print your chosen mason jar image to a size that fits well on your board, leaving space for flowers above.
- Chalk Method: Flip your printed jar template over. Using the side of a piece of chalk, heavily rub the entire back of the jar outline. Ensure you cover all the lines you want to transfer.
- Position and Trace: Place the chalk-covered side down onto your prepared wood board, positioning the jar where you want it to appear. Secure it with a bit of painter’s tape if needed. Using a pencil or stylus, firmly trace over all the lines of the mason jar on the front of the paper. Press hard enough to transfer the chalk lines to the wood.
- Remove Template: Carefully lift the paper to reveal your chalk outline on the wood. Don’t worry if it’s not perfect; you’ll refine it with paint.
Step 3: Painting the Mason Jar Outline
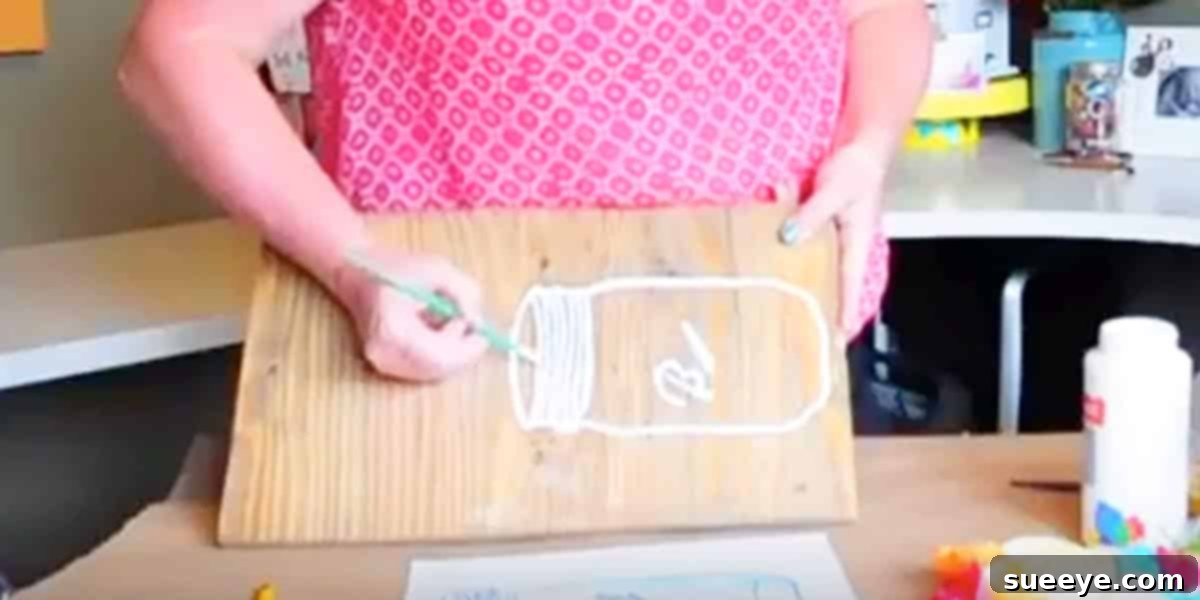
- Outline the Jar: Using a fine-tipped brush and your chosen jar color (e.g., a muted blue or greenish-grey), carefully paint over the chalk outline. Take your time to create clean, crisp lines.
- Fill in the Jar: Once the outline is dry (or immediately after, if you’re careful), use a slightly larger brush to fill in the inside of the jar with the same color. Aim for even coverage.
- Add Details (Optional): For a more realistic look, use a slightly darker shade of your jar color to add subtle shadows along the bottom and sides of the jar, especially where it would meet the “table” or a faux water line. You can also add a small highlight with a lighter shade to mimic glass reflections. Allow the paint to dry completely.
Step 4: Background and Distressing (Optional but Recommended for Rustic Look)
If you desire a weathered, vintage aesthetic, now is the time to distress your board. This step is best done after the jar paint has fully dried.
- Dry Brushing (Optional): Dip a dry brush into a contrasting paint color (e.g., a darker brown or grey) and wipe off most of the paint on a paper towel. Lightly brush over the edges and surface of your board to create a subtle, aged texture.
- Sanding for Distress: Once all paint is dry, use fine-grit sandpaper (220+) to gently sand certain areas. Focus on the edges of the board, corners, and any raised areas to reveal the raw wood or underlying base coat. Be subtle; you want a naturally worn look, not a heavily damaged one. You can also lightly sand over parts of the painted mason jar to make it look faded.
- Wood Wax/Glaze (Optional): For an authentic antique look, apply a thin layer of dark wood wax or glaze over your distressed paint. Wipe off the excess, allowing it to settle into the sanded areas and crevices, enhancing the aged effect.
Step 5: Attaching Your Faux Flowers
- Arrange and Visualize: Before applying any glue, arrange your chosen faux flowers or floral picks at the top “opening” of your painted mason jar. Experiment with different compositions until you achieve a visually pleasing and balanced arrangement. Consider mixing heights, textures, and colors.
- Hot Glue: Once you’re happy with the arrangement, pick up one floral piece at a time, apply a small dab of hot glue to its base, and firmly press it onto the top edge of your painted jar. Hold for a few seconds until secure. Repeat this process for all your flowers, building up the arrangement layer by layer. Be careful with the hot glue.
- Add Accents: If you’re incorporating burlap, lace, or other fabric elements, hot glue them into your floral arrangement for added texture and charm.
Step 6: Sealing and Finishing Touches
- Apply Sealer (Optional but Recommended): Once all paint is dry and flowers are securely attached, consider applying a clear matte or satin wood sealer. This protects your artwork from dust, moisture, and fading, ensuring its longevity. Spray sealers are often easiest for this. Follow product instructions for application and drying time.
- Attach Hanger: Flip your board over and carefully screw or hammer a sawtooth picture hanger onto the back, centered at the top. This will allow for easy and secure wall mounting.
Endless Customization Ideas for Your Mason Jar Art
The beauty of this DIY project is its incredible adaptability. Here are more ideas to inspire your creativity and make your sign truly unique:
- Seasonal Themes: Swap out flowers for each season! Think bright sunflowers for summer, warm-toned leaves and berries for autumn, festive evergreens for winter, or pastel tulips for spring.
- Personalized Text: Add a stenciled or hand-lettered word or phrase above or below the jar, such as “Home,” “Welcome,” “Gather,” “Blessed,” or your family name.
- Faux Water Effect: Paint a subtle light blue or green wash at the bottom of the painted jar to give the illusion of water, making your flowers appear even more real.
- Different Jar Shapes: Don’t limit yourself to classic mason jars. Explore templates for other vintage canning jars, milk bottles, or even small vases.
- Multiple Jars: Paint two or three smaller mason jars side-by-side on a larger board, each with its own floral arrangement.
- Lighting Embellishment: For an enchanting evening glow, carefully drape a string of tiny battery-operated LED fairy lights over or around your floral arrangement.
- Frame it Up: Once completed, add a rustic wooden frame around your board for an even more polished look.
- Distress the Jar: Lightly sand over the painted jar itself to give it a more aged, vintage glass appearance.
Tips for Success
- Patience is Key: Don’t rush the drying times between paint coats. This prevents smudges and ensures a crisp finish.
- Work in a Well-Ventilated Area: Especially when painting or using spray sealers.
- Test Colors: If unsure about paint colors, test them on a scrap piece of wood first.
- Hot Glue Safety: Be cautious when using a hot glue gun to avoid burns.
- Embrace Imperfection: Part of the charm of handmade rustic decor is its slight imperfections. Don’t strive for machine-like precision; let your unique touch shine through.
Displaying Your Handmade Masterpiece
Once your beautiful rustic mason jar sign is complete, it’s time to find its perfect spot! It makes a charming addition to an entryway, a cozy focal point in the living room, a refreshing accent in the kitchen or dining area, or a calming presence in the bedroom. It also makes an incredibly thoughtful and personal gift for housewarmings, birthdays, or holidays. Your friends and family will surely appreciate the effort and love poured into such a unique handmade item.
Conclusion: A Project That Blooms with Charm
This DIY rustic mason jar wall decor project offers a delightful opportunity to unleash your creativity, save money, and add truly personalized charm to your home. It’s a simple yet incredibly effective way to capture the popular farmhouse aesthetic, bringing warmth, texture, and a touch of nature indoors. From selecting your perfect wood board to arranging your chosen blossoms, every step is designed to be enjoyable and rewarding. So, gather your materials, follow these steps, and prepare to create a stunning piece of wall art that will be admired by all. Happy crafting!