
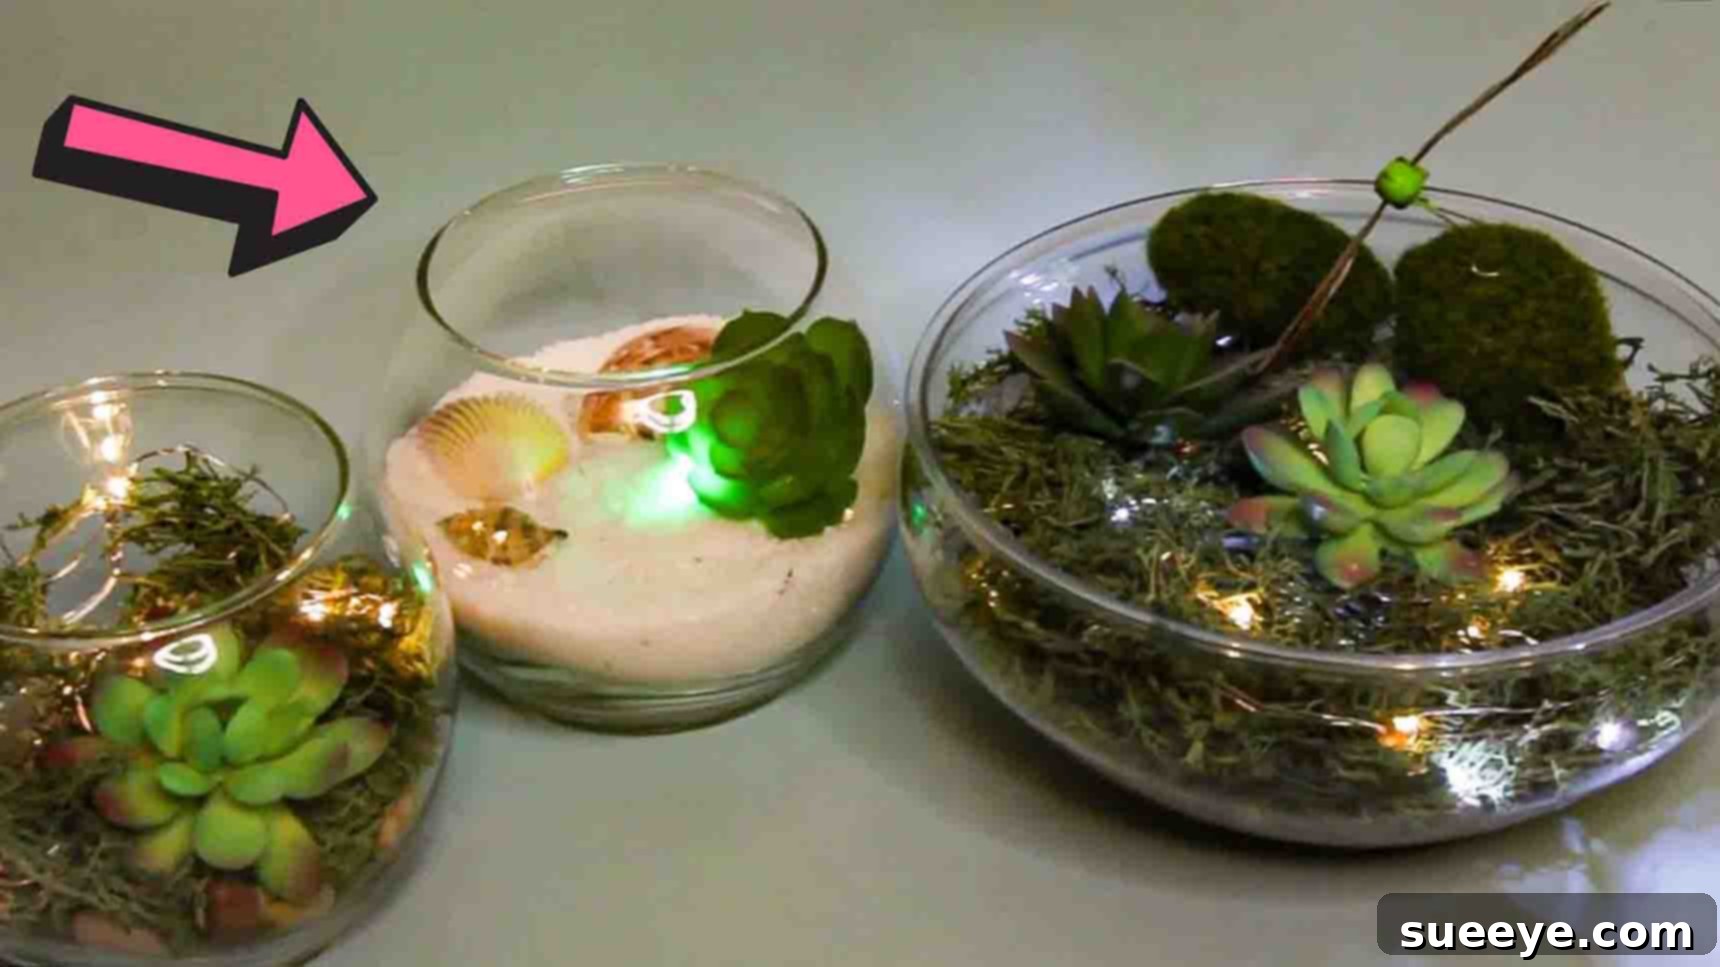
Illuminate Your Home: The Ultimate DIY Dollar Tree Light-Up Terrarium Guide
Are you searching for an enchanting yet budget-friendly way to elevate your home decor? Look no further! This comprehensive guide will walk you through creating your very own stunning light-up terrarium, a captivating centerpiece that promises to add a magical glow to any room. Inspired by the brilliant ideas from Bargain Bethany on YouTube, this DIY project is not only incredibly easy to make but also incredibly kind to your wallet, sourcing all essential materials from your local Dollar Tree. Imagine a miniature luminous landscape nestled on your coffee table, bookshelf, or bedside table – a beacon of warmth and personalized style.
Terrariums have long been cherished for their ability to bring a touch of nature indoors, requiring minimal maintenance while offering maximum aesthetic appeal. But what if you could enhance that natural beauty with a soft, inviting glow? A light-up terrarium takes this concept to the next level, transforming a simple decorative piece into a mesmerizing focal point, perfect for creating a cozy ambiance during evenings or as a unique nightlight. This tutorial will provide you with all the insights, tips, and creative ideas you need to craft a terrarium that reflects your unique taste and brightens your living space.
Why Choose a DIY Light-Up Terrarium?
The appeal of a DIY light-up terrarium extends far beyond its visual charm. Opting for a homemade terrarium, especially one constructed with Dollar Tree finds, offers a myriad of benefits:
- Unbeatable Affordability: Most, if not all, materials can be purchased from Dollar Tree, ensuring this project remains exceptionally budget-friendly. You can create a high-end look without the high-end price tag.
- Ease of Creation: Perfect for crafters of all skill levels, from beginners to seasoned DIY enthusiasts. The steps are straightforward, requiring no complex tools or techniques.
- Endless Customization: Your terrarium can be a true reflection of your personality. With a vast array of Dollar Tree decor items, you can choose themes, colors, and textures that perfectly match your home’s aesthetic or create a unique gift.
- Charming Ambiance: The integrated LED lights provide a warm, soothing glow, transforming any corner into a tranquil retreat. It’s an instant mood enhancer and a fantastic way to add soft lighting to a room.
- Sustainable Decor: By creating your own decor, you engage in a sustainable practice, often upcycling items or giving new life to inexpensive finds.
- Perfect Gift Idea: A handmade light-up terrarium makes for a thoughtful and personalized gift for birthdays, holidays, housewarmings, or just because.
Ready to embark on this illuminated crafting adventure? Gather your supplies, clear your workspace, and let’s bring some sparkle into your home!
Materials You’ll Need:
One of the greatest aspects of this project is the accessibility and affordability of the materials. Every item listed below can typically be found at your local Dollar Tree, allowing you to create a beautiful piece without breaking the bank. Here’s a detailed look at what you’ll need:
- Garden Dish: This will be the base of your terrarium. Dollar Tree offers various sizes and shapes, from clear glass bowls to plastic planters. A clear glass dish is ideal for showcasing the layers and lights within.
- Succulents (Artificial Recommended): While real succulents are lovely, artificial ones from Dollar Tree require zero maintenance, making them perfect for this project, especially if you want to integrate lights without worrying about watering. Choose a variety of sizes and shapes for visual interest.
- Floral Moss: Green floral moss is essential for covering surfaces, adding texture, and creating a natural, earthy feel. It also serves to conceal the LED lights. You can find different shades and types, such as sheet moss or reindeer moss.
- Floral Decorations: Think small faux flowers, greenery sprigs, tiny pebbles glued to sticks, or even miniature decorative elements that complement your chosen theme. These add pops of color and intricate details.
- Stones/Pebbles: Used for drainage (if using real plants, though not strictly necessary for artificial ones), stability, and aesthetic appeal. Small decorative stones or aquarium gravel work wonderfully.
- White Sand: Adds a contrasting layer, often mimicking a beach or desert landscape. It’s excellent for creating visual separation between layers and highlighting other elements.
- Seashells: If you’re going for a coastal or beach-themed terrarium, seashells are a must. Dollar Tree often carries bags of assorted shells that can beautifully enhance your design.
- Color-Changing Tea Lights (Optional but Recommended): These small, battery-operated lights add an extra layer of dynamic illumination and a fun, whimsical touch. Place them strategically for a surprising pop of color.
- LED String Lights (Battery-Operated): The heart of your light-up terrarium! Choose delicate fairy lights or micro LED strings. Battery-operated options are crucial for portability and safety, as there’s no need for an outlet. Look for ones with a thin wire that can be easily manipulated and hidden.
Step-by-Step Directions to Craft Your Light-Up Terrarium:
Now that you have all your materials, let’s bring your vision to life! This process is designed to be enjoyable and straightforward, allowing your creativity to shine through each step.
Step 1: Laying the Foundation and Arranging Your Greenery
Begin by preparing your chosen garden dish. If it’s glass, ensure it’s clean and dry for optimal clarity. The first element to place is your primary succulent. Carefully position it inside the dish, considering its size and how it will interact with other elements. If you’re using multiple succulents, arrange them aesthetically, ensuring each has its space while contributing to a cohesive look.
Next, fill the bowl with stones or pebbles around the base of your succulent(s). These stones serve multiple purposes: they add weight to stabilize your arrangement, provide a visual base layer, and can contribute to a natural landscape feel. Don’t be afraid to create variations in height and texture with your stones. Once your succulent is securely in place and surrounded by stones, gently add some floral moss over certain areas of the stones. This moss helps to soften the edges, introduce a vibrant green hue, and mimic natural ground cover. Distribute it around the succulent and other empty spaces to fill out the bowl beautifully.
This is also the perfect moment to incorporate additional floral decorations. Small faux flowers, tiny leaves, or decorative sprigs can be strategically placed to add pops of color and intricate details, further enhancing the miniature garden effect. Experiment with different arrangements until you achieve a look that you love – remember, there’s no right or wrong way, just your way!
Step 2: Illuminating Your Terrarium with Magical Lights
Now for the “light-up” part of your terrarium! Carefully place your LED string lights inside the bowl. The goal is to distribute the lights evenly to create a harmonious glow. You can spiral them around the succulent, weave them through the floral decorations, or simply lay them at the base of the dish, ensuring the battery pack remains accessible for turning the lights on and off, and for battery replacement. Some DIYers prefer to hide the battery pack beneath a layer of moss at the back of the terrarium or even outside the dish, depending on its design.
Once the string lights are positioned, take more of your green moss and gently cover parts of the lights and any visible wires. The moss not only helps to camouflage the hardware but also softens the light, creating a diffused, enchanting effect. However, it’s crucial to ensure that some of the lights are still “sticking out” or exposed enough to be clearly seen, allowing their beautiful glow to illuminate your miniature landscape. You want the light to emanate from within the terrarium, highlighting the textures and colors of your arrangement.
If you’re using color-changing tea lights, strategically place them in areas where their dynamic colors can be best appreciated, perhaps nestled amongst the stones or at the base of a particularly prominent succulent. These can add a playful and vibrant element to the consistent glow of the string lights.
Optional Finishing Touches: Adding Sand and Seashells
For an extra layer of visual interest and to personalize your terrarium further, consider adding white sand and seashells. If you didn’t already incorporate them in Step 1, gently sprinkle white sand in desired areas, creating miniature dunes or a subtle beach effect. This can beautifully contrast with the green moss and dark stones. Then, artfully place seashells on top of the sand or nestled among your other decorations. These elements are particularly effective if you’re aiming for a coastal or serene desert theme, providing texture and a narrative to your miniature world.
Design & Customization Tips for Your Unique Terrarium
The beauty of DIY is the freedom to personalize. Here are some ideas to make your light-up terrarium truly one-of-a-kind:
- Themed Terrariums:
- Beach Oasis: Use blue glass pebbles, white sand, various seashells, and small faux palm trees.
- Enchanted Forest: Incorporate more moss, tiny faux mushrooms, small branches, and perhaps a miniature animal figurine.
- Minimalist Modern: Stick to one or two succulents, geometric stones, and a single string of cool white lights in a sleek glass container.
- Seasonal Charm: Add miniature pumpkins and autumn leaves for fall, or tiny ornaments and snow for winter.
- Color Palettes: Experiment with different colored LED string lights (if available) or select floral decorations in a specific color scheme to match your room’s decor.
- Layering: Pay attention to the layers you create with stones, sand, and moss. Visible layers add depth and professional appeal to your terrarium.
- Container Variety: While a garden dish is common, consider other Dollar Tree finds like clear glass vases, hurricane lamps, or even larger decorative jars for different effects.
- Adding Figurines: Small figurines – fairies, gnomes, tiny animals, or even miniature architectural pieces – can add a storytelling element and personality to your terrarium.
Caring for Your Light-Up Terrarium (Even with Artificial Plants)
Even though this terrarium primarily uses artificial elements, a little care goes a long way in maintaining its sparkle and beauty:
- Dusting: Over time, dust can accumulate. Gently dust your succulents, moss, and other decorations with a soft brush or a can of compressed air to keep them looking fresh.
- Battery Management: The LED string lights and tea lights are battery-operated. Keep spare batteries on hand and replace them when the glow starts to dim. For convenience, choose lights that have easily accessible battery compartments.
- Placement: While it doesn’t need sunlight, place your terrarium in a spot where it won’t be easily knocked over, and where its glow can be best appreciated – perhaps on a console table, a bedroom nightstand, or as a dining table centerpiece.
- Cleaning the Glass: If your glass dish gets smudged, carefully wipe the exterior with a soft, damp cloth to restore its clarity.
Frequently Asked Questions About DIY Light-Up Terrariums
Here are some common questions you might have as you create your enchanting light-up terrarium:
- Can I use real succulents or plants instead of artificial ones?
- Absolutely! If you prefer real plants, ensure your garden dish has a drainage layer (charcoal or small rocks at the very bottom) and use appropriate soil. Real succulents require bright, indirect light and minimal watering. Be mindful that battery-operated lights might need to be removed for watering to prevent damage.
- How long do the LED string lights typically last?
- The lifespan of the LED bulbs themselves is very long (thousands of hours). The battery life, however, depends on the type and quality of batteries used, and how often you turn the lights on. Typically, a good set of AA or AAA batteries can last several days to a few weeks of continuous use, or much longer with intermittent use.
- What if my Dollar Tree doesn’t have all the exact materials?
- Embrace creativity! The beauty of DIY is adapting. Look for similar items that can serve the same purpose. For instance, if you can’t find specific floral decorations, use decorative pebbles, ribbons, or small ornaments. Any clear container can be substituted for a garden dish.
- Is this project suitable for children?
- Yes, with adult supervision! It’s a fantastic craft for older children or teens. The materials are safe, and the process helps develop fine motor skills and creativity. Ensure they handle any sharp edges (if applicable) and small parts carefully.
- How can I make my terrarium glow brighter?
- You can use a longer string of LED lights, or incorporate more than one string. Placing reflective elements like mirrors (tiny mirror tiles can be found at Dollar Tree) or lighter colored stones can also help amplify the light within the terrarium.
DIY Dollar Tree Light-Up Terrarium Tutorial – Your Magical Creation Awaits!
You now have all the knowledge and inspiration to create your very own breathtaking DIY light-up terrarium. This project is a testament to how simple, inexpensive materials can be transformed into something truly magical with a little creativity and effort. Whether you’re making it for yourself, as a thoughtful gift, or as a fun activity with family, the process is as rewarding as the final illuminated masterpiece.
Remember, the most important ingredient is your personal touch. Feel free to deviate from the suggestions, mix and match materials, and experiment with different arrangements until your terrarium perfectly captures your vision. Once complete, find the perfect spot in your home for your new glowing decor piece, switch on the lights, and bask in the warm, inviting ambiance it creates. We encourage you to share your beautiful creations and inspire others to discover the joy of crafting. Happy DIYing!