
Irresistible No-Bake Chocolate Peanut Butter Dream Dessert
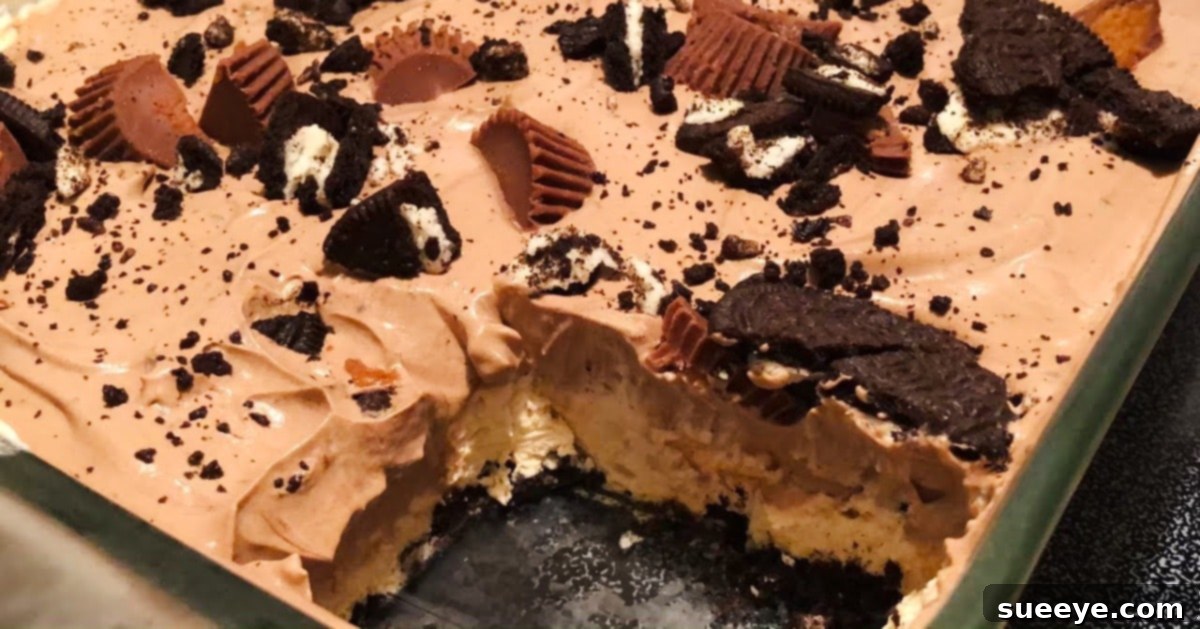
Prepare to delight your taste buds with an incredibly easy and absolutely irresistible dessert that requires no oven at all! This No-Bake Chocolate Peanut Butter Dream Dessert combines the timeless perfection of chocolate and peanut butter in a symphony of flavors and textures. Forget complicated baking steps; this recipe focuses on simple assembly, making it a fantastic choice for novice cooks and seasoned dessert enthusiasts alike. Inspired by delightful home cooking channels like Southern Sassy Mama on YouTube, this dessert features a crunchy Oreo cookie crust, a luscious, airy peanut butter cream cheese layer, a rich and smooth chocolate pudding, all crowned with delightful mini peanut butter cups and crushed Oreos. It’s the ultimate crowd-pleaser for parties, potlucks, or simply a sweet treat to enjoy with family and friends.
Its charm lies in its straightforward nature – no intricate techniques, just pure, unadulterated dessert bliss. Every bite offers a harmonious blend of creamy and crunchy, sweet and salty, delivering an experience that’s reminiscent of a gourmet peanut butter pie but with an even more delightful, melt-in-your-mouth texture. Get ready to create a masterpiece that looks impressive yet takes minimal effort and will have everyone asking for the recipe!
Why You’ll Fall in Love with This No-Bake Chocolate Peanut Butter Dessert
This dessert isn’t just easy; it’s a game-changer for anyone who loves rich flavors and simple preparation. Here’s why this No-Bake Chocolate Peanut Butter Dream Dessert will become your go-to recipe:
- Effortless Elegance: The biggest draw is that it’s entirely no-bake! No need to preheat your oven, worry about baking times, or deal with tricky pastry. This dessert comes together with simple mixing and layering, making it perfect for hot summer days or when you just don’t want to turn on the oven.
- A Flavor Match Made in Heaven: Chocolate and peanut butter are a classic combination for a reason. The deep, rich notes of chocolate perfectly complement the creamy, slightly salty taste of peanut butter, creating a balanced and addictive flavor profile that appeals to almost everyone. This dessert elevates that classic pairing to new heights.
- Sensational Textural Experience: This isn’t just a dessert; it’s a textural adventure! You’ll encounter the satisfying crunch of the Oreo cookie crust, the velvety smoothness of the peanut butter cream cheese layer, the silkiness of the chocolate fudge pudding, and the delightful chewiness of miniature peanut butter cups. Each layer adds a unique dimension, ensuring every spoonful is exciting and never boring.
- Crowd-Pleasing Perfection: Whether you’re hosting a birthday party, a holiday gathering, a casual potluck, or simply looking for a special treat, this dessert is guaranteed to impress. Its visually appealing layers and universally loved flavors make it a reliable hit that guests will rave about and request again and again.
- Beginner-Friendly: Even if you’re new to making desserts, you’ll find this recipe incredibly forgiving and easy to follow. The steps are straightforward, and there’s very little room for error, ensuring a successful and delicious outcome every time. It’s an ideal recipe to build confidence in the kitchen.
- Customizable Potential: While delicious as is, this recipe also offers plenty of room for personalization. You can experiment with different cookie crusts, pudding flavors, or additional toppings to make it uniquely yours, catering to different tastes and occasions.
Gather Your Ingredients: Simple & Delicious Components
One of the beauties of this recipe is its reliance on readily available ingredients that are likely already in your pantry or easily found at any grocery store. For the best results, ensure your cream cheese is softened to room temperature for a smooth, lump-free mixture, and have all your components measured out before you begin. This “mise en place” approach will make the assembly process even smoother and more enjoyable!
For the Crunchy Oreo Crust:
- 16 Full-Size Oreo Cookies: These iconic chocolate sandwich cookies form the robust and flavorful base. You can use regular or even a ‘double stuff’ version for extra chocolatey goodness. Ensure they are well crushed for a cohesive crust.
- 2 Tablespoons Unsalted Butter, Melted: The butter acts as a binder, holding the crushed Oreos together to create a firm and delicious crust that holds its shape beautifully when sliced. Using unsalted butter gives you control over the overall saltiness.
For the Creamy Peanut Butter Fluff Mixture:
- 8 Ounces (1 Block) Cream Cheese, Softened: Room temperature cream cheese is absolutely crucial for achieving a smooth, velvety texture without any lumps. Take it out of the fridge at least 30 minutes to an hour before you start preparing.
- 1/2 Cup Creamy Peanut Butter: Use your favorite brand of smooth, processed peanut butter (like Jif or Skippy). Avoid natural peanut butter that separates, as its oil content might affect the consistency and stability of the fluff layer.
- 1 Cup Powdered Sugar (Confectioners’ Sugar): This finely milled sugar sweetens the peanut butter mixture and contributes to its smooth, melt-in-your-mouth texture. It dissolves easily, preventing graininess.
- 8 Ounces Cool Whip, Thawed: A tub of ready-to-use whipped topping provides the light, airy, and fluffy consistency that makes this layer so delightful. Make sure it’s fully thawed in the refrigerator but still cold to ensure it incorporates well without deflating.
For the Rich Chocolate Pudding Mixture:
- 1 Box (3.9 Ounces) Jell-O Instant Chocolate Fudge Pudding Mix: Instant pudding is the key to the quick and easy preparation of this dessert’s chocolate layer. Chocolate fudge offers a deep, satisfying chocolate flavor that contrasts beautifully with the peanut butter.
- 2 Cups Cold Milk: Use cold milk (dairy or a suitable non-dairy alternative for instant pudding) to ensure the pudding sets properly and quickly, yielding a firm and smooth consistency.
- 8 Ounces Cool Whip, Thawed: Another tub of thawed Cool Whip is folded into the prepared pudding to lighten it significantly, creating a mousse-like consistency that’s incredibly smooth, fluffy, and enjoyable to eat.
For the Irresistible Toppings:
- 20 Miniature Peanut Butter Cups: These add delightful bursts of chocolate and peanut butter flavor, plus a pleasant chewiness and visual appeal to the top layers. Reese’s Miniatures are a popular and perfect choice.
- 5 Additional Oreo Cookies, Crushed: A final sprinkle of crushed Oreos provides extra crunch, enhances the chocolate theme, and offers a lovely visual finish, tying all the layers together with a familiar texture.
Step-by-Step Instructions: Assembling Your Masterpiece
Creating this spectacular no-bake dessert is a breeze when you follow these simple steps. Each layer builds upon the last, contributing to the overall harmony of flavors and textures. Remember to have your ingredients ready, and softened cream cheese is your best friend here! Let’s get started on your delicious journey.
1. Prepare the Decadent Oreo Crust:
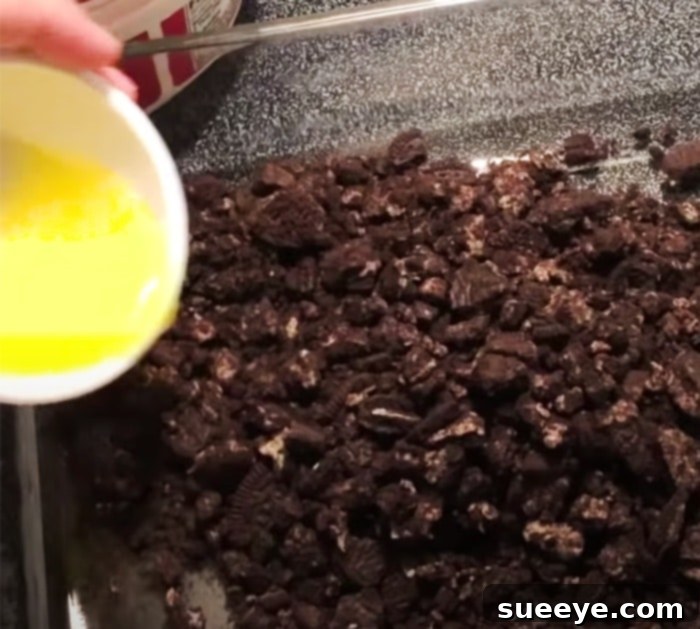
Begin by making the robust foundation of your dessert. Take your 16 Oreo cookies and place them into a large, sturdy Ziploc bag. Seal the bag, removing as much air as possible, then use a rolling pin, the bottom of a heavy glass, or a meat mallet to crush them into fine, uniform crumbs. For a quicker and more consistent result, you can pulse them in a food processor until they resemble fine sand. Once crushed, transfer the Oreo crumbs into a 9×13 inch baking dish (or a similar sized square dish for thicker slices). Melt the 2 tablespoons of unsalted butter and pour it evenly over the crushed Oreos. Use the back of a spoon or your clean hands to thoroughly mix the butter into the crumbs until they are uniformly moistened and resemble wet sand. Press this mixture firmly and evenly into the bottom of the baking dish, ensuring it forms a compact and smooth layer. Pressing it down well will help it hold together firmly when sliced. For an extra firm crust, you can pop this into the freezer for about 10-15 minutes while you prepare the next layer.
2. Whip Up the Luscious Peanut Butter Fluff:
In a large mixing bowl, using an electric mixer (either a handheld mixer or a stand mixer fitted with a paddle attachment), beat the softened cream cheese on medium speed until it is light, airy, and completely smooth, ensuring there are absolutely no lumps. This is critical for a silky texture. Add the 1/2 cup of creamy peanut butter and continue to beat until thoroughly combined and the mixture is perfectly smooth. Gradually add the 1 cup of powdered sugar, mixing until fully incorporated and the mixture is creamy and well-sweetened. Finally, and with a gentle hand, fold in one 8-ounce tub of thawed Cool Whip using a rubber spatula. Be careful not to overmix, as this will deflate the airy texture of the Cool Whip, resulting in a denser layer. You want to maintain that light and fluffy consistency. Once combined, carefully spread this creamy peanut butter mixture evenly over the chilled Oreo crust in your baking dish, smoothing the top with your spatula for an even layer.
3. Add a Layer of Miniature Peanut Butter Cups:
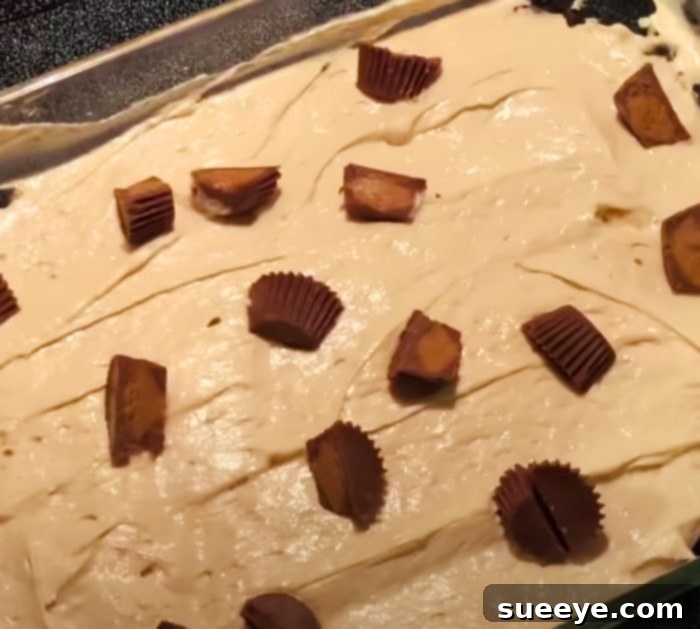
Take your 20 miniature peanut butter cups and, using a sharp knife, carefully cut each one in half. You can cut them lengthwise or crosswise, depending on your preference. Arrange about half of these cut peanut butter cups in an even, scattered layer over the top of the peanut butter mixture. This step adds an extra burst of concentrated peanut butter and chocolate goodness within the dessert itself, creating an exciting textural and flavor surprise in every single bite.
4. Create the Silky Chocolate Fudge Pudding Layer:
In a separate large mixing bowl, combine the 1 box of Jell-O instant chocolate fudge pudding mix with 2 cups of cold milk. Whisk vigorously for about 2 minutes until the mixture begins to thicken significantly. Ensure you whisk away any lumps to achieve a perfectly smooth pudding. Allow the pudding to sit undisturbed for another 1-2 minutes to firm up further, as per package directions. Once thickened, gently fold in the second 8-ounce tub of thawed Cool Whip using a rubber spatula until it’s fully incorporated and the mixture is light, airy, and mousse-like. This step transforms the dense pudding into a cloud-like chocolate dream. Carefully pour and spread this chocolate pudding mixture evenly over the layer of peanut butter cups and peanut butter fluff. Take your time to ensure a smooth, uniform top layer.
5. Final Touches: More Peanut Butter Cups & Crushed Oreos:
Now for the grand finale of toppings, which adds both visual appeal and an extra layer of flavor and crunch! Scatter the remaining halved miniature peanut butter cups evenly over the top of the chocolate pudding layer. Then, take your 5 additional Oreo cookies, crush them (using the same method as for the crust, or simply by hand), and sprinkle these crumbs generously over the entire surface of the dessert. These toppings not only add visual appeal, making your dessert look professionally made, but also provide delightful texture and intensify the beloved chocolate and peanut butter flavors throughout.
6. Chill to Perfection:
This is arguably the most important step for any no-bake dessert! Once all the layers are beautifully assembled and topped, cover the baking dish tightly with plastic wrap or aluminum foil. Place the dessert gently in the refrigerator for a minimum of 3-4 hours. This chilling time is crucial as it allows all the layers to set properly, firm up completely, and most importantly, allows all the delicious flavors to meld beautifully together. For the absolute best results, and to achieve a truly firm and cohesive dessert that slices cleanly, chilling it overnight (or for at least 6-8 hours) is highly recommended. A well-chilled dessert will not only be easier to serve but will also deliver the most satisfying taste and texture experience.
Expert Tips for Success & Delicious Variations
Mastering this no-bake dessert is incredibly easy, but a few expert tips can elevate your creation even further, ensuring perfect results every time. Plus, don’t be afraid to get creative with these delicious variations!
- Room Temperature Cream Cheese is Non-Negotiable: We can’t stress this enough! Attempting to beat cold cream cheese will result in a lumpy, inconsistent peanut butter layer that won’t be as smooth or airy. Plan ahead and let it soften on the counter for at least an hour before you begin mixing.
- Don’t Overmix the Cool Whip: When gently folding in the thawed Cool Whip to both the peanut butter and pudding mixtures, use a light hand and fold just until combined. Overmixing will cause the Cool Whip to lose its airy volume and delicate texture, resulting in a denser, less fluffy dessert.
- Chill Time is Crucial: Patience is a virtue, especially with no-bake desserts. The designated chilling time allows the layers to set properly, firm up, and all the flavors to fully develop and meld into a harmonious whole. Don’t rush this step – it’s key to the dessert’s success and presentation.
- Choosing Your Peanut Butter Wisely: Opt for creamy, processed peanut butter (like Jif or Skippy) for the best texture and stability in the peanut butter fluff. Natural peanut butter (the kind that separates with oil on top) can be too oily and may not yield the desired consistent texture for this recipe.
- Pan Size Matters for Layer Thickness: A standard 9×13 inch baking dish is ideal for this recipe, resulting in perfectly proportioned layers. If you use a smaller dish (e.g., an 8×8 inch square pan), your layers will be thicker, and you might need slightly longer chilling time. A slightly larger dish will give thinner layers.
- Crust Alternatives for a New Twist: While Oreos provide a classic and beloved chocolatey base, you can easily experiment with other cookie crusts! Graham cracker crumbs, Nilla Wafers, chocolate chip cookies, or even shortbread cookies crushed and mixed with butter would make delicious alternatives, offering a unique flavor profile.
- Pudding Flavor Swaps for Variety: Feel free to experiment with different instant pudding flavors to change things up. Vanilla, cheesecake, butterscotch, or even white chocolate pudding could offer a delightful twist. Just ensure it is “instant” pudding mix, as cooked pudding requires different preparation.
- Extra Decadence with Drizzles: For an additional touch of indulgence, drizzle chocolate syrup, caramel sauce, or even a swirl of warm peanut butter over individual slices just before serving. A tiny sprinkle of flaky sea salt on top can also beautifully enhance the sweet and savory balance.
- Nut-Free Version (with caution): For those with nut allergies, you can replace peanut butter with a sunflower seed butter (like SunButter) and omit the peanut butter cups, replacing them with chocolate candies or extra chocolate chips. Always check all ingredient labels carefully to ensure they are nut-free.
- Make Ahead Perfection: This dessert is an excellent candidate for making ahead! You can prepare it a full day in advance, allowing flavors to deepen and making your event day stress-free. It often tastes even better the next day!
Storage Instructions
To keep your No-Bake Chocolate Peanut Butter Dream Dessert fresh, delicious, and safe to eat, proper storage is key:
- Refrigeration is Essential: Always store any leftover dessert in the refrigerator. Due to the dairy components (cream cheese, milk, Cool Whip), it must be kept cold. Cover the baking dish tightly with plastic wrap, aluminum foil, or transfer individual slices to an airtight container to prevent drying out and absorbing other odors from the fridge.
- Optimal Shelf Life: When stored correctly in the refrigerator, this dessert will remain fresh, delightful, and structurally sound for 3-4 days. While the Oreo crust might soften slightly over time, the flavors will continue to be fantastic.
- Freezing for Longer Storage: While technically possible to freeze this dessert, be aware that the texture of the Cool Whip and pudding layers can change slightly upon thawing, potentially becoming a bit softer or watery. If you do freeze, ensure the dessert is thoroughly wrapped in plastic wrap and then aluminum foil to prevent freezer burn. Consume within 1-2 months for best quality. Thaw slowly in the refrigerator overnight before serving.
Conclusion: Your New Favorite No-Bake Treat Awaits!
This No-Bake Chocolate Peanut Butter Dream Dessert is more than just a recipe; it’s an invitation to pure joy and simplicity in the kitchen. Combining the universally beloved flavors of chocolate and peanut butter with an incredibly easy, no-fuss preparation method, it stands out as a true culinary gem. Whether you’re craving a rich, satisfying treat for yourself, need a show-stopping dessert for a gathering, or simply want to explore the delightful world of no-bake creations, this recipe is designed to exceed your expectations and deliver pure bliss.
The harmonious layers of crunchy Oreo crust, creamy peanut butter fluff, and silky chocolate pudding, all studded with decadent miniature peanut butter cups, create an experience that’s both comforting and exciting. It’s the perfect sweet escape, offering gourmet taste without the gourmet effort. So, gather your ingredients, follow these straightforward steps, and prepare to indulge in what will surely become a staple in your dessert repertoire. Get ready to impress yourself, your family, and everyone lucky enough to get a slice of this irresistible, dreamy creation!