
Create a Stunning Radiant Floral Panel Quilt: An Easy Step-by-Step Guide
Quilting offers a wonderfully rewarding way to transform beautiful fabrics into cozy, artistic masterpieces. For those seeking a project that delivers spectacular results without overwhelming complexity, a floral panel quilt is an exceptional choice. This detailed guide, inspired by the fantastic tutorials from SewVeryEasy, will walk you through creating a breathtaking “Radiant Quilt” starting with just one magnificent floral panel. You’ll learn how to precisely cut, assemble, and border your fabric to create a stunning visual effect that truly lives up to its name.
Floral panels are a quilter’s dream, offering a central design element that eliminates much of the intricate piecing typically associated with traditional quilts. This project is not only beginner-friendly but also offers a satisfying experience for seasoned quilters looking for a quick yet impactful make. By cutting a single large panel into four sections, we create a dynamic layout that highlights the fabric’s natural beauty, framed by thoughtfully chosen borders that enhance its radiant appeal.
Why Choose a Floral Panel Quilt?
Floral panel quilts stand out for several compelling reasons. Firstly, they are incredibly versatile. The wide array of stunning floral panel designs available means you can find the perfect motif to match any decor or recipient’s taste. From vibrant, bold blooms to delicate, subtle blossoms, the possibilities are endless.
Secondly, panel quilts are a fantastic entry point for beginners. Unlike complex traditional block patterns, a panel provides the “picture” for your quilt top, allowing you to focus on essential quilting skills such as accurate cutting, precise seaming, and adding borders. This simplifies the process, building confidence and fostering a love for the craft without the initial overwhelm.
Lastly, the visual impact of a well-executed floral panel quilt is undeniable. The “radiant” effect we’ll achieve in this project transforms a simple panel into a focal point, drawing the eye and adding warmth and beauty to any space. It’s a project that looks much more complicated than it actually is, making it perfect for gifting or displaying proudly in your own home.
Materials You’ll Need for Your Radiant Quilt
Before diving into the steps, gather your tools and materials. Having everything ready will make your quilting journey smooth and enjoyable.
- Panel Fabric: The star of your quilt! Choose a beautiful floral panel that inspires you. Ensure it’s large enough to be cut into four substantial pieces (usually around 24 inches square or larger).
- Complementary Border Fabrics: You’ll need several coordinating fabrics for your borders and cornerstones. Consider a variety of shades and patterns that complement your panel without overpowering it. Lighter fabrics work wonderfully for cornerstones to add contrast and highlight the design.
- Cloth Iron: Essential for pressing seams flat and crisp, which is crucial for a professional-looking quilt.
- Ironing Board: Provides a stable, heat-resistant surface for pressing.
- Quilting Ruler (Acrylic): A clear, sturdy ruler, preferably at least 6″ x 24″, for accurate measuring and cutting.
- Rotary Cutter: This tool makes precise, straight cuts quickly and efficiently. Always use it with a self-healing mat.
- Self-Healing Cutting Mat: Protects your work surface and extends the life of your rotary cutter blade.
- Fabric Pins: For holding fabric layers together securely before sewing.
- Sewing Machine: A reliable machine with a good 1/4-inch seam allowance foot (or marking) is ideal.
- Matching Thread: High-quality polyester or cotton thread that blends with your fabrics.
- Fabric Scissors: For clipping threads and making small cuts.
Get Your Free Quilt Pattern!
To ensure you have all the specific dimensions and visual guides for this project, you can access the free pattern. This pattern provides detailed diagrams and measurements that complement these instructions beautifully:
Free Pattern Link: https://www.ttfabrics.com/
Step-by-Step Guide: Crafting Your Radiant Floral Panel Quilt
Now, let’s begin the exciting process of transforming your floral panel into a radiant quilt!
Preparation is Key: Pressing Your Fabric Panel
The foundation of any beautiful quilt is meticulously prepared fabric. Begin by taking your large floral panel and giving it a thorough press with a hot iron. Ensure there are absolutely no wrinkles or creases. This step is vital because perfectly flat fabric ensures accurate measurements and cuts, leading to a quilt that lies flat and square. Press until the fabric feels crisp and smooth, almost starchy.
Precisely Dividing Your Floral Panel into Four Sections
This unique quilt design relies on dividing your central floral panel into four equal parts, which will then be reassembled to create a dynamic, radiant effect. To do this accurately, follow these steps:
- Lay your pressed panel flat on your cutting mat or a large, clean surface.
- Carefully fold the fabric in half, matching up all the raw edges as precisely as possible. Take your time to align the corners and sides perfectly.
- Lightly press along this fold with your iron. You don’t need a heavy crease, just enough to create a visible guideline.
- Now, fold the fabric in half again, perpendicular to your first fold. Again, ensure all edges are neatly matched. This will divide your panel into quarters.
- Lightly press this second fold. When you unfold the fabric, you should see two distinct crease lines that intersect at the center of your panel.
- Open and lay the fabric out flat. You will now use these crease lines as your cutting guides.
- Place your quilting ruler along one of the crease lines, aligning it perfectly. Using your rotary cutter, make a clean, straight cut along this line.
- Repeat this process for the second crease line. You should now have four perfectly cut, equal sections of your floral panel. Accuracy here is paramount for the final assembly.
Trimming and Squaring Up Your Quilt Pieces
Even with careful cutting, it’s a good practice to square up your pieces to ensure they are all exactly the same size, which is critical for consistent seam allowances and a flat finished quilt. This method also helps in trimming off any selvage edges or slight inconsistencies:
- Stack all four cut fabric pieces neatly on top of each other. Align their edges as perfectly as possible. Using pins can help secure them together.
- Using your quilting ruler and rotary cutter, trim all the pieces simultaneously to your desired dimensions. For this project, measure and cut each stack to 17 inches in length by 11 ½ inches in width. This ensures all four sections are identical and ready for assembly.
- Press out any remaining slight creases or fold marks from the previous steps with your iron.
Assembling the Central Quilt Block
With your panel pieces perfectly prepared, it’s time to start assembling the radiant heart of your quilt:
- Lay out your four fabric sections right side up, arranging them in the pattern you desire. Refer to the pattern link provided earlier for the suggested layout that creates the radiant effect.
- Take your first border strips. Cut several strips measuring 17 inches long by 1 ½ inches wide from a complementary fabric.
- Pin these 1 ½-inch strips to the designated sides of your panel pieces, as shown in the pattern. You will be attaching strips to the inner edges of two sections to start, then combining them.
- Carefully sew these strips to the panel pieces, maintaining a consistent ¼-inch seam allowance. Press your seams open or towards the darker fabric.
- Next, for the outer borders of these initial pieces, cut strips measuring 18 inches by 2 inches and 14 inches by 2 inches. Pin and sew these in place, again following the pattern diagram.
- Continue sewing all the central parts together, ensuring the radiant pattern begins to emerge. This initial assembly forms the core of your quilt top.
Adding the First Layer of Borders
Borders not only frame your quilt but also allow you to expand its size and introduce additional design elements. Let’s add the first layer:
- Once your central floral panel block is fully assembled, lay it flat.
- Cut strips of your chosen border fabric. For this initial border, you will create a 1 ½-inch wide border around the entire panel. Measure the exact length of each side of your assembled panel and cut your strips accordingly, adding an inch or two for trimming later.
- Pin and sew the shorter border strips to the sides of your panel first, then the longer strips to the top and bottom. Remember to use a ¼-inch seam allowance. Press your seams after each attachment to keep the quilt top flat and square.
Incorporating Decorative Cornerstones and the Second Border
Cornerstones add a touch of elegance and visual interest, breaking up the continuous lines of the borders. They also provide an excellent opportunity to introduce a contrasting fabric.
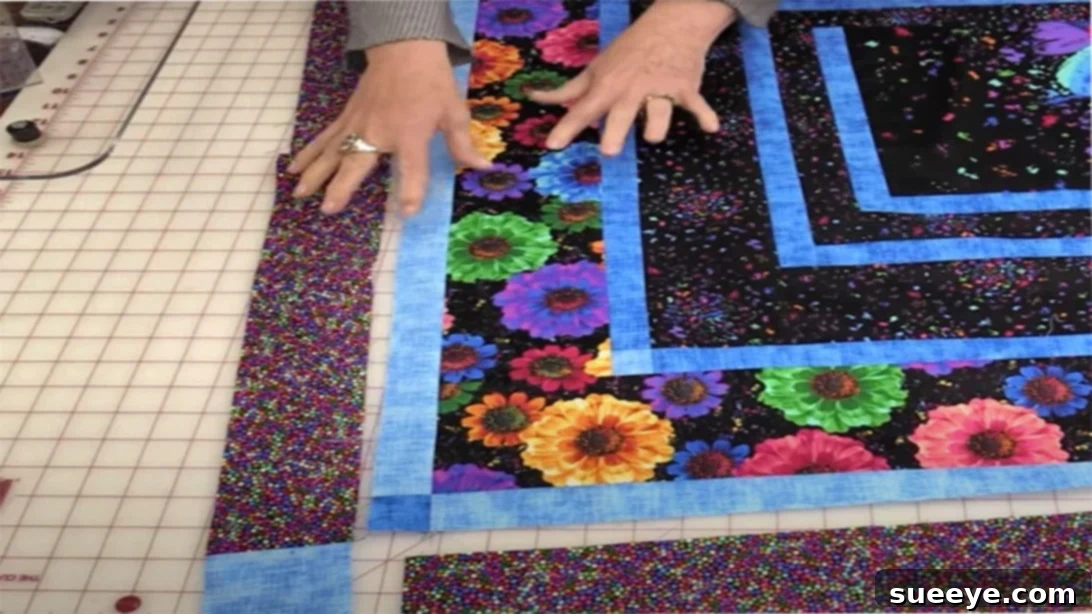
- For the next border, cut strips approximately 4 inches wide from your chosen border fabric. Measure and cut these to fit around the entire panel, similar to the previous border.
- From the same fabric you used for the 1 ½-inch border, cut longer strips that will connect the corners of this 4-inch border. These will become part of your cornerstones.
- From a lighter, contrasting fabric, cut out square pieces to serve as your cornerstones. These squares will be sewn into the corners of this 4-inch border, creating a break in the pattern and adding visual appeal.
- Sew the 4-inch wide border strips to the sides of your quilt, then attach the cornerstone squares to the ends of the remaining 4-inch strips before sewing them to the top and bottom of the quilt. This creates a framed look with distinct corner accents.
- Press all seams meticulously.
Building Depth with the Third Border and Lighter Accents
The layers of borders are what contribute significantly to the “radiant” effect, drawing the eye outwards from the central panel.
- For the third border, cut a beautiful wide strip of fabric, approximately 4 ½ inches wide. This wider border provides a substantial frame.
- Measure and cut these strips to fit around the entire panel, just as you did for the previous borders.
- Sew this 4 ½-inch border all the way around your quilt top, ensuring even seams. Press thoroughly.
- From the lighter, contrasting fabric you used for the cornerstones, cut a second set of 1 ½-inch wide border strips. These strips will go around the corners of this newly added border, providing another layer of accent and visual separation.
- Sew these lighter accent strips into place around the corners.
The Grand Finale: The Final Border and Cornerstones
The last border brings everything together, completing the frame of your radiant masterpiece.
- For the final border, select a fabric that ties all the previous elements together or offers a strong contrast to frame the entire piece. Cut strips approximately 3 inches wide.
- Measure and cut these strips to fit around the entire perimeter of your quilt top.
- Sew this 3-inch wide border securely all the way around.
- Finally, cut out a last set of cornerstones for this outermost border. These can be from the same lighter fabric or a new contrasting color to add a final touch of detail.
- Sew these cornerstones onto the four corners of your quilt, completing the border assembly.
- Give your entire quilt top one last thorough press, making sure all seams are flat and the quilt lies perfectly square.
Tips for a Flawless Radiant Quilt
Achieving a professional-looking quilt involves more than just following steps; it also requires attention to detail and good habits:
- Consistent Seam Allowance: A ¼-inch seam allowance is standard in quilting. Practice maintaining it precisely. Use a ¼-inch foot on your machine if you have one.
- Pressing is Your Friend: Press seams after every single step. This flattens the fabric, prevents bulk, and ensures accurate subsequent cuts and seams. Generally, press seams open or to the darker fabric.
- Trim Threads: Clip loose threads as you go to prevent them from getting caught in later seams or showing through lighter fabrics.
- Squaring Up: Regularly check that your blocks and quilt top remain square throughout the process. A slight deviation early on can compound into a significant problem later.
- Use Quality Materials: Good quality fabric, thread, and sharp needles make a huge difference in the final outcome and enjoyment of the process.
- Patience and Precision: Quilting is a journey, not a race. Take your time, measure twice, cut once, and enjoy the process of creating something beautiful by hand.
Customizing Your Floral Panel Quilt
While this tutorial provides a specific design, feel free to personalize your radiant quilt:
- Fabric Choices: Experiment with different border fabrics. Consider solids that pick up a color from the floral panel, or subtle blenders that add texture without distraction.
- Cornerstone Variety: Play with different sizes or shapes for your cornerstones, or even use miniature pieced blocks instead of solid squares.
- Quilting Designs: Once your quilt top is complete, think about the quilting itself. Simple straight lines can enhance the geometric borders, while free-motion quilting can echo the floral motifs of your panel.
- Backing and Binding: Choose a backing fabric that complements the front, and select a binding that either blends in for a seamless look or contrasts for a bold frame.
Conclusion: Your Radiant Masterpiece Awaits!
You’ve now learned how to transform a simple floral panel into a captivating and radiant quilt with this comprehensive step-by-step guide. This project is a fantastic way to develop your quilting skills while creating a stunning piece that will bring joy and beauty to any home. Whether it’s a gift for a loved one or a treasured addition to your own collection, the satisfaction of completing a handmade quilt is truly unmatched.
We hope you enjoyed following along with these instructions, inspired by the wonderful work of SewVeryEasy. Grab your favorite floral panel, get your rotary cutter ready, and embark on your journey to create a truly radiant quilt!