
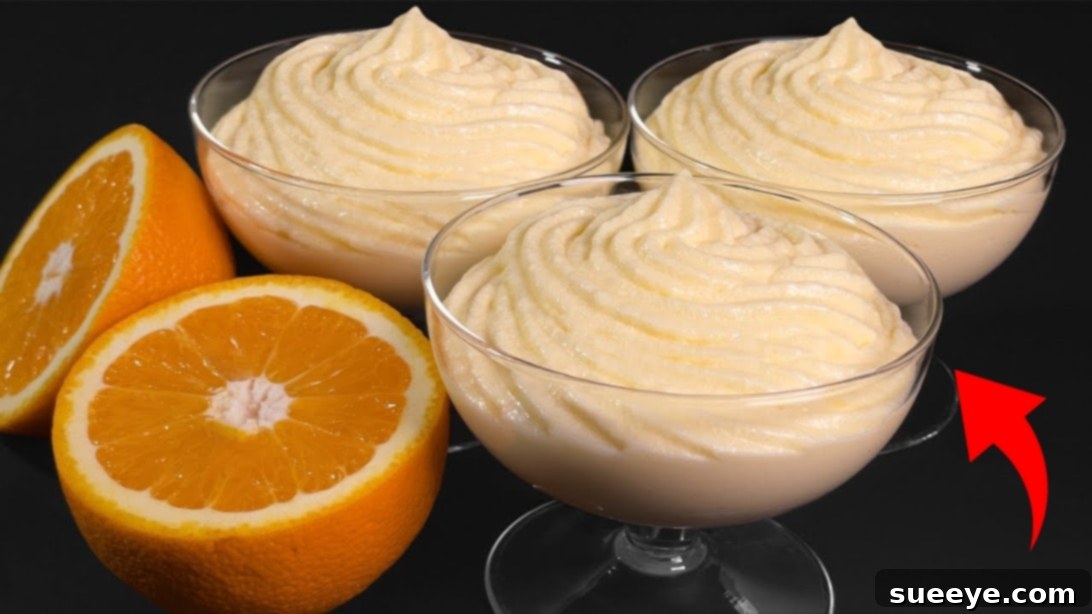
Irresistibly Creamy Orange Dessert: A Zesty Mascarpone Delight
Prepare to be amazed by this unbelievably delicious creamy orange dessert recipe, inspired by the creative culinary minds at Useful and Quick. This unique creation defies expectations, offering a taste and texture unlike anything you’ve experienced before. Imagine a delicate, mousse-like consistency that melts in your mouth, perfectly balancing sweet and tart notes from fresh oranges and rich mascarpone. It’s an exquisite treat that is so incredibly good, you’ll find it nearly impossible to stop at just one spoonful. Whether you’re a seasoned baker or a curious beginner, this recipe promises a delightful journey for your taste buds and is sure to become a new favorite. Get ready to impress your family and friends with this stunning citrus masterpiece!
Why You’ll Fall in Love with This Creamy Orange Dessert
This dessert isn’t just another sweet treat; it’s an experience. Its appeal lies in several key aspects that make it stand out from typical desserts:
- Unique Mousse-like Texture: Unlike a standard pudding or custard, this dessert boasts a light, airy, and velvety mousse-like texture that truly sets it apart. The expert combination of whipped cream and mascarpone creates an unparalleled richness without being overly heavy, making each bite a dream.
- Perfect Flavor Balance: The natural tartness and vibrant aroma of freshly squeezed oranges are beautifully complemented by the sweetness of granulated sugar and the creamy, subtly sweet notes of mascarpone. Each spoonful offers a delightful dance between bright, refreshing citrus and smooth, indulgent creaminess.
- Impressive Yet Simple to Make: While this dessert looks elegant and sophisticated, making it is surprisingly straightforward. With clear, step-by-step instructions, even novice cooks can achieve stunning, professional-looking results that will surely impress guests.
- Versatile for Any Occasion: Whether you’re hosting a formal dinner party, looking for a refreshing summer dessert, or simply craving something special to brighten your day, this creamy orange delight fits perfectly. Its refreshing character makes it ideal for warmer months, but its comforting creaminess is welcome year-round.
- No Oven Required: For those hot days or when you prefer to avoid turning on the oven, this recipe is a dream come true. Most of the preparation involves whisking, stirring on the stovetop, and chilling, making it a convenient and energy-efficient choice for a gourmet treat.
- Fresh and Natural Ingredients: Focusing on fresh oranges and quality dairy products ensures a dessert that tastes wholesome and vibrant, free from artificial flavors.
Ingredients for Your Orange Dessert Masterpiece:
Gathering fresh, high-quality ingredients is the first step towards creating an unforgettable dessert. Here’s what you’ll need to bring this creamy orange dream to life:
- 4 to 5 medium-sized oranges: These are the heart of our dessert. Opt for ripe, juicy varieties like Navel or Valencia for the best flavor profile and maximum yield of fresh juice. The quality of your oranges will significantly impact the final taste, so choose wisely.
- 1/2 cup (100g) granulated sugar: This provides the perfect level of sweetness to balance the natural tartness of the oranges. You can adjust this amount slightly based on the sweetness of your oranges and your personal preference.
- 3 medium eggs: Eggs play a crucial role as a binder and contribute to the creamy custard base. They add richness and help the mixture thicken properly, ensuring a smooth, luxurious texture.
- 1/4 cup + 3 tablespoons (approx. 60g) cornstarch: This essential thickener gives the orange mixture its characteristic smooth, pudding-like consistency before it’s blended with the cream. Ensure it’s fully dissolved and lump-free when mixing to avoid a grainy texture.
- 1/4 teaspoon vanilla extract: A small amount of pure vanilla extract enhances the overall flavor profile. It adds a warm, aromatic note that beautifully complements and deepens the citrus flavors without overpowering them.
- 8.8 oz (250g) mascarpone cheese: The true star ingredient for ultimate creaminess! Mascarpone is a luxurious Italian cream cheese, renowned for its incredibly rich, smooth, and slightly sweet flavor. For best results, ensure it’s at room temperature for easier and smoother incorporation into the whipped cream, but not too warm.
- 2 cups (480ml) cold heavy whipping cream (at least 35% fat): This is absolutely essential for creating that light, airy, and incredibly fluffy mousse-like texture. It’s critical that the cream is very cold to whip properly and achieve maximum volume and stability.
- 1/4 teaspoon salt: Often overlooked, a tiny pinch of salt is crucial for enhancing all the other flavors. It brightens the sweetness of the sugar and sharpens the natural tang and vibrancy of the orange, bringing all components into perfect harmony.
Step-by-Step Guide: Crafting Your Creamy Orange Dessert
Follow these detailed instructions carefully to ensure your creamy orange dessert turns out perfectly. Precision and patience are key to achieving the desired texture and flavor profile!
Step 1: Preparing the Fresh Orange Juice
Begin by washing your chosen oranges thoroughly under cold running water. Slice each orange in half horizontally, exposing the juicy segments. Using a citrus juicer, a manual reamer, or even a sturdy fork, squeeze the juice from all the orange halves into a fine-mesh strainer positioned over a clean bowl. This crucial step is vital to ensure that all seeds and any large, undesirable pulp pieces are effectively removed, resulting in a perfectly smooth and clear orange base for our custard. You will need approximately 2 cups (480ml) of freshly squeezed, pulp-free orange juice. If you find yourself slightly short on juice, you can supplement with a small amount of good-quality, not-from-concentrate store-bought orange juice, or simply squeeze an additional orange.
Step 2: Combining the Egg, Sugar, and Vanilla Base
In a medium-sized, heavy-bottomed pot (or saucepan), crack open your three medium eggs. Add the 1/2 cup of granulated sugar and the 1/4 teaspoon of vanilla extract. Using a sturdy whisk, thoroughly combine these ingredients until the mixture is a uniform pale yellow color and appears smooth, with no visible streaks of egg yolk or undissolved sugar grains. Whisk vigorously for about 1 to 2 minutes to ensure everything is well incorporated and slightly aerated before we introduce the liquids. This also helps to break down the sugar crystals.
Step 3: Initial Orange Juice Integration and Heating
Carefully pour about half of your freshly strained orange juice (approximately 1 cup) into the egg and sugar mixture in the pot. Whisk gently until it’s just combined and uniform. Avoid over-whisking at this stage, as our primary goal is just to integrate the liquids. Place the pot over medium heat. It’s important to continuously stir or whisk the mixture to prevent any scorching or sticking to the bottom of the pot, especially as it begins to warm up. Bring the mixture to a gentle boil, ensuring it heats evenly throughout. This initial heating helps to temper the eggs, preventing them from scrambling, and begins the initial thickening process.
Step 4: Thickening the Orange Custard to Perfection
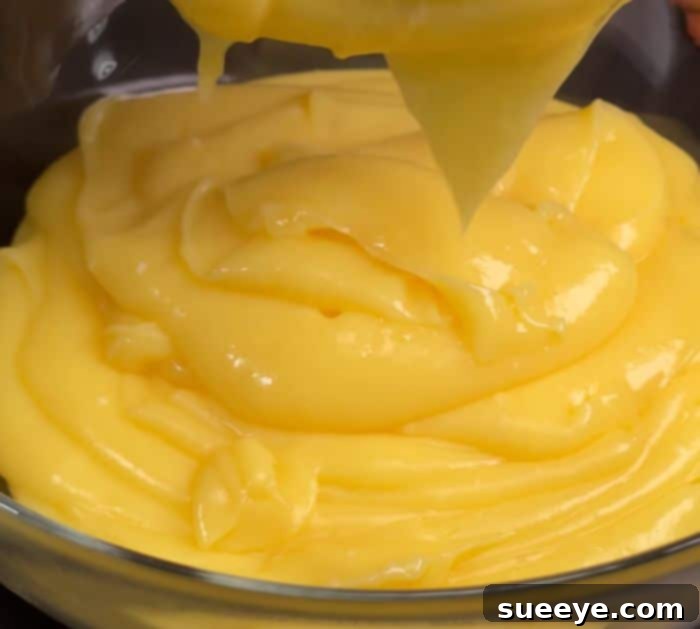
While the first half of the orange juice mixture is heating on the stove, prepare your cornstarch slurry. In a separate, medium-sized bowl, add the 1/4 cup plus 3 tablespoons of cornstarch. Gradually pour the remaining half of the orange juice (the other 1 cup) into the cornstarch, whisking continuously and thoroughly until the cornstarch is completely dissolved and absolutely no lumps remain. This creates a smooth, liquid slurry that will be the key to thickening your custard. Once the mixture in the pot has reached a gentle boil, immediately transfer the prepared cornstarch slurry into the hot pot. Continue to whisk constantly and vigorously. You will notice the mixture will begin to thicken quite rapidly, transforming into a rich, glossy, pudding-like consistency. Keep whisking for another 1-2 minutes after it has thickened to ensure the cornstarch is fully cooked and the mixture is smooth and coats the back of a spoon. Once done, remove the pot from the heat. Transfer the hot orange custard into a clean, heatproof bowl. To prevent a “skin” from forming on top, immediately cover the surface of the custard directly with plastic cling wrap, pressing it down so it touches the entire surface. Allow it to cool at room temperature for about 30-60 minutes, then transfer it to the refrigerator until it is completely chilled – this can take at least 2-3 hours, or preferably overnight for the best results and stability.
Step 5: Whipping the Cream and Mascarpone
In a separate, very cold large mixing bowl (for optimal results, you can chill the bowl and your whisk attachments in the freezer for 10-15 minutes beforehand), pour in the 2 cups of cold heavy whipping cream. Using an electric mixer (either a handheld mixer or a stand mixer with a whisk attachment), whisk the cream on medium-high speed until it forms soft peaks. Be careful not to over-whip at this stage; we want it light and airy, not stiff. Next, add the 8.8 oz (250g) of mascarpone cheese to the whipped cream. It’s helpful if your mascarpone is at a cooler room temperature to prevent lumps and make it easier to incorporate smoothly. Continue whisking on medium speed until the mascarpone is fully blended with the cream, resulting in a smooth, fluffy, and firm mixture that holds its shape. Again, be cautious not to overmix, or it may curdle and lose its delightful texture.
Step 6: Combining the Orange and Cream Mixtures Gently
Once your orange custard from Step 4 is completely cooled and thoroughly chilled (it should be thick and firm), remove the cling wrap. Give it a good whisk by hand for about a minute to make it smooth and uniform again, breaking up any potential lumps or stiffness that might have formed during chilling. This step is crucial for ensuring a silky-smooth final dessert. Gently transfer the whisked orange mixture into the large bowl containing the whipped cream and mascarpone. Using a spatula or a large whisk, carefully fold the orange custard into the cream mixture. Continue folding gently and patiently until the two components are fully incorporated, resulting in a soft, airy, incredibly creamy texture and a beautiful, delicate light yellow or pale orange color. The key here is gentle folding to avoid deflating the cream, which preserves the mousse-like lightness of the dessert.
Step 7: Serving Your Delicious Creamy Orange Dessert
Now for the most enjoyable part: serving your homemade masterpiece! Carefully transfer the finished creamy orange dessert mixture into a piping bag fitted with a star tip (or any decorative tip you prefer for an elegant touch). If you don’t have a piping bag, simply spoon the mixture into cups for a more rustic yet equally delicious presentation. Gently squeeze or spoon the mixture into individual serving cups, small glasses, or elegant ramekins. For an extra touch of elegance and flavor, you can garnish each serving with a thin slice of fresh orange, a delicate sprig of mint, a sprinkle of fresh orange zest, or a tiny curl of white chocolate. Serve immediately for the best texture and enjoyment, or chill for another 30 minutes to firm it up slightly before serving. Sit back, relax, and savor this refreshing and irresistible treat!
Tips for Achieving the Perfect Creamy Orange Dessert
Even though this recipe is straightforward, a few expert tips can elevate your dessert from delicious to absolutely divine:
- Always Use Fresh Oranges: This recipe truly shines with freshly squeezed orange juice. Avoid using store-bought concentrates or juices that contain added sugars or preservatives, as they simply lack the vibrant, natural flavor and zest that fresh oranges provide.
- Thorough Chilling is Key: For both the orange custard and the whipped cream, ensuring all components are very cold is absolutely crucial for achieving the desired light, airy texture and stability. Do not rush the chilling process for the orange custard; patience will be rewarded.
- Do Not Over-Whip the Cream: When whipping the heavy cream, stop as soon as it reaches soft peaks. Over-whipping can lead to a grainy texture and subsequently, a denser, less pleasant final product when combined with the mascarpone.
- Master Gentle Folding: When combining the chilled orange custard with the mascarpone cream, use a gentle, upward folding motion with a spatula. This technique preserves the airiness of the whipped cream, which is fundamental to achieving the dessert’s signature light, mousse-like consistency.
- Taste and Adjust Sweetness: Before chilling the orange custard, always taste it. If your oranges are particularly tart, you might want to add a tiny bit more sugar (1-2 teaspoons) to the initial custard mixture to achieve your preferred balance of sweet and tart.
- Mascarpone Temperature Matters: While heavy cream should be very cold, mascarpone cheese blends best when it’s at a cooler room temperature (not warm). This prevents it from becoming too stiff or clumpy when mixed into the whipped cream, ensuring a smooth, uniform blend.
Serving Suggestions and Creative Variations
This creamy orange dessert is wonderfully delightful on its own, but here are a few ideas to elevate your serving experience or introduce delightful variations:
- Elegant Garnishes: Enhance the visual appeal with a fresh orange segment, finely grated orange zest, homemade candied orange peel, a delicate sprig of mint, or a light dusting of powdered sugar.
- Citrus Medley Boost: For an even brighter, more complex citrus profile, experiment by adding a touch of lemon or lime zest (about half a teaspoon) to the orange custard mixture during Step 2.
- Layered Dessert Extravaganza: Create a stunning presentation by layering the creamy orange mixture with complementary textures. Consider crumbled shortbread cookies, crisp graham cracker crumbs, or delicate ladyfingers briefly soaked in a little orange liqueur or orange juice.
- Luxurious Chocolate Pairing: A thin drizzle of melted dark chocolate or a sprinkle of finely grated chocolate shavings can offer a wonderfully rich and luxurious contrast to the zesty orange flavors.
- Fresh Fruit Topping: Top individual servings with fresh berries such as raspberries, blueberries, or sliced strawberries for added color, freshness, and a burst of complementary fruitiness. A spoonful of good-quality orange marmalade also works beautifully.
- Mini Individual Tarts: For an extra-special occasion, fill small, pre-baked tart shells with the orange cream for elegant, single-serving desserts that are easy to handle and visually appealing.
Storage Information for Your Creamy Orange Dessert
This creamy orange dessert is undeniably at its peak when enjoyed fresh, offering the best texture and vibrant flavor. However, if you have leftovers or are preparing it slightly in advance, it can be stored. Cover individual portions or the entire batch tightly with plastic wrap or transfer to an airtight container to prevent it from absorbing any refrigerator odors and to maintain its freshness. Store the dessert in the refrigerator for up to 2-3 days. While the flavor will remain delicious, please note that the delicate mousse-like texture may slightly soften over time. Freezing this dessert is generally not recommended, as the delicate emulsion of the cream and mascarpone can break down during thawing, significantly altering the exquisite, light texture we’ve worked so hard to achieve.
This creamy orange dessert is more than just a recipe; it’s a culinary journey into delightful flavors and textures. Its vibrant citrus notes, combined with the luxurious creaminess of mascarpone, create an unforgettable experience that will leave everyone craving for more. Whether you’re making it for a special occasion or simply to brighten your day, this dessert is guaranteed to bring smiles and compliments. Don’t hesitate to try this fantastic recipe inspired by Useful and Quick – your taste buds will definitely thank you!
Did you try this irresistible recipe? We’d absolutely love to hear your thoughts, tips, and see your beautiful creations! Share your experience and photos in the comments section below.