
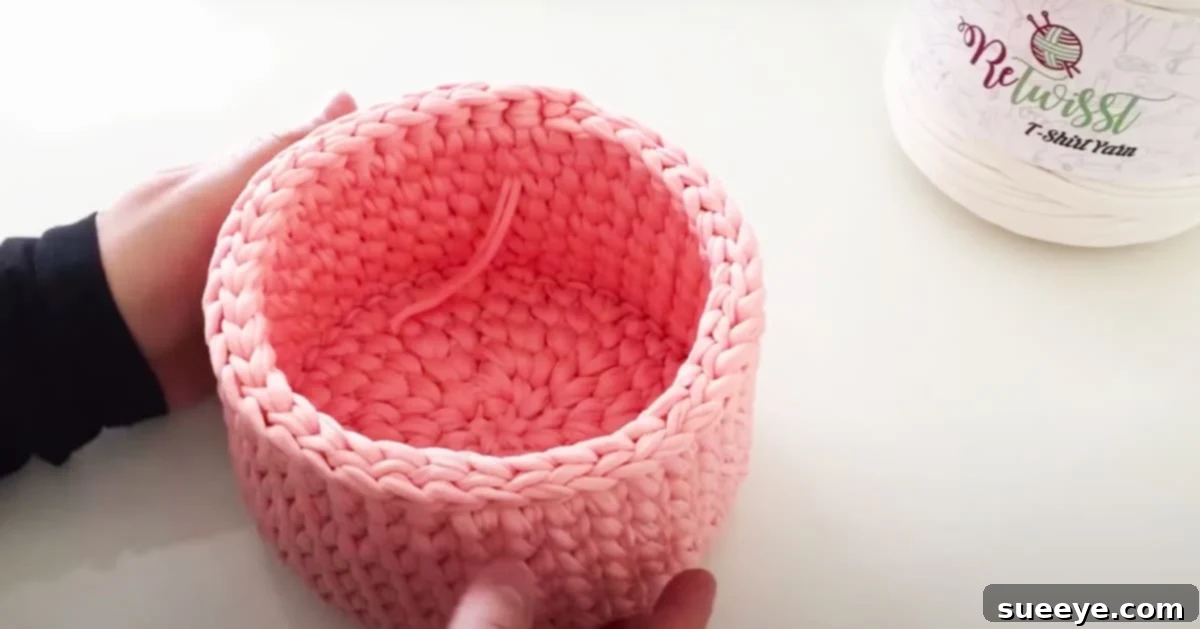
Craft Your Own Stylish T-Shirt Yarn Crochet Basket: A Comprehensive Guide
Embrace the joy of handmade craftsmanship by creating a beautiful and incredibly sturdy crochet basket from t-shirt yarn. This rewarding DIY project offers a perfect blend of functionality and aesthetic appeal, making it an ideal addition to any home decor. Whether you’re looking for an elegant storage solution, a unique gift idea, or simply a satisfying crafting challenge, a handmade t-shirt yarn basket fits the bill perfectly. While it might require a foundational understanding of crochet stitches, the results—a durable, textured, and versatile basket—are truly worth the effort, transforming simple yarn into a cherished household item.
Why Choose T-Shirt Yarn for Your Crochet Projects?
T-shirt yarn, often referred to as “Zpagetti” or “fabric yarn,” is a wonderfully unique material that breathes new life into crochet projects. Made from recycled textile scraps, typically cotton jersey, it’s not only an eco-friendly choice but also possesses distinct qualities that make it superior for structural items like baskets. Unlike traditional thinner yarns, t-shirt yarn is thick, slightly stretchy, and creates a dense fabric that holds its shape exceptionally well. This inherent sturdiness is precisely why it’s the go-to material for baskets designed to withstand daily use, providing robust storage without collapsing. Its substantial gauge also means projects work up quickly, offering a gratifying pace for crafters.
Beyond its practicality, t-shirt yarn introduces a rich texture and modern aesthetic. Available in a vast spectrum of colors, from vibrant hues to subtle neutrals, it allows for endless creative expression. The finished basket will not only be functional but also a chic decorative piece that adds a touch of bohemian charm or minimalist elegance, depending on your chosen yarn. Furthermore, working with this chunky yarn can be a therapeutic experience, as the stitches are clear and the fabric grows rapidly, making the creative process deeply satisfying.
Is This Crochet Basket Project Beginner-Friendly? Navigating the Learning Curve
The original description suggests this particular crochet basket might not be entirely “beginner-friendly,” and it’s an honest assessment. However, it’s more accurate to describe it as an excellent project for someone who has mastered the absolute basics of crochet—such as chaining, single crochet, and perhaps slip stitch—and is ready to advance their skills. If you possess these fundamental techniques, this project becomes an exciting and achievable challenge rather than an insurmountable hurdle. Think of it as an “intermediate-friendly” stepping stone that builds confidence and expands your crafting repertoire.
Learning new crochet patterns can take various forms, catering to different learning styles. Visual learners often thrive with video tutorials, which provide real-time demonstrations of stitch placement and technique. For those who learn best by watching, the ReTwisst tutorial on YouTube is an invaluable resource. This particular video offers a clear, visual guide to constructing the basket, allowing you to follow along with each movement of the hook and yarn. While it may not feature verbal instructions, the detailed visual steps are often sufficient for many aspiring crafters.
Conversely, some individuals prefer written instructions, which allow for a more self-paced approach, enabling them to read, re-read, and analyze each step at their leisure. If you find the visual pace a little fast or prefer supplementary textual guidance, consider searching for similar t-shirt yarn basket patterns that include detailed written steps. Combining visual aids with written descriptions can create a powerful learning synergy, ensuring you grasp every nuance of the pattern. The key is patience and a willingness to practice; don’t be discouraged if your first few attempts aren’t perfect. Every stitch is a step toward mastery.
Essential Materials for Your T-Shirt Yarn Crochet Basket
Before embarking on your crochet journey, gather these simple yet crucial materials. The beauty of this project lies in its minimalist requirements, making it accessible and quick to prepare for.
- Crochet Hook: The size of your crochet hook will largely depend on the thickness of your t-shirt yarn. Generally, a larger hook (e.g., 8mm to 12mm) is recommended for t-shirt yarn to create a looser fabric that’s easier to work with, yet still firm enough to maintain the basket’s structure. Experiment with different sizes to find what feels comfortable and produces the desired stitch density.
- T-Shirt Yarn: Select your preferred color and quantity. The amount needed will vary based on the desired size of your basket. For a small to medium basket, you might need one to two large skeins of t-shirt yarn (typically 100-120 meters per skein). Consider the weight and stretch of the yarn, as these factors will influence the final look and feel of your basket.
Optional but helpful additions include a pair of sharp scissors for cutting the yarn and a yarn needle for weaving in ends neatly at the end of the project.
Step-by-Step Guide: Crocheting Your T-Shirt Yarn Basket
Let’s dive into the fascinating process of transforming t-shirt yarn into a functional and beautiful basket. The ReTwisst tutorial serves as an excellent visual guide, and here we’ll break down the general techniques involved, complementing the visual learning experience.
Phase 1: Starting the Base (The Foundation)
Begin with your chosen t-shirt yarn and a suitably sized crochet hook. The video demonstrates a technique to create a sturdy starting point, often resembling a “magic ring” or an alternative method for a solid center. This typically involves:
- Creating a Slip Knot and Foundation Chain: Make a slip knot and chain a few stitches (e.g., 2-4 chains).
- Forming the First Round: Work several single crochet stitches into the first chain stitch (or into the magic ring if you opted for that method). This creates the very center of your basket’s base. The video’s initial steps, where the yarn is wrapped around fingers and the hook is manipulated, likely guides you through creating this secure starting loop. It’s crucial to follow closely here, as a strong foundation is key to a robust basket.
Phase 2: Building the Basket Walls
Once your foundation is established, the next phase involves expanding the base to the desired diameter and then transitioning to the sides. This process typically uses single crochet stitches, working in continuous rounds to avoid visible seams, though joining rounds can also be used for a slightly different look. The video shows a continuous, smooth progression, which is characteristic of working in a spiral.
- Expanding the Base: Continue crocheting in rounds, increasing your stitches evenly in each round to keep the base flat and prevent it from curling. The pattern usually involves a set number of increases per round (e.g., increasing 6 stitches per round if starting with 6 stitches in the magic ring). Maintain a consistent tension to ensure an even, flat base.
- Forming the Sides: Once your base reaches the desired width, it’s time to build the walls. This is often achieved by crocheting into a different loop of the stitch (e.g., the back loop only, or the third loop for extra sturdiness) for one round, or simply by discontinuing increases. This subtle change forces the fabric to turn upwards, creating the vertical structure of your basket.
- Crocheting the Walls: Continue crocheting in rounds without further increases. Simply work one single crochet stitch into each stitch from the previous round. This creates the straight, vertical walls of your basket. The thickness of the t-shirt yarn ensures these walls will be robust and stand tall, ready to hold various items.
Phase 3: Finishing Your Basket
The beauty of this project is its adaptability. You can continue crocheting until the basket reaches your preferred height, whether you envision a shallow tray or a deep storage bin. Once satisfied, it’s time for the finishing touches:
- Creating the Rim: For a neat and sturdy top edge, you might want to work a round of slip stitches or reverse single crochet. This adds a polished finish and further reinforces the basket’s structure.
- Fastening Off and Weaving in Ends: Cut your yarn, leaving a tail of about 6 inches. Yarn over and pull the tail completely through the loop on your hook to secure the stitch. Then, use a yarn needle to carefully weave in the tail into the stitches of the basket, hiding it discreetly. This ensures your basket looks professional and won’t unravel with use.
Remember that consistent tension is paramount when working with t-shirt yarn to avoid a wobbly or uneven basket. Take breaks if your hands get tired, and don’t hesitate to rewatch segments of the tutorial if you need clarification on a particular stitch or technique. The process is enjoyable, and the satisfaction of seeing your basket take shape is immensely rewarding.
Creative Applications for Your Handmade Crochet Basket
The versatility of a sturdy t-shirt yarn crochet basket is truly remarkable. Far beyond being merely a “cute basket for storage,” it can serve a multitude of purposes throughout your home, adding both functionality and a touch of handcrafted charm. Its robust construction ensures it can handle a surprising amount of weight and wear, making it a practical choice for everyday organization.
- Nursery and Kid’s Rooms: Ideal for organizing toys, diapers, small clothing items, or craft supplies. The soft yet firm texture of t-shirt yarn makes it safe for little hands, and the customizable colors can easily match any room’s theme.
- Bathroom Organization: Perfect for holding toiletries, washcloths, extra rolls of toilet paper, or makeup. It adds a spa-like feel while keeping surfaces clutter-free.
- Living Room and Entryway: Use it as a stylish catch-all for remotes, keys, mail, or loose change. A larger basket can even serve as a chic holder for throws or magazines, contributing to a cozy ambiance.
- Craft Room/Office: Keep your crafting supplies, pens, markers, or small stationery neatly sorted and easily accessible. The textured design also makes it a pleasant visual addition to your workspace.
- Plant Pot Cover: Slip a small plant pot inside a crochet basket for a unique and stylish planter. Just ensure you use a waterproof saucer inside to protect the yarn from moisture.
- Thoughtful Gift Baskets: As mentioned, these make exceptional gift baskets. Fill them with homemade goodies, spa essentials, or small gifts tailored to the recipient. The basket itself becomes part of the gift – an inexpensive, thoughtful, and reusable container that adds significant value.
The ability to customize the size and color means you can tailor each basket to its specific purpose and placement, truly making it an integral part of your home’s aesthetic. From mini baskets perfect for desk organization to larger ones designed for laundry or blanket storage, the possibilities are limited only by your imagination and the amount of yarn you have!
The Rewarding Journey of Crocheting: From Yarn to Heirloom
There’s a unique satisfaction that comes with creating something tangible and beautiful with your own hands. Crocheting, particularly with the forgiving nature of t-shirt yarn, offers a meditative and engaging experience. The rhythmic motion of the hook and the yarn, the smooth progression of stitches, and the gradual transformation from a simple strand into a defined, functional object can be deeply calming and creatively fulfilling.
Many crafters find watching crochet videos, much like the ReTwisst tutorial, incredibly satisfying not just for learning, but for the sheer visual pleasure of seeing the craft unfold. The “smooth transitions” mentioned in the original text speak to the graceful flow of crochet, a testament to the artisan’s skill and the inherent beauty of the craft itself. This journey is not just about the end product; it’s about the process, the learning, and the quiet moments of creation.
While this particular project is framed as intermediate, remember that every master was once a beginner. The sturdy nature of the t-shirt yarn means that any small imperfections in your stitches are often less noticeable, making it a forgiving material for practice. The enduring appeal of a handmade crochet basket lies not only in its utility but also in the story it tells—a story of dedication, creativity, and the personal touch you’ve woven into every loop. It’s more than just a storage item; it’s a piece of art, a testament to sustainable living, and a potential heirloom that can be cherished for years to come.
Conclusion: Start Your T-Shirt Yarn Basket Adventure Today!
In conclusion, the t-shirt yarn crochet basket project stands out as a highly rewarding and practical endeavor for anyone with basic to intermediate crochet skills. Its robust structure, aesthetic versatility, and the sustainable appeal of t-shirt yarn make it a must-try for home decor enthusiasts and crafters alike. From decluttering a busy nursery to adding a personalized touch to your living space, these handmade baskets offer endless possibilities.
Don’t let the initial perception of difficulty deter you. Armed with a good visual tutorial like the one from ReTwisst, the right materials, and a dose of patience, you’ll soon be enjoying the immense satisfaction of creating something truly useful and beautiful. So, gather your crochet hook and t-shirt yarn, and embark on this delightful crafting adventure. You’re not just making a basket; you’re crafting a piece of functional art that brings warmth, organization, and a unique handmade charm to your home.