
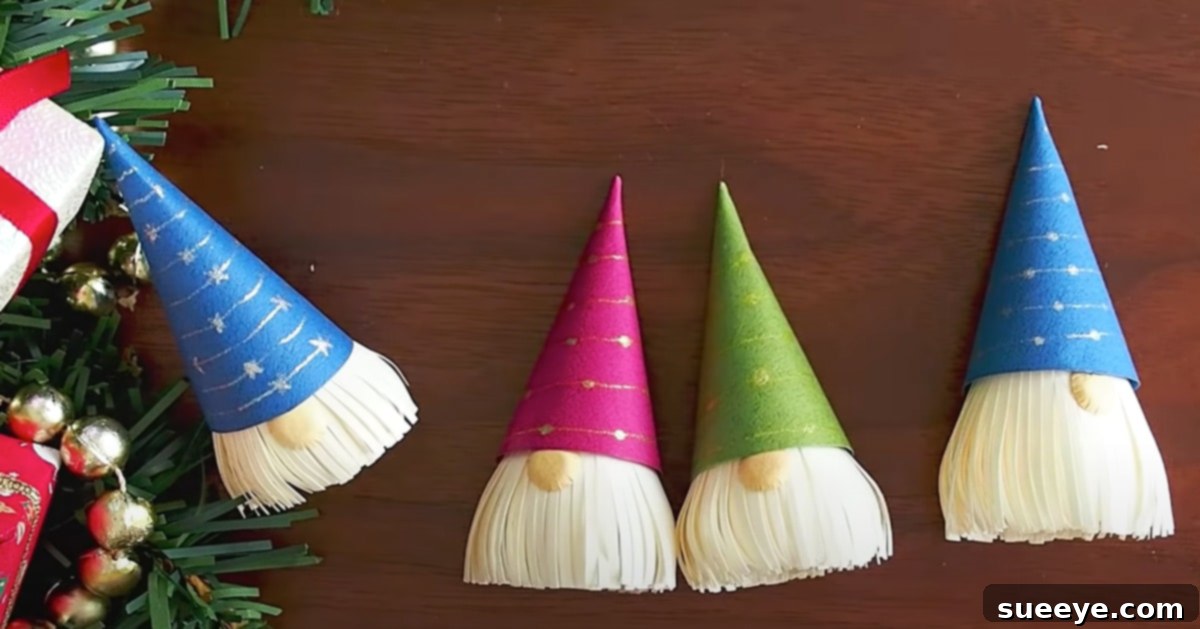
Craft Your Own Whimsical Wonderland: A Step-by-Step Guide to DIY Paper Christmas Gnomes
Embrace the enchanting spirit of the holidays by crafting your very own adorable paper Christmas gnomes! These charming little figures, popularized by creative tutorials like the one from SimplePaperMade on YouTube, offer a delightful way to add a personalized and festive touch to your seasonal decorations and gift-giving. Imagine these miniature, bearded companions gracing your mantelpiece, enhancing your Christmas tree, or bringing an extra sprinkle of joy to your holiday packaging. This craft is not only incredibly easy to follow but also remarkably quick, allowing you to create a whole troupe of gnomes in under an hour. It’s a fantastic project for crafters of all skill levels, and an especially wonderful activity for families, where children can unleash their creativity by designing unique gnome hats and assisting with the simple assembly process. Dive into the magic of handmade holidays and bring these endearing paper gnomes to life!
Why DIY Paper Christmas Gnomes Are a Must-Make This Season
In recent years, gnomes have become an iconic symbol of holiday cheer, representing luck, protection, and festive whimsy. Crafting your own paper gnomes offers numerous benefits beyond just creating a cute decoration. Firstly, it’s an incredibly budget-friendly project, requiring only a few basic paper crafting supplies that you might already have at home. This makes it an accessible craft for everyone, regardless of budget. Secondly, handmade items carry a unique charm and personal touch that mass-produced decorations simply cannot replicate. Each gnome you create will be distinct, reflecting your individual style and creativity. Whether you’re aiming for a classic red and white Christmas theme, a rustic farmhouse aesthetic, or a vibrant, modern look, paper gnomes can be customized to perfectly complement your existing holiday decor. Moreover, it’s an excellent activity for reducing screen time and engaging in a mindful, hands-on project that can be enjoyed solo or as a fun bonding experience with family and friends. The simplicity of this craft makes it perfect for introducing children to the joys of DIY, fostering their fine motor skills and imaginative play.
Gather Your Essential Gnome-Making Supplies
Before embarking on your gnome-making adventure, ensure you have all the necessary tools and materials ready. Having everything organized will make the crafting process smooth and enjoyable. Here’s a detailed list of what you’ll need:
- Tant Paper (or any Colored Craft Paper): Tant paper is known for its beautiful texture and vibrant colors, making it ideal for craft projects. However, any good quality colored paper, cardstock, or even patterned scrapbook paper will work wonderfully for your gnomes’ hats and bodies. Experiment with different colors and patterns to create a diverse gnome family.
- Gold-colored Ballpoint Pen (e.g., Pentel Hybrid Dual Metallic): A metallic pen adds a touch of sparkle and elegance to your gnome hats. While a gold pen is recommended for a classic festive look, feel free to use silver, bronze, or even glitter pens to personalize your designs. Regular colored markers or pens can also be used for simpler patterns.
- Paper Knife (or Craft Knife): Essential for precise cuts, especially when creating intricate details or cleanly cutting out circular shapes. Always use with caution and on a self-healing cutting mat to protect your work surface. If crafting with children, adult supervision is crucial, or switch to child-safe scissors for their parts.
- Embossing Pen (Envospen): An embossing pen, like the Envospen mentioned, is used to create impressed lines or patterns on paper without cutting through it. This can add subtle texture and dimension to your gnome hats or other paper elements. If you don’t have one, you can achieve a similar effect by gently scoring with a dull tool or the back of a craft knife.
- Circular Ruler (or Compass): A circular ruler or a compass is indispensable for accurately drawing circles of various sizes, which are needed for the gnome hats and noses. If neither is available, you can trace around circular objects of different diameters (e.g., cups, coins, lids) to get the desired shapes.
- Tweezers: Handy for picking up and placing small paper pieces, especially when applying glue or positioning the nose and beard. They provide precision and keep your fingers clean.
- Scissors: A good pair of sharp scissors is fundamental for general cutting, especially for the paper strips for the beard and larger cuts.
- Wood Glue: A strong adhesive like wood glue is excellent for paper crafts as it provides a firm bond and dries clear. Ensure you have a small amount on hand for assembly.
- Glue Bottle (with fine tip applicator): A glue bottle with a fine tip applicator makes it much easier to apply small, controlled amounts of glue, preventing excess and ensuring neatness. If you don’t have one, you can use a toothpick or a small brush to apply glue from a regular bottle.
Step-by-Step Guide: Crafting Your Adorable Paper Gnomes
Follow these detailed instructions to transform simple paper into charming Christmas gnomes. Remember, the beauty of DIY lies in personalization, so don’t hesitate to infuse your own creative flair into each step!
1. Crafting the Iconic Gnome Hat
The gnome’s hat is its most recognizable feature. To begin, use your circular ruler or compass to draw a quarter-circle (a 90-degree sector) on your chosen paper. The radius of this quarter-circle will determine the height of your gnome’s hat. For instance, a larger radius will result in a taller, grander hat, while a smaller radius creates a daintier one. Carefully cut out this 90-degree paper shape using your paper knife or scissors for clean edges. Once cut, apply a thin line of wood glue along one of the straight edges of the quarter-circle. Gently bring the other straight edge over to meet and overlap the glued edge, forming a perfect cone shape. Hold it in place for a few moments until the glue begins to set. Ensure the seam is neat and secure.
2. Designing the Hat: A Touch of Personal Flair
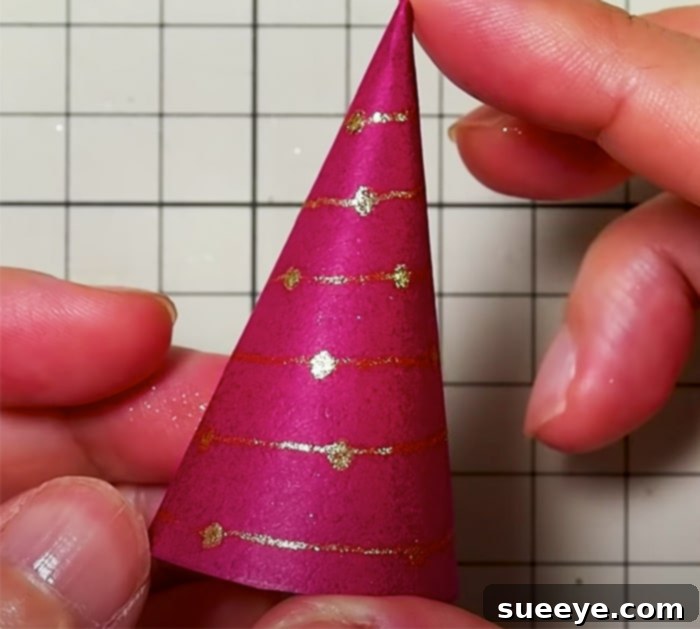
With your cone hat formed, it’s time for artistic expression! Take your gold-colored ballpoint pen (or your preferred metallic pen/marker) and begin to design patterns on the gnome’s hat. You can draw intricate swirls, festive polka dots, delicate stars, or classic stripes. Consider adding small snowflakes or a gnome-specific motif. This is where you can truly make each gnome unique. If you have an embossing pen, you can also add subtle textural details that catch the light beautifully. Encourage kids to draw their favorite holiday symbols, making their gnomes truly their own.
3. Adding the Charming Nose
The gnome’s nose is a small but crucial detail that brings the face to life. Take a contrasting color of paper, perhaps a skin-tone shade or a light pink, and use your circular ruler or a small coin to draw a tiny circle. The size of the circle should be proportionate to your gnome’s hat – typically quite small. Carefully cut out this small circle. Set it aside, as it will be attached later in the assembly process, usually peeking out from under the hat.
4. Creating the Gnome’s Signature Beard
No gnome is complete without its majestic beard! For this, you will need a piece of white paper, or any color you envision for your gnome’s beard (grey, brown, or even a whimsical color). First, cut a white strip of paper about 1.5 to 2 inches wide and long enough to wrap around the base of your gnome’s cone hat. Glue the ends of this strip together to form a ring. Next, cut another long, slightly wider piece of white paper. Along one long edge of this piece, make small, parallel slits using your scissors, cutting about halfway into the width of the paper. These slits will create the individual strands of the gnome’s hair or beard. You can vary the length and spacing of the slits for different beard textures. Once you’ve created these fringes, glue the un-slit end of this piece around the inside of the white ring you made earlier, ensuring the fringed part hangs downwards, ready to become the gnome’s voluminous beard. For a fuller beard, you might use two layers of fringed paper.
5. Assembling Your Gnome: Bringing It All Together
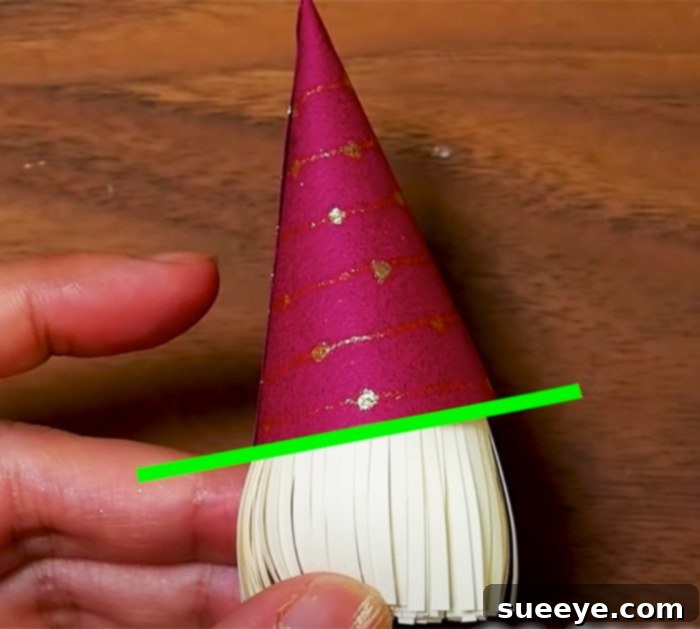
Now it’s time to bring all the elements together. Take your decorated cone hat and your beard piece. Apply a thin line of glue around the inside base of the cone hat. Carefully attach the beard piece to the inside rim of the hat, positioning it so that the fringed part hangs down beautifully. Next, position the small circular nose you cut earlier. It should be placed at the front of the hat, just above where the beard begins, giving the impression that it’s peeking out. Use a tiny dot of glue for this. Tweezers can be very helpful for precise placement. Allow all the glue to dry completely before handling your finished gnome. For a visual demonstration and additional nuanced tips, watching the SimplePaperMade tutorial on YouTube can provide invaluable insight into the delicate steps and details.
Creative Ways to Display Your Charming Paper Gnomes
Once your delightful paper gnomes are complete, the fun doesn’t stop there! Their versatility means there are countless ways to incorporate them into your holiday celebrations and home decor. Here are some inspiring ideas:
- Enchanting Home Decor: Place them individually or in small clusters on shelves, windowsills, mantelpieces, or as part of a festive table centerpiece. Their miniature size makes them perfect for tucking into unexpected spots to bring a smile.
- Unique Gift Toppers & Tags: Forget generic bows! Attach a handmade gnome to the top of a beautifully wrapped present for a truly memorable and personalized gift embellishment. You can even write the recipient’s name on the gnome’s hat or body.
- Festive Wine Bottle Adornments: As suggested in the original inspiration, these gnomes are perfectly sized to fit over the neck of an opened (or unopened!) wine bottle, transforming it into a charming gift or a festive table accessory.
- DIY Christmas Ornaments: Attach a thin string or loop to the top of the gnome’s hat, and they instantly become adorable ornaments for your Christmas tree. Imagine a tree adorned with a collection of unique, handmade gnomes!
- Whimsical Garlands and Mobiles: String several gnomes together with thin decorative thread or fishing line to create a magical garland to hang across a doorway, above a window, or along a staircase railing. For an ethereal effect, hang them at varying lengths from the ceiling to create a floating gnome mobile.
- Party Favors or Place Card Holders: If you’re hosting a holiday gathering, these gnomes make wonderful party favors that guests can take home. Alternatively, attach a small tag with a guest’s name to the gnome’s beard or hat to use them as unique place card holders at your dinner table.
- Kids’ Room Decor: Beyond Christmas, these gnomes can be a delightful addition to a child’s bedroom or play area, adding a touch of fantasy and whimsy year-round.
- Seasonal Vignettes: Create a charming winter wonderland scene with your gnomes by pairing them with miniature trees, faux snow, or other small festive figures.
Tips for Success and Gnome-Making Fun
To ensure your gnome-making experience is as enjoyable and successful as possible, consider these practical tips:
- Precision is Key: While this is an easy craft, taking your time with cutting and gluing will yield the neatest results. Sharp tools make clean cuts, and a steady hand with glue ensures a strong, invisible bond.
- Experiment with Materials: Don’t limit yourself to just plain paper! Try using textured cardstock, glitter paper, foil paper, or even small fabric scraps for the hats or beards to add different dimensions and finishes.
- Vary Sizes and Colors: Create a family of gnomes in different sizes and a spectrum of colors. This adds visual interest and allows for more dynamic displays. Imagine a tall papa gnome, a medium mama gnome, and tiny baby gnomes!
- Personalize the Details: Beyond hat patterns, consider adding tiny embellishments like mini pom-poms to the hat tips, small buttons for eyes (if you want to give them eyes), or even a touch of cotton ball for a fluffy beard.
- Crafting with Kids: For younger children, pre-cut some of the more intricate shapes. Let them focus on decorating the hats with crayons, markers, or stickers, and assist them with the gluing process. Emphasize safety when using sharp tools.
- Batch Crafting: If you plan to make many gnomes, prepare all your hat cones, noses, and beard strips in advance. This assembly-line approach can significantly speed up the process.
- Troubleshooting Glue: If you accidentally use too much glue, gently dab it with a dry paper towel. If it’s already drying, a slightly damp cotton swab can help clean up excess, but be careful not to smudge ink.