
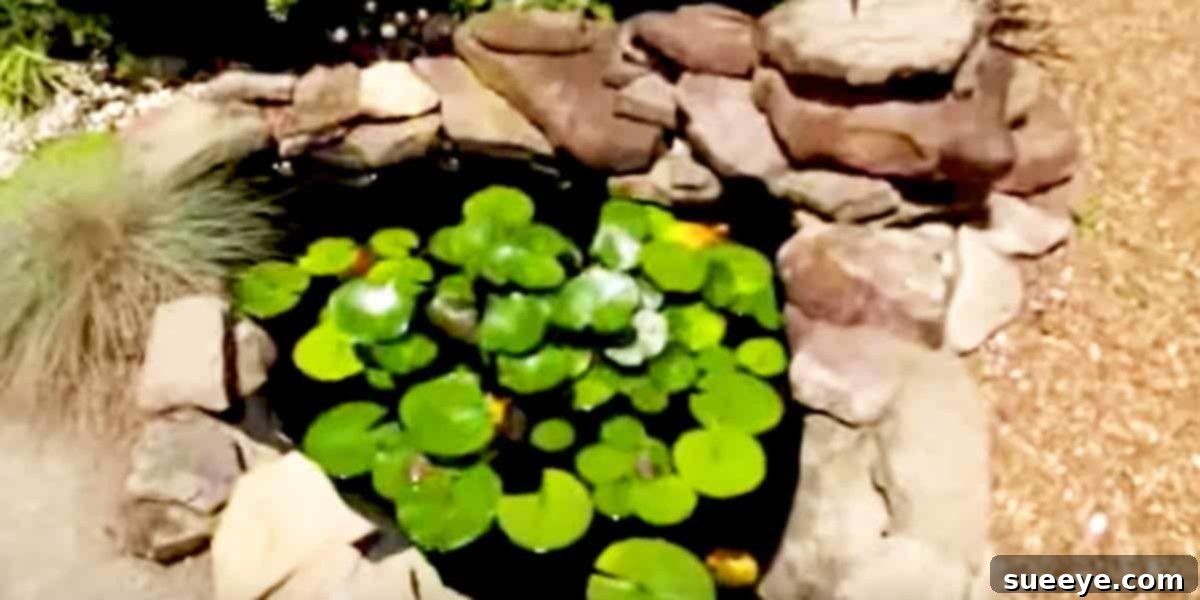
Transform Your Backyard: A Comprehensive Guide to Building Your Own Garden Pond
Imagine stepping outside your door into a serene sanctuary where the gentle murmur of flowing water and the vibrant colors of nature wash away the day’s stress. A backyard pond isn’t just a garden feature; it’s a private oasis, a tranquil escape waiting to be discovered just steps from your patio. Picture colorful fish gracefully gliding beneath lily pads adorned with exquisite blooms, creating a living masterpiece in your outdoor space. Getting lost in this personal paradise, soothed by the peaceful symphony of nature, is an experience more accessible than you might think.
Many dream of enhancing their outdoor living areas, and incorporating a water feature like a garden pond stands out as one of the most impactful and rewarding projects. Contrary to popular belief, building your own pond is not nearly as complicated or costly as it might seem. This guide will walk you through everything you need to know, from initial planning to enjoying your very own aquatic haven. Even I, without any professional assistance, successfully constructed a beautiful pond in my backyard over a single weekend, transforming my outdoor space into a cherished retreat.
Why a Backyard Pond Is Your Next Essential DIY Project
Incorporating a water feature like a garden pond offers an array of benefits that extend far beyond mere aesthetics. It’s a clever DIY project that promises to enrich your lifestyle and beautify your surroundings without demanding a fortune. Here’s why a backyard pond is a truly exceptional addition to any home:
- Unrivaled Aesthetic Appeal: A pond instantly becomes the focal point of your garden. Its reflective surface, the movement of water, and the life it supports create a dynamic and ever-changing landscape feature that captivates the eye and complements any garden style, from rustic to modern.
- A Source of Calm and Relaxation: The soothing sounds of bubbling water or a gentle waterfall are renowned for their stress-reducing qualities. There’s a profound sense of peace that comes from watching fish swim or listening to the natural melodies created by your pond, making it the perfect spot for quiet contemplation or unwinding after a long day.
- Attracts Beneficial Wildlife: A pond becomes a vibrant ecosystem, drawing in a variety of fascinating creatures. Birds will visit for a drink or a bath, dragonflies will dart elegantly across the water, and frogs might serenade you on summer evenings. This biodiversity enriches your garden and offers endless opportunities for nature observation.
- Enhances Property Value: A well-designed and maintained water feature can significantly boost your home’s curb appeal and market value. It’s a unique selling point that demonstrates thoughtful landscaping and a commitment to creating an inviting outdoor environment.
- Therapeutic and Engaging Hobby: From designing its layout to selecting plants and fish, building and maintaining a pond can be a deeply satisfying hobby. It connects you with nature, offers opportunities for creativity, and provides a continuous sense of accomplishment.
- Cost-Effective DIY Potential: While professional installations can be pricey, building a beautiful and functional pond yourself is surprisingly affordable. With careful planning and the right resources, you can achieve stunning results within a reasonable budget, making it one of the most rewarding DIY projects for your outdoor space.
Planning Your Dream Garden Pond: From Vision to Reality
The key to a successful and enjoyable garden pond lies in meticulous planning. Taking the time to consider these factors will ensure your pond not only looks beautiful but also thrives as a healthy ecosystem.
1. Location, Location, Location
Choosing the right spot is paramount. Consider:
- Sunlight Exposure: Most pond plants, especially water lilies, require at least 5-6 hours of direct sunlight daily. However, too much sun can lead to excessive algae growth. A balance is ideal, perhaps with some afternoon shade.
- Visibility: Place your pond where you can easily see and enjoy it from your patio, deck, or a favorite window. This maximizes its stress-relieving benefits.
- Proximity to Electricity and Water: You’ll need electricity for the pump and filter, and a water source for filling and topping off. Keep these utilities in mind to minimize trenching and hose lengths.
- Tree Roots: Avoid building directly under large trees. Roots can damage liners, and falling leaves will constantly clog filters and decompose in the water, impacting water quality.
- Runoff: Ensure your pond isn’t in a low-lying area where rainwater runoff from lawns (potentially carrying pesticides or fertilizers) can easily enter it.
2. Size, Shape, and Depth
Your pond’s dimensions will depend on your space, budget, and desired inhabitants.
- Size: Even a small pond can have a big impact. Measure your available space and sketch out different shapes to visualize what works best.
- Shape: Naturalistic, irregular shapes blend seamlessly into a garden, while geometric shapes can create a more formal, contemporary look. Pinterest and various landscaping galleries offer countless ideas for inspiration.
- Depth: For fish like koi, a depth of at least 2-3 feet (60-90 cm) is recommended to protect them from predators and temperature extremes. For smaller fish or purely ornamental ponds, 18-24 inches (45-60 cm) may suffice. Incorporate different depths or “shelves” for marginal plants.
3. Budgeting and Materials
A comprehensive budget helps avoid surprises. Key materials typically include:
- Pond Liner: High-quality EPDM liners are durable and flexible. PVC is a more budget-friendly option for smaller ponds. Always use an underlayment to protect the liner from punctures.
- Pump and Filter System: Essential for water circulation and clarity. Choose a pump appropriate for your pond’s volume and a filter system (mechanical, biological, or a combination) that matches your pond’s needs, especially if you plan to keep fish.
- Rocks and Gravel: For lining the bottom, creating natural edges, and providing habitat.
- Pond Plants: A mix of submerged, marginal, and floating plants enhances beauty, oxygenates the water, and provides shade and filtration.
- Fish (Optional): Select species appropriate for your pond size and local climate.
- Tools: Shovels, wheelbarrow, level, utility knife, etc.
Essential Tools and Materials for Pond Construction
Before you break ground, gather your essential tools and materials. Having everything on hand will make the construction process much smoother.
Basic Tools:
- Shovel and spade for digging
- Wheelbarrow for moving soil
- Level (a long board and spirit level work well)
- Rope or garden hose for marking the pond outline
- Utility knife or heavy-duty scissors for trimming liner
- Work gloves
- Measuring tape
Key Materials:
- Pond Liner: EPDM (ethylene propylene diene monomer) rubber liners are highly recommended for their durability, flexibility, and longevity. Calculate the size needed: (Pond Length + 2 x Max Depth + 2 ft overlap) x (Pond Width + 2 x Max Depth + 2 ft overlap).
- Pond Underlayment: A geotextile fabric placed beneath the liner to protect it from sharp objects, roots, and rocks.
- Pond Pump: Sized according to your pond’s volume to circulate water efficiently.
- Pond Filter: Crucial for maintaining water clarity and health. Options include pressure filters, biological filters, and skimmers.
- Tubing/Hosing: To connect the pump to the filter and any waterfalls or features.
- Rocks and Boulders: For creating natural edges, waterfalls, and hiding the liner.
- Pond Gravel: For the bottom of the pond, providing surface area for beneficial bacteria.
- Pond Plants: A variety of aquatic plants for filtration, oxygenation, and aesthetics.
- Electrical Supply: An outdoor-rated, GFCI (Ground Fault Circuit Interrupter) protected outlet is essential for your pump and other electrical components.
- Water Dechlorinator: To neutralize chlorine and chloramines in tap water, making it safe for fish and plants.
Step-by-Step Guide: Building Your DIY Backyard Pond
This tutorial simplifies the pond building process, enabling you to create your aquatic haven with confidence.
Step 1: Mark the Outline and Dig
Using rope, spray paint, or a garden hose, mark the desired outline of your pond. Begin digging, starting with the deepest section. Gradually create shelves around the perimeter for plants, ensuring varied depths. Remember to dig about 6 inches deeper than your desired finished depth to accommodate the underlayment, liner, and gravel.
Step 2: Level the Edges
One of the most critical steps! Use a spirit level and a straight board to ensure the entire perimeter of your pond is perfectly level. Uneven edges will result in unsightly exposed liner and an unbalanced water level. Take your time with this step, as it impacts the final appearance significantly.
Step 3: Install Underlayment and Liner
Remove any sharp objects from the excavated area. Lay down the underlayment, covering the entire dug-out area smoothly. Then, carefully drape the pond liner over the underlayment, centering it as much as possible. Allow plenty of overlap around the edges. Gently smooth out large wrinkles, but don’t worry about perfection yet.
Step 4: Fill with Water and Form Liner
Start slowly filling the pond with water. As the pond fills, the weight of the water will help press the liner into place. Continue to gently pull and adjust the liner to smooth out any major creases, working from the center outwards. This process helps create a natural, conforming shape.
Step 5: Trim and Secure the Liner
Once the pond is filled, let it sit for a few hours or overnight for the liner to settle completely. Then, trim the excess liner, leaving an overhang of about 12-18 inches (30-45 cm) around the perimeter. You’ll use this excess to create a natural-looking edge. Bury the edges of the liner under soil, rocks, or flagstones to secure it and conceal the material.
Step 6: Install Pump, Filter, and Water Features
Place your pump in the deepest part of the pond, ensuring it’s on a stable surface and elevated slightly to prevent it from sucking up excessive sludge. Connect the pump to your filter and any waterfalls or fountains using appropriate tubing. Conceal the tubing and electrical cords as much as possible using rocks, gravel, or by burying them. Ensure all electrical connections are GFCI protected and rated for outdoor use.
Step 7: Add Rocks, Gravel, and Decorations
Carefully place larger rocks and boulders around the perimeter and on shelves to create a natural look and hide the liner. Add a layer of pond gravel to the bottom of the pond. This provides a surface for beneficial bacteria to colonize, aiding in biological filtration. Integrate any decorative elements like statues or unique stones.
Step 8: Introduce Aquatic Plants
Select a variety of aquatic plants. Marginal plants (like irises, cattails) go on the shallow shelves, submerged plants (like anacharis) go at the bottom, and floating plants (like water hyacinth, water lettuce, lily pads) float on the surface. Plants are vital for oxygenating the water, consuming excess nutrients, providing shade, and enhancing the pond’s ecosystem.
Step 9: Water Conditioning and Introducing Fish (Optional)
After filling, treat the water with a dechlorinator to remove chlorine and chloramines, which are harmful to fish and beneficial bacteria. Allow the pond to cycle for at least a week, or preferably longer, before introducing fish. This gives the biological filter time to establish. When adding fish, acclimate them slowly to the pond’s water temperature to prevent shock.
Maintaining Your Pond for Lasting Beauty and Health
A well-maintained pond remains a source of joy for years. Regular, simple tasks will keep your aquatic ecosystem thriving.
- Water Quality Management: Regularly test your pond water for pH, ammonia, nitrite, and nitrate levels. Perform partial water changes (10-20% weekly) to dilute accumulated nitrates and replenish essential minerals, especially during hot weather.
- Filtration System Cleaning: Clean your filter media regularly to prevent clogs and ensure efficient operation. This may involve rinsing sponges or replacing filter pads as needed.
- Algae Control: Green water and string algae are common. Employ natural solutions like adding more aquatic plants (especially submerged and floating varieties for shade and nutrient uptake), ensuring proper filtration, and reducing direct sunlight exposure. UV clarifiers can also be highly effective against green water algae.
- Plant Care: Trim back overgrown marginal plants, remove yellowing leaves, and divide crowded plants annually. Remove dead or decaying plant matter promptly to prevent it from fouling the water.
- Fish Care: Feed fish a high-quality food in moderation – only what they can consume in a few minutes. Overfeeding contributes to poor water quality. Monitor your fish for any signs of illness or stress.
- Seasonal Maintenance:
- Spring: Perform a thorough spring cleaning, removing accumulated debris and excess sludge. Check pump and filter for winter damage.
- Summer: Monitor water levels due to evaporation, top off with dechlorinated water. Keep an eye on algae growth.
- Fall: Use a pond net to catch falling leaves before they sink and decompose. Reduce fish feeding as temperatures drop.
- Winter: For areas with freezing temperatures, consider a pond de-icer or aerator to keep a hole open in the ice, allowing gas exchange. Bring sensitive pumps and plants indoors.
Common Mistakes to Avoid When Building a Pond
Even with the best intentions, first-time pond builders can sometimes overlook key details. Being aware of these common pitfalls can save you time, effort, and potential headaches:
- Inadequate Leveling: As mentioned, a perfectly level pond edge is crucial. Skimping on this step will lead to a lopsided pond and visible liner.
- Insufficient Filtration: Underestimating the size or type of pump and filter needed for your pond’s volume and fish load is a common error. This results in murky water and an unhealthy ecosystem.
- Too Much Direct Sunlight: While plants need sun, excessive exposure can lead to persistent algae blooms, especially without sufficient plant coverage or shade.
- Not Using Underlayment: Skipping the underlayment is a risky shortcut. It protects your expensive liner from sharp stones and roots, extending its lifespan significantly.
- Overstocking Fish: Too many fish in a small pond quickly overwhelm the biological filter, leading to poor water quality, disease, and stress for your aquatic inhabitants. Research appropriate stocking levels for your pond size.
- Ignoring Local Regulations: Always check with your local municipality for any zoning laws, permits, or safety requirements related to pond construction, especially concerning depth or fencing.
- Lack of an Electrical GFCI Outlet: Safety first! All outdoor electrical components for your pond must be connected to a GFCI-protected outlet to prevent electrical shock.
Your Private Paradise Awaits
Building a garden pond is more than just a home improvement project; it’s an investment in tranquility, beauty, and a deeper connection with nature. From the initial excavation to the joyous moment you watch fish explore their new home, the journey is incredibly rewarding. The good news is that with this detailed guide, you have the knowledge and confidence to embark on this clever DIY project without costing you a fortune or requiring professional intervention. You’ll find countless styles and shapes to inspire your project, whether you’re drawing ideas from photos on Pinterest or following the ingenious methods of experienced pond builders like Lee Haze.
Embrace the opportunity to transform your outdoor living space into a refreshing haven. With a little planning and effort, you can enjoy relaxing summer moments and beyond, surrounded by the peaceful sounds and vibrant life of your very own backyard pond. So, gather your tools, unleash your creativity, and get ready to build the pond of your dreams!