
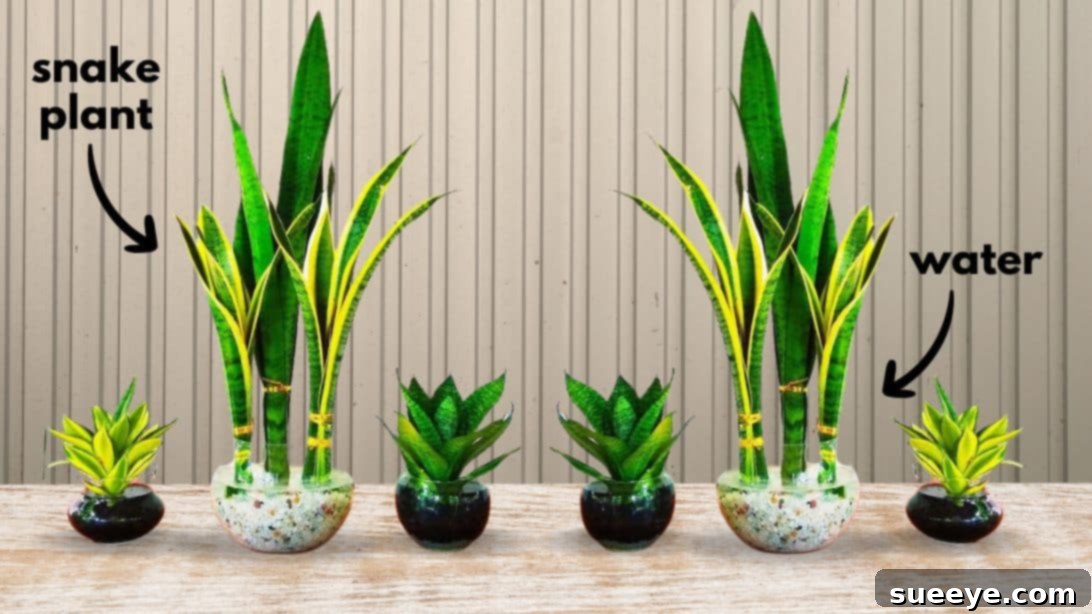
Mastering Snake Plant Propagation: Your Ultimate Guide to Growing Sansevieria in Water
Snake plants, scientifically known as Sansevieria trifasciata, are celebrated worldwide as quintessential houseplants. Revered for their striking architectural form, incredible resilience, and potent air-purifying capabilities, they effortlessly elevate any indoor space. While most commonly found thriving in soil, a lesser-known but equally rewarding method of cultivation involves growing these magnificent plants directly in water. This technique, often referred to as water propagation or hydroponics, offers a clean, pest-free, and aesthetically pleasing alternative to traditional potting. If you’re looking for a simple yet elegant way to expand your plant collection, decorate your home, or simply observe the fascinating process of root development, learning how to grow snake plants in water is a skill worth mastering. This comprehensive guide will walk you through every step, from selecting the perfect cutting to ensuring long-term vitality, making you a confident water gardener. You can also find visual tutorials, such as the one by Green plants on Youtube, to complement this written guide. Happy planting!
Why Choose Water Propagation for Your Snake Plants?
Opting for water propagation over traditional soil planting comes with a host of unique benefits that appeal to both novice and experienced plant enthusiasts:
- Clean and Pest-Free Environment: Growing in water eliminates soil-borne pests like fungus gnats and reduces the risk of soil-related diseases. This results in a cleaner indoor environment, free from potential mess or unwanted intruders.
- Aesthetic Appeal: A snake plant elegantly displayed in a clear glass container, showcasing its developing roots, adds a unique and modern decorative touch to any room. It transforms a simple plant into a living art piece.
- Easy Root Monitoring: With transparent containers, you can easily observe the growth and health of the roots. This visual feedback is invaluable for understanding your plant’s development and identifying any issues early on.
- Reduced Watering Hassle: While water changes are necessary, the frequency is often less demanding than monitoring soil moisture levels, especially for beginners who might struggle with over or under-watering.
- Educational Experience: It’s a fantastic way to introduce children or curious adults to plant biology, allowing them to witness the miracle of root formation firsthand.
- Versatile Decor: Water-grown snake plants can be placed in various settings where soil might be inconvenient, such as on office desks, bathroom shelves, or in minimalist living spaces.
Essential Materials for Water Propagation
Before embarking on your water propagation journey, gathering the right tools is crucial. Ensuring you have everything at hand will make the process smooth and enjoyable. Here’s a detailed list of what you’ll need:
- Sharp, Sterilized Blade: A very sharp knife, box cutter, or even robust scissors are ideal. The key is a clean, precise cut to minimize damage to the plant tissue and reduce the risk of infection. Sterilize the blade with rubbing alcohol before use.
- Clean Cloth or Tissue: For gently wiping down the snake plant leaves, removing any dust or debris, and ensuring a clean surface for propagation.
- Tying Wire (or strong twine/rubber band): Used to gently bundle the leaf cuttings together, providing stability in the container. Floral wire or soft garden ties also work well.
- Scissors: Primarily for cutting the tying wire to size and trimming any excess.
- Plant Gravel or Decorative Stones: Not strictly for nutrition, but essential for providing physical support to the snake plant cuttings, keeping them upright in the glass bowl. You can choose any color or size that complements your decor; black and white are popular for their minimalist appeal. Ensure they are inert and won’t leach chemicals into the water.
- Water (for cleaning): For thoroughly rinsing the gravel and tools.
- Glass Bowl or Clear Container: A transparent container is highly recommended to allow for root observation and to add to the aesthetic appeal. Ensure it’s wide enough to accommodate your plant bundle and has a stable base.
- Filtered or Distilled Water (for plant): This is crucial for filling your plant’s container. Filtered, distilled, or rainwater is preferred over regular tap water, as it minimizes the presence of chlorine, fluoride, and other minerals that can accumulate and potentially harm your plant’s delicate roots over time.
Note on Gravel: The choice of gravel is primarily aesthetic and for support. Whether you opt for black, white, or a mix, ensure it’s thoroughly cleaned before use to prevent introducing contaminants to your plant’s new environment.
Step-by-Step Guide: Propagating Snake Plants in Water
Follow these detailed instructions to successfully propagate your snake plant in water. Patience is key, as root development can take several weeks.
Step 1: Selecting and Preparing Your Cuttings
Carefully choose a healthy, mature leaf from an established snake plant. Look for leaves that are firm, vibrant in color, and free from any signs of disease or damage. Using your sharp, sterilized blade, cut the leaf cleanly near its base from the mother plant. Aim for a clean, straight cut to minimize stress on both the mother plant and the cutting. You can use an entire leaf or cut it into smaller sections, though longer sections tend to root more reliably. Ensure your cutting is at least 6-8 inches long for optimal results.
Step 2: Cleaning the Leaf Cuttings
Gently wipe each leaf cutting with a clean, damp cloth or tissue. This step removes any accumulated dust, dirt, or potential pathogens from the leaf surface. A clean cutting is less susceptible to rot once submerged in water. Allow the cut end to air dry and callus over for a day or two before proceeding; this additional step can further reduce the risk of rot.
Step 3: Making the Diagonal Cut
With your sharp, sterilized blade, make a fresh diagonal cut at the very bottom of each leaf cutting. This cut should be approximately 1-2 inches from the bottom tip. Cutting diagonally serves a dual purpose: it increases the surface area exposed to water, which can encourage faster root development, and it helps you remember which end is the bottom, preventing you from accidentally submerging the wrong side (which won’t root). A V-shape cut can also be effective.
Step 4: Securing the Leaf Cuttings
Gather the prepared leaf cuttings together into a neat bundle. Using your tying wire (or chosen alternative), gently tie them together a few inches from the bottom. The aim is to keep them upright and stable without constricting the plant tissue too tightly, allowing for future root growth. Twist the ends of the wire together to secure the bundle, then use your scissors to trim any excess wire, ensuring it doesn’t interfere with the plant or container.
Step 5: Preparing the Container and Gravel
Thoroughly clean your plant gravel with water, ideally using a colander to ensure all fine dust and debris are rinsed away. This prevents cloudiness in your water and removes potential contaminants that could hinder root development or encourage algae growth. Once cleaned, allow the gravel to air dry completely or pat it dry with a clean cloth. Cleanliness is paramount for successful water propagation.
Step 6: Arranging the Snake Plant in the Container
Add a base layer of the cleaned gravel to the bottom of your glass bowl, spreading it evenly to create a stable foundation. Carefully place your bundled snake plant cuttings in the center of the bowl, ensuring the diagonally cut ends are facing down and are in contact with the gravel. Hold the plant in an upright position while gradually adding more gravel around the base. The gravel should fill the bowl sufficiently to support the plant firmly, preventing it from toppling over, but leave enough space above for water and for you to easily change it without disturbing the roots.
Step 7: Filling with Water and Initial Care
Gently fill the glass bowl with filtered, distilled, or rainwater, ensuring that the bottom 1-2 inches of the leaf cuttings are submerged. Avoid submerging too much of the leaf, as this can lead to rot. The water level should be just enough to cover the diagonally cut ends, allowing the plant to draw moisture. For ongoing care, change the water regularly: if you’re using filtered or distilled water, refresh it at least twice a month. If you’re using fresh tap water, it’s best to change it once a week to prevent the buildup of minerals, chlorine, and other chemicals, and to ensure adequate oxygenation for the developing roots. Always ensure the water is at room temperature when replenishing.
Ongoing Care and Maintenance for Water-Grown Snake Plants
Once your snake plant cuttings are set up in water, consistent care is key to their successful rooting and long-term health. Understanding these practices will ensure your plant thrives.
Water Changing Schedule
Regular water changes are vital for water-grown snake plants. As mentioned, filtered or distilled water should be changed every two weeks, while tap water (preferably dechlorinated by letting it sit out for 24 hours) should be changed weekly. This practice replenishes oxygen, removes waste products excreted by the plant, and prevents the buildup of bacteria and algae growth, which can harm your plant. When changing water, you might gently rinse the developing roots (once they form) to remove any slime or residue, ensuring a fresh start.
Lighting Requirements
Snake plants are renowned for their adaptability to various light conditions, but for optimal root development and growth in water, they thrive in bright, indirect light. Place your water-grown snake plant near a window where it receives ample light but is shielded from harsh, direct sunlight, especially during the hottest parts of the day. Too much direct sun can scorch the leaves and promote excessive algae growth, while too little light might significantly slow down root development.
Temperature and Humidity
These plants prefer average room temperatures, generally between 65-80°F (18-27°C). They are not particularly fussy about humidity levels, making them ideal for most indoor environments without special requirements. However, avoid placing them in drafty areas, near air conditioning vents, or close to heat sources, as extreme temperature fluctuations can stress the plant and impede rooting.
Nutrient Considerations
During the initial propagation phase, snake plants typically don’t require external nutrients. The leaf cutting contains enough stored energy for root development. Once roots are well-established (usually a few inches long) and you observe new leaf growth (which can take several months), you may consider adding a very diluted, all-purpose liquid houseplant fertilizer specifically formulated for hydroponics. Use sparingly, perhaps at ¼ strength, once every 4-6 weeks during active growth periods. Over-fertilization can burn the delicate roots and do more harm than good.
Monitoring Root Development
Patience is a virtue when propagating snake plants in water. Roots can take anywhere from 4-8 weeks, or even longer (up to several months), to appear. Keep a close eye on the water level and change it as recommended. Once roots begin to form, they will typically emerge from the diagonally cut end of the leaf. They will appear as small white nubs first, gradually elongating into a healthy, robust root system. Continue to provide optimal conditions and watch them flourish. The sight of new roots is incredibly rewarding!
Common Problems and Troubleshooting
While water propagation is generally straightforward and successful, you might encounter a few common issues. Knowing how to identify and address them can save your plant cuttings.
- No Root Development: If weeks pass with no signs of roots, reassess your cutting. Ensure it’s a healthy, mature leaf from a vigorous mother plant. Check the water quality and ensure it’s changed regularly. Sometimes, older cuttings or those in less-than-ideal light conditions take longer. Ensure the plant is receiving adequate indirect light and consistent room temperature.
- Leaf Rotting: This is the most common issue. It often occurs if the cutting is unhealthy to begin with, if too much of the leaf is submerged, or if the water isn’t changed frequently enough, leading to bacterial growth. If you notice signs of rot (mushy, discolored tissue), immediately remove the affected portion with a sterile blade, re-cut to a healthy section, and place it in fresh, clean water. Ensure only the very bottom 1-2 inches are submerged. Allowing the cut end to callus before submerging can also prevent this.
- Algae Growth: Green algae in the water indicates too much direct light or infrequent water changes. Algae competes with your plant for nutrients and oxygen, and can make the water cloudy. Change the water, clean the container thoroughly, and move the plant to a location with less direct light. Occasionally, wiping down the inside of the glass container can help control algae.
- Yellowing Leaves: While some yellowing on older, lower leaves can be normal as the plant expends energy on roots, excessive yellowing might indicate stress. This could be due to nutrient deficiency (if the plant has been in water for a very long time without any nutrients), extreme temperature fluctuations, or poor water quality. Ensure regular water changes and consider a very diluted liquid fertilizer if roots are well-established and new growth is desired.
Frequently Asked Questions About Water-Grown Snake Plants
Can I use any type of snake plant for water propagation?
Most varieties of Sansevieria trifasciata (e.g., ‘Laurentii’, ‘Zeylanica’, ‘Black Coral’) can be successfully propagated in water from leaf cuttings. However, it’s worth noting that variegated varieties like ‘Laurentii’ may lose their distinctive yellow stripes when propagated from leaf cuttings, as the variegation often originates from the mother plant’s rhizome, and new growth from a leaf cutting might revert to the plain green form.
How long does it take for roots to grow?
Root development can vary significantly, typically taking anywhere from 4 weeks to several months. Factors like consistent temperature, adequate indirect light, and the overall health of the mother plant can influence the speed of rooting. While it requires patience, the emergence of roots is a clear sign of success.
Do I need to add fertilizer to the water?
During the initial rooting phase, fertilizer is generally not needed. The leaf cutting contains sufficient stored energy to produce roots. Once roots are well-established (several inches long) and you observe new leaf growth, you can introduce a very diluted (e.g., ¼ strength) liquid houseplant fertilizer specifically designed for hydroponics or water-based plants. Use it sparingly and monitor your plant’s response.
Can snake plants live in water permanently?
While snake plants can thrive in water for extended periods with proper care, they are not naturally aquatic plants. For long-term health and robust growth, it’s often recommended to eventually transfer them to soil once a strong root system has developed. However, with consistent water changes, occasional cleaning, and the careful addition of dilute nutrient solutions, many enthusiasts successfully keep them in water indefinitely as beautiful decorative pieces.
What kind of container is best for water propagation?
A clear glass container is highly recommended as it allows you to observe root development, monitor water clarity, and adds to the aesthetic appeal of your plant. Ensure it’s stable and large enough to hold the plant cuttings without tipping over. Mason jars, decorative vases, glass bowls, or even wide-mouthed bottles work exceptionally well. The most important aspect is cleanliness.
Conclusion: Embrace the Simplicity of Water Propagation
Growing snake plants in water is a delightful and rewarding experience that combines the inherent beauty of these resilient plants with the elegance and cleanliness of hydroponic cultivation. From their unmatched air-purifying qualities to their striking visual appeal, Sansevieria are truly exceptional houseplants that deserve a place in every home. By following this detailed guide, you’ve gained all the knowledge necessary to successfully propagate your own snake plants, transforming simple leaf cuttings into thriving, root-bound specimens. Whether you’re aiming to expand your collection, create stunning decorative displays, or simply enjoy a low-maintenance gardening project, water propagation offers a clean, engaging, and highly effective method. So, gather your materials, select your cuttings with care, and prepare to be amazed by the serene beauty and steady growth of your water-grown snake plants. The journey of nurturing these magnificent plants in water is not just about growing a plant; it’s about cultivating patience, appreciating nature, and enhancing your living space with vibrant, living art. Happy planting!