
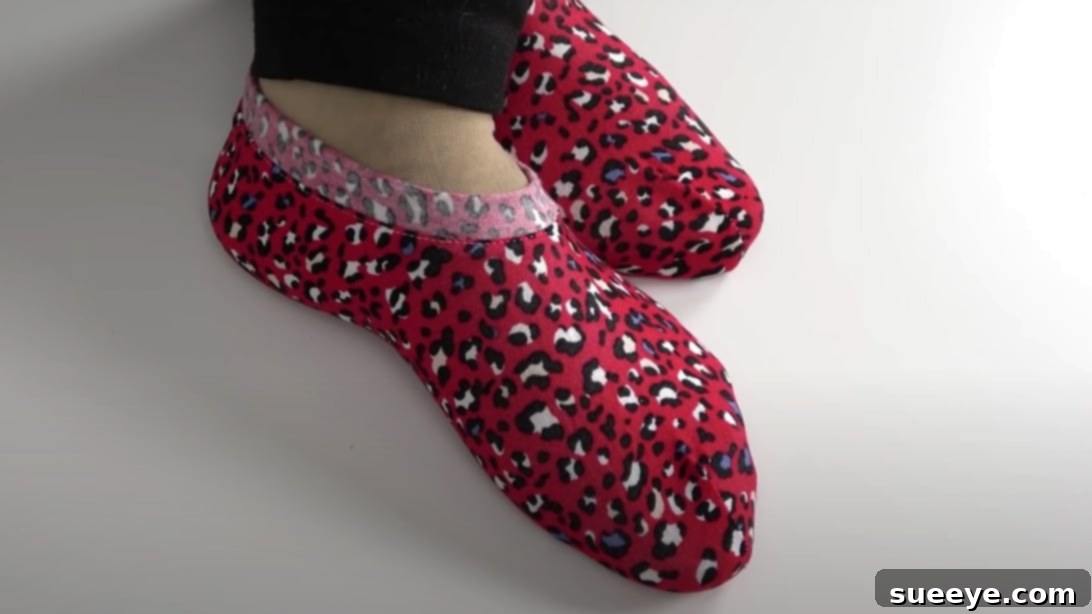
DIY Winter Socks: Craft Cozy Warmth in 10 Minutes or Less
As the crisp air bites and winter’s chill begins to set in, there’s nothing quite like slipping your feet into a pair of warm, incredibly cozy socks. But why settle for off-the-rack when you can create your own custom-fit comfort? This detailed guide will show you how to make luxurious DIY winter socks quickly and easily, often in just 10 minutes! Imagine a quick craft session, a steaming mug of hot chocolate, and then the satisfying warmth of socks you’ve made yourself. Whether you’re a seasoned seamster or a complete beginner, this project is designed for simplicity and speed, guaranteeing you snug feet all season long.
Creating your own socks isn’t just about saving money; it’s about personalized comfort, the joy of a handmade item, and the ability to choose fabrics that perfectly suit your needs. From the exact fit to your preferred material texture, homemade socks offer a level of customization that store-bought options simply can’t match. Get ready to transform a simple piece of fabric into your new favorite winter essential!
Why Embark on a DIY Sock-Making Adventure?
Before we dive into the creation process, let’s explore the compelling reasons why making your own winter socks is a fantastic idea:
- Unparalleled Comfort and Perfect Fit: Store-bought socks often come in generic sizes. By making your own, you can tailor the dimensions precisely to your feet, ensuring no uncomfortable squeezing or annoying sagging. You control the snugness, the length, and the overall feel.
- Personalized Style: Tired of limited color and pattern options? When you craft your own socks, you’re the designer! Choose fabrics that reflect your personality, match your loungewear, or even create unique gifts for loved ones.
- Cost-Effectiveness: High-quality, warm winter socks can be surprisingly expensive. This DIY project allows you to create premium comfort at a fraction of the cost, especially if you utilize fabric scraps or remnants.
- Material Control: Do you prefer natural fibers, hypoallergenic materials, or extra warmth? Selecting your own fabric means you can ensure your socks are made from materials that are kind to your skin and provide the exact level of warmth and breathability you desire. Combed cotton, fleece, or even a soft flannel can be ideal choices.
- Quick and Rewarding Project: In a world of complex crafts, this project stands out for its speed. It’s incredibly satisfying to complete a functional and cozy item in under an hour, providing instant gratification.
- Eco-Friendly Option: Repurpose old blankets, sweaters, or fabric remnants to give them a new life, reducing waste and contributing to a more sustainable lifestyle.
Gather Your Essential Materials
To begin your journey into cozy sock creation, you’ll need a few basic sewing supplies. Most of these are likely already in your craft drawer, making this an accessible project for almost anyone:
- Measurement Tape: Essential for accurate foot dimensions. Precision here ensures a perfectly fitting sock.
- Combed Cotton Fabric: This is a highly recommended material due to its softness, durability, and excellent warmth-to-breathability ratio. It’s comfortable against the skin and holds up well.
- Alternatives: For extra warmth, consider fleece (super soft, no fraying edges), wool blends (excellent insulation), or even a thick, soft flannel. Ensure your chosen fabric has a slight stretch for comfort, but avoids being overly flimsy.
- Quantity: For a pair of adult socks, a piece of fabric roughly 18-24 inches (45-60 cm) long by the width of your fabric (typically 45-60 inches/115-150 cm) should be more than sufficient. You’ll only need a smaller section for each sock.
- Fabric Clips or Pins: Clips are often preferred for thicker fabrics as they hold layers securely without distorting the material or leaving pin marks.
- Pencil or Fabric Marker: For clearly marking your fabric patterns. A tailor’s chalk can also be very effective, especially on darker fabrics.
- Sewing Machine or Hand Sewing Kit: A sewing machine will make this a 10-minute project. However, if you prefer hand sewing, a basic needle and thread are all you need. Just be prepared for the project to take a bit longer. Use an all-purpose thread that matches or complements your fabric color.
- Sharp Fabric Scissors: Clean cuts are crucial for neat seams and a professional finish.
Step-by-Step Directions: Crafting Your Cozy Winter Socks
Follow these simple steps to create your own pair of custom winter socks. Remember, precision in cutting leads to a better fit and an easier sewing process!
1. Accurate Foot Measurements: The Foundation of a Perfect Fit
Begin by taking precise measurements of your feet. This is the most crucial step for achieving a custom, comfortable fit. Grab your favorite measuring tape and follow these guidelines:
- Foot Length: Measure from the tip of your longest toe to the back of your heel.
- Foot Width: Measure around the widest part of your foot (usually across the ball of your foot).
- Instep Height/Circumference: To determine the proper sock height and opening size, measure the circumference of your foot at the instep (the top part of your foot where your leg meets your foot). This measurement will inform the ‘V-shape’ cut for the sock’s opening.
- Desired Sock Height: Decide how tall you want your socks to be – ankle-height, crew, or knee-high. Measure from the floor up to this point on your leg.
Tip: Always measure both feet, as slight differences are common. Use the larger measurements to ensure both socks fit comfortably. Add a small seam allowance (e.g., 1/4 inch or 0.6 cm) to all your measurements when transferring them to fabric.
2. Preparing Your Fabric Pieces for Cutting
Lay your chosen combed cotton fabric flat and smooth on a large surface. You will need two identical pieces for each sock. So, for a pair of socks, you will prepare four fabric sections initially.
- Cut Initial Rectangles: Cut two pieces of fabric that are roughly the length and width of your foot measurements plus a few inches extra for seam allowance and error. Ensure these two pieces are identical.
- Fold and Clip: Take one of your fabric pieces and fold it in half lengthwise, ensuring the raw edges align perfectly. Secure these open edges together with clips to prevent any shifting while you cut. Repeat this for the second piece of fabric. This folding technique helps create symmetrical sock halves.
3. Shaping the Sock Body: Cutting the Foot Pattern
Now, it’s time to bring the sock shape to life. Using your pencil or fabric marker, carefully trace the outline of your foot pattern onto the folded fabric. Remember, you’re tracing the shape of half a sock, with the fold acting as the center line for the top/bottom.
- Instep Angle: From the folded portion of the fabric, measure and cut the height of your instep at a slight angle. This creates the upper part of the sock that will hug your foot.
- Toe Curve: Starting from the tip of your imagined toes down to the bottom edge of the fabric, trace and cut a smooth, rounded curve. This forms the toe box of your sock.
- Heel Curve: Similarly, for the heel of your foot, trace and cut a gentle curve. A well-defined heel curve ensures the sock cups your heel comfortably and prevents slipping.
Cut slowly and precisely along your marked lines. Once cut, unfold the fabric to reveal the full sock pattern. You should now have two symmetrical sock halves for one foot.
4. Creating the V-Shape Opening and Cuff Strips
After cutting, remove both pieces of fabric and spread them out flat on your table, completely separated. You’ll notice the upper part of the sock has a V-shaped opening where your foot will enter and where the cuff will attach.
- Measure the V-Shape: Carefully measure the entire circumference of this V-shaped section on one of your sock pieces. This measurement is crucial for determining the length of your cuff strip.
- Cut Cuff Strips: From a separate piece of fabric (or the remaining part of your main fabric), cut two long strips. Each strip’s length should match the V-shaped measurement you just took, plus a small seam allowance (e.g., 1/2 inch or 1.2 cm) for joining the strip ends. The width of these strips will determine the final height of your sock cuff (e.g., 4 inches for a 2-inch finished cuff).
- Fold Cuff Strips: Fold each strip in half lengthwise, with the “right sides” (the side you want facing out) touching. This creates a double-layered, more durable, and comfortable cuff.
5. Assembling the Main Sock Body
Now, it’s time to sew the two main sock pieces together to form the foot portion. This step brings your flat fabric into a three-dimensional sock shape.
- Right Sides Together: Place the two main sock pieces you cut in Step 3 on top of each other, with their “right sides” (the side that will be visible when finished) facing each other. Align all edges precisely.
- Stitch Sole and Heel: Using your sewing machine (or needle and thread), stitch along the curved edges of the sole and heel. You’ll be sewing from the tip of the toes, around the bottom curve, and up the back of the heel. Use a straight stitch for strength. If your fabric has stretch, a small zigzag stitch (like a lightning bolt stitch) can prevent popped seams when worn.
- Leave Openings: Crucially, do not stitch the V-shaped opening at the top of the sock or the very top edge where the cuff will be attached. These openings are essential for your foot to enter and for attaching the cuff.
- Reinforce Stress Points: Backstitch at the beginning and end of your seams, especially at the heel and toe, for added durability.
6. Attaching the Cuff and Final Touches
The last step involves attaching the cuff to the main sock body, completing your project. This is where your socks truly start to look finished!
- Form the Cuff Loop: Take one of your folded cuff strips. Sew the short ends of the strip together, right sides facing, to form a loop. Repeat for the second cuff.
- Attach Cuff to Sock: With the main sock body still inside-out, align the raw edges of your cuff loop (which is already folded and sewn into a loop) with the raw edges of the V-shaped opening on the sock. Pin or clip them securely around the entire opening. Ensure the seam of the cuff aligns with a discreet spot on the sock (e.g., the back of the heel or side).
- Sew the Cuff: Stitch the cuff to the sock body all the way around the V-shaped opening. Use a stretchy stitch (like a zigzag) if your fabric allows, as this area needs to stretch to get your foot in.
- Turn Upright: Once the cuff is securely sewn, trim any loose threads and turn your newly made sock right side out. Voilà! You’ve got a perfectly ideal, home-made sock, just the way you want it! Repeat all steps for the second sock.
Perfect for lounging around the house on a chilly evening or adding an extra layer of warmth when you venture out in style!
Tips for Success and Customization
Elevate your sock-making game with these handy tips and ideas:
- Pre-wash Your Fabric: Always pre-wash and dry your fabric before cutting and sewing. This prevents any unwanted shrinkage after your socks are finished, ensuring they retain their perfect fit.
- Test Fit: If you’re unsure about the sizing, use basting stitches (long, temporary stitches) to sew your sock together first. Try it on, make any necessary adjustments, and then sew with permanent stitches.
- Consistent Seam Allowance: Try to maintain a consistent seam allowance throughout your project. This creates neater seams and a more professional finish.
- Working with Stretchy Fabrics: If you choose a very stretchy fabric like fleece or knit, use a ballpoint needle in your sewing machine to prevent damaging the fabric fibers. A walking foot attachment can also help feed stretchy fabrics evenly.
- Add Non-Slip Soles: For ultimate safety on slippery floors, apply fabric paint designed for non-slip grip (often found in craft stores) to the bottom of your finished socks.
- Embellish Your Socks: Get creative! Add embroidery, iron-on patches, pom-poms, or even small fabric appliques to make your socks truly unique.
- Gift Idea: Handmade socks make incredibly thoughtful and personal gifts for birthdays, holidays, or just because. Package them with a warm drink mix for a cozy present.
- Kids’ Socks: This project is easily adaptable for children’s feet. Just take their measurements and follow the same steps for pint-sized coziness.
Troubleshooting Common Issues
Even with simple projects, a few hiccups can occur. Here’s how to address them:
- Socks Feel Too Tight: If your socks are too snug, especially around the instep or cuff, you might need to increase your initial measurements slightly or use a more stretchy fabric. For existing socks, you can carefully snip the inner seam allowance in a few spots (being careful not to cut the main seam) to give a little extra room.
- Socks Feel Too Loose/Slipping Down: This usually means your initial measurements were too generous, or your fabric lacks sufficient recovery. For future pairs, reduce your measurements slightly. For current socks, you could try adding a thin elastic band into the cuff, or if sewing, take in the side seams slightly.
- Seams Are Bulky or Uneven: This often happens with thicker fabrics or inconsistent seam allowances. Trim the seam allowance closer to the stitching (being careful not to cut the stitches), or press the seams open and flat using an iron.
- Cuff Isn’t Stretchy Enough: If the cuff feels restrictive, ensure you are using a fabric with good stretch for the cuff, and use a zigzag stitch when attaching it. You can also add a small piece of elastic into the cuff seam for extra stretch and staying power.
Conclusion: Embrace the Warmth of Handmade Comfort
There you have it – a comprehensive guide to crafting your very own warm and wonderful DIY winter socks. This project proves that creating custom, high-quality comfort doesn’t have to be complicated or time-consuming. In just 10 minutes (or a little longer if you’re hand-sewing or perfecting your technique), you can transform a simple piece of fabric into a luxurious haven for your feet.
So, why wait for the deep freeze to fully set in? Gather your materials, put on some calming music, and enjoy the incredibly rewarding process of making something truly special with your own hands. Your feet will thank you for the personalized warmth, and you’ll bask in the satisfaction of a handmade creation. Say goodbye to cold toes and hello to your coziest winter yet!