
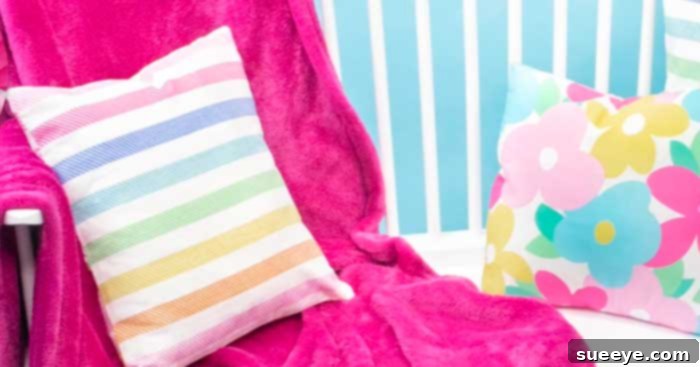
DIY 15-Minute Envelope Pillow Cover: Transform Your Home Decor with This Super Easy Sewing Project
Are you looking to refresh your living space with a personal touch without investing a lot of time or money? Perhaps you’re struggling to find the perfect pillow covers that truly match your unique style or existing decor? Look no further! Creating your own beautiful and functional throw pillow covers is much simpler than you might imagine. This comprehensive tutorial will guide you through making a stylish envelope-style pillow cover in as little as 15 minutes, making it an ideal project even if you’re new to sewing. Inspired by clear and concise instructions, such as those found on channels like Sweet Red Poppy, you’ll soon be crafting durable, removable, and easily washable covers for all your decorative pillows, adding a customized flair to every corner of your home.
The envelope pillow cover design is a fantastic choice for its simplicity and practicality. Unlike traditional pillow covers that may involve zippers, buttons, or elaborate closures, the envelope style features an elegant overlapping back. This ingenious design allows for effortless insertion and removal of your pillow forms, making washing and swapping out covers a breeze. Not only does this method result in a neat and professional finish, but it also means less fuss when it comes to maintenance. Get ready to dive into the rewarding world of DIY home decor and customize your cushions with an endless array of fabric possibilities!
Why Sew Your Own Envelope Pillow Covers? The Benefits of DIY Home Decor
Choosing to sew your own pillow covers offers a myriad of advantages that make it a beloved project for crafters and home decor enthusiasts alike. Here’s why you should consider making your next set of throw pillow covers:
- Unmatched Customization and Personalization: The most compelling reason is the freedom to select any fabric, pattern, and color that perfectly complements your home’s existing aesthetic. No more endless searching through stores for the “just right” cover; now you can bring your exact vision to life. This allows for truly unique pieces that reflect your personality and style.
- Cost-Effective Home Refresh: Purchasing ready-made decorative pillow covers, especially those of high quality or with unique designs, can quickly become expensive. Making them yourself often requires only a small amount of fabric, thread, and your time, offering significant savings while achieving a high-end, bespoke look.
- Quick and Rewarding Project: This specific envelope pillow cover style is celebrated for its incredible speed. In just about 15 minutes, you can transform a piece of fabric into a functional and beautiful pillow cover. This provides immediate gratification and a tangible sense of accomplishment, making it perfect for a weekend afternoon project.
- Effortless Maintenance: The smart envelope closure design completely eliminates the frustration of broken zippers or missing buttons. Covers are simple to slip off and toss into the washing machine whenever needed, which is particularly advantageous for homes with pets, young children, or high-traffic living areas where spills and dirt are common.
- Thoughtful and Unique Gifts: Handmade pillow covers make incredibly thoughtful and personalized gifts for housewarmings, birthdays, weddings, or holidays. A custom-made pillow cover shows care and effort that mass-produced items simply cannot convey.
- Skill Building for Beginners: For those new to sewing, this project serves as an excellent entry point. It allows you to practice fundamental sewing machine operations, learn precise fabric cutting techniques, and gain experience in handling different fabric types, all while building confidence for more complex future projects.
- Sustainable Decor Choice: By creating your own covers, you can repurpose fabrics, choose eco-friendly materials, and reduce waste associated with fast fashion or mass-produced home goods.
Essential Materials & Tools for Your DIY Pillow Cover Project
Before you embark on your sewing journey, it’s crucial to gather all your supplies. Having everything ready will ensure a smooth, enjoyable, and efficient sewing experience. While the list is minimal, the quality of your tools can significantly impact the final professional look of your pillow cover.
- Fabric: This is the creative heart of your project! Choose a fabric that not only suits your pillow’s intended use but also aligns with your desired aesthetic. For a standard 18×18 inch throw pillow, you’ll generally need about 3/4 to 1 yard of fabric, depending on the fabric’s width and any directional patterns.
- Pillow Form (Insert): This is the cushion insert that your new cover will encase. Accurately measure its exact dimensions, as all your fabric cutting measurements will be based on this.
- Sewing Machine: Any basic sewing machine capable of executing a straight stitch will be perfectly adequate for this project. Ensure it’s threaded with appropriate needle size for your fabric.
- Fabric Scissors or Rotary Cutter: Sharp scissors specifically designed for fabric are absolutely essential for clean, accurate cuts. Alternatively, a rotary cutter used with a self-healing mat and a clear quilting ruler can offer superior precision and speed, especially for straight lines.
- Iron & Ironing Board: An iron is non-negotiable for achieving a professional finish. It’s vital for pressing seams flat, creating crisp folds, and ensuring your fabric lies perfectly, which in turn leads to precise sewing.
- All-Purpose Thread: Select a high-quality all-purpose polyester thread that either perfectly matches or beautifully complements your chosen fabric color.
- Sewing Pins or Fabric Clips: These are indispensable for holding your fabric pieces securely together before and during sewing, preventing shifting and ensuring accurate alignment.
- Measuring Tape or Ruler: For taking precise measurements of your pillow form and marking your fabric.
- Fabric Chalk or Washable Fabric Marker (Optional): Useful for clearly marking cutting lines or other notations on your fabric.
Choosing the Right Fabric: A Deeper Dive into Texture and Durability
The fabric you select is paramount to the overall look, feel, and longevity of your pillow cover. Consider these critical factors when making your choice:
- Durability and Use: For frequently used throw pillows in high-traffic areas, opt for robust, medium to heavyweight fabrics such as cotton duck, canvas, upholstery fabric, denim, or even faux leather. These materials are designed to withstand regular wear and tear.
- Softness and Comfort: If the pillow’s primary function is for cuddling or comfort, lean towards softer fabrics like linen, flannel, velvet, minky, or a soft cotton blend. Consider the hand-feel against your skin.
- Texture and Visual Interest: Fabrics with interesting textures (e.g., slub linen, faux fur, corduroy, brocade) can add significant depth, dimension, and visual appeal to your home decor, creating a more layered and sophisticated look.
- Pattern, Color, and Style: This is where your personal style truly shines! Choose solid colors for timeless versatility, subtle patterns for a classic or minimalist aesthetic, or bold, vibrant prints to create a striking statement piece. Always consider how the pattern will look once cut and sewn onto the pillow.
- Washability and Care: Always meticulously check the care instructions for your chosen fabric. Most cottons and linens are conveniently machine washable, making them ideal for practical pillow covers. It is highly recommended to pre-wash and dry your fabric before cutting and sewing to prevent any future shrinkage that could distort your finished cover.
- Indoor vs. Outdoor: If you’re making covers for outdoor use, choose fabrics specifically labeled as “outdoor fabric” (e.g., Sunbrella, solution-dyed acrylics). These are treated to resist UV fading, mildew, and moisture.
Step-by-Step Guide: How to Sew Your 15-Minute Envelope Pillow Cover
Follow these straightforward steps with attention to detail, and you’ll have a beautifully finished pillow cover that looks professionally made in no time. Remember, precision in cutting and diligent pressing are your best friends for achieving a polished result!
Step One: Prepare and Precisely Cut Your Fabric Pieces
Accuracy in this initial step is absolutely crucial for ensuring a perfectly fitting pillow cover that isn’t too baggy or too tight. You will need to cut three distinct pieces of fabric: one for the front of the pillow and two for the overlapping back panels.
- Measure Your Pillow Form Accurately: Begin by precisely measuring both the width and the height of your pillow form. For instance, if you have a standard 18×18 inch pillow form, these will be your foundational measurements.
- Cut the Front Piece: Cut one piece of your chosen fabric to the exact dimensions of your pillow form. If your pillow form measures 18×18 inches, your front fabric piece should also be precisely 18×18 inches. This ensures a snug and taut fit for a plump pillow.
- Cut the Back Pieces for the Envelope Opening: Now, for the two back pieces that will create the signature envelope opening. Each back piece needs to be the full width of your pillow form, but slightly more than half the height, to allow for a generous overlap and adequate seam allowance.
- Width: This measurement should be exactly the same as your pillow form’s width (e.g., 18 inches).
- Height: To calculate the height, take your pillow form’s height, divide it by two, and then add an additional 3 inches. This extra allowance is critical for the hem and the secure overlap of the envelope.
* Formula: (Pillow Form Height / 2) + 3 inches.
* Example for an 18-inch pillow: (18 inches / 2) + 3 inches = 9 inches + 3 inches = 12 inches.
* Therefore, you will cut two back pieces that are 18 inches wide by 12 inches high. This ensures a substantial and secure overlap for your envelope closure.
Image courtesy of Sweet Red Poppy, adapted from YouTube video.
Step Two: Hem the Back Panels for a Clean and Durable Finish
This crucial step creates the neat, finished edge for your envelope opening, preventing unsightly fraying and significantly enhancing the durability and professional appearance of your pillow cover.
- Prepare the First Back Piece: Take one of your two cut back fabric pieces. Along one of its longest raw edges (which would be the 18-inch side in our example), carefully press the raw edge inward by 1/2 inch using your iron. A crisp fold is key here.
- Create the Double-Fold Hem: Now, take that first pressed fold and flip it over *again* by another 1/2 inch. Press firmly to create a clean and sturdy double-fold hem. This technique encloses the raw edge entirely.
- Sew the Hem Securely: Using your sewing machine, carefully sew along the inner edge of this newly created double-folded hem, approximately 1/4 inch from the pressed edge. Remember to backstitch at both the beginning and the end of your seam to securely lock your stitches in place and prevent unraveling.
- Repeat for the Second Back Piece: Perform steps 1 through 3 on the remaining back fabric piece. It’s important that both back panels have a neatly hemmed edge along one of their long sides, as these will form the visible opening of your envelope closure.
Step Three: Assemble the Pillow Cover Layers (Right Sides Together)
Now it’s time to bring all three precisely cut and hemmed pieces together. This is the pivotal moment where the clever design of the envelope pillow cover begins to take its final form.
- Lay Out the Front Piece: Place your main front fabric piece (e.g., 18×18 inches) onto your clean work surface with its *right side facing up*. The “right side” refers to the patterned or desired finished side of your fabric that will be visible on your completed pillow.
- Position the First Back Piece: Take one of your hemmed back pieces. Place it directly on top of the front piece, ensuring its *right side is facing down* (meaning the patterned side is touching the patterned side of the front piece). Align its raw edges perfectly with three sides of the front piece. The hemmed edge of this back piece should be positioned towards the center of the front piece.
- Position the Second Back Piece: Next, take your second hemmed back piece. Place it on top of the first back piece (and the front piece beneath it), once again with its *right side facing down*. Align its raw edges with the remaining three sides of the front piece, making sure that its hemmed edge substantially overlaps the hemmed edge of the first back piece in the center. At this point, the patterned sides of all three pieces should be touching or facing inwards.
- Verify Overlap: Carefully check to ensure that the two back pieces overlap sufficiently in the middle to create a secure and neat envelope closure. A good overlap will prevent your pillow form from peeking out.
- Secure with Pins: Meticulously pin all four outer sides of the stacked fabric layers together. Pay particular attention to pinning generously where the two back pieces overlap to prevent any shifting during the final sewing stage.
Step Four: Stitch All Sides and Finish Your Pillow Cover
The final sewing step is where your hard work culminates, and your custom pillow cover truly comes to life!
- Sew All Around the Perimeter: Using your sewing machine, stitch all the way around the outer perimeter of your securely pinned fabric stack. Maintain a consistent 1/2 inch seam allowance throughout. Begin sewing at one edge, remember to backstitch a few stitches to secure your thread, continue sewing along the edge, pivot precisely at each corner, and then backstitch again when you meet your starting point. It’s crucial to catch all layers of fabric evenly, especially where the two back pieces overlap.
- Trim Corners for Crispness: To minimize bulk and ensure perfectly crisp, sharp corners when your cover is turned right side out, carefully trim the corners of your pillow cover at an angle. Make sure to cut close to your stitch line, but without accidentally cutting through it.
- Turn Right Side Out: Gently reach into the overlapping envelope opening, carefully push out all four corners, and turn your entire pillow cover right side out. For extra sharp corners, you can use a point turner, a chopstick, or even the blunt end of a pencil to gently push them out from the inside.
- Final Press (Optional but Highly Recommended): Give your newly sewn pillow cover a final, thorough press with the iron. This step flattens all the seams, removes any wrinkles, and gives your cover a beautifully polished and professional appearance.
- Insert Your Pillow Form: Finally, slide your pillow form into your brand-new envelope cover through the convenient overlapping opening. Adjust the pillow form until it comfortably fills the corners and sides evenly, creating a plush and inviting cushion.
Image courtesy of Sweet Red Poppy, adapted from YouTube video.
Yes, it truly is that simple and rewarding! In just a short amount of time, you’ve transformed a piece of fabric into a beautiful, functional, and custom envelope pillow cover, ready to enhance your home decor.
Pro Tips for a Perfect DIY Pillow Cover Every Time
To ensure your sewing project goes smoothly and results in a stunning, professional-looking pillow cover, keep these expert tips in mind:
- Always Pre-Wash Your Fabric: It cannot be stressed enough: always pre-wash and dry your fabric using the method you intend to use for the finished product (e.g., machine wash and dry). This crucial step prevents any unsightly shrinkage or distortion after your cover is made and washed for the first time.
- Pressing is Paramount: Ironing your fabric before cutting and pressing your seams meticulously at each and every step of the construction process is not an optional extra; it is fundamental. Pressing ensures precise cutting, neat seams, and contributes immensely to a crisp, professional finish.
- Use Sharp, Dedicated Tools: Dull fabric scissors or a worn-out rotary blade can lead to jagged edges, inaccurate cuts, and frustration. Always use sharp tools specifically dedicated to fabric to ensure clean, smooth lines.
- Backstitch at the Beginning and End: Make it a habit to always backstitch (sew a few stitches forward, then a few backward, then forward again) at both the beginning and the end of every seam. This locks your stitches securely in place and prevents them from unraveling over time.
- Maintain a Consistent Seam Allowance: Strive for an even and consistent seam allowance throughout your entire project. This is vital for maintaining the intended shape and precise size of your pillow cover and ensures a symmetrical final product.
- Pillow Form Size vs. Cover Size for Plumpness: For a truly plump, professional, and full-looking pillow, many experienced sewers prefer to make their pillow cover slightly smaller (typically 1/2 inch to 1 inch smaller) than their pillow form. For example, for an 18×18 inch form, you might cut your front piece at 17.5×17.5 inches. This creates a firmer, more substantial pillow.
- Test Your Stitches: Before committing to your main project, perform a quick test stitch on a small scrap piece of your chosen fabric. This allows you to check your sewing machine’s tension settings and ensure your stitch length and appearance are exactly how you want them.
- Choose Directional Prints Wisely: If using a fabric with a one-way print (e.g., animals, words), ensure all your fabric pieces are cut with the print oriented in the correct direction when the pillow cover is finished.
Care and Maintenance of Your Handmade Pillow Covers
To ensure your beautiful new handmade pillow covers last for many years and retain their vibrant appearance, proper care is absolutely essential. While you should always refer to the specific care instructions for your chosen fabric, here are some general guidelines that apply to most homemade covers:
- Machine Wash (General): Most cotton and linen covers can be safely machine washed. Opt for a gentle cycle using cold water and a mild, color-safe detergent to protect the fabric and prevent fading.
- Avoid Harsh Bleach: Bleach and harsh chemical whiteners can severely damage fabric fibers, weaken seams, and cause colors to fade prematurely. Avoid using them unless specifically recommended for your fabric.
- Drying Methods: Tumble dry your pillow covers on a low heat setting to minimize shrinkage and protect fabric integrity. For best results and to further prevent shrinkage and wrinkles, air dry by laying them flat or hanging them. Iron on a medium setting if needed to remove wrinkles, preferably while slightly damp.
- Spot Clean for Small Spills: For minor spills or stains, address them immediately. Gently spot clean the affected area with a damp cloth and a very mild soap solution, then blot dry.
- Protect from Direct Sunlight: Prolonged exposure to direct sunlight can cause fabrics to fade over time. Rotate your pillows or use window treatments to minimize sun exposure for longevity.
Unleash Your Creativity: Endless Customization Ideas for Your Pillow Covers
Once you’ve mastered the basic envelope pillow cover technique, an entire world of creative possibilities opens up. Don’t stop at the basics; get creative and make your pillows truly unique and reflective of your personal style!
- Add Decorative Trim or Piping: Elevate the sophistication of your cover by sewing in decorative trim, cording, fringe, or piping into the seams before the final stitch. This adds a luxurious, tailored finish.
- Embrace Color Blocking: Use two or more contrasting or complementary fabrics for different sections of the pillow cover. This can create a modern, graphic, or playful aesthetic.
- Incorporate Appliqué: Sew on fabric shapes, letters, or patches for an artistic and personalized touch. This is a great way to use up fabric scraps.
- Hand or Machine Embroidery: Embellish your fabric with intricate hand embroidery or a machine embroidery design before assembling the cover. This adds texture and bespoke artistry.
- Fabric Paint or Stenciling: For a non-sewing embellishment, use fabric paints or stencils to add custom patterns, quotes, or designs directly onto your fabric. Ensure paints are heat-set according to instructions.
- Experiment with Different Sizes & Shapes: The same fundamental envelope technique can be easily adapted for square, rectangular, or even slightly more complex pillow forms (with minor adjustments for curves). Think beyond the standard square!
- Mix and Match Fabrics: Use a patterned fabric for the front and a solid coordinating fabric for the back, or vice-versa. Textural contrasts can also be very appealing.
- Add Buttons or Ties: While the envelope style is great, you could add decorative non-functional buttons or ties to the hemmed edge for extra visual interest.
Frequently Asked Questions About Sewing Envelope Pillow Covers
- Q: Can I make an envelope pillow cover without a sewing machine?
- A: Absolutely! While a sewing machine makes this project incredibly fast and easy, you can certainly hand-sew an envelope pillow cover. Use a sturdy backstitch for durability, especially on the seams. It will require more time and patience but is entirely feasible for those without machine access.
- Q: How do I calculate the fabric needed for a different sized pillow form?
- A: For the front piece, always cut it to the exact dimensions of your pillow form (e.g., for a 20×20 inch pillow, cut 20×20 inches). For the two back pieces, each should be the full width of your pillow form, and the height is calculated as (Pillow Form Height / 2) + 3 inches for seam allowance and overlap. Always add a little extra fabric if you’re unsure or working with a busy directional print.
- Q: My finished pillow cover looks a bit baggy. What might have gone wrong?
- A: A common reason for a baggy cover is cutting the fabric too large. For a snug, plump, and professional-looking fit, many sewers prefer to cut their front piece 1/2 inch to 1 inch smaller than the pillow form’s actual dimensions. For example, for an 18×18 inch form, you might cut the front piece 17.5×17.5 inches.
- Q: What type of fabric is best for outdoor throw pillows?
- A: For outdoor pillows, always seek out fabrics specifically designed for outdoor use. Look for weather-resistant materials such as outdoor canvas, Sunbrella, or solution-dyed acrylics. These fabrics are engineered to resist fading from UV rays, mildew, and moisture, ensuring longevity in outdoor environments.
- Q: Can I use this envelope method for pillows with a different shape, like rectangular?
- A: Yes, absolutely! The same envelope principle applies perfectly to rectangular pillow forms. Simply adjust your width and height measurements according to your specific rectangular pillow. For example, for a 12×20 inch rectangular form, your front piece would be 12×20 inches. Your two back pieces would each be 20 inches wide, and their height would be calculated as (12 inches / 2) + 3 inches = 9 inches high.
- Q: How can I make my pillow cover even faster?
- A: To speed up the process, ensure your fabric is pre-washed and pressed flat before you start. Use a rotary cutter for quick, precise cuts. Prepare all your pieces and thread your machine before you begin sewing. Focusing on one step at a time for all covers if you’re making multiple can also improve efficiency.