
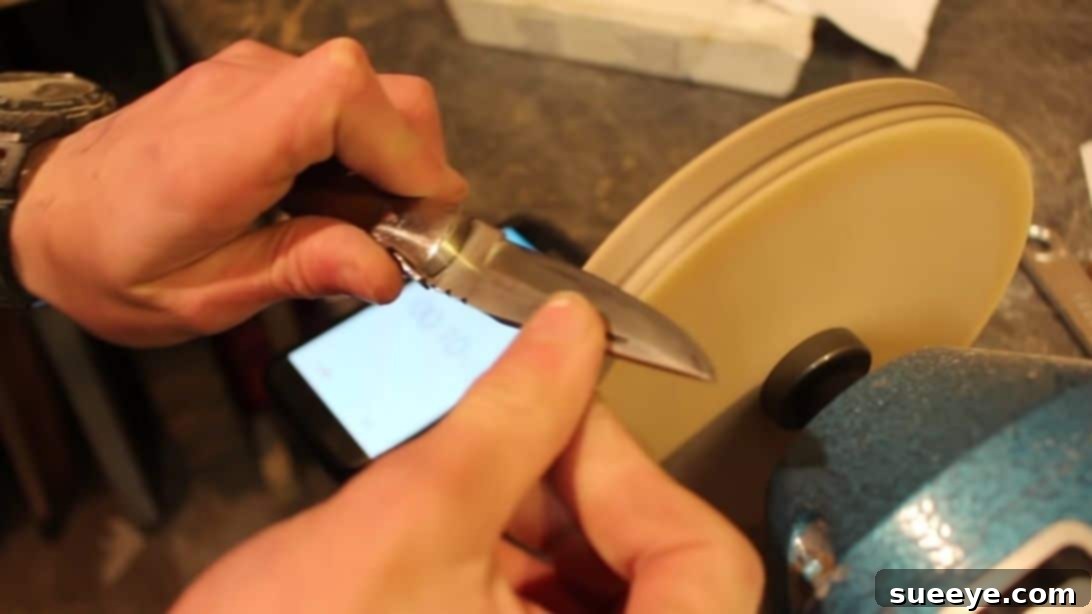
For anyone who finds joy in the culinary arts, whether it’s a dedicated chef or a home cooking enthusiast, a truly sharp knife is not merely a tool but an indispensable extension of their skill. The quality of your cuts directly impacts the preparation, presentation, and even the flavor of your dishes. A dull knife, on the other hand, can turn a pleasurable task into a frustrating, inefficient, and surprisingly dangerous chore. It demands more force, increasing the risk of slips and accidents, and compromises the integrity of delicate ingredients.
Fortunately, achieving and maintaining razor-sharp edges doesn’t require expensive professional services or complicated equipment. This comprehensive guide will empower you to transform your dull blades into precision instruments using two effective DIY methods. We’ll delve into a remarkably fast technique demonstrated by the experts at TAOW on YouTube, capable of restoring a keen edge in as little as one minute. Additionally, we will explore the timeless art of whetstone sharpening, offering a meticulous approach for those who seek ultimate control and refinement. By the end of this tutorial, your knives will be so sharp they’ll effortlessly slice through paper, a true hallmark of a perfectly honed blade.
Mastering Knife Sharpening: Achieve Razor-Sharp Blades at Home
Before diving into the sharpening techniques, gathering the correct tools is crucial. Each item plays a vital role in ensuring a safe, efficient, and ultimately successful sharpening process.
Essential Materials for Knife Sharpening
- Bench Grinder or Power Drill: These power tools serve as the engine for our DIY sharpening wheel, providing the rotational force needed for rapid material removal and polishing. If using a power drill, ensure it can be securely mounted or held for stable operation. Safety is paramount when operating such equipment.
- Plywood: A sturdy piece of plywood, approximately 15cm x 15cm (6×6 inches) or slightly larger, will be transformed into your custom sharpening disc. Its rigidity is essential for consistent results.
- Pencil: A basic but indispensable tool for marking and measuring your plywood disc, ensuring precision before cutting.
- Wet Stones (Whetstones): Also known as sharpening stones, these are abrasive blocks used with water (or sometimes oil) to hone a knife’s edge. Different grits are available, from coarse for significant edge repair to very fine for polishing. We recommend having at least a medium-grit stone for general sharpening and a fine-grit stone for refinement.
- White Polishing Compound: This specialized abrasive paste, often in stick or bar form, is applied to the sharpening wheel or strop to achieve a mirror-finish edge and remove any microscopic burrs. It’s crucial for achieving that final, hair-splitting sharpness.
- Safety Goggles: (Highly Recommended) Protect your eyes from metal particles, wood debris, or polishing compound fragments, especially when using power tools.
- Work Gloves: (Highly Recommended) Offer protection against accidental cuts and improve grip, enhancing safety during the sharpening process.
Step-by-Step Guide to Sharpening Your Knives
We will explore two distinct methods, each offering unique advantages. Choose the method that best suits your comfort level, the type of knife you’re sharpening, and the speed you desire.
Method 1: The Rapid Bench Grinder & Plywood Wheel Technique
This method leverages the power of a bench grinder or drill to create a fast and effective sharpening system, ideal for quickly restoring severely dull knives to a formidable state. It’s important to approach this method with careful attention to safety and technique.
Step 1: Preparing Your Custom Sharpening Disc
Begin by taking your plywood piece. Using your pencil and a ruler or compass, mark the exact center of the board. From this center point, measure and draw a perfectly round pattern with a 15cm (approximately 6 inches) diameter. Precision here ensures a balanced wheel. Carefully cut out this circular disc from the plywood. Once cut, mount the plywood disc securely onto the arbor of your bench grinder or a drill chuck. Ensure it is tightly fastened and spins without wobble. Turn the machine on briefly and lightly chisel the spinning side of the wooden disc. This process helps to true up the disc, trimming any excess material and smoothing out any rough surfaces, which is vital for a consistent and even sharpening action.
Step 2: Safety First and Polishing Compound Application
Before introducing your knife, a critical safety check is imperative. Observe the direction of the disc’s rotation. It is absolutely crucial that the grinding face of the wooden disc spins *away* from the cutting edge of the knife. Sharpening into the rotation could cause the knife to catch, resulting in dangerous kickback or severe chipping of the blade. Always wear your safety goggles. Once the rotation direction is confirmed, turn the machine off and apply the white polishing compound generously over the entire working surface of the disc. This compound, containing fine abrasive particles, is key not just for sharpening but also for polishing the knife to a bright, shiny finish and removing any unwanted micro-burrs or material from the blade’s surface. Reapply as needed throughout the sharpening process.
Step 3: Sharpening the Blade with Precision
With the polishing compound applied and the machine on, carefully bring the knife’s edge to the spinning disc. The most critical aspect of this step is maintaining a consistent angle. For most kitchen knives, an angle between 15 and 20 degrees per side is ideal for a sharp, durable edge. Imagine the angle of the existing bevel on your knife and strive to replicate it. Apply very light pressure; the speed of the disc and the abrasive compound do most of the work. Excessive pressure can overheat the blade, reducing its hardness and causing it to dull faster, or even chip the edge. Make controlled, smooth passes, moving the blade across the entire width of the disc, from heel to tip. Sharpen one side until you feel a slight burr (a tiny lip of metal) forming on the opposite side of the edge. Then, switch to the other side and repeat the process to remove the burr. Alternate sides with fewer and lighter passes as the knife gets sharper, refining the edge with each stroke. This method can restore a remarkably keen edge very quickly.
Method 2: The Traditional and Precise Whetstone Sharpening Method
Whetstone sharpening is a time-honored technique that offers exceptional control and precision, making it the preferred method for high-quality or delicate knives. While it requires more patience and practice than the power tool method, it yields a consistently refined and razor-sharp edge with minimal material removal.
Step 1: Preparing Your Whetstones
The name “wet stone” isn’t just for show – moisture is essential. Before you begin, soak your whetstones in water for 5-10 minutes, or until no more bubbles emerge. This ensures the stone is thoroughly hydrated. During sharpening, continuously splash water onto the stone’s surface to create a slurry. This milky paste of abrasive particles and water is crucial for effective sharpening; it helps carry away metal filings, prevents the stone from clogging, and provides a finer abrasive action. If you have multiple grits, start with a medium-grit stone (e.g., 1000-grit) for general sharpening, then progress to a finer grit (e.g., 3000-6000 grit) for refining the edge.
Step 2: Mastering the Angle and Motion
Place the wet stone securely on a non-slip surface. Using both hands, lay the knife flat on the stone, then lift its spine until you achieve your desired sharpening angle. Again, 15-20 degrees per side is a common range for kitchen knives. Maintaining this consistent angle throughout the process is paramount for a uniform and sharp edge. Imagine slicing a thin sliver off the stone with each stroke. Glide the knife back and forth across the stone, using long, smooth strokes that cover the entire length of the blade, from heel to tip. For a right-handed person, typically, you would push the knife away from you for one stroke, then pull it back towards you for the next, or use a continuous forward and backward motion. Apply moderate pressure on coarser grits, reducing it significantly as you move to finer grits. Sharpen one side until you feel a consistent burr along the entire length of the opposite edge. This burr indicates that you’ve removed enough metal to create a new, sharp edge.
Step 3: Refining the Edge and Removing the Burr
Once the burr is formed on one side, flip the knife over and sharpen the other side. The goal now is to form a burr on the first side and then progressively reduce and eliminate it. As you work through finer grits, reduce your pressure and the number of strokes. Finish with extremely light strokes, alternating sides, to carefully remove the burr and polish the edge. A very fine burr can be removed by gently stropping the knife on a leather strop (if available) or even by carefully slicing into a piece of scrap wood. The result should be an incredibly keen edge that feels smooth and devoid of any burr. This method, while more time-consuming, offers unparalleled control over the sharpening process and is often preferred for maintaining the longevity and precision of high-end knives, as it removes less material than aggressive grinding.
Post-Sharpening: The Paper Test and Blade Maintenance
After sharpening, regardless of the method used, it’s essential to test your knife’s edge to ensure it meets your expectations. The ultimate indicator of a truly sharp knife is its ability to perform the “paper test.”
- The Paper Test: Hold a piece of paper (a standard sheet of printer paper works well) vertically with one hand. With your sharpened knife, attempt to slice through the paper from top to bottom without any tearing or snagging. A truly razor-sharp knife will slice through the paper with minimal effort, leaving a clean, smooth cut. If it tears, catches, or requires significant force, further refinement is needed.
- Cleaning and Stropping: Always clean your knife thoroughly after sharpening to remove any metal dust or polishing compound residue. A quick wipe with a damp cloth followed by a dry one is usually sufficient. For an even finer, mirror-like edge, consider stropping the knife on a leather strop charged with polishing compound. This step further refines the edge and removes any microscopic imperfections.
- Storage: Store your newly sharpened knives properly to protect their edges. Magnetic strips, knife blocks, or individual blade guards are excellent options to prevent the edge from hitting other utensils or surfaces, which can quickly dull them.
Maintaining sharp knives is not just about making cooking easier and more enjoyable; it’s fundamentally about safety. A sharp blade requires less force, giving you greater control and significantly reducing the risk of slips and accidents. By mastering these DIY sharpening techniques, you’re not only extending the life of your valuable knives but also elevating your skills in the kitchen or workshop.
Experiment with both the rapid grinder method and the precise whetstone technique to discover which one best fits your needs and preferences. With a little practice, you’ll soon be enjoying the effortless precision of perfectly sharp blades. Happy sharpening!
*All images used here are all credited to TAOW on YouTube. Follow their page for more insightful tutorials like this one.