
Revolutionize Your Beauty Routine: Discover the Ultimate DIY Magnetic Makeup Board!
Are you tired of endlessly rummaging through cluttered drawers, frantically searching for that elusive eyeshadow palette or the perfect lipstick shade? Do you dream of a perfectly organized vanity where every cosmetic item is visible, accessible, and ready at your fingertips? If these scenarios resonate with your daily struggles, then you’ve stumbled upon a truly ingenious and transformative solution that promises to redefine your morning beauty ritual: the DIY Magnetic Makeup Board. This innovative approach to cosmetic storage isn’t just a clever hack; it’s a complete game-changer designed to bring order, efficiency, and a touch of personalized elegance to your getting-ready routine.
For too long, beauty enthusiasts everywhere have battled with the chaos of conventional makeup storage. Bulky bags, overflowing drawers, and scattered products can easily turn what should be a relaxing moment of self-care into a frustrating treasure hunt. Imagine reclaiming those precious minutes each morning, no longer wasted on digging through a chaotic collection. The magnetic makeup board offers a brilliant escape from this daily struggle, providing an elegant, incredibly practical, and highly customizable way to keep your favorite items impeccably organized and always beautifully on display.
Why a Magnetic Makeup Board is an Essential Addition to Your Beauty Space
The myriad benefits of creating your own magnetic makeup board extend far beyond mere organization. This simple yet profoundly brilliant concept effectively addresses several common frustrations and inconveniences often faced by beauty lovers, elevating your entire beauty experience:
-
Unrivaled Visibility and Instant Accessibility
Bid farewell to forgotten blushes or neglected palettes that languish unseen at the bottom of a makeup bag. With a magnetic board, every single item in your collection is displayed prominently and openly, allowing you to survey your entire arsenal at a single glance. This not only makes selecting your daily essentials incredibly quick and intuitive but also encourages you to rediscover and actively use products you might have otherwise forgotten about, maximizing your investment.
-
Effortless Decluttering and Optimal Space Saving
Traditional makeup storage solutions, such as bulky organizers and multiple drawers, often consume valuable counter or drawer space, contributing to a cluttered aesthetic. A magnetic board ingeniously utilizes vertical wall space, thereby freeing up your vanity for other essentials or simply fostering a cleaner, more minimalist and serene environment. It naturally encourages you to curate your collection, keeping only the items you truly love and use regularly, thus reducing unnecessary clutter.
-
Significant Time-Saving Efficiency
One of the most immediate and universally appreciated benefits of this system is the remarkable amount of time saved. No more frantic searches for that specific bronzer, mascara, or lip gloss! Your favorite products are precisely where you left them – magnetically secured and waiting for you. Over the course of weeks and months, these reclaimed minutes accumulate significantly, allowing for a more relaxed, stress-free, and enjoyable start to your day.
-
Personalized Aesthetic Appeal and Decor Enhancement
Unlike generic, mass-produced store-bought organizers, a DIY magnetic makeup board offers complete creative freedom. It can be fully customized to perfectly match your personal style, existing room decor, and preferred aesthetic. From the choice of the picture frame to the fabric pattern, every element can reflect your unique taste, transforming a purely functional item into a beautiful, personalized piece of wall art that enhances your space.
-
Enhanced Damage Prevention and Improved Hygiene
Keeping individual makeup items separated and clearly visible on a board significantly reduces the risk of accidental breakage, such as shattered eyeshadows or cracked compacts, which often occur when items jostle against each other in drawers or bags. Furthermore, it promotes better hygiene by keeping products elevated and off potentially damp, dusty, or contaminated surfaces, prolonging their usability and safety.
The Universal Struggle: Tackling Common Makeup Storage Woes Head-On
Before delving into the practical “how-to” aspects of this project, it’s important to acknowledge the nearly universal challenges many individuals face with their growing beauty collections. We’ve all experienced it: a drawer crammed to capacity with tubes and compacts, a makeup bag bursting at the seams, or a countertop perpetually obscured by a colorful (yet undeniably messy) array of cosmetic products. This pervasive disorganization isn’t merely an aesthetic nuisance; it leads to several tangible problems:
- **Wasted Time:** Precious minutes, often during the busiest part of the day, are lost searching for specific items.
- **Forgotten and Expired Products:** Many valuable beauty products go unused because they are hidden from sight, leading to their eventual expiration and, consequently, wasted money.
- **Cluttered and Stressful Spaces:** A messy vanity or bathroom counter can make your entire personal space feel less serene, inviting, and relaxing, impacting your overall mood.
- **Damage and Breakage:** Items bumping against each other, particularly delicate powders and glass bottles, frequently results in broken compacts, spilled powders, or damaged packaging, leading to further waste.
The magnetic makeup board provides a wonderfully simple yet profoundly elegant solution to these widespread issues, restoring a sense of calm, control, and efficiency to your daily beauty routine.
DIY vs. Off-the-Shelf Solutions: The Undeniable Appeal of Crafting Your Own
While the market is flooded with numerous commercial makeup organizers and storage solutions, opting for a DIY magnetic board offers unparalleled advantages that often surpass their store-bought counterparts:
- **Exceptional Cost-Effectiveness:** You can create a highly functional, incredibly attractive, and durable organizer for a mere fraction of the price of many high-end, brand-name commercial solutions. This makes sophisticated organization accessible to all budgets.
- **Complete and Utter Customization:** From the precise size and unique shape to the specific colors, patterns, and textures, every single aspect of your magnetic board can be tailored to your exact preferences, individual needs, and existing decor. You are never limited by restrictive, mass-produced designs.
- **Deep Satisfaction of Personal Creation:** There is immense and lasting satisfaction in creating something beautiful and functional with your own hands, especially when the result is such a practical, aesthetically pleasing, and impactful addition to your daily life.
- **Eco-Friendly Potential and Sustainability:** This project offers an excellent opportunity to repurpose an old or unused picture frame, utilize scrap fabric, or even upcycle materials, contributing positively to a more sustainable and environmentally conscious lifestyle by reducing waste.
Your Step-by-Step Guide to Crafting a Stunning Magnetic Makeup Board
Ready to embark on this incredibly rewarding DIY project? The process is surprisingly straightforward, requiring only minimal tools and basic craft skills. Here’s a comprehensive breakdown of everything you’ll need and a detailed guide on how to put it all together:
Essential Materials You’ll Need:
- **A Sturdy Picture Frame:** Choose any size, material, or style that perfectly suits your available space and personal aesthetic. Larger frames naturally offer more display area. Consider exploring local thrift stores or antique shops for unique, character-filled options that can be upcycled.
- **Decorative Fabric:** A generously sized piece of fabric, ensuring it’s slightly larger on all sides than your picture frame’s inner opening. This fabric will serve as the beautiful and personalized aesthetic backdrop for your makeup collection. Select a pattern, color, or texture that beautifully complements your room’s existing decor.
- **Sheet Metal:** This crucial component forms the magnetic core of your board. Galvanized steel sheet metal (often readily available in pre-cut sizes at major hardware stores like Home Depot, Lowe’s, or local metal suppliers) is ideal. It needs to fit snugly and securely inside your chosen picture frame.
- **Strong Magnets:** High-quality neodymium disc magnets or convenient self-adhesive magnetic strips are perfect for securely attaching to the backs of your makeup items. Neodymium magnets are particularly recommended for their superior strength-to-size ratio.
- **Reliable Adhesive:** A hot glue gun, super glue, or a strong, quick-drying craft adhesive will be essential for securely attaching the fabric to the metal and the magnets to your makeup products.
- **Basic Tools:** You will need a good pair of scissors, a ruler or measuring tape, and potentially a staple gun (if your frame has a removable backing and you prefer to secure the fabric directly to it for extra tautness).
Simple and Clear Assembly Instructions:
- **Prepare Your Frame Thoroughly:** Begin by carefully removing the glass, any existing matting, and the backing from your chosen picture frame. You will only be utilizing the frame itself for this project. Take a moment to clean the frame thoroughly if necessary, ensuring it’s free of dust or debris.
- **Accurately Cut the Fabric:** Lay your sheet metal flat over the wrong side of your chosen decorative fabric. Using the metal as a guide, cut the fabric so that it extends a few inches (approximately 2-3 inches) larger on all four sides than the metal sheet. This extra fabric will provide sufficient material to wrap neatly around the metal.
- **Expertly Wrap the Metal:** Center the sheet metal precisely on the wrong side of your cut fabric. Beginning with one side, carefully fold the edges of the fabric over the metal sheet, pulling it taut to ensure a smooth, wrinkle-free surface on the front. Secure these folded edges firmly to the back of the metal sheet using your strong adhesive or staple gun. Continue around all four sides, ensuring consistent tension.
- **Securely Insert into Frame:** Once the fabric is perfectly wrapped and secured, carefully place your fabric-covered metal sheet into the picture frame, positioning it just like you would a photograph or artwork. Secure it firmly in place using the frame’s original fasteners (if applicable) or by applying a continuous bead of strong adhesive around the edges from the back of the frame, pressing gently until it sets.
- **Strategically Hang Your Masterpiece:** Allow ample time for any adhesive to completely dry and cure, ensuring everything is securely bonded. Once dry, hang your brand-new magnetic makeup board in a convenient, easily accessible location – perhaps strategically near your vanity, within your bathroom, or even discreetly inside a closet door for a truly uncluttered look.
Transforming Your Makeup into Magnetic Marvels
Now that your beautifully crafted magnetic board is complete and ready, it’s time for the exciting step of making your makeup “stick”! This process is incredibly simple and requires minimal effort:
- **Thoughtfully Choose Your Magnets:** Small, thin, yet powerful neodymium magnets are highly recommended. Their compact size means they won’t add noticeable bulk to your makeup items, and their superior strength ensures a firm hold. Alternatively, self-adhesive magnetic strips can also work effectively, especially for larger or heavier items.
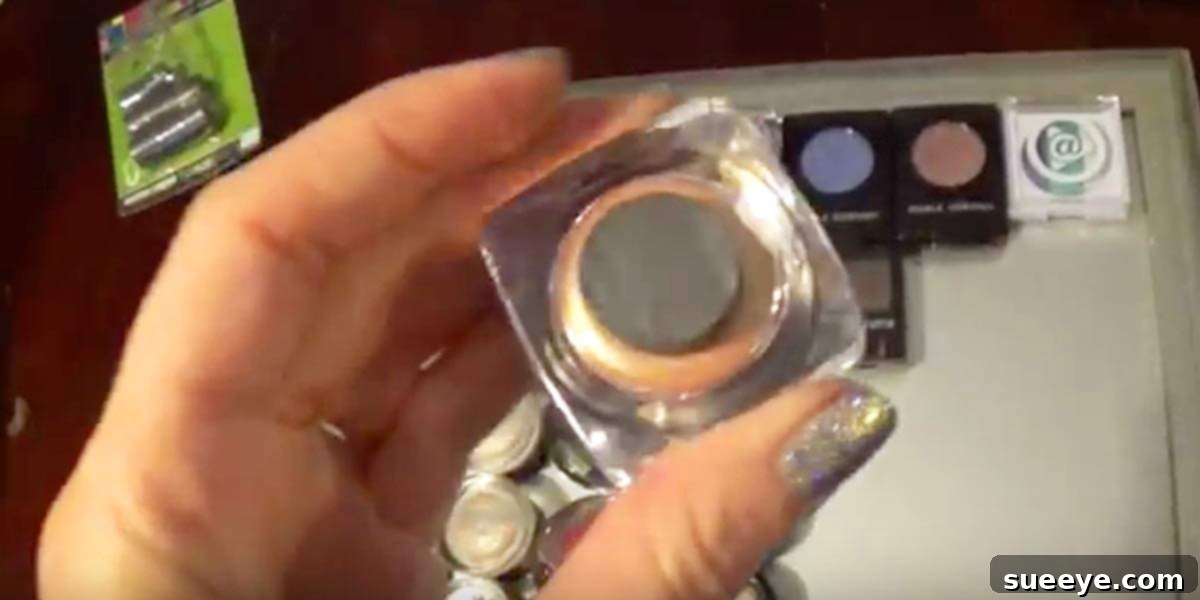
- **Carefully Attach to Makeup Items:** Simply peel and stick (if using self-adhesive magnets) or apply a tiny dab of strong, quick-drying glue to securely attach a magnet to the back of each makeup item you wish to display. Eyeshadow palettes, single eyeshadows, blushes, bronzers, highlighters, contour kits, and even lipsticks (by attaching a magnet to the very bottom) are perfect candidates for this magnetic transformation.
- **Test and Creatively Arrange:** Once the glue on your makeup items has completely dried and cured, test the strength of the magnet by placing the item on your magnetic board. Then, unleash your creativity and arrange your items in a way that is both aesthetically pleasing and highly functional on your new magnetic display. You might group items by type (e.g., all eye products together), by color family, or by the order in which you use them in your daily routine.
Designing Your Dream Makeup Display: Advanced Tips for Customization
The true beauty and enduring appeal of a DIY project lie in its boundless potential for personalization. Take the opportunity to make your magnetic makeup board truly unique and a reflection of your individual style:
- **Experiment with Frame Aesthetics:** Opt for a distressed, weathered vintage frame for a charming shabby-chic look, a sleek metallic or minimalist black frame for modern elegance, or a vibrantly painted frame to introduce a bold pop of color and personality into your space.
- **Explore Fabric Flair:** Choose fabrics with intricate patterns, luxurious textures like velvet or faux fur, or sophisticated solid colors that perfectly complement your room’s existing color palette. You could even use a striking piece of wallpaper or decorative paper for a completely different and unique visual effect.
- **Integrate Small Containers and Accessories:** Enhance functionality by attaching small, magnetic containers, cups, or even mini baskets to hold makeup brushes, eyeliners, lip pencils, or other non-magnetic items that you want to keep within easy reach.
- **Add Informative Labels and Intelligent Organization:** Consider incorporating small, magnetic labels or elegant hand-lettered tags to clearly categorize different sections of your board (e.g., “Eyes,” “Face,” “Lips,” “Brushes”) for even greater efficiency and a polished, organized look.
Beyond Cosmetics: Maximizing Your Magnetic Board’s Versatile Potential
Do not limit the utility of your fantastic new magnetic board to just makeup! This incredibly versatile organizer can prove to be exceptionally useful for a wide array of small, frequently used items throughout your home or personal space:
- **Hair Accessories Galore:** Keep all your bobby pins, hair clips, hair ties (by attaching a tiny magnet), and headbands neatly organized and always within immediate reach, preventing them from scattering.
- **Effortless Jewelry Display:** Utilize the board to beautifully display your favorite earrings, delicate necklaces, or rings, making them effortlessly easy to select each day and effectively preventing annoying tangles and misplaced pieces.
- **Handy Small Tools:** Tweezers, nail clippers, cuticle pushers, or other small beauty and grooming tools can also find a designated, organized home on your magnetic board.
- **Crafting and Hobby Supplies:** For the avid crafter, small metal dies, needles, sewing pins, or even tiny beads with metal components can be efficiently stored and accessed, streamlining your creative process.
Maintaining Your Masterpiece: Keeping It Tidy, Functional, and Pristine
To ensure your magnetic makeup board remains a consistent source of joy, efficiency, and aesthetic pleasure for years to come, a little routine maintenance goes a long way:
- **Regular Dusting:** Make it a habit to gently wipe down the fabric surface and the picture frame regularly with a soft, dry cloth or a duster to prevent any dust accumulation.
- **Targeted Spot Cleaning:** Should your fabric backdrop acquire a smudge or minor stain, spot clean it carefully and gently using a lightly damp cloth and a very mild soap solution, ensuring not to oversaturate the fabric.
- **Flexible Rearrangement:** Your makeup collection, personal preferences, and daily routine may evolve over time. Do not hesitate to freely re-arrange items on your board as needed to best suit your current needs and maintain optimal functionality.
- **Magnet Integrity Check:** Periodically inspect all the magnets to ensure they are still securely attached to your makeup items and are maintaining their strong hold on the board. Re-glue any loose magnets promptly.
Embrace the Magnetic Revolution: Say Goodbye to Clutter and Hello to Efficiency!
This truly ingenious and wonderfully practical DIY magnetic makeup board is destined to become every beauty lover’s dream come true. It represents a simple, incredibly affordable, and profoundly effective solution to one of the most common daily frustrations faced by millions. By investing just a little bit of your time and creativity into this rewarding project, you will gain countless hours back, enjoy the serenity of a beautifully organized space, and rediscover the sheer joy and full potential of your entire makeup collection.
Stop hunting and start beautifying with unparalleled ease and confidence. Join the growing ranks of those who have enthusiastically embraced this clever organization hack and fundamentally transform your beauty routine today. Your perfectly organized, always-at-hand cosmetic collection, ready to inspire and simplify your life, eagerly awaits your creation!