
DIY Marble Coasters: Craft Your Own Functional Art
Are you searching for a creative outlet that results in something both beautiful and incredibly useful? Look no further than the delightful world of DIY marble coasters! These charming creations are not only a blast to make but also serve as fantastic additions to your home decor, offering protection for your surfaces with a touch of personalized style. Imagine effortlessly whipping up a batch of these unique pieces, perfectly tailored to your taste or designed as thoughtful gifts for friends and family.
From housewarming parties to birthdays, or simply as a token of appreciation, handmade marble coasters make an unforgettable present that everyone can appreciate and use daily. The beauty of this craft lies in its simplicity and boundless customization. With just a few basic materials and a dash of creativity, you can mix and match any combination of colors, creating a marbled masterpiece that is uniquely yours. Get ready to dive into a project that promises fun, functionality, and endless possibilities!
Why Handmade Coasters Are a Must-Have
In a world of mass-produced goods, there’s a special charm and intrinsic value in items crafted by hand. DIY marble coasters stand out for numerous reasons, making them an excellent project for crafters of all skill levels.
- Unmatched Customization: Unlike store-bought coasters, your handmade versions can perfectly match your existing decor, reflect your personality, or be customized for a specific recipient. Choose vibrant hues, sophisticated neutrals, or even seasonal palettes.
- Practicality Meets Aesthetics: Coasters are essential for protecting furniture from unsightly water rings, heat damage, and spills. Why settle for bland protectors when you can have elegant, artistic pieces that enhance your living space?
- Cost-Effective Decor: Crafting your own coasters is often significantly more economical than purchasing designer sets, especially when you need several to adorn different rooms in your home.
- Therapeutic & Rewarding: The process of kneading, twisting, and shaping clay can be incredibly meditative and stress-reducing. There’s immense satisfaction in seeing your vision come to life and knowing you created something beautiful from scratch.
- Eco-Friendly Option: By making your own, you’re embracing a more sustainable approach to home decor, often using fewer resources and reducing waste compared to complex manufacturing processes.
The Magic of Oven-Baked Clay: Your Ideal Crafting Medium
Oven-baked clay, also widely known as polymer clay, is the star of this DIY project, and for good reason. Its versatility, ease of use, and durability once cured make it the perfect medium for creating long-lasting coasters.
This remarkable material starts soft and pliable, allowing you to easily blend colors, sculpt intricate designs, and achieve stunning marbled effects. Unlike air-dry clay, polymer clay remains workable until you decide to bake it in a conventional home oven, a process that hardens it into a durable, plastic-like state. It comes in a vast array of colors, eliminating the need for painting after baking, though you can certainly add extra details if you wish. Its non-toxic nature (when used as directed) also makes it a safe and enjoyable material for crafters of all ages, including children.
Essential Materials for Your Marble Coasters
Gathering your tools before you begin ensures a smooth and enjoyable crafting experience. Most of these items are readily available at craft stores or even in your own kitchen.
- Oven-Baked Clay (Polymer Clay): Choose 2-4 complementary or contrasting colors. Brands like Sculpey or Fimo are popular choices.
- Rolling Pin: For flattening your clay evenly. A dedicated craft rolling pin or a clean kitchen one will work.
- Parchment Paper or Wax Paper: To protect your work surface and prevent the clay from sticking. Also essential for baking.
- Baking Sheet: To cure your coasters in the oven.
- Round Cookie Cutters: For perfectly shaped coasters. A diameter of 3.5 to 4 inches is ideal. Don’t have one? A glass, jar lid, or even a can will work just as well!
- Craft Knife or Clay Blade: For precise cuts, if needed, and for separating clay.
- Sandpaper (fine-grit): Optional, but recommended for smoothing edges after baking.
- Clear Sealant/Varnish (Gloss or Matte): A waterproof, non-toxic sealant to protect your finished coasters from moisture and add durability. Look for craft varnishes designed for polymer clay.
- Optional: Cork or Felt Pads: Small adhesive-backed pads to stick to the bottom of your coasters, providing extra grip and furniture protection.
Step-by-Step Tutorial: Crafting Your Own Marble Coasters
Ready to get started? Follow these simple steps to create your own collection of beautiful and functional marble coasters.
Step 1: Prepare Your Workspace
Lay down parchment or wax paper on a clean, flat surface to protect it from the clay. Ensure you have all your materials within easy reach. Preheat your oven according to the clay manufacturer’s instructions (temperatures typically range from 275°F to 300°F / 130°C to 150°C).
Step 2: Condition Your Clay Colors
Take a small amount of each chosen clay color. Knead and work each piece individually until it becomes soft, pliable, and easy to manipulate. This conditioning process is crucial for preventing cracks and ensuring a smooth, even blend when you marble them.
Step 3: Create the Marbled Design
This is where the magic happens! There are several ways to achieve a marbled effect:
- Twist & Fold: Roll each conditioned clay color into a snake-like rope. Twist two or three different colored ropes together. Gently fold the twisted rope in half and twist again. Repeat this process a few times.
- Stack & Swirl: Flatten small pieces of different colored clay into thin sheets. Stack them randomly, then gently twist and roll them together to create unique swirls.
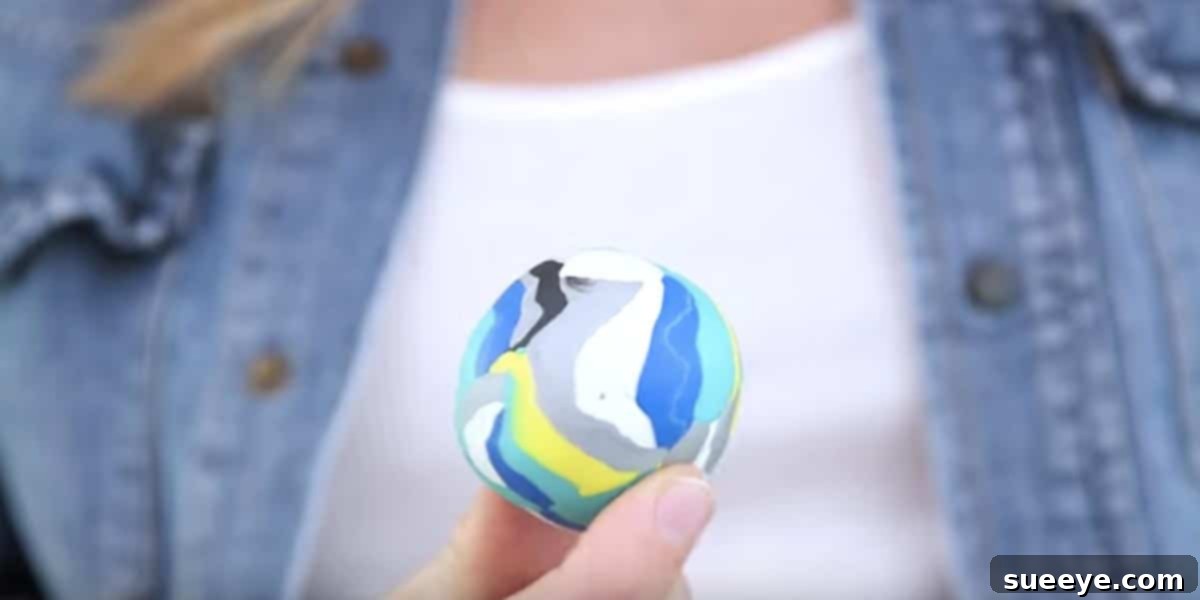
- The “Swishing and Roll” Technique: For a more organic, fluid marble effect, gently swish and roll the combined clay colors. Don’t overmix, or the colors will blend into a single muddy shade. The goal is to see distinct streaks and swirls of each color. Play around with it until you achieve the result you desire – remember, no two marbled patterns will ever be exactly the same!
Step 4: Roll and Shape Your Coasters
Once you’re happy with your marbled clay ball, place it on your parchment-covered surface. Use your rolling pin to flatten the clay evenly to a thickness of about 1/4 inch (approximately 0.6 cm). Ensure the thickness is consistent across the entire sheet to promote even baking.
Now, take your round cookie cutter (or a glass/cup) and firmly press it into the flattened clay to cut out your coaster shapes. Carefully lift the excess clay from around your cut shapes. You can re-roll any remaining marbled clay scraps to make more coasters, or condition it back to a single color for another project.
Gently smooth the edges of each cut coaster with your fingers to remove any rough spots or imperfections.
Step 5: Bake Your Coasters
Carefully transfer your unbaked clay coasters, still on the parchment paper, to a baking sheet. Place the baking sheet into your preheated oven. Bake according to the clay manufacturer’s instructions regarding temperature and time. Baking times typically range from 15 to 30 minutes, depending on the clay brand and thickness.
Important: Do not exceed the recommended temperature, as this can cause the clay to burn or release fumes. Always supervise children during the baking process.
Step 6: Cool and Finish
Once baked, carefully remove the baking sheet from the oven and let the coasters cool completely on the parchment paper. They will be soft when hot but will harden as they cool. Once cool, they should feel firm and rigid.
If desired, use fine-grit sandpaper to gently sand any rough edges or bumps for a perfectly smooth finish. Wipe away any dust with a damp cloth.
Finally, apply a thin, even coat of clear sealant or varnish to the top and sides of each coaster. This step is crucial for making them waterproof, enhancing their durability, and giving them a professional, polished look. Allow the first coat to dry completely, then apply a second coat if recommended by the sealant manufacturer. Ensure the sealant is fully cured before using the coasters.
For extra protection, attach small cork or felt pads to the bottom of each coaster. This prevents scratching on delicate furniture surfaces and helps the coasters stay in place.
Unleash Your Creativity: Design Ideas & Variations
The beauty of oven-baked clay coasters is how easily you can adapt them to various styles and themes. Don’t be afraid to experiment!
- Color Palettes: Experiment with vibrant contrasting colors for a bold statement, or subtle pastel tones for a delicate, serene feel. Consider monochromatic schemes with different shades of the same color for sophisticated depth.
- Geometric Shapes: While round is classic, try square, hexagonal, or even custom organic shapes using a craft knife.
- Textured Effects: Before baking, gently press lace, a leaf, or even a textured rubber stamp onto the flattened clay to create subtle impressions.
- Gilded Edges: After sealing, use a gold or silver paint pen to trace the edges of your coasters for an elegant, luxurious touch.
- Post-Baking Embellishments: Once sealed, you can add further details with acrylic paints, metallic markers, or even small adhesive gems for extra sparkle.
Coasters as the Perfect Personalized Gift
One of the most rewarding aspects of making these coasters is their potential as truly unique and heartfelt gifts. When you give a handmade item, you’re not just giving an object; you’re giving a piece of your time, effort, and creativity.
- Housewarming Gifts: Customize a set in the new homeowner’s favorite colors or to match their new decor. It’s a thoughtful way to welcome them to their space.
- Birthday & Holiday Gifts: A set of personalized coasters is perfect for anyone on your list, from friends and family to teachers and colleagues.
- Wedding Favors or Bridal Shower Gifts: Make a larger batch in the wedding colors for a memorable favor that guests will actually use.
- Host/Hostess Gifts: A beautiful alternative to a bottle of wine, these show genuine appreciation for their hospitality.
Imagine the delight on your friend’s face when they receive a set of coasters handcrafted by you, in the colors they adore. It’s a gift that speaks volumes without saying a word, a testament to your thoughtfulness and care.
DIY with Kids: A Fun & Educational Activity
Looking for an engaging activity to banish boredom? This DIY marble coaster tutorial is perfect for involving your children! Not only is it a fun way to spend quality time together, but it also offers numerous developmental benefits for kids:
- Fine Motor Skills: Kneading, rolling, and shaping clay helps develop dexterity and hand-eye coordination.
- Color Recognition & Mixing: Kids can learn about primary and secondary colors as they experiment with different clay combinations.
- Creativity & Imagination: Encourages children to express themselves and explore different patterns and designs.
- Patience & Problem-Solving: Following steps and waiting for the clay to bake teaches patience and sequential thinking.
- Sense of Accomplishment: There’s nothing quite like the pride a child feels when they’ve created something functional and beautiful with their own hands.
Always ensure non-toxic clay is used when crafting with children and provide adult supervision, especially during the baking stage.
Care and Maintenance for Your Clay Coasters
To ensure your beautiful handmade coasters last for years, proper care is important:
- Cleaning: Wipe them clean with a damp cloth and mild soap if needed. Avoid harsh abrasive cleaners or scrubbing pads, as these can damage the sealant.
- Avoid Dishwashers: Never put your polymer clay coasters in the dishwasher. The high heat and harsh detergents can damage the clay and sealant.
- Heat Tolerance: While oven-baked clay is durable, avoid placing extremely hot items directly from the stove or oven onto the coasters, as prolonged intense heat could potentially affect the sealant or clay over time.
- Storage: Store them in a cool, dry place when not in use.
Conclusion: Your Next Creative Adventure Awaits!
Making DIY marble coasters from oven-baked clay is truly a project that ticks all the boxes: it’s incredibly fun, yields a highly functional product, allows for endless creative expression, and makes for genuinely thoughtful gifts. Whether you’re looking to spruce up your own home, find that perfect personalized present, or engage in a delightful crafting session with your little ones, this tutorial provides all you need to get started.
So, gather your clay, choose your colors, and prepare to be amazed by what you can create. These little pieces of functional art are sure to bring joy and color into any space. Happy crafting!