
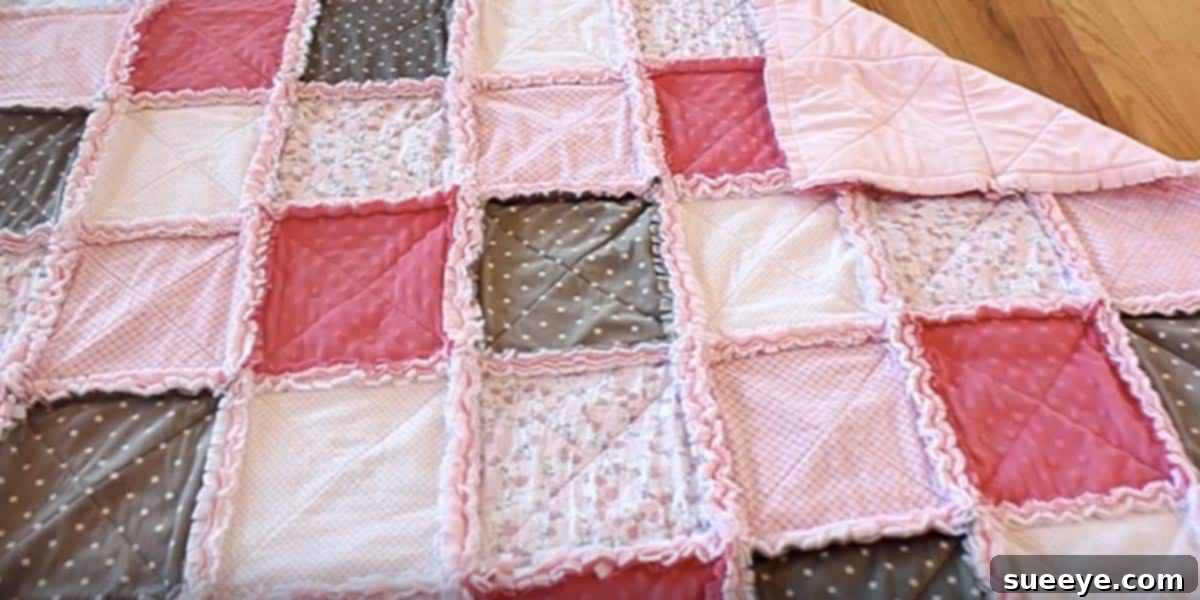
Discover the Joy of Quilting: Your Easy Guide to Making a Beginner-Friendly Rag Quilt
Embarking on a new craft can sometimes feel overwhelming, especially when the project seems intricate and beyond your current skill level. Many aspiring crafters, myself included, have felt a twinge of intimidation when contemplating their first quilt. However, what if I told you there’s a perfect starting point that makes quilting accessible, enjoyable, and incredibly rewarding? The rag quilt is precisely that project. It’s a fantastic entry point for beginners, designed with simplicity in mind, allowing you to bypass complex techniques and dive straight into the satisfying world of fabric and stitches. If the thought of making a quilt has ever felt daunting, consider this your invitation to begin with a rag quilt – it’s an experience that can quickly transform apprehension into a passion for fabric arts.
Why a Rag Quilt is the Perfect Starting Point for New Quilters
The beauty of the rag quilt lies in its forgiving nature and charming, rustic aesthetic. Unlike traditional quilts that often require precise piecing, intricate quilting patterns, and a carefully executed binding, rag quilts embrace a more relaxed approach. The signature “ragged” edges are not only intentional but are also part of the design, eliminating the need for complex finishing techniques. This means less stress about achieving perfect seams and more focus on the pure joy of creation. For those new to sewing or quilting, this simpler method offers a wonderful opportunity to build confidence, practice basic machine sewing skills, and create a beautiful, functional item without getting bogged down in advanced steps.
The process involves cutting fabric squares, layering them with batting, stitching them together with exposed seams, and then clipping those seams to encourage fraying after washing. This unique construction method is remarkably straightforward, making it an ideal choice for a weekend project or even a quick handmade gift. You’ll learn fundamental quilting principles – like selecting fabrics, layering, and basic machine operation – in a low-pressure environment. Plus, the end result is a wonderfully soft, cozy, and durable quilt that looks like it took far more effort than it actually did.
The Timeless Comfort and Sentimental Value of a Handmade Quilt
There’s an undeniable magic in snuggling beneath a favorite blanket, whether you’re lost in the pages of a captivating book, enjoying a movie marathon, or simply drifting off for a peaceful nap. Most of us cherish at least one blanket that holds special memories, a warmth that goes beyond its physical properties. These aren’t just pieces of fabric; they are comfort objects, silent witnesses to countless moments of relaxation and solace. For children, a favorite blanket can be a constant companion, a source of security and imaginative play, carrying their stories and dreams within its folds.
I’ve witnessed this firsthand with my own children, each with their beloved comfort item. My daughter, however, began to articulate a specific wish: for a quilt made just for her. She had a treasured quilt crafted by her Grandma when she was born, a testament to enduring love and generations of family warmth. But time, love, and countless adventures had taken their toll. That poor quilt was barely a blanket anymore, a mosaic of holes and fraying threads, with hardly an ounce of batting left to provide its original plushness. It was a beautiful, tattered relic, proof of a life truly lived and loved.
A Legacy of Love: Crafting a New Heirloom
Seeing her cherished heirloom slowly fade, I knew it was only fair that she too should have a brand-new, favorite blanket to snuggle. A blanket that was strong, whole, and imbued with fresh love and intention. This realization spurred me to pull out my sewing machine, select some lovely fabrics, and begin crafting a quilt specifically for her. The process was not just about making an object; it was about continuing a legacy of love, creating a new heirloom that she could cherish, wear out, and perhaps one day pass on.
The moment I finished it, her reaction was priceless. Her face lit up with an unadulterated joy and a profound sense of pride that touched my heart. It was more than just receiving a gift; it was seeing something made specifically for her, by hand, with care. That look alone made every stitch worthwhile and reinforced the powerful, emotional connection that handmade items carry. It’s a feeling that resonates deeply, far beyond the material value of the item itself.
Gathering Your Supplies: What You’ll Need for Your Rag Quilt Project
One of the appealing aspects of a rag quilt is that it doesn’t require a vast array of specialized tools. With a few basic sewing essentials and some fabric, you’re well on your way to creating your cozy masterpiece. Here’s a general rundown of what you’ll typically need:
- Fabric: The heart of your quilt! Flannel is a very popular choice for rag quilts because it frays beautifully and is wonderfully soft. Cotton is another excellent option, offering a wide variety of prints and colors. You might also consider mixing in some Minky or cuddle fabric for an extra layer of softness. You’ll need fabric for the front and back of your quilt blocks.
- Batting: This provides the warmth and loft to your quilt. Cotton batting is common and creates a lovely drape, while polyester batting tends to be puffier and lighter. You’ll cut batting squares to fit between your fabric layers.
- Thread: A strong, durable polyester thread is recommended. Choose a color that blends well with your fabrics or a contrasting one if you want your stitching to stand out.
- Sewing Machine: Any standard sewing machine capable of a straight stitch will work perfectly.
- Fabric Scissors or Rotary Cutter: Sharp scissors are essential for cutting fabric squares. A rotary cutter paired with a self-healing mat and a quilting ruler can make the cutting process much faster and more precise, especially for multiple squares.
- Pins or Fabric Clips: To hold your fabric layers together before sewing.
- Fabric Marker or Chalk: For marking your stitching lines if desired.
Selecting Your Fabrics: Color, Pattern, and Comfort
The fabric selection process is arguably one of the most enjoyable parts of making a quilt. It’s where your creativity truly shines! For a rag quilt, you can choose a cohesive color palette for a more coordinated look, or embrace a wonderfully eclectic mix of patterns and colors for a vibrant, playful quilt. Flannel is often recommended for beginners because its natural tendency to fray when washed is what gives a rag quilt its signature soft, fuzzy edges. However, cotton fabrics work just as well, and even a combination of different fabric types can add interesting texture and visual appeal.
A crucial tip for all quilting projects, but especially for rag quilts, is to pre-wash your fabrics. This step helps prevent shrinking and color bleeding after your quilt is finished, ensuring that your beautiful creation maintains its size and vibrancy over time. Think about the recipient – what colors do they love? Are there patterns that evoke a special memory or feeling? The tactile experience of a rag quilt is very important, so consider fabrics that feel good against the skin, adding to its overall cozy appeal.
The Simple Steps to Creating Your Cozy Rag Quilt (Conceptual Overview)
While I won’t provide a detailed, step-by-step tutorial with specific measurements here, understanding the basic conceptual flow will show you just how manageable a rag quilt truly is. The process typically involves these main stages:
- Cutting Your Squares: You’ll start by cutting numerous squares of fabric for the front and back of each quilt block, along with slightly smaller squares of batting to go in between. The size of your squares will determine the overall size of your finished quilt.
- Layering the Blocks: Each quilt block is typically a “sandwich” of three layers: a bottom fabric square (right side down), a batting square in the middle, and a top fabric square (right side up).
- Stitching the “X”: Many rag quilt patterns call for an “X” to be stitched across each layered square. This helps to secure the batting and adds a lovely quilted texture to each block.
- Assembling the Quilt: Once all your individual blocks are ready, you’ll begin sewing them together, first into rows, and then connecting those rows to form the larger quilt top. The key difference here from traditional quilting is that you will sew with the raw edges facing upwards, toward the front of the quilt.
- Clipping the Seams: This is the signature step of a rag quilt! Once all your blocks are sewn together and the entire quilt top is assembled, you’ll take sharp scissors and clip into the seam allowances, being careful not to cut through your stitching. These clips are what will create the beautiful frayed edges.
- The First Wash: After clipping, the quilt needs a good wash and dry. This is where the magic happens! The agitation of the washing machine and dryer will encourage those clipped seams to fray and soften, creating the characteristic “ragged” texture that gives the quilt its unique charm and incredible softness. Prepare for a lot of lint in your dryer filter – it’s all part of the process!
Essential Tips for First-Time Quilters
For your initial rag quilt adventure, remember these few encouraging tips:
- Patience is Key: Don’t rush the process. Enjoy each stage, from fabric selection to the final wash.
- Sharp Tools: Use sharp fabric scissors or a fresh blade in your rotary cutter for clean cuts.
- Consistent Seam Allowance: While perfection isn’t required, try to maintain a consistent seam allowance throughout the project for a uniform look.
- Embrace Imperfection: Handmade items have character. Don’t worry if every stitch isn’t flawless; it’s part of the charm!
- Follow a Guide: If you’re feeling unsure, look for a beginner-friendly rag quilt tutorial online. Many fantastic resources offer visual, step-by-step guidance.
The Heartfelt Impact of Giving a Handmade Gift
Making something with your own hands, like a custom-designed rag quilt, and presenting it as a gift carries an extraordinary weight of sentiment. It transcends the transactional nature of store-bought presents. When you give a handmade item, you’re not just offering an object; you’re sharing a piece of your time, your effort, and your personal creativity. This inherent investment of self is what makes handmade gifts so profoundly touching. I’ve personally experienced reactions where friends have acted as if I’ve handed them “a bar of gold” upon receiving a handmade quilt, simply because they understood the love and dedication poured into it.
Such gifts create lasting memories and foster deeper connections. They communicate thoughtfulness, care, and a unique personal touch that mass-produced items simply cannot replicate. A rag quilt, being both practical and beautiful, becomes a cherished possession, a tangible reminder of the giver’s affection and the special bond shared. It’s a gift that warms the body and the heart, making it truly priceless.
Beyond Your First Rag Quilt: A World of Creative Possibilities
Once you’ve completed your first rag quilt, you might find yourself bitten by the quilting bug! The confidence gained from finishing this accessible project often opens the door to exploring more complex quilting patterns and techniques. You might begin experimenting with different block designs, trying out traditional piecing, or even venturing into appliqué. Quilting is a hobby with endless creative possibilities, offering a satisfying journey of skill development and artistic expression.
From wall hangings and table runners to elaborate bed quilts, the world of fabric arts is vast and welcoming. Each new project presents an opportunity to learn something new, to challenge yourself creatively, and to produce something beautiful and unique. Your rag quilt is just the beginning of what could become a deeply fulfilling and enduring creative passion.
Caring for Your Rag Quilt: Achieving that Signature Softness
The care process for a rag quilt is almost as important as its creation, as it’s during the first wash that the quilt truly comes alive with its characteristic “ragged” softness. After clipping all your seams, toss your quilt into the washing machine on a gentle cycle with a mild detergent. You might want to use a color catcher if you’ve used very vibrant fabrics, just in case there’s any initial color bleeding. The real magic happens in the dryer: use a low-heat setting, and be prepared to clean your lint trap multiple times! The initial washes will produce a significant amount of lint as the clipped edges fray and soften. This is exactly what you want to achieve that plush, worn-in feel.
With each subsequent wash, your rag quilt will only get softer and cozier, making it an enduring source of comfort. Regular washing on a gentle cycle and drying on low heat will help maintain its unique texture and extend its life, ensuring it remains a beloved item for years to come.
Conclusion: Embrace Your Inner Quilter and Start Today!
Making your first quilt doesn’t have to be an intimidating endeavor. The rag quilt offers a perfect, beginner-friendly pathway into the wonderful world of quilting, proving that anyone can create a beautiful, handmade masterpiece. It’s an incredibly rewarding project that yields a cozy, charming, and deeply personal item, whether for yourself or as a heartfelt gift for a loved one. From overcoming initial apprehension to experiencing the sheer joy of creating something with your own hands, the journey of making a rag quilt is filled with satisfaction at every stitch.
So, gather your fabrics, fire up your sewing machine, and prepare to discover the immense pleasure of bringing fabric to life. There’s no better time to start, and no better project to begin with, than the humble yet magnificent rag quilt. You’ll not only gain a new skill but also create a treasured item that embodies warmth, comfort, and a touch of handmade love.