
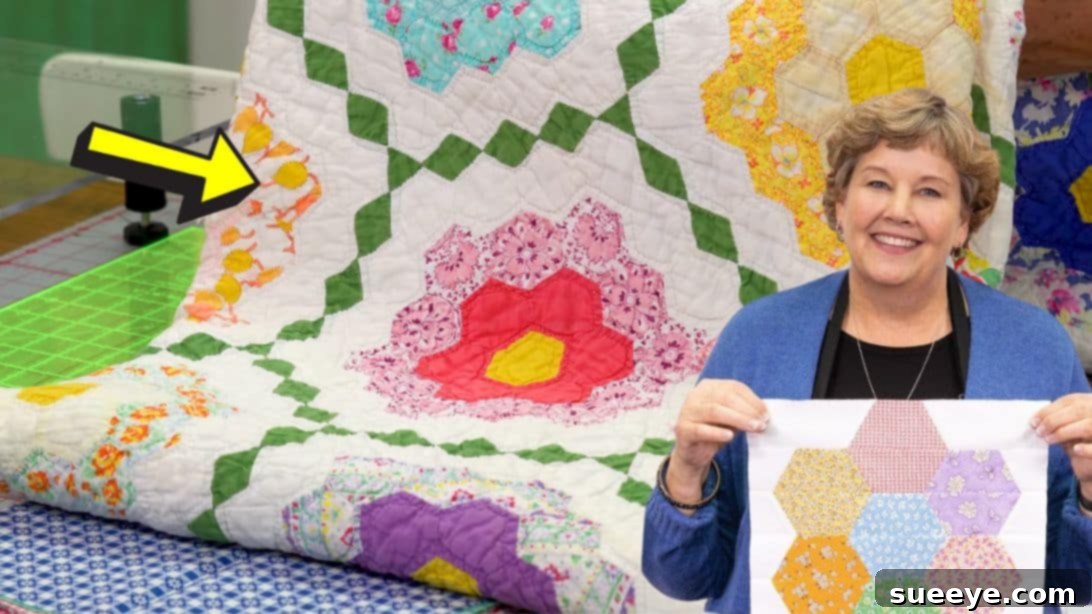
The art of quilting has captivated hearts for centuries, offering a unique blend of creativity, comfort, and heritage. Among the countless cherished designs, the Vintage Blossom Quilt stands out as a true classic. Its timeless floral motif evokes a sense of nostalgia and beauty, making it a beloved project for many quilters. While its intricate appearance might suggest a daunting task, the renowned Jenny Doan from Missouri Star Quilt Company has ingeniously developed a method that streamlines the process, making this exquisite pattern accessible to everyone, from seasoned crafters to enthusiastic beginners. This comprehensive guide will walk you through Jenny’s simplified approach, ensuring that your journey to completing this magnificent quilt is not only successful but also immensely fulfilling. Get ready to transform fabric into a stunning heirloom that will be cherished for years to come.
Why the Vintage Blossom Quilt is a Must-Make Project
The Vintage Blossom Quilt is more than just a series of sewn fabric pieces; it’s an opportunity to create a piece of art that tells a story. Its enduring appeal lies in several key aspects:
- Timeless Elegance: The floral motif and classic arrangement never go out of style, making it a perfect addition to any home decor, whether traditional or modern.
- Versatility in Design: With endless possibilities for fabric selection, you can customize your quilt to reflect any season, color palette, or personal aesthetic. From vibrant spring blooms to subtle autumnal hues, the choice is yours.
- A Sense of Accomplishment: While Jenny Doan’s method simplifies the steps, the visual complexity of the finished quilt provides an incredible sense of pride and achievement.
- Skill Enhancement: This project offers an excellent opportunity to refine your cutting, piecing, and pressing techniques, building confidence for future quilting endeavors.
Embarking on this project with Jenny Doan’s guidance means you’re not just following instructions; you’re joining a legacy of quilters who appreciate efficient and enjoyable crafting. Let’s gather our materials and dive into creating your very own Vintage Blossom Quilt.
Materials for Your Vintage Blossom Quilt
Successful quilting begins with the right materials. Jenny Doan’s method often leverages pre-cut fabrics, which save valuable time and ensure consistent sizing. Here’s a detailed list of what you’ll need to bring your Vintage Blossom Quilt to life:
- 4 packs of 5″ print squares: These pre-cut squares, often called Charm Packs, are ideal for the blossom petals. Choosing coordinating or contrasting patterns within these packs will add depth and character to your quilt.
- 1 roll of 2 1/2″ background strips: Commonly known as Jelly Rolls, these strips are perfect for the background elements that frame your blossoms and form the inner border. A neutral background color (like cream, white, or a light gray) will make your print squares pop, but don’t shy away from experimenting with bolder choices if they fit your vision.
- 1 1/2 yards of outer border fabric: This fabric will create a beautiful frame around the entire quilt, tying all your blocks together. Consider a fabric that complements both your print squares and your background strips.
- 3/4 yard binding fabric: The binding is the finishing touch that encases the raw edges of your quilt. It should be durable and either match or contrast appealingly with your outer border and quilt top.
- 5 1/4 yards of backing fabric: This is the fabric for the underside of your quilt. While often unseen, a comfortable and appealing backing can significantly enhance the overall feel and aesthetic. Consider wide-back fabrics to minimize seams.
- 5″ half-hexagon template: This specialized ruler or template is crucial for accurately cutting your half-hexagon shapes, ensuring uniformity in your blossom blocks. Precision here is key!
- Basic quilting tools: While not listed in the original, you’ll also need a rotary cutter, a self-healing cutting mat, an acrylic ruler, sewing machine, thread (good quality cotton is recommended), fabric scissors, pins or clips, an iron, and an ironing board.
Selecting your fabrics is one of the most exciting parts of the quilting process. Take your time to choose colors and patterns that speak to you, as these choices will define the personality of your finished quilt. Good quality 100% cotton fabric is recommended for its durability and ease of use.
Step-by-Step Guide: Crafting Your Vintage Blossom Quilt
Follow these detailed instructions, inspired by Jenny Doan’s efficient methods, to create your beautiful Vintage Blossom Quilt blocks. Precision in cutting and pressing will ensure your blocks come together seamlessly.
Step 1: Precision Cutting for Half-Hexagons
This initial step lays the foundation for all your blossom blocks. Accurate cutting is paramount for achieving perfectly aligned pieces later on.
Begin by taking seven of your 5″ print squares and stacking them neatly. Ensure all edges are perfectly aligned. Using your rotary cutter and ruler, carefully cut these stacked squares into four smaller 5″ squares. This initial cut helps to manage your fabric more efficiently. Next, take one of your 2 1/2″ background strips. Fold this strip in half lengthwise, ensuring the raw edges meet perfectly. Place your 5″ half-hexagon template onto the folded strip. Position the short, straight side of the template precisely along the folded edge of the fabric strip. This technique allows you to cut two mirror-image half-hexagons at once when unfolded.
Carefully cut around the curved and angled edges of the template, removing the excess fabric from both sides. Once cut, unfold the fabric. You will now have a hexagon shape with two straight edges. Use the straight edge of your acrylic ruler to cut this shape directly in half along its vertical axis, creating two separate half-hexagon pieces. Repeat this process with the remaining stacked squares and background strips until you have a sufficient number of half-hexagons to create all your desired blossom blocks. Remember, consistency in this step will ensure your blocks fit together perfectly.
Step 2: Arranging Your Blossom Blocks
This is where the creative magic truly begins! You’ll transform individual half-hexagons into beautiful floral motifs.
Select two matching half-hexagon pieces, ideally from your print squares, and position them side-by-side to form a complete hexagon shape. These will form the center of your blossom. Next, choose two more half-hexagons, which can be matching or contrasting, and place them adjacent to the first two, extending the sides of your initial hexagon. Continue adding half-hexagons in this manner, building outward, until you achieve a flower-like arrangement. The goal is to create a visually pleasing bloom that will eventually be squared off. Don’t hesitate to experiment with different fabric combinations and arrangements. Lay out several combinations on a design wall or floor. Step back and observe how the colors and patterns interact. If the initial arrangement doesn’t quite capture the look you envision, simply rearrange the pieces until you are completely satisfied with the composition of your blossom. This iterative process allows for artistic freedom and ensures that each block is unique and beautiful.
Step 3: Squaring Up the Hexagon Blossom into a Block
To integrate your beautiful blossoms into a traditional quilt layout, you need to square them off. This step involves adding background fabric strips to create straight edges around your hexagon flower.
Take several pieces of your background half-hexagons. You will need to cut some of these in the middle to create specific shapes that fit snugly against the angles of your blossom. The goal is to create a straight vertical edge on the left and right sides of your flower. Carefully place these cut background half-hexagons along the angled sides of your hexagon blossom until you achieve a straight line. For the top and bottom edges of your blossom, you will need to cut specific background strips. Start by cutting a 6″ by 2 1/2″ strip from your background fabric. To shape this strip correctly, align the end of your 5″ half-hexagon template with one end of the 6″ x 2 1/2″ strip. Cut along the template’s angle. This will give you the perfect angled piece needed for the top and bottom of your squared-off block. Place one of these angled background pieces on the top side of your blossom and another on the bottom. Repeat this shaping and placement process for the remaining sides, ensuring that all four sides of your blossom now have straight, squared-off edges. At first glance, these background pieces might appear slightly short, but once all the seam allowances are taken into account during sewing, they will align perfectly to form a 12 1/2″ square block. This meticulous step ensures uniformity across all your quilt blocks, which is essential for a professional finish.
Step 4: Assembling Individual Quilt Blocks
Now that your blossom blocks are designed and ready to be squared, it’s time to sew them together to form your completed blocks.
Begin by sewing the rows of your individual blossom block together. This usually involves sewing the smaller half-hexagon background pieces to the larger print half-hexagons, working from the center outward. Always use a precise quarter-inch seam allowance. This is a standard in quilting and ensures that your finished block dimensions are accurate. After sewing each seam, press it open or to one side. Pressing open creates a flatter seam, which can be beneficial for reducing bulk, especially where multiple seams intersect. Pressing to one side, usually towards the darker fabric, can help with nesting seams later when joining blocks. Choose the method you prefer, but be consistent throughout your project. Once you have sewn all the internal rows and components of a single blossom block, sew these rows together to complete the block. Take extra care to line up your seams accurately. Using pins at seam intersections can help prevent fabric shifting and ensure a crisp, clean finish. Repeat this process for all your blossom blocks until you have 20 completed blocks.
Step 5: Final Assembly of the Quilt Top with Sashing and Cornerstones
With all your individual blossom blocks complete, it’s time to bring your quilt top together.
First, take each finished block and press it flat. Then, square it precisely to 12 1/2″. This step is critical for ensuring that all your blocks are uniform in size, which will prevent puckering or uneven edges when you join them. A specialized squaring ruler can be incredibly helpful here. For a standard throw-size quilt, you will need a total of 20 blocks. The layout for this design is typically four blocks across and five blocks down, creating a beautiful grid of vintage blossoms. To give your blocks definition and a cohesive look, you will introduce sashing strips and cornerstones.
- Sashing: You will need 12 1/2″ strips for the sashing. These strips are sewn between your blocks, both horizontally and vertically, to frame each blossom and create visual separation. The sashing helps to enhance the “stained-glass” effect often seen in traditional quilts.
- Cornerstones: For the cornerstones, you will use 2 1/2″ squares. These small squares are sewn at the intersections of your sashing strips, adding a decorative detail and helping to align your sashing perfectly.
Lay out your 20 blocks with the sashing strips and cornerstones on a design wall or floor to visualize the final arrangement before sewing. Once you are happy with the layout, begin by sewing the sashing to the sides of your blocks to form rows. Then, sew the cornerstone squares to the sashing strips to create your connecting sashing rows. Finally, join these completed rows together to form your stunning Vintage Blossom Quilt top. This systematic approach ensures an organized and enjoyable assembly process, leading to a beautifully finished quilt.
Pro Tips for Quilting Success
To make your quilting experience even more rewarding and to achieve a professional-looking finish, consider these expert tips:
- Maintain a Consistent Seam Allowance: The quarter-inch seam is your best friend in quilting. Invest in a quarter-inch foot for your sewing machine if you don’t have one, or mark your machine bed. Consistency prevents blocks from being different sizes.
- Pressing Matters: Pressing is not ironing. Gently lift and set your iron down, rather than sliding it, to avoid distorting your fabric. Decide whether to press seams open or to one side and stick with it throughout the project for a uniform look.
- Square Up Regularly: Don’t skip the squaring-up step after each block. It makes a significant difference in how easily your quilt top comes together and reduces the chances of wavy borders.
- Pre-Wash Your Fabrics (Optional): Some quilters pre-wash fabrics to prevent shrinkage and color bleeding, especially if mixing different fabric types or colors. If you choose to pre-wash, remember to starch and press them afterward to restore their crispness.
- Invest in Quality Tools: A sharp rotary cutter blade, a good quality cutting mat, and accurate rulers are invaluable. They reduce frustration and improve the precision of your cuts.
- Take Breaks: Quilting can be meticulous work. If you feel tired or frustrated, step away for a bit. Fresh eyes can often spot errors or inspire new solutions.
- Embrace Imperfection: While precision is encouraged, remember that handmade quilts have character. Don’t let minor imperfections deter you from finishing your beautiful project.
Bringing Your Quilt to Life: Beyond the Top
Once your Vintage Blossom Quilt top is complete, you’re on the home stretch! The next steps involve layering, quilting, and binding:
- Basting: This is the process of temporarily holding the three layers of your quilt (top, batting, and backing) together. You can use safety pins, spray basting adhesive, or hand basting stitches.
- Quilting: This is where you sew through all three layers to create the texture and design of your quilt. You can choose to machine quilt (using a domestic machine or a longarm) or hand quilt. Simple straight lines, stippling, or following the contours of your blossoms are popular choices.
- Binding: The final step is to bind your quilt, which encases the raw edges, adding durability and a polished finish. This is typically done by machine sewing one side of the binding strip to the quilt edge, then hand-stitching or machine-stitching the other side to the back.
Each of these steps offers further opportunities for creativity and skill development, transforming your quilt top into a cozy, finished masterpiece.
Vintage Blossom Quilt with Jenny Doan: Your Masterpiece Awaits
The Vintage Blossom Quilt, made accessible through Jenny Doan’s brilliant instruction, is more than just a project; it’s an heirloom in the making. By following these detailed steps, you’ll not only hone your quilting skills but also create a piece that exudes warmth, beauty, and your personal touch. The satisfaction of seeing your carefully chosen fabrics transform into a blossoming garden of color and pattern is truly unmatched. Whether this is your first quilt or your fiftieth, the joy of completing such a classic design is immense.
We encourage you to embark on this creative journey with enthusiasm and patience. Remember, every stitch tells a part of your story. Don’t hesitate to refer back to Jenny Doan’s original video tutorial on the Missouri Star YouTube channel for visual guidance as you work through each step. Once finished, your Vintage Blossom Quilt will be a testament to your dedication and a source of comfort and beauty for years to come. Happy quilting!