
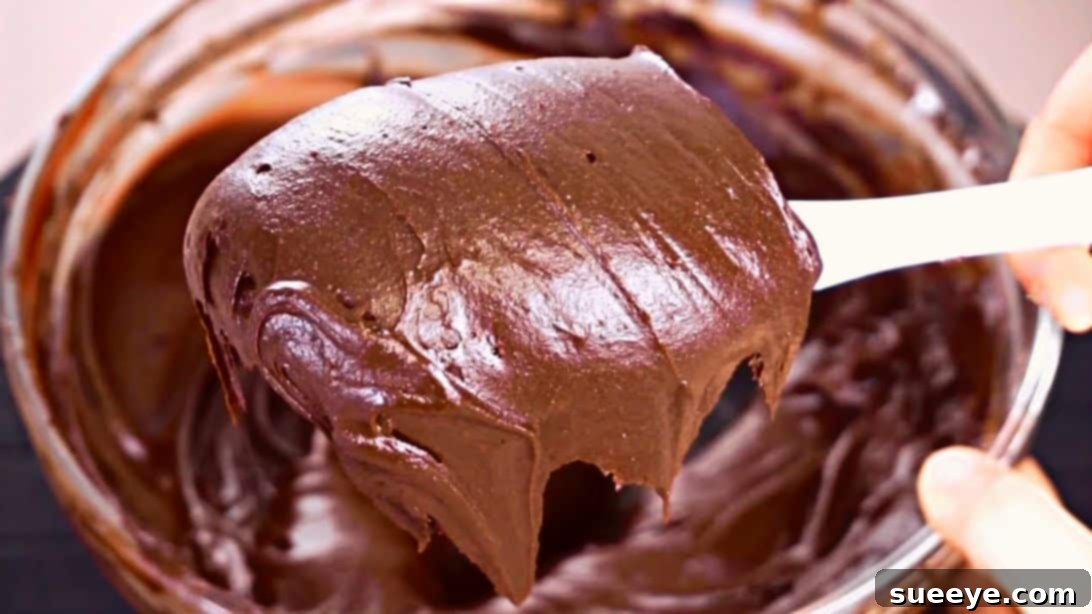
The Ultimate 10-Minute Easy Chocolate Frosting Recipe for Any Occasion
There’s an undeniable joy in baking, especially when it involves creating delightful treats for special celebrations or simply elevating an ordinary day. A truly exceptional dessert often hinges on its frosting, and when it comes to classic appeal, nothing quite beats a rich, creamy chocolate frosting. Whether you’re preparing for upcoming holidays, a birthday party, or just satisfying a sweet craving, having a reliable and quick chocolate frosting recipe is a game-changer in any kitchen.
Today, we’re diving into a sensational chocolate frosting recipe inspired by the brilliant insights of Emma’s Goodies on YouTube. What makes this recipe truly stand out? It’s incredibly easy, remarkably quick, and yields a perfectly smooth, luscious frosting in a mere 10 minutes! Requiring only six readily available ingredients, this method is virtually fail-proof and, for those who appreciate a less buttery finish, it hits just the right note. If you’re ready to master this essential chocolate frosting, continue reading for comprehensive instructions and be sure to check out her helpful video tutorial on YouTube for visual guidance.
Why This Chocolate Frosting Recipe Is a Must-Try
In a world of complex baking endeavors, finding a recipe that promises speed without sacrificing quality is like discovering a culinary treasure. This particular chocolate frosting recipe embodies simplicity and efficiency, making it an indispensable addition to your baking repertoire. Here’s why it deserves a spot in your favorites:
- Unbelievably Fast: Forget waiting hours for butter to soften or spending endless minutes whisking. This recipe truly comes together in about 10 minutes from start to finish, perfect for last-minute decorating or busy schedules.
- Simple Ingredients: With just six common pantry staples, you won’t need to hunt for exotic items. Chances are, you already have everything you need on hand.
- Fail-Proof Consistency: Designed for success, this recipe consistently produces a smooth, spreadable, and pipeable frosting. Even novice bakers will achieve professional-looking results.
- Balanced Richness: Unlike some traditional buttercreams that can feel overly heavy, this recipe strikes a beautiful balance. It incorporates just enough butter for richness without being overwhelming, allowing the deep chocolate flavor to shine through.
- Versatile Application: From elegant layer cakes and festive cupcakes to simple brownies and cookies, this frosting is incredibly versatile and adheres beautifully to various baked goods.
- Deep Chocolate Flavor: The combination of unsweetened cocoa powder and dark chocolate ensures a robust and authentic chocolate taste that will satisfy even the most discerning chocolate lovers.
Whether you’re a seasoned baker or just starting your culinary journey, this recipe empowers you to create delicious, high-quality chocolate frosting with minimal effort and maximum satisfaction.
Essential Ingredients for Your Perfect Chocolate Frosting
The magic of this 10-minute chocolate frosting lies in its simple yet effective blend of ingredients. Each component plays a crucial role in achieving the desired texture, flavor, and richness. Using good quality ingredients will undoubtedly elevate your final product, ensuring a truly decadent experience.
- 400 grams or 3¼ cups of Powdered Sugar (Confectioners’ Sugar): This is the base of our frosting, providing sweetness and contributing significantly to its smooth, fine texture. Sifting is highly recommended to prevent lumps.
- 80 grams or ⅔ cups of Unsweetened Cocoa Powder: The primary source of chocolate flavor. Opt for a good quality unsweetened cocoa powder (natural or Dutch-processed works here, but Dutch-processed often gives a darker color and smoother flavor).
- 150 grams or 1⅓ sticks of Softened Butter: Butter adds richness, creaminess, and helps stabilize the frosting. Ensure it’s truly softened, not melted, so it incorporates smoothly without making the frosting oily.
- 100 grams or ½ cup of Boiling Water: This is a key ingredient that helps dissolve the sugar and cocoa, creating an incredibly smooth consistency and enhancing the chocolate flavor. It also helps to melt the butter slightly as you mix.
- 60 grams or 2 ounces of Melted Dark Chocolate (75% cocoa recommended): This adds depth, intensity, and a more complex chocolate profile to the frosting. A higher cocoa percentage (like 75%) will deliver a more sophisticated, less sweet chocolate taste.
- 3 grams or ½ tsp of Salt: A pinch of salt is essential! It balances the sweetness, enhances the chocolate flavor, and brings all the components into harmony. Don’t skip it!
Step-by-Step Directions for Your Quick Chocolate Frosting
Follow these easy steps to create a heavenly chocolate frosting that will impress everyone. Precision and proper mixing are key to achieving that perfect, smooth consistency.
Step 1: Combine Dry Ingredients and Start Mixing
Begin by taking a large mixing bowl. Add your measured powdered sugar and unsweetened cocoa powder into the bowl. To ensure an ultra-smooth frosting, it’s highly recommended to sift both ingredients before adding them to the bowl, which prevents any lumps from forming. Using a spatula or whisk, gently mix these dry ingredients together until they are thoroughly combined and no streaks of pure cocoa or sugar remain. This initial mixing helps to evenly distribute the chocolate flavor throughout the base.
Next, introduce the softened butter to the mixture. Ensure your butter is at room temperature to allow for easier incorporation. Pour in the boiling water. Now, with a hand mixer or a stand mixer fitted with a paddle attachment, begin beating the ingredients together on a low speed, gradually increasing to medium. Continue to beat the mixture until it transforms into a wonderfully smooth and uniform consistency. Scrape down the sides of the bowl periodically to ensure everything is fully incorporated. This initial beating process is crucial for creating the creamy base of your frosting.
Step 2: Incorporate Melted Chocolate and Chill
For the next vital step, prepare your dark chocolate. Break the dark chocolate into small pieces and place them in a microwave-safe bowl. Melt the chocolate in the microwave, heating it in 30-second intervals and stirring thoroughly after each interval. This prevents the chocolate from burning and ensures a smooth, even melt. Alternatively, you can melt the chocolate using a double boiler method for a more gentle approach.
Once your dark chocolate is completely melted and smooth, add it directly to the sugar, cocoa, and butter mixture in your mixing bowl. Continue beating all the ingredients together with your hand mixer or stand mixer. Beat until the melted chocolate is fully incorporated, and the entire frosting mixture is uniform in color and texture. The addition of melted chocolate will deepen the color and enrich the flavor of your frosting significantly.
Finally, for best results and ease of application, place your freshly made chocolate frosting into the refrigerator. Allow it to chill for approximately 30 minutes. This chilling period allows the frosting to firm up slightly, making it easier to spread, pipe, and achieve a stable finish on your cakes or cupcakes. Once chilled, give it a quick stir before using.
Pro Tips for the Best Chocolate Frosting
Achieving a truly exceptional chocolate frosting goes beyond just following the steps. Here are some expert tips to ensure your frosting is always perfect:
- Sift Dry Ingredients: Don’t skip sifting the powdered sugar and cocoa powder. This is the single most important step to prevent a grainy or lumpy frosting and ensure a silky-smooth finish.
- Room Temperature Butter: Your butter should be soft enough to indent easily with a finger, but not melted or greasy. Cold butter won’t incorporate well, leading to lumps, while melted butter can make the frosting too thin.
- Quality Chocolate Matters: The type of cocoa powder and dark chocolate you use significantly impacts the final flavor. Invest in good quality products for a richer, more nuanced chocolate taste.
- Don’t Overbeat (Initially): When first combining the dry ingredients with butter and boiling water, start on low speed to prevent a cloud of powdered sugar and cocoa. Gradually increase speed.
- Achieving the Right Consistency: If your frosting is too thick after chilling, add a tiny bit more boiling water (half a teaspoon at a time) and beat again until desired consistency is reached. If it’s too thin, you can add a tablespoon or two of extra sifted powdered sugar.
- Scrape the Bowl: Regularly scrape down the sides and bottom of your mixing bowl with a spatula during the beating process. This ensures all ingredients are fully incorporated and prevents unmixed pockets.
- Chill Time is Important: The 30-minute chill time is crucial. It allows the butter and chocolate to firm up slightly, giving the frosting a better structure for spreading and piping.
Creative Variations and Serving Suggestions
While this classic chocolate frosting is perfect as is, it also serves as an excellent base for various flavor enhancements and creative applications.
Flavorful Variations:
- Espresso Kick: Dissolve 1-2 teaspoons of instant espresso powder into the boiling water before adding it to the mixture. This deepens the chocolate flavor without making it taste like coffee.
- Mint Chocolate: Add ½ to 1 teaspoon of peppermint extract along with the melted chocolate for a refreshing twist.
- Orange Zest: Incorporate 1-2 teaspoons of finely grated orange zest for a bright, citrusy note that pairs wonderfully with chocolate.
- Nutty Flavor: A tablespoon of hazelnut or almond extract can add a sophisticated depth.
- Spicy Chocolate: A pinch of cayenne pepper (¼ teaspoon) can add an unexpected and intriguing warmth.
Perfect Pairings and Serving Suggestions:
- Cakes: This frosting is ideal for decorating layer cakes (chocolate, vanilla, red velvet), sheet cakes, and Bundt cakes. Its smooth texture makes it easy to spread evenly.
- Cupcakes: Pipe it onto cupcakes using your favorite nozzle for a professional finish. It holds its shape beautifully.
- Brownies & Cookies: Spread a generous layer over cooled brownies or use it as a filling for sandwich cookies.
- Donuts & Pastries: A delightful glaze for homemade donuts or a rich filling for cream puffs and eclairs.
- Dipping Sauce: Slightly warm leftover frosting can even be served as a decadent dipping sauce for fruits or pretzels.
Storage Tips for Freshness
Proper storage ensures your delicious chocolate frosting remains fresh and ready for your next baking adventure.
- At Room Temperature: If your frosting is for immediate use (within 1-2 days) and your kitchen isn’t excessively warm, you can store it in an airtight container at room temperature.
- In the Refrigerator: For longer storage, transfer the frosting to an airtight container and refrigerate for up to 1 week. Before using, let it come to room temperature and then re-whip it with a hand mixer for a few minutes to restore its creamy consistency.
- Freezing: This frosting freezes beautifully! Store it in a freezer-safe, airtight container for up to 3 months. Thaw overnight in the refrigerator, then let it come to room temperature and re-whip thoroughly before use.
- Frosted Baked Goods: Cakes and cupcakes decorated with this frosting can generally be stored at room temperature for up to 2-3 days, or refrigerated for up to 5 days, covered loosely to prevent drying.
Frequently Asked Questions About Chocolate Frosting
Q: Can I use granulated sugar instead of powdered sugar?
A: No, powdered sugar (confectioners’ sugar) is essential for this recipe. Granulated sugar will not dissolve properly and will result in a grainy, unpleasant texture. The fine particles of powdered sugar are what give the frosting its smooth consistency.
Q: My frosting is too thick, what should I do?
A: If your frosting is too thick, especially after chilling, add a very small amount of boiling water (start with ½ teaspoon) and beat it into the frosting until you reach the desired consistency. Repeat if necessary, adding tiny amounts to avoid making it too thin.
Q: What if my frosting is too thin?
A: If your frosting is too thin, try adding 1-2 tablespoons of additional sifted powdered sugar. If it’s still too thin, chilling it in the refrigerator for 15-30 minutes will help it firm up. The butter and chocolate will solidify more when cold.
Q: Why boiling water and not milk or cold water?
A: Boiling water is key because its heat helps to partially melt the butter and fully dissolve the cocoa powder and powdered sugar, resulting in an exceptionally smooth, lump-free frosting. Milk or cold water would not achieve the same effect and might lead to a grainy or stiffer texture.
Q: Can I make this frosting ahead of time?
A: Absolutely! This frosting is great for making in advance. Prepare it as directed, then store it in an airtight container in the refrigerator for up to a week. Before using, let it come to room temperature and then re-whip it with a hand mixer until it’s light and fluffy again.
Q: What kind of cocoa powder is best for this recipe?
A: Both natural unsweetened cocoa powder and Dutch-processed cocoa powder work well. Dutch-processed cocoa powder has been treated to reduce its acidity, resulting in a darker color and a smoother, less bitter chocolate flavor. Natural cocoa powder is more acidic and offers a fruitier, sharper chocolate taste. Choose based on your preference for depth and color.
Final Thoughts on Your Easy Chocolate Frosting
This 10-minute easy chocolate frosting recipe truly lives up to its name, offering a simple, quick, and incredibly delicious way to enhance any baked treat. Its rich flavor, smooth consistency, and fail-proof nature make it an indispensable asset for both novice and experienced bakers alike. Gone are the days of complicated frosting recipes or settling for store-bought alternatives; with just a handful of ingredients and minimal effort, you can create a luxurious homemade chocolate frosting that will impress every time.
So, the next time a baking inspiration strikes or a special occasion calls for a touch of chocolatey indulgence, reach for this recipe. You’ll be delighted by how effortlessly you can transform simple ingredients into a decadent topping. We encourage you to try it out, experiment with the suggested variations, and make it your own. Happy baking, and enjoy the sweet rewards of your culinary creativity!
*A special thank you to Emma’s Goodies via YouTube for inspiring this fantastic recipe and for the images used here. If you enjoyed this recipe, we highly recommend visiting her channel for more wonderful baking ideas and tutorials – don’t forget to subscribe!