
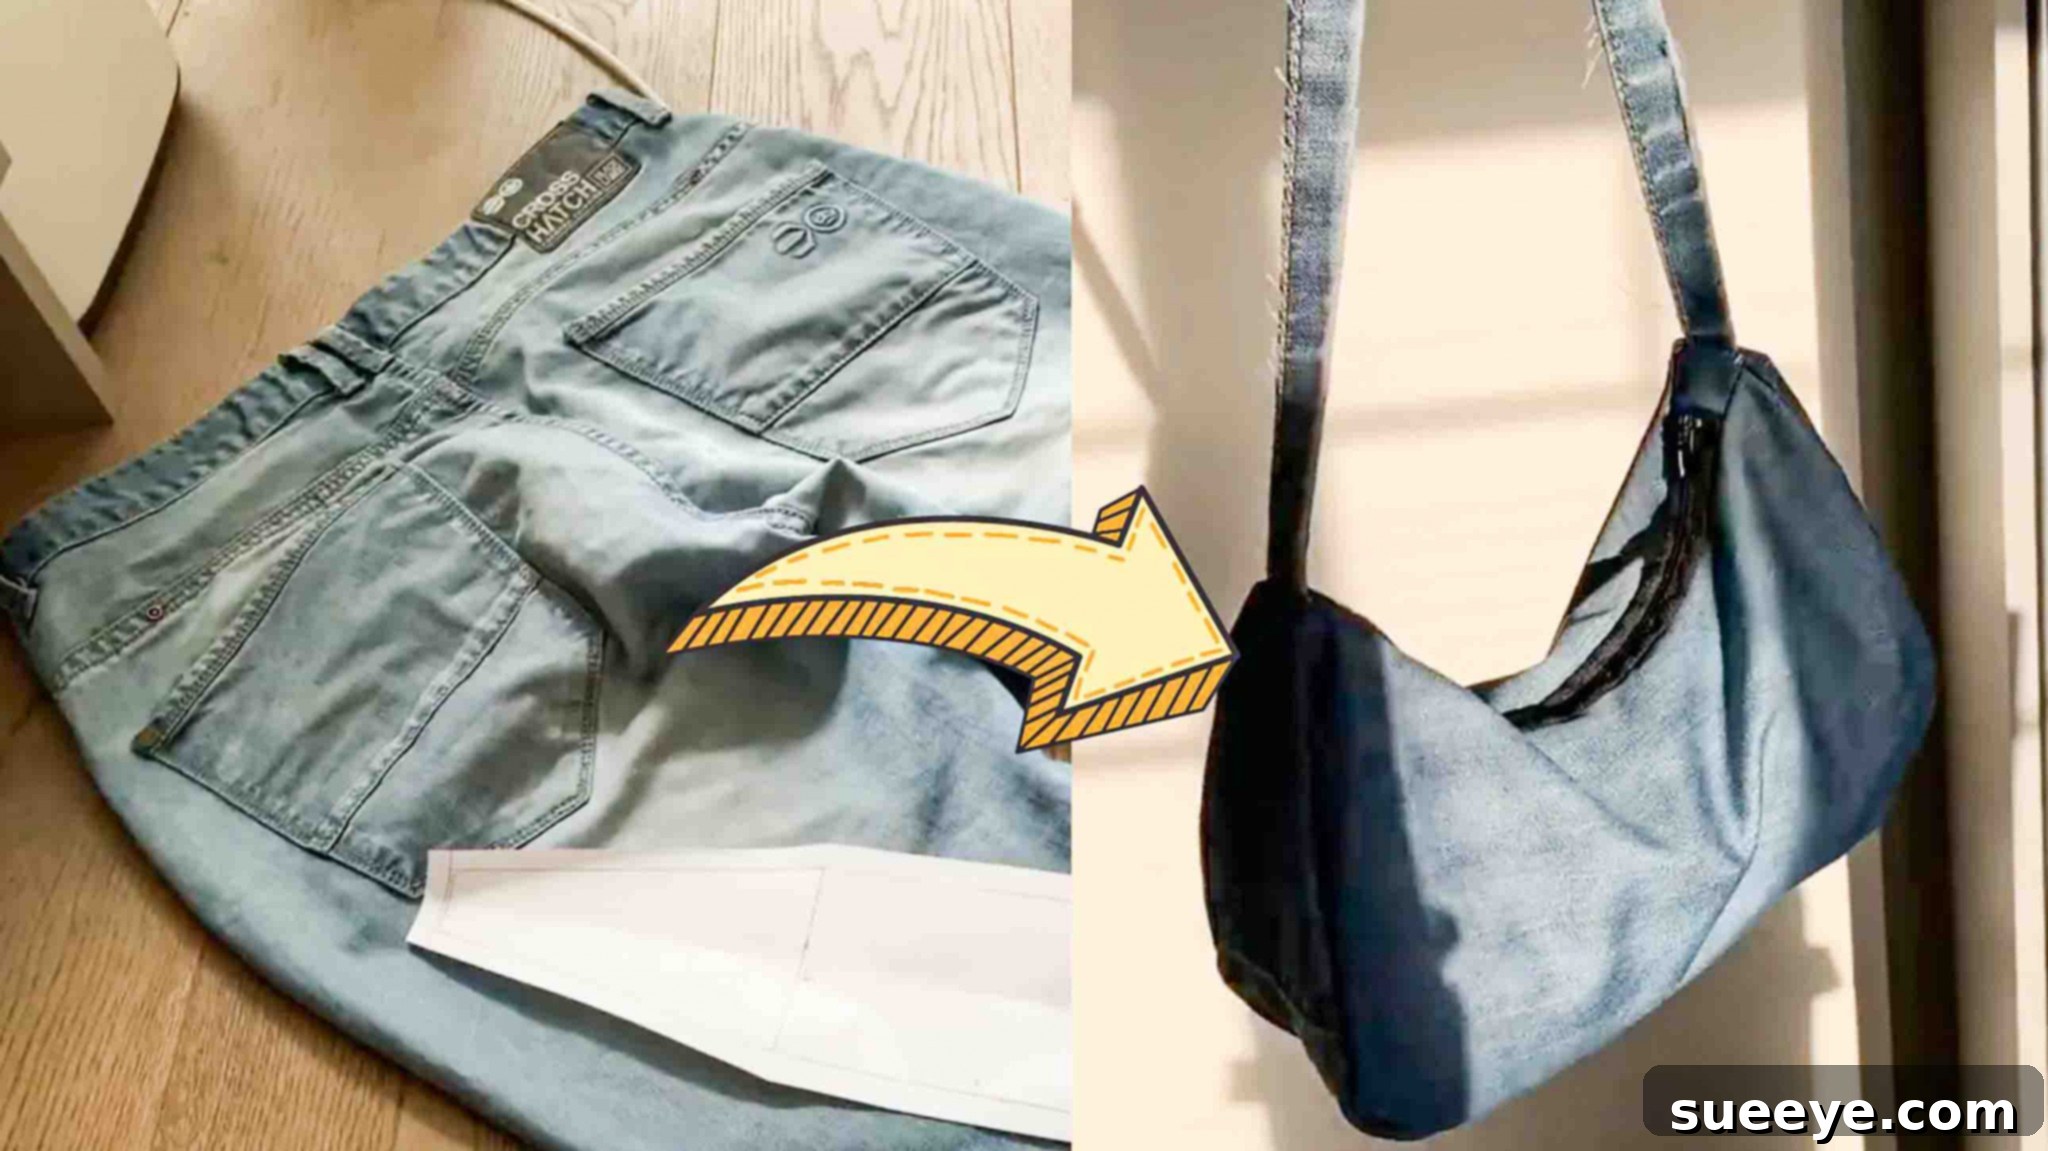
Upcycle Old Jeans: Your Ultimate DIY Baguette Bag Sewing Tutorial for Sustainable Style
Are you looking for a creative and sustainable way to refresh your wardrobe without breaking the bank? Look no further than your closet! There’s an incredibly satisfying and fashionable way to give your old jeans a new lease on life: by transforming them into a chic and trendy DIY baguette bag. This project, inspired by the fantastic tutorial from ellyantics on Youtube, is not only an excellent example of eco-friendly fashion but also results in a unique accessory you’ll be proud to carry everywhere. Its sleek design and practical size make it perfect for everyday use, adding a touch of personalized style to any outfit.
What makes this DIY baguette bag project even better is its accessibility. It’s specifically designed to be beginner-friendly, making it an ideal entry point for anyone new to sewing. You don’t need extensive experience or a vast understanding of complex sewing jargon to successfully complete this bag. We’ll guide you through each step with clear, concise instructions, ensuring that even if you’re just starting your sewing journey, you can achieve professional-looking results. Embrace the joy of crafting, learn valuable sewing skills, and contribute to a more sustainable lifestyle by turning your pre-loved denim into a fabulous, functional fashion statement.
Beyond its aesthetic appeal, upcycling old jeans into a new accessory significantly reduces textile waste. Every pair of jeans diverted from a landfill lessens environmental impact, making this project a win-win for both your style and the planet. Get ready to gather your materials and embark on a rewarding creative adventure that culminates in a truly unique, handmade denim baguette bag!
Essential Materials for Your DIY Baguette Bag
Before diving into the creative process, ensure you have all the necessary tools and materials at hand. Having everything ready will make your sewing experience smooth and enjoyable. Here’s what you’ll need to transform those old jeans into a stunning baguette bag:
- Paper and Pencil: These are crucial for drafting accurate templates, ensuring your bag’s shape and proportions are just right. Any standard paper will work, but a larger sheet or taped-together smaller sheets might be needed for the main template.
- Old Pair of Jeans: The star of our project! Choose a pair that is clean and in good condition, as the fabric will form the main body of your bag. Different washes and thicknesses of denim can offer varying textures and looks.
- Tape Measure: Essential for precise measurements during template creation and fabric cutting. Accuracy here translates to a well-proportioned bag.
- Sharp Fabric Scissors: Invest in a good pair of fabric scissors. They make cutting denim much easier and result in cleaner, more accurate edges, which are vital for a professional finish.
- Sewing Pins: Used to hold fabric pieces together before sewing, ensuring they don’t shift. A good supply of sharp pins is always handy.
- Fabric Pen or Chalk: For tracing your templates onto the denim. A fabric pen or tailor’s chalk that shows up clearly on denim is recommended, and preferably one that fades or washes away.
- Zipper: A key component for closing your baguette bag securely. Choose a zipper that complements your denim and is suitable for the bag’s opening length (around 10-12 inches is usually ideal, but you can adjust based on your bag’s final width).
- Sewing Machine (and appropriate needle/thread): While some steps can be hand-sewn, a sewing machine will make this project much quicker and provide stronger, more consistent seams, especially when working with denim. Make sure to use a sturdy denim needle and strong polyester thread for durability.
- Iron and Ironing Board: Often overlooked, an iron is invaluable for pressing seams flat as you go, which greatly improves the final appearance and structure of your bag.
Gathering these items beforehand will set you up for success and allow you to focus purely on the crafting process. Let’s get started on bringing your unique denim baguette bag to life!
Step-by-Step Guide: Crafting Your DIY Denim Baguette Bag
Creating your DIY baguette bag is a fulfilling process that involves careful preparation and precise sewing. Follow these detailed instructions to craft a beautiful, custom accessory from your old jeans.
Step 1: Crafting the Perfect Templates
The foundation of any successful sewing project lies in accurate templates. This step is crucial for defining the shape and size of your baguette bag, so take your time and measure precisely.
- Main Bag Body Template: Begin by taking a large sheet of paper and a pencil. Draw a primary rectangle with precise measurements of 10 inches in width and 6 inches in height. This rectangle will serve as the central panel for your bag’s front and back.
- Shaping the Baguette Curve: On one of the longer sides (the 10-inch side) of your rectangle, you will now sculpt the distinctive curved shape that gives the baguette bag its name. Carefully sketch a gentle, convex curve, starting from one corner and arching gracefully towards the other. Once you are happy with the curve on one half, fold your paper in half along the center of the rectangle’s width. Cut along the curved line you’ve drawn, ensuring both sides are symmetrical. Remember to leave approximately a 2 cm (about 0.75-inch) seam allowance around the entire perimeter of this template; this allowance is critical for sewing the pieces together later without sacrificing the bag’s intended size.
- Refining the Top Dip: After cutting the main body shape, unfold your template. Next, sketch a subtle dip at the very top center of the bag’s opening. This dip adds a stylish design element and makes the bag comfortable to open and close. Fold the template in half again, aligning the curved edges, and carefully cut along this new dip line to ensure symmetry.
- Measuring for the Side/Bottom Strip Template: With your main bag body template now complete, fold it in half lengthwise. Using your tape measure, carefully measure from the very top corner, tracing along the curved edge, all the way down to the middle point of the bottom edge. This measurement will define the length of the fabric strip that forms the side and bottom of your bag. Once you have this measurement, create a new rectangular template that measures 12 inches in length and 3 inches in width. This piece will be used as a guide for the continuous fabric strip that wraps around the side and bottom of the bag, giving it depth and structure.
- Creating the Trapezium Base Template: For the very bottom panel of the bag, you’ll create a trapezium-shaped template. Start by marking the halfway point along the 12-inch side of the side/bottom strip guide (which would be at 6 inches). From this 6-inch mark, draw a vertical line upwards, measuring 3 inches. This helps establish the central axis and height for your trapezium. Now, sketch the trapezium shape, ensuring it has a flat bottom and angled sides that will connect to the curved main body panels. Critically, ensure you leave a generous 1-inch gap outside the primary trapezium shape on all sides, and then add a 2 cm (approx. 0.75-inch) seam allowance around the entire perimeter when you cut the paper template. This trapezium template represents one half of the bag’s bottom, designed to accommodate the curvature of the main body pieces.
Once all your paper templates are cut, label them clearly (e.g., “Main Bag Body,” “Side/Bottom Strip,” “Bottom Panel Half”) to avoid confusion. These templates are your blueprint for a perfectly shaped baguette bag.
Step 2: Precisely Cutting Your Denim Fabric
With your templates ready, it’s time to transfer these shapes onto your denim fabric. This step requires careful placement and cutting to ensure your bag pieces are accurate and minimize fabric waste.
- Preparing Your Denim: Lay your old pair of jeans flat and smooth on a large work surface. Identify the parts of the jeans that offer the largest, flattest sections of fabric, such as the legs. Consider any interesting features like pockets or seams you might want to incorporate or avoid. For consistency, try to cut pieces from similar areas of the denim.
- Cutting the Main Bag Body Pieces: Take your main bag body template. Place it onto the wrong side of your denim fabric. Using a fabric pen or tailor’s chalk, carefully trace around the template. You will need to cut two identical pieces for the front and back of your bag. Ensure you trace neatly and clearly. After tracing, use your sharp fabric scissors to carefully cut out these two denim pieces. Cut precisely along your marked lines, as accuracy here is vital for the bag’s final shape.
- Cutting the Side/Bottom Strip Pieces: Next, take your long rectangular side/bottom strip template (the 12-inch x 3-inch guide). You’ll need to cut two pieces of denim using this template. Place the template on the denim, trace, and cut. These two strips will form the continuous side and bottom panel of your bag, giving it its three-dimensional structure.
- Cutting the Trapezium Base Pieces: Finally, place your trapezium-shaped template onto the denim. You will need to cut two identical pieces using this template. Trace carefully and cut out these two pieces. These will form the reinforced bottom of your baguette bag, providing stability.
- Organizing Your Cut Pieces: Once all pieces are cut, organize them by type (e.g., two main body pieces, two side strips, two bottom panels). This will prevent confusion during the assembly stage. Double-check that you have all the necessary pieces before moving on.
Cutting denim accurately can be challenging due to its thickness. Take your time, use sharp scissors, and make smooth, continuous cuts to avoid jagged edges. Proper cutting sets the stage for a professional-looking finished product.
Step 3: Assembling and Sewing Your Baguette Bag
Now comes the exciting part: bringing your denim pieces together to form the baguette bag! This step involves several key sewing processes, from attaching the zipper to constructing the bag’s body and strap.
- Preparing the Main Bag Panels: Take your two longer main body pieces of the bag. Identify the thicker, straighter side of each piece (this will typically be the side that was the original 10-inch rectangle before the curve and dip were cut). Pin these two pieces together along this thicker side, right sides facing. Sew along the pinned line with a straight stitch, using a 2 cm (0.75-inch) seam allowance, ensuring your stitches are secure at the beginning and end with backstitching. Press the seam open to reduce bulk and create a neater finish. You should now have one larger piece that forms the main exterior of your bag.
- Attaching Zipper Tabs: Cut two small squares (approximately 1.5 inches x 1.5 inches) from your leftover denim fabric. These will serve as zipper tabs, creating a clean finish at the ends of your zipper. Pin one small denim square to each end of your zipper, enclosing the metal stopper. Stitch these squares securely in place, sewing across the zipper tape and into the fabric tabs. Trim any excess fabric.
- Installing the Zipper: Lay one of your main bag body pieces flat, right side up. Place the zipper on top, right side down, aligning the top edge of the zipper tape with the top curved edge of the denim fabric. Ensure the zipper is centered. Pin the zipper in place. Using a zipper foot on your sewing machine, sew along the edge of the zipper tape. Repeat this process for the other main bag body piece, attaching it to the other side of the zipper. When sewing, make sure the zipper pull is out of the way; you may need to stop sewing, lift the presser foot, slide the pull past the foot, and then continue. Press the fabric away from the zipper, ensuring a neat and flat finish.
- Constructing the Bag Body: With the zipper now installed between the two main bag body pieces, lay the fabric flat with the right side up. Now, take your two long rectangular side/bottom strip pieces and your two trapezium base pieces. Pin the two side strips together along one short end, right sides facing, and sew. Repeat for the two trapezium base pieces. This creates a longer continuous strip for the side/bottom and a continuous piece for the base.
- Attaching the Bottom Panel: Turn your bag inside out (wrong side facing out). Take the combined side/bottom strip and align it with one of the main bag body pieces, starting from one end of the zipper. Pin the side/bottom strip all around the curved edge of the main bag body, matching up raw edges. Take your time to ease the fabric around the curves, clipping into the seam allowance of the side/bottom strip where necessary to make it curve smoothly. Sew all around this pinned edge, using your chosen seam allowance. Repeat this process for the other main bag body piece, attaching the other edge of the side/bottom strip.
- Integrating the Trapezium Bottom: Carefully align the trapezium bottom piece (the two trapeziums you sewed together) with the bottom edge of the side/bottom strip. This step can be a bit tricky due to the curves. Pin it meticulously all around, ensuring a smooth fit. Sew the trapezium bottom securely in place, creating the full three-dimensional shape of the bag.
- Crafting and Attaching the Strap: For a truly authentic denim look, utilize the existing hem of your old jeans to create a sturdy strap. Cut a long strip from the hem, aiming for a length that suits your preferred way of carrying the baguette bag (typically 18-24 inches for a shoulder bag). If the hem isn’t long enough, you can stitch two pieces together. At each end of the bag, you should have left a small gap (between the end of the zipper and the fabric) where the bag handle can fit through. Carefully insert one end of the denim strap into one gap, ensuring the strap is not twisted and is facing the right way. Pin it securely in place, then sew it firmly with multiple passes of your sewing machine to ensure it can withstand regular use. Repeat for the other end of the strap on the opposite side of the bag.
Throughout the sewing process, remember to backstitch at the beginning and end of each seam for added durability. Pressing your seams open after each major step will contribute significantly to a crisp and professional finish. Turn your bag right side out, admire your handiwork, and trim any loose threads. You’ve just created a unique, upcycled denim baguette bag!
Why Choose a DIY Baguette Bag Made From Old Jeans?
The allure of a DIY baguette bag crafted from old jeans extends far beyond its stylish appearance. This project embodies several benefits that resonate with modern values of sustainability, individuality, and practical skill development. Here’s why making your own denim baguette bag is an excellent choice:
Sustainable and Eco-Friendly Fashion
In an era dominated by fast fashion, embracing upcycling is a powerful statement. Millions of tons of textile waste end up in landfills each year, with denim being a significant contributor. By transforming an old pair of jeans into a functional and fashionable accessory, you actively participate in reducing this waste. You extend the life cycle of the fabric, conserving resources like water and energy that would otherwise be used to produce new textiles. This eco-conscious approach makes your baguette bag not just an accessory, but a symbol of sustainable living.
Uniqueness and Personal Style
Mass-produced bags, while convenient, often lack character. A handmade denim baguette bag, however, is inherently unique. No two pairs of old jeans are exactly alike – variations in wash, wear, and fading mean your bag will possess a distinct personality. You have complete creative control over its design, from the specific cut of denim you choose to any embellishments you might add. This allows you to express your individual style and carry a piece that truly reflects you, setting you apart from the crowd.
Cost-Effective and Budget-Friendly
Fashion can be expensive, but upcycling offers a brilliant alternative. Instead of spending money on a new bag, you’re repurposing an item you already own. The primary costs involved are minimal – perhaps just for a zipper and thread – making this an incredibly budget-friendly way to acquire a new, trendy accessory. It’s smart shopping at its finest, proving that style doesn’t have to come with a hefty price tag.
Skill Development and Personal Satisfaction
For beginners, this project is an excellent way to learn fundamental sewing techniques. You’ll gain experience with pattern making, accurate cutting, pinning, straight stitching, curved seams, and zipper installation – all valuable skills that can be applied to future sewing endeavors. The sense of accomplishment that comes from creating something beautiful and functional with your own hands is immensely rewarding. Each time you carry your DIY baguette bag, you’ll be reminded of your creativity and newfound skills.
Durability and Longevity
Denim is renowned for its strength and durability. When sewn correctly, your upcycled denim baguette bag will be robust and long-lasting, capable of withstanding daily wear and tear. Unlike some flimsier fabrics, denim holds its shape well and ages gracefully, developing character over time, much like a favorite pair of jeans. This means your handmade bag will be a reliable companion for many seasons to come.
In conclusion, choosing to make a DIY baguette bag from old jeans is more than just a craft project; it’s a commitment to sustainable living, an opportunity for self-expression, and a testament to the enduring appeal of handmade items. It’s a stylish and sensible choice for anyone looking to add a personal touch to their wardrobe while also contributing positively to the environment.