
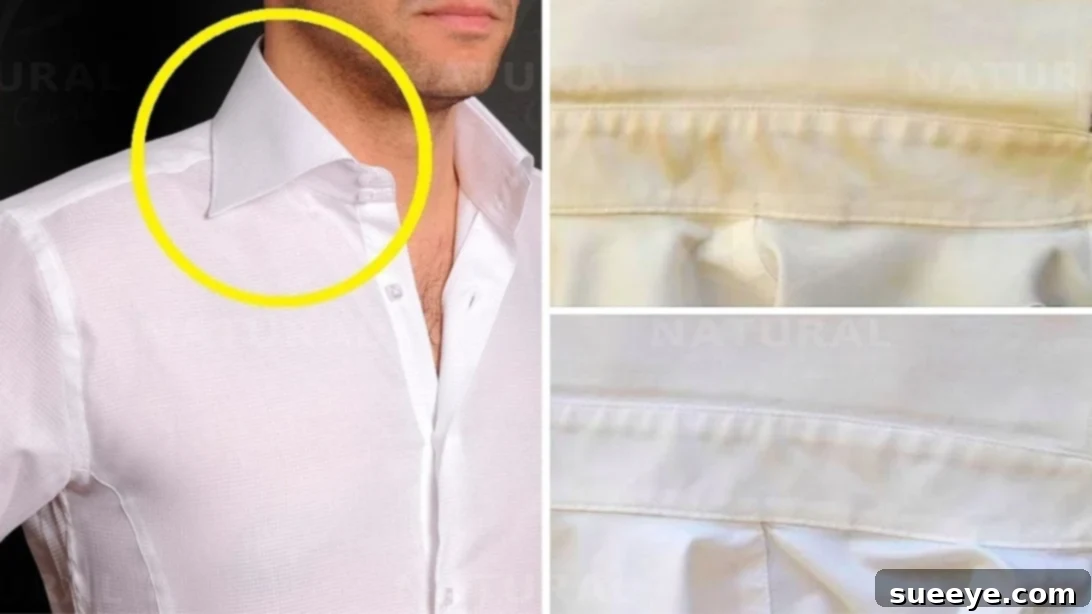
White clothes are a wardrobe staple for many, offering unparalleled versatility and a clean, crisp aesthetic. They pair effortlessly with any color or style, making outfit selection a breeze. However, this love affair with white garments often comes with a common and frustrating challenge: unsightly sweat stains, particularly around the collar and underarm areas. These yellow or dingy marks can quickly diminish the appeal of your favorite shirt, uniform, or bedding, making you feel less confident and often leading to premature disposal of otherwise perfectly good clothing.
If you’ve ever found yourself struggling to keep your whites bright, especially when daily routines involve significant physical activity or mandatory white uniforms, you’re certainly not alone. The good news is, you don’t have to resort to harsh chemicals or costly dry cleaning services to restore your garments to their former glory. We’re here to share an incredibly effective, yet surprisingly simple and budget-friendly solution that utilizes just three common household ingredients. Say goodbye to stubborn sweat stains and hello to brilliantly white clothes!
This powerful DIY stain remover, inspired by ingenious home remedies, is designed to tackle even the most persistent yellow discoloration. Not only is it highly effective, but it’s also gentle on your fabrics and much cheaper than commercial alternatives. Ready to transform your laundry routine and revive your whites? Keep reading for the full, step-by-step instructions and discover how easy it is to achieve pristine results.
Understanding Sweat Stains: Why Do They Appear on White Clothes?
Before diving into the solution, it’s helpful to understand what causes these frustrating stains. Contrary to popular belief, pure sweat itself is largely clear and odorless. The yellowing often associated with sweat stains isn’t just from perspiration alone. It’s typically a chemical reaction between the proteins, oils, and salts in your sweat and the aluminum compounds found in many antiperspirants. When these elements combine and are exposed to oxygen and the heat of your body, they can create a stubborn, yellowish residue that bonds with the fabric fibers. Over time, these stains can darken and become more challenging to remove, especially if they are “set in” by machine drying.
Factors like diet, stress levels, fabric type, and even certain medications can influence the composition of your sweat and, consequently, the likelihood and severity of these stains. While preventing them entirely can be difficult, understanding their origin empowers you to choose more effective treatment and prevention strategies.
Gather Your Simple Ingredients and Tools
One of the best aspects of this homemade stain remover is that it calls for items you likely already have in your pantry or laundry room. No need for specialized or expensive products! Here’s what you’ll need to assemble:
- One Teaspoon of Dishwashing Liquid: Any brand you prefer will work. The degreasing power of dish soap is crucial for breaking down body oils and the fatty components of sweat.
- Three to Four Tablespoons of Hydrogen Peroxide (3% Solution): This is a key ingredient for its powerful oxidizing properties, which help to break down and lift the discoloration. Always use a 3% solution, commonly found in pharmacies, as stronger concentrations can be too harsh for fabrics.
- Two Tablespoons of Baking Soda: A natural abrasive, deodorizer, and brightener, baking soda works synergistically with hydrogen peroxide to lift stains and refresh fabrics. Its mild alkalinity also helps balance the solution.
- Small Plastic Basin or Container: For mixing your ingredients and for soaking the stained garment.
- An Old Toothbrush: Essential for gently scrubbing the stain and working the mixture deep into the fabric fibers without causing damage.
Ensuring you have these items on hand before you start will make the process smooth and efficient, allowing you to tackle those stubborn stains without interruption.
Step-by-Step Guide to Stain Removal
This process is incredibly straightforward, requiring minimal effort for maximum impact. Follow these steps carefully to achieve the best results and restore your white garments.
Step 1: Create Your Powerful Stain-Fighting Paste
In a small, non-metallic container (a plastic bowl or cup is ideal), combine the measured ingredients. Start by adding 1 teaspoon of your chosen dishwashing liquid. Next, carefully pour in 3 or 4 tablespoons of 3% hydrogen peroxide. Finally, add 2 tablespoons of baking soda. Using a spoon or stirring stick, mix all ingredients thoroughly. Stir continuously until the mixture transforms into a smooth, homogenous paste. The consistency should be thick enough to cling to the fabric but spreadable. If it’s too thick, you can add a tiny bit more hydrogen peroxide; if too thin, a pinch more baking soda. This paste is your secret weapon against sweat stains.
Step 2: Apply and Let the Mixture Work Its Magic
Once your paste is ready, it’s time for application. Take your stained white garment and carefully apply the mixture directly onto the affected areas. These commonly include the underarm zones, the inner collar, and sometimes even cuffs. Use your old toothbrush to gently but firmly rub the paste into the fabric. The bristles help work the solution deep into the fibers, dislodging the embedded stain particles. Ensure the entire stained area is thoroughly covered and saturated with the paste. For heavily soiled areas or set-in stains, you might want to apply a slightly thicker layer and rub a bit more vigorously, always being mindful not to damage the fabric.
After applying and scrubbing, place the treated garment into your plastic basin. Allow the mixture to sit and penetrate the fabric for at least 15-30 minutes. For extremely stubborn or old stains, you can extend this waiting period up to an hour or even a few hours. This crucial “dwell time” gives the hydrogen peroxide, baking soda, and dish soap ample opportunity to break down the stain at a molecular level. While you wait, if you notice recurring yellow or grimy spots specifically under your arms even after washing, it might be a good indicator to re-evaluate your current deodorant or antiperspirant product. Some formulations are more prone to causing these reactions than others.
Step 3: Wash as Usual and Reveal Your Clean Whites
Once the mixture has had sufficient time to work its magic, carefully transfer the treated garment from the plastic basin directly into your washing machine. You do not need to rinse the paste off beforehand. Wash your clothes as you normally would, using your preferred detergent and your usual cycle settings (e.g., warm water for whites). It’s important to note that with this effective pre-treatment, there is absolutely no need to add bleach or chlorine to the wash. In fact, using chlorine bleach on sweat stains that contain antiperspirant residue can sometimes worsen the yellowing by reacting with the aluminum compounds. This natural solution is powerful enough on its own.
After the wash cycle is complete, inspect your garment before drying. If any faint traces of the stain remain, do not put the item in the dryer, as the heat can permanently set the stain. Instead, repeat steps 2 and 3. For best results and to preserve the brightness of your whites, air drying in the sun can also provide a natural bleaching effect. Once dried, you’ll be amazed at how those frustrating yellow marks have vanished, leaving your white clothes looking fresh, clean, and ready to wear again!
Proactive Measures: How to Prevent Sweat Stains on White Clothes
While this homemade stain remover is highly effective, prevention is always better than cure. By incorporating a few simple habits into your routine, you can significantly reduce the occurrence of sweat stains and extend the life of your white garments:
- Choose the Right Antiperspirant/Deodorant: Many antiperspirants contain aluminum zirconium, which reacts with sweat to cause yellow stains. Consider switching to an aluminum-free deodorant, or one specifically formulated to prevent yellow stains. Applying a thinner layer of antiperspirant can also help.
- Wear an Undershirt: For dress shirts or valuable white tops, an undershirt can act as a barrier between your skin and the outer garment, absorbing sweat and deodorant before it reaches your main shirt.
- Wash Clothes Promptly: Don’t let sweaty clothes sit in the laundry basket for days. Wash them as soon as possible after wearing to prevent stains from setting in.
- Don’t Over-Dry: If you suspect a stain might still be present after washing, avoid putting the garment in the dryer. The heat from a dryer can bake the stain into the fabric, making it much harder, if not impossible, to remove later. Always air dry until you’re certain the stain is gone.
- Stay Hydrated: Drinking plenty of water can help dilute the concentration of salts and chemicals in your sweat.
- Review Your Diet: Certain foods (like those high in sulfur, caffeine, or very spicy dishes) can sometimes affect sweat composition. While not a direct cause, it’s an aspect to consider for overall body health and sweat characteristics.
Why This Simple Solution Stands Out
In a world full of specialized cleaning products, why opt for a homemade remedy? The answer lies in its unique blend of effectiveness, affordability, and gentleness. Commercial stain removers can be expensive, and many contain harsh chemicals that might be detrimental to your skin, the environment, or even delicate fabrics over time. Bleach, while a powerful whitener, can sometimes interact negatively with the compounds in sweat stains, leading to permanent yellowing or fabric damage if not used correctly.
This three-ingredient concoction harnesses the natural power of common household items: dish soap acts as a surfactant, lifting oils and grime; hydrogen peroxide provides a safe and effective bleaching action for whiteness; and baking soda works as a mild abrasive to scrub away residue and a natural deodorizer. Together, they form a synergistic team that tackles the complex nature of sweat stains without the need for aggressive chemicals, making it a sustainable and sensible choice for maintaining your white wardrobe.
Final Thoughts on Pristine Laundry Care
Maintaining bright, clean white clothes doesn’t have to be a never-ending battle. With this easy, cheap, and incredibly effective DIY solution, you can confidently wear your favorite white garments without the dread of unsightly underarm or collar stains. This method not only restores your clothes but also empowers you with practical knowledge for effective home care.
Give this tip a try on your next laundry day and experience the satisfaction of seeing your whites return to their brilliant best. This simple hack proves that sometimes, the best solutions are the ones found right in your own home. For more brilliant tips and tricks on home maintenance, cleaning, and natural remedies, consider exploring resources like the “Natural Cures” YouTube channel, where you can find a wealth of useful information to simplify your life. Happy laundering!