
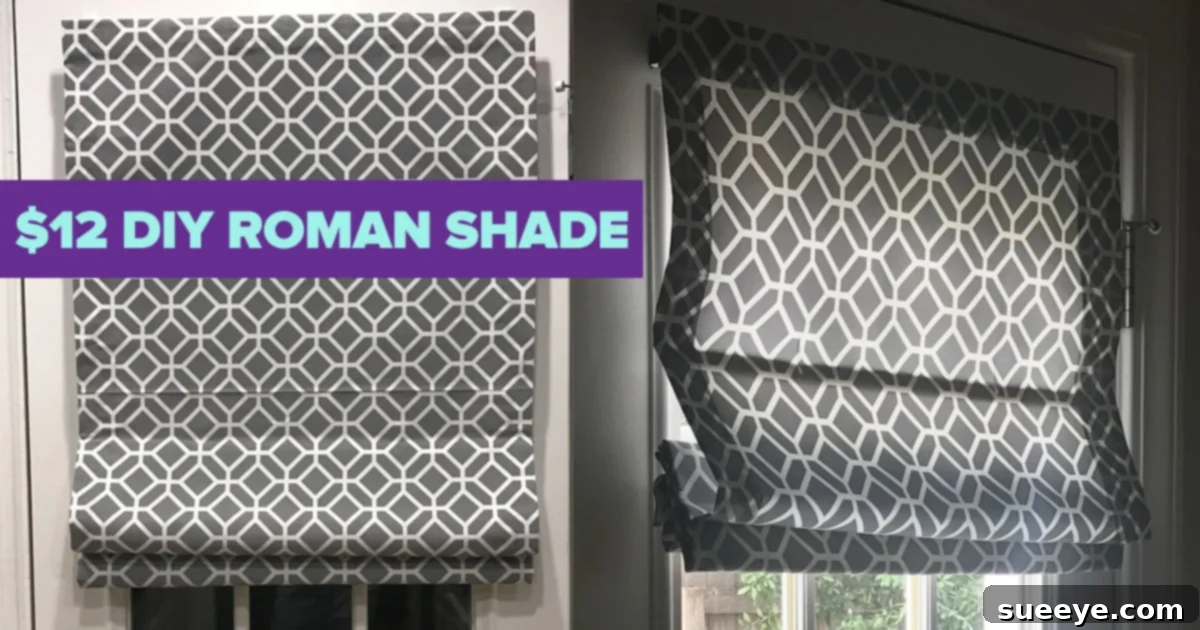
DIY Roman Shades: Elegant Window Treatments Made Easy (No Sewing Required!)
Are you dreaming of beautifully tailored Roman shades to elevate your home’s aesthetic, but the thought of custom prices makes you sigh? You’re not alone! Many homeowners adore the sophisticated look of Roman shades, which offer a clean, uncluttered alternative to traditional blinds or heavy curtains. They provide excellent light control and a distinct visual appeal that can dramatically transform any room. For a long time, I believed they were an unattainable luxury, reserved only for those with a generous interior design budget or exceptional sewing skills. I found myself wishing for the day I could afford custom shades for my bedroom door, a prominent feature I looked at every single day.
Then, a brilliant idea sparked! I stumbled upon a revolutionary tutorial demonstrating how to craft stunning Roman shades using an everyday item: mini blinds. This discovery was a game-changer. Not only did I decide to embark on this exciting DIY project for my bedroom door, but I was so impressed with the results that I immediately planned another one for my kitchen window – and decided to capture the entire process on video to share the magic. This project proved that anyone, regardless of their sewing proficiency (or lack thereof!), can achieve a high-end, custom look without breaking the bank.
Whether you’re looking to update a small bathroom window, a large living room bay window, or even a glass door, this comprehensive guide will walk you through creating your very own Roman shades. My own sewing skills are far from amazing, yet this project requires nothing more than precise measuring, a bit of cutting, and the power of fabric glue. Say goodbye to expensive custom orders and hello to a rewarding, budget-friendly home decor solution. Follow along, watch the accompanying video for visual guidance, and prepare to be amazed at how simple it is to craft bespoke window treatments that perfectly complement your style.
Transform Your Windows: Create Custom Roman Shades from Mini Blinds
Why Choose DIY Roman Shades? The Benefits of This No-Sew Project
Roman shades are celebrated for their ability to bring a sense of tailored elegance to any space. Unlike standard horizontal blinds, which can often feel stark or dated, Roman shades fold neatly into soft pleats when raised, adding texture and warmth. When lowered, they present a smooth panel of fabric, offering privacy and filtering light beautifully. The traditional challenge has always been their cost; custom shades can be incredibly expensive due to the intricate fabric work and precise measurements required. This DIY method elegantly bypasses that hurdle, offering several compelling advantages:
- Unbeatable Affordability: By repurposing inexpensive mini blinds and choosing your own fabric, you drastically cut down on costs compared to buying custom-made shades.
- Complete Customization: You have absolute freedom to select the fabric that perfectly matches your existing decor, desired color palette, and light-filtering needs. From bold patterns to subtle textures, the choice is yours.
- No Sewing Skills Required: This is perhaps the biggest draw! If the thought of a sewing machine fills you with dread, fear not. High-quality fabric glue handles all the hemming and attaching, making it accessible to everyone.
- Simple Process: The steps are straightforward and logical, making it a perfect project for beginners and seasoned DIYers alike.
- Quick Transformation: You can complete a shade in an afternoon, enjoying instant gratification and a refreshed living space.
- Increased Home Value: Custom window treatments, even DIY ones, add a polished and thoughtful touch that can enhance your home’s perceived value and aesthetic appeal.
This project is more than just making a window covering; it’s about empowering yourself to create beautiful, functional decor that truly reflects your personal style, all while staying well within your budget. Let’s dive into the specifics of making your own.
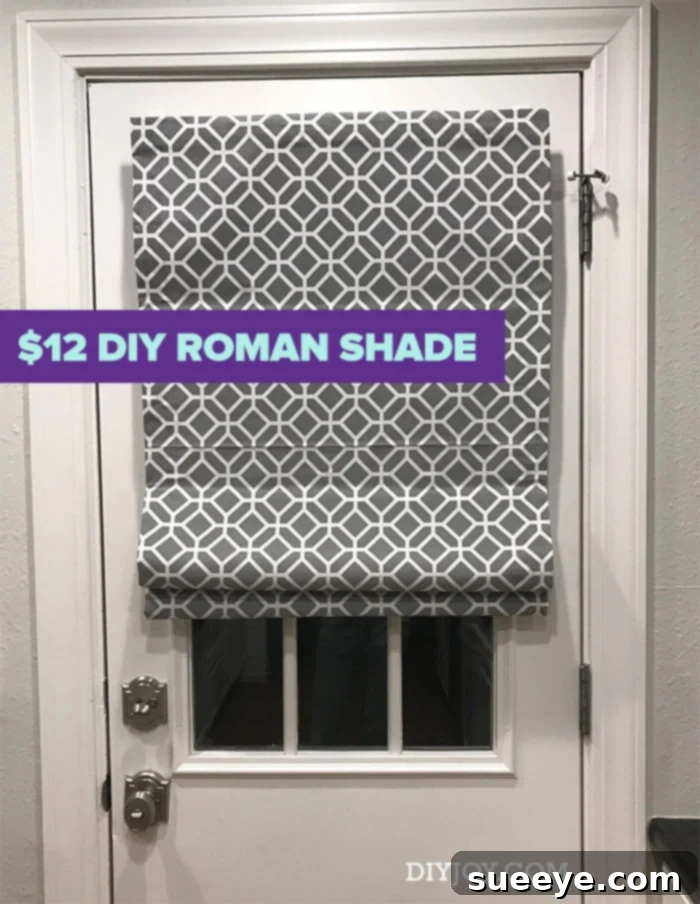
Essential Supplies Needed for Homemade DIY Window Shades
Before you begin this exciting transformation, gather all your materials. Having everything at hand will make the process smooth and enjoyable. Remember, the beauty of this project lies in its simplicity and the readily available supplies.
- Fabric: The star of your Roman shade!
- Choose a medium-weight fabric for the best results – something that drapes nicely but isn’t too flimsy or too stiff. Cotton, linen, or a blend are excellent choices. Consider if you want light-filtering, room-darkening, or blackout capabilities when selecting your fabric.
- Refer to the measuring notes in the video and detailed below for precise fabric quantities. Always err on the side of caution and purchase a little extra to account for any errors or pattern matching.
- Measurement Tip: You’ll need enough fabric to cover your entire window, plus a 3-inch allowance on all four sides for hemming.
- Mini Blind that covers your window: The structural backbone of your Roman shade.
- We highly recommend using a cordless mini blind for safety, especially if you have children or pets, and for a cleaner, more modern look. Cordless blinds are also easier to manipulate for this project.
- Ensure the blind’s width is suitable for your window. It can be the exact size or up to an inch wider if you prefer an outside mount or want to minimize light gaps.
- Fabri-tac Fabric Glue: Your best friend for a no-sew project.
- This industrial-strength fabric adhesive is known for its quick-drying, flexible, and durable bond. It’s essential for creating clean, long-lasting hems and securing the blind components to your fabric without a single stitch.
- 2 Large Buttons: These are merely temporary tools for assembly, so their appearance doesn’t matter. They will help prevent the pull cords from retracting prematurely.
- Additional Tools (Recommended):
- Measuring tape or ruler
- Sharp fabric scissors
- Iron and ironing board (crucial for crisp hems)
- Fabric marker or tailor’s chalk
- A large, clean, flat surface to work on
Step-by-Step Guide: How to Make a No-Sew Roman Shade
Follow these detailed instructions to create a professional-looking Roman shade with ease. Precision in measuring and patience with drying times are key to a successful outcome.
Step One: Precise Window Measurement and Mini Blind Selection
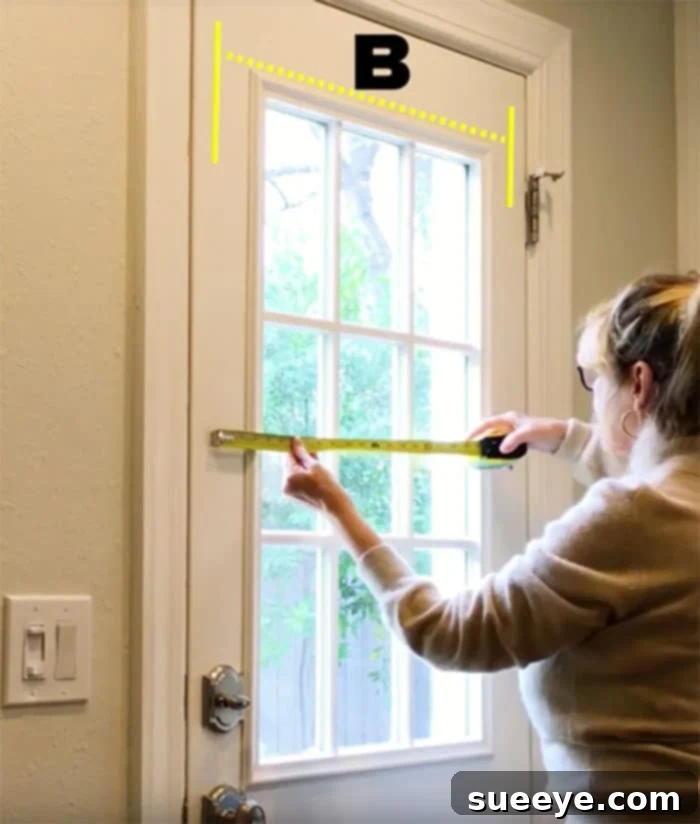
The foundation of any successful window treatment begins with accurate measurements. Grab your measuring tape and determine the exact dimensions of your window or door frame. For an inside mount, measure the width at the top, middle, and bottom, using the smallest measurement to ensure a snug fit. For length, measure from the top inside of the frame to the sill. If you plan for an outside mount, measure the exact width you want the shade to cover, typically extending a few inches beyond the window frame on each side to block more light. Once you have your measurements, purchase a mini blind that matches these dimensions. As a rule of thumb, it’s generally safe to go one inch wider than your window if you’re opting for an outside mount, ensuring adequate coverage and minimizing light leakage. Remember, cordless mini blinds are highly recommended for ease of use and safety.
Step Two: Fabric Measurement – The Canvas for Your Shade
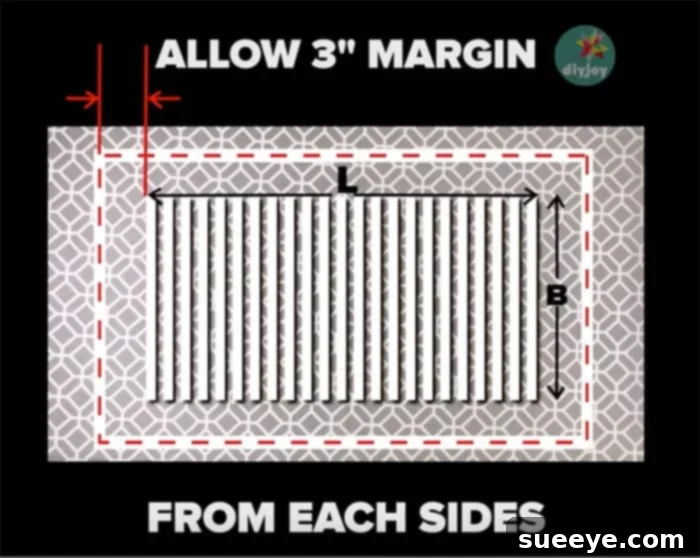
Lay your chosen fabric flat on a large, clean surface, ensuring it is smooth and wrinkle-free. Extend your mini blind completely over the fabric. This will give you a clear visual of the working area. You will need to account for ample excess fabric to create neat, professional-looking hems. Specifically, you’ll require a generous 3-inch allowance on all sides of the mini blind – that’s 3 inches at the top, 3 inches at the bottom, and 3 inches on each side. This margin is crucial for folding and gluing, creating a clean, finished edge without any raw fabric showing.
Step Three: Marking Your Fabric for Precision Cutting
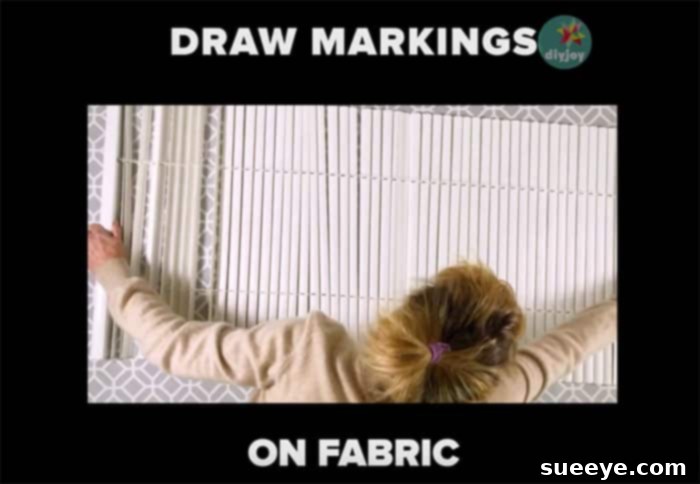
With the mini blind still extended over your fabric, carefully mark your cutting lines. Use a fabric marker, tailor’s chalk, or even a pencil to draw a clear outline around the blind, making sure to add that essential 3-inch overhang around all four edges. Use a ruler or straight edge to ensure your lines are perfectly straight and parallel to the blind’s edges. Accuracy here will save you headaches later and ensure your finished shade looks crisp and symmetrical.

Step Four: Making the Clean Cut
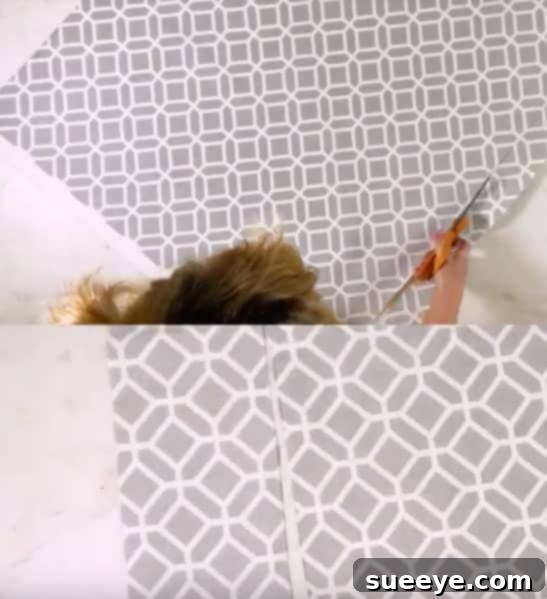
Once your fabric is accurately marked, it’s time to cut. Use sharp fabric scissors for a clean, fray-free edge. Cut along the lines you marked in the previous step. Take your time to ensure your cuts are straight and precise, as this will directly impact the neatness of your finished Roman shade. A clean cut makes for a clean hem.
Step Five: Creating Clean Edges with Initial Folds
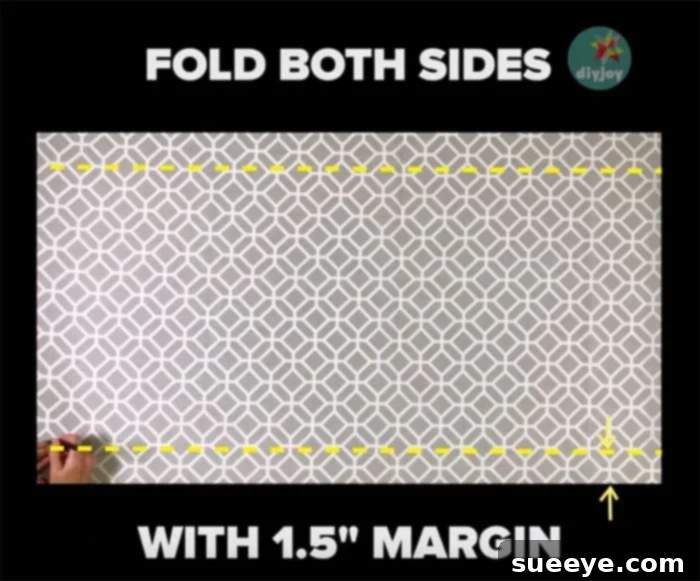
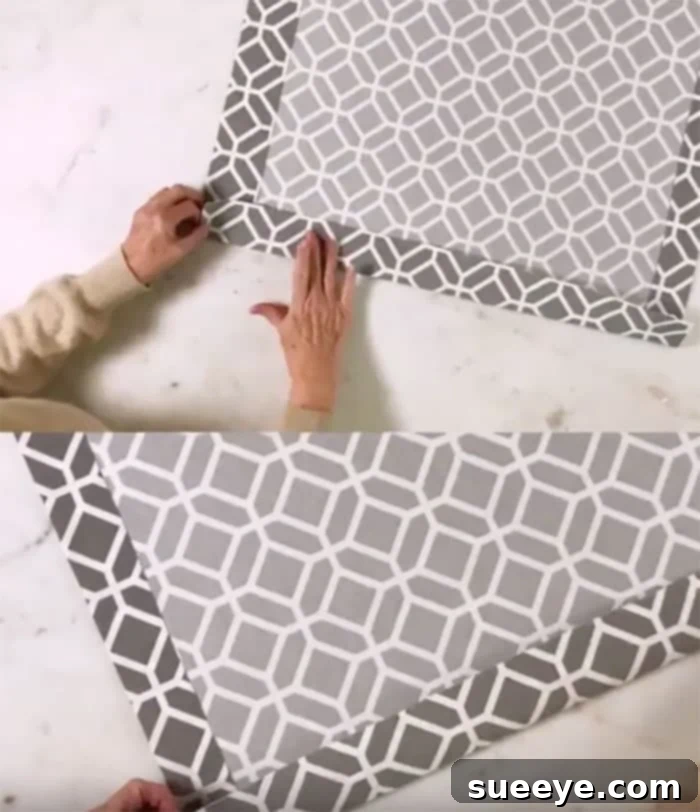
Now, let’s prepare the fabric for hemming. On both sides that correspond to the width of your shade, fold the fabric inwards by 1.5 inches. This 1.5-inch margin is exactly half of the 3-inch allowance you initially left, creating a clean double hem. This step ensures that the raw edges of your fabric are completely enclosed, giving your Roman shade a professional and durable finish without any visible fraying. These folds will be secured in the following steps.
Step Six: Ironing for Crisp, Professional Creases
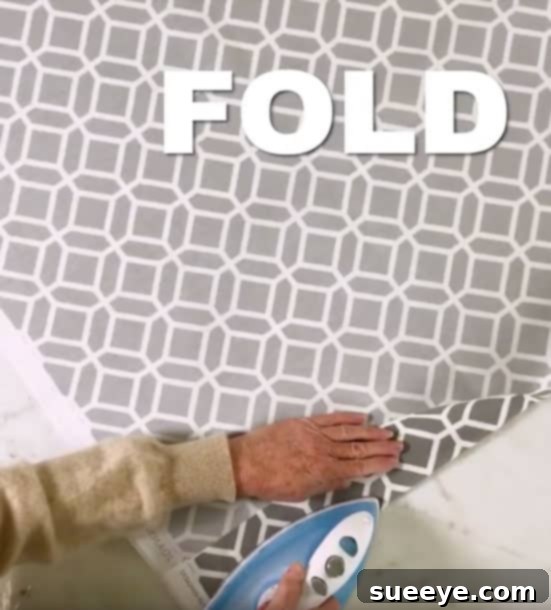
A well-defined crease is key to a professional-looking no-sew project. Take your fabric to an ironing board and iron a crisp crease all the way around on your fabric, following the 1.5-inch folds you made in Step Five. Press firmly and evenly. Ironing not only sets the folds beautifully but also helps the fabric glue adhere better, ensuring your hems are straight, sharp, and permanent. This step adds a level of polish that truly elevates the DIY shade.
Step Seven: Securing the Hems with Fabric Glue
Now it’s time to make those hems permanent using your fabric glue. Carefully lift the folded edges and apply a continuous, thin bead of Fabri-tac fabric glue inside all the creases. Press the folded fabric down firmly, smoothing it out to ensure full contact and an even bond. Work slowly and methodically, making sure no glue seeps out onto the front of your fabric. Allow these glued hems to dry completely according to the glue manufacturer’s instructions – this is crucial for durability. Once the side hems are dry, repeat the marking, folding, ironing, and gluing process for the top and bottom edges of your fabric, ensuring a consistent 1.5-inch double hem all around. Patiently let all glued sections dry thoroughly before proceeding to the next step. This patience will be rewarded with perfectly finished edges.
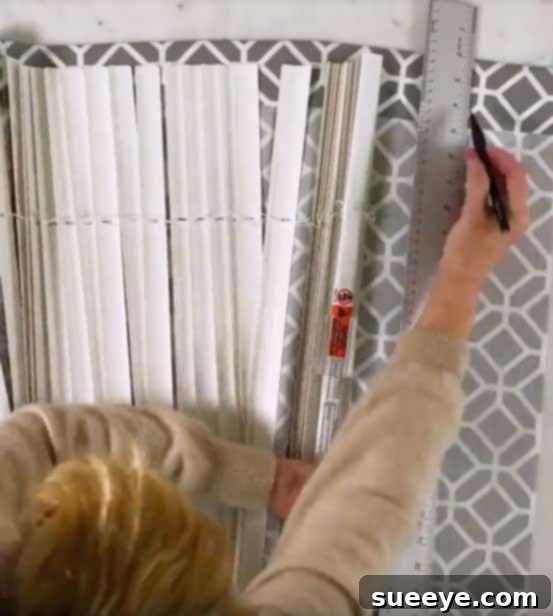
Mark and fold, iron the other two sides. Glue and fold. Allow to dry completely.
Step Eight: Preparing the Mini Blind – Cord Removal and Management
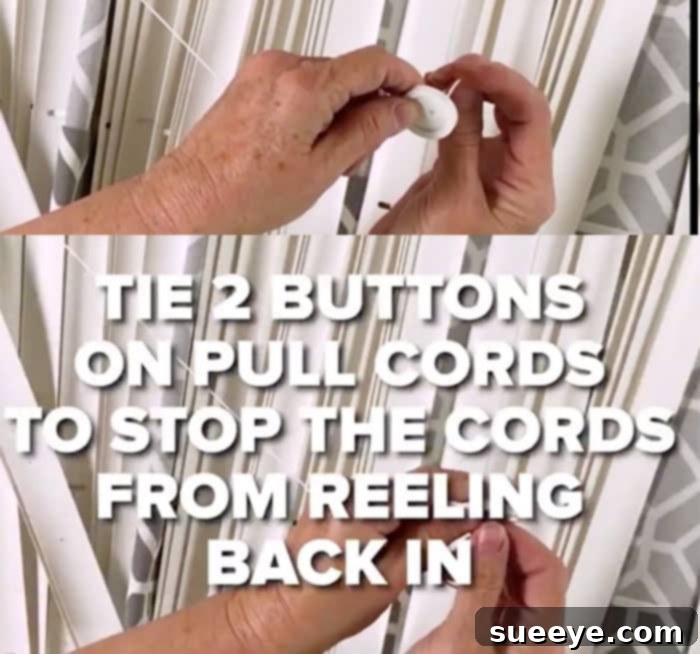
Bring your mini blind back to your workspace and extend it fully. The next critical step involves modifying the blind’s internal structure. Begin by carefully removing the pull cord from the blind. This is usually done by dislodging small pegs or end caps at the bottom rod of the mini blind. Hold the cords tightly to prevent them from retracting entirely into the headrail, then gently pull them completely out of the blind’s slats. Once the main pull cords are free, immediately tie one of your large buttons onto the end of each cord. These buttons will act as temporary stoppers, preventing the cords from reeling back into the headrail accidentally while you work. This step ensures that you can easily re-thread the cords later.
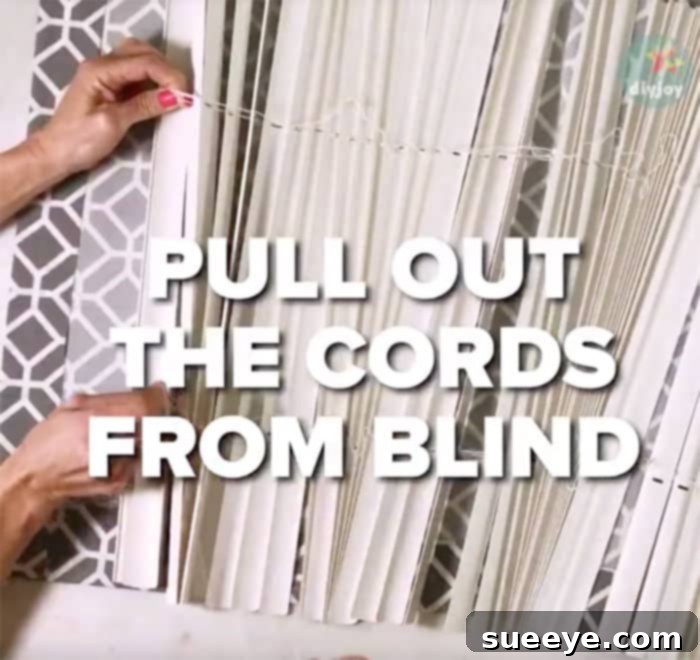
Tie 2 buttons on pull cords to stop the cords from reeling back in.
Step Nine: Deconstructing the Blind – Slats and Ladder Cords
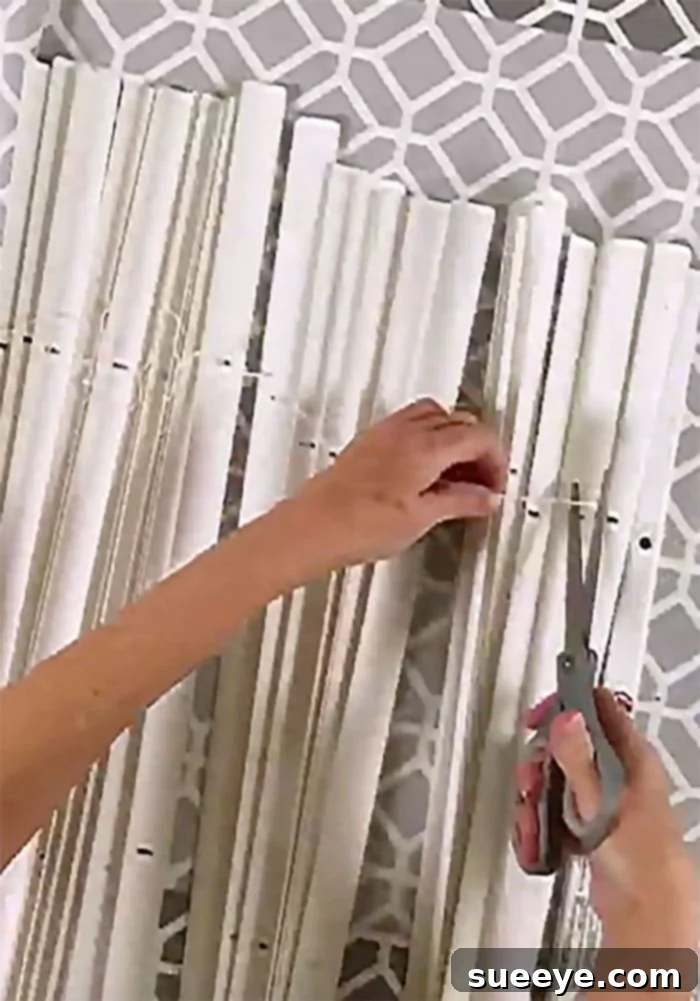
Now, you’ll transform the mini blind into the skeletal structure for your Roman shade. Carefully cut and remove all the ladder cords – these are the vertical strings that hold all the individual slats together. Once these are cut, you can easily remove the majority of the blind slats. For a standard Roman shade that creates beautiful, even folds, you will typically need to retain only a few key slats: the top rod (which houses the lifting mechanism), the bottom rod (which will be the weighted bottom of your shade), and generally about three equally spaced internal slats. The exact number of internal slats might vary slightly depending on the desired fold depth and the overall length of your shade, but three is a good starting point for even pleats. Discard the remaining slats.
Step Ten: Strategic Slat Placement on Fabric
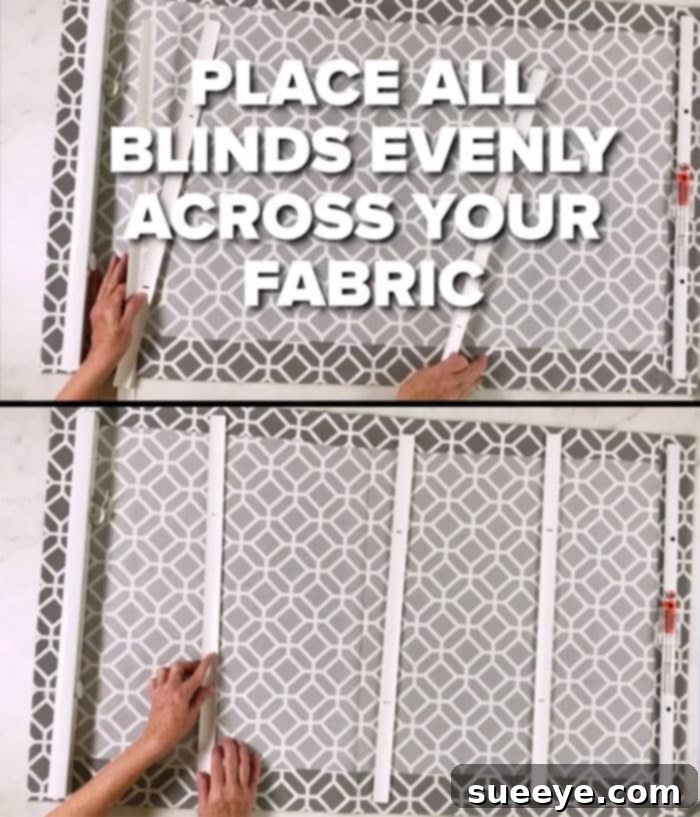
Lay your prepared fabric (right side down) flat on your work surface. Carefully position the remaining blind pieces on the fabric: the top rod, your selected three internal slats, and the bottom rod. This is a critical step for achieving even, symmetrical folds in your Roman shade. Measure and adjust the placement of each slat evenly across the fabric. The top rod should be positioned at the very top edge of your fabric. The bottom rod will be at the bottom. Distribute the three internal slats at equal intervals between the top and bottom rods. Visualizing how the shade will fold when raised can help with optimal spacing. Use a ruler and mark lightly with a fabric pencil if needed to ensure perfect alignment before gluing.
Step Eleven: Adhering Blind Components to Fabric
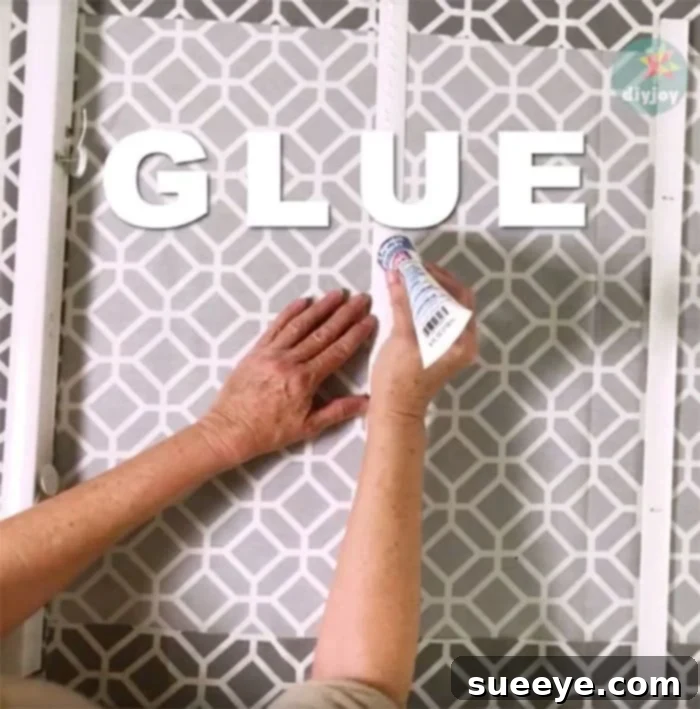
With your slats perfectly positioned, it’s time to secure them permanently to the fabric. Apply a continuous, thin line of fabric glue along the entire length of each blind piece (the top rod, the three internal slats, and the bottom rod). Carefully press each piece firmly onto the fabric in its marked position. Ensure good contact along the entire length of each slat. Pay extra attention to the ends to prevent lifting. Once all pieces are glued, apply pressure evenly across the entire surface to ensure a strong bond. Allow the glue to dry completely and thoroughly. This drying time is crucial for the structural integrity of your Roman shade, so resist the urge to rush this step.
Step Twelve: Re-cording and Final Assembly
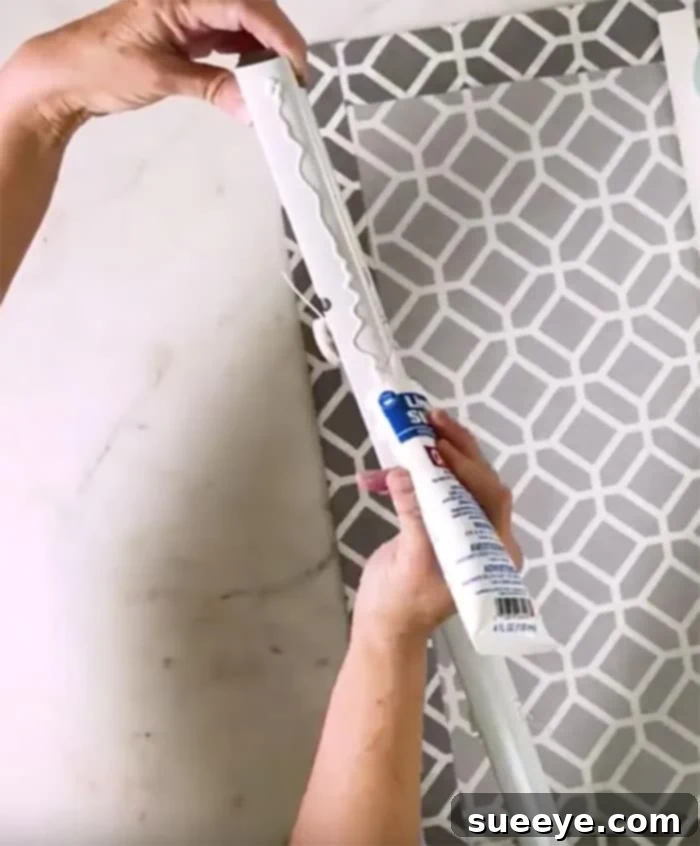
Once the glue has completely dried and the blind components are firmly attached to your fabric, you can remove the temporary buttons from your pull cords. Carefully run your pull cords back through the appropriate holes in the top rod and then through the newly glued internal slats. Guide the cords down to the bottom bar. At the bottom bar, replace the pegs that you removed in Step Eight, securing the cords tightly. Double-check that the cords are threaded correctly and that they operate smoothly, allowing the shade to raise and lower evenly. Tie a secure knot at the bottom to prevent the cords from slipping. Once again, allow any newly glued or secured parts to dry completely before attempting to hang your beautifully transformed blind.
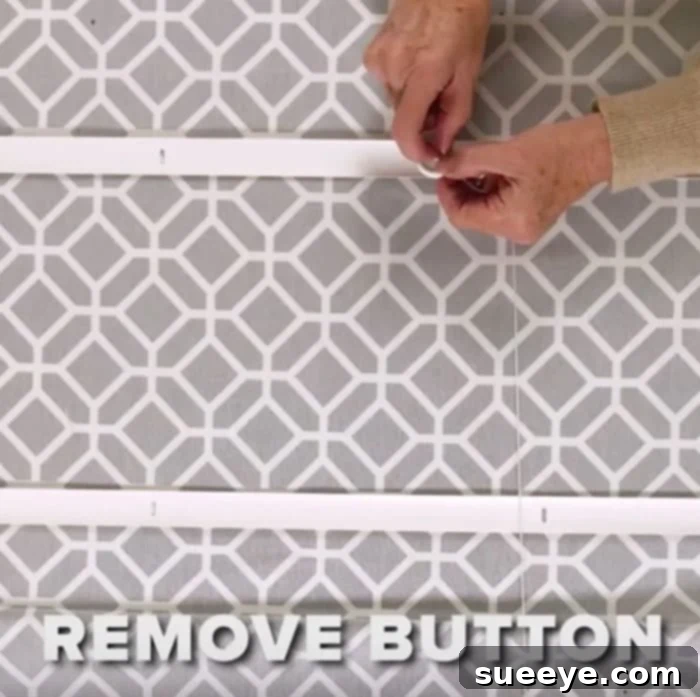
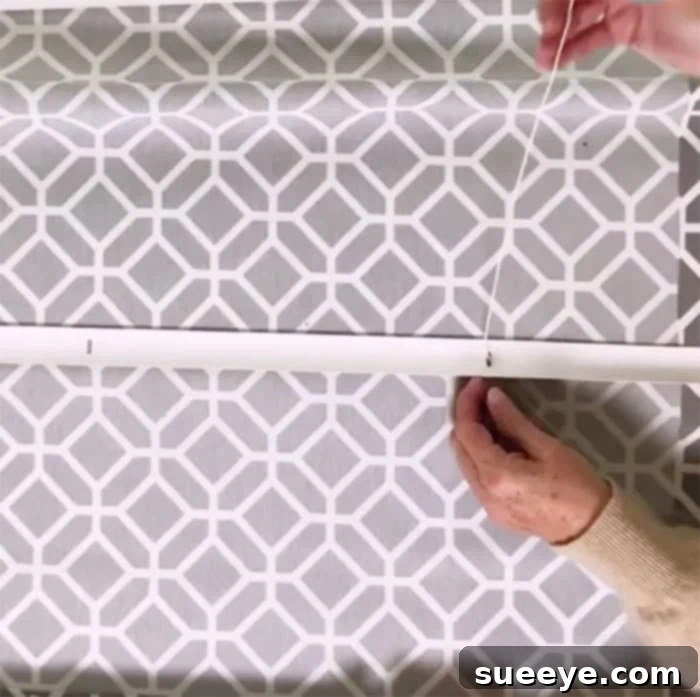
Step Thirteen: Installation and Enjoyment!
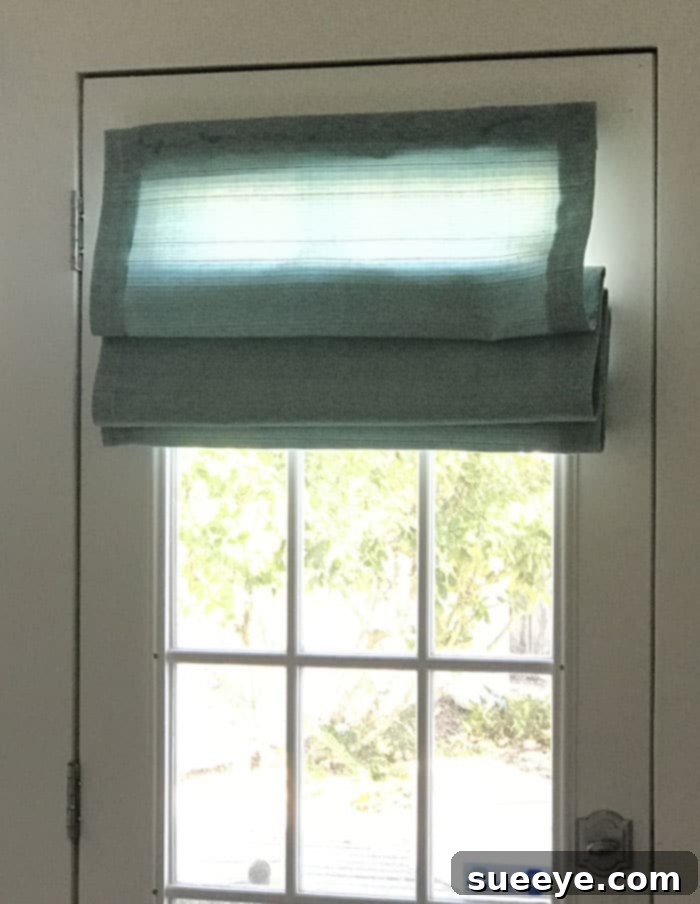
You’re almost there! Install the mounting hardware for your mini blind according to the manufacturer’s instructions, ensuring it is level and securely fastened to your window frame or wall. Once the brackets are in place, gently press your newly crafted Roman shade into position, securing it into the mounting hardware. Take a step back and admire your handiwork! You’ve successfully created a custom, elegant Roman shade that looks professionally made, all thanks to your clever DIY efforts. Enjoy the refined beauty and enhanced privacy your new window treatment brings to your space!
Tips for Success & Troubleshooting Your No-Sew Roman Shades
Even with the most straightforward DIY projects, a few tips can ensure a smoother experience and a flawless finish. Here are some extra pointers and troubleshooting advice:
- Choosing the Right Fabric: While any medium-weight fabric works, consider the light. Sheer fabrics will filter light gently, while opaque or blackout fabrics offer more privacy and room darkening. Always pre-wash and iron your fabric to prevent shrinking or warping after assembly.
- Glue Application: Use a consistent, thin bead of fabric glue. Too much glue can seep through the fabric, creating stiff or visible spots. Too little won’t provide a strong enough bond. Practice on a scrap piece if you’re unsure.
- Drying Time is Key: Patience is truly a virtue here. Allow ample drying time for each glued section before moving on. Rushing can compromise the bond and the overall durability of your shade.
- Even Folds: If your shade isn’t folding perfectly evenly, gently adjust the spacing of your internal slats. Small shifts can make a big difference. Ironing the fabric after the slats are glued but before threading the cords can also help define the folds.
- Cleaning: For light cleaning, use a soft brush or vacuum with an upholstery attachment. For deeper cleaning, spot clean with a mild fabric cleaner, being careful not to soak the glued areas. Always test cleaners on an inconspicuous spot first.
- Safety First: If you’re not using cordless blinds, ensure all cords are kept out of reach of children and pets using safety devices like cord cleats.
Customize Your Creation: Personalizing Your Roman Shades
The beauty of DIY lies in customization! Once you’ve mastered the basic technique, consider these ideas to make your Roman shades truly unique:
- Pattern Play: Don’t shy away from bold patterns, stripes, or florals. Just remember to account for pattern matching when buying your fabric and cutting.
- Add Embellishments: Consider attaching decorative trim, tassels, or pom-poms along the bottom edge or sides of your shade for an extra touch of flair.
- Layering: For added insulation or light control, consider layering your DIY Roman shade with sheer curtains or drapes.
- Blackout Liner: For bedrooms or media rooms, you can glue a separate blackout fabric layer to the back of your chosen decorative fabric before beginning the hemming process.
My Personal Experience: A Game-Changer for Home Decor
I can honestly say this DIY project has been a game-changer for my home decor. I’ve now crafted two of these stunning Roman shades: one for my bedroom door, which instantly elevated the entire room, and another super cute one for my kitchen window, adding a touch of personalized charm. The ease of the process, coupled with the freedom to select fabrics that perfectly matched my existing decor, was incredibly satisfying. Every single person who has seen these shades has been thoroughly impressed, often asking where I bought them! But none are as impressed as I am with my own ingenuity. It’s an incredible feeling to create home decor that not only fits my budget but also looks truly amazing and custom-made. I encourage you to try this project – you won’t regret the beautiful, affordable transformation it brings to your home!