
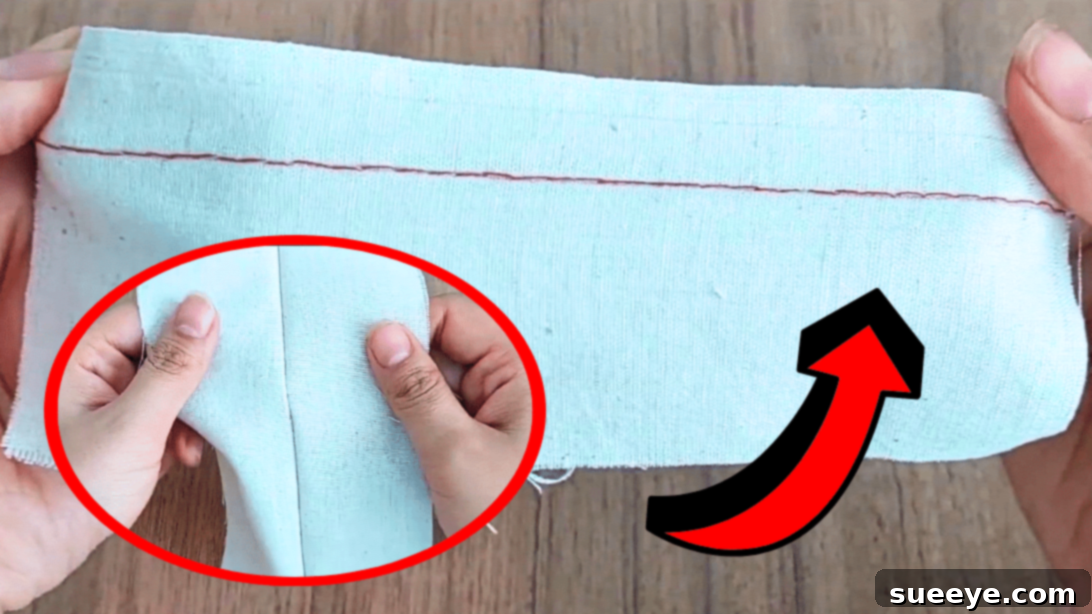
Every journey begins with a single step, and for those venturing into the rewarding world of sewing, mastering foundational hand stitches is an invaluable skill. While sewing machines offer speed and convenience, the ability to hand sew with the precision and strength of a machine stitch is a game-changer. This technique, often referred to as the backstitch, not only makes your work look professionally finished but also provides unparalleled durability and control. It’s a skill that elevates you from novice to a truly capable seamstress or quilter, empowering you to tackle projects where a machine might not be suitable, or to simply achieve a level of detail that only hand sewing can provide.
RELATED: 7 Basic Hand Stitches For Beginners
The backstitch is renowned as one of the strongest hand stitches available, creating a seam that rivals, and in some cases even surpasses, machine stitching in resilience. Learning this method now will equip you with a versatile tool for countless future projects, from emergency repairs to intricate garment construction and detailed quilting. It’s a foundational skill that opens up a world of creative possibilities. To guide you through this process, we’ll draw inspiration from experts like mary sewing room on YouTube, whose clear tutorials make learning accessible. With a little practice, you’ll be amazed at the quality and strength you can achieve with just a needle and thread.
The Power of the Hand Backstitch: Why It Matters
Before diving into the mechanics, let’s understand why mastering the backstitch is so crucial for any sewing enthusiast. This particular stitch offers a multitude of benefits that make it an indispensable part of your sewing repertoire:
- Unrivaled Durability and Strength: The backstitch creates a robust, interlocking seam that is incredibly difficult to pull apart. Each stitch overlaps the previous one, forming a continuous line of secure stitches that mimic the integrity of a machine-sewn seam. This makes it perfect for areas of garments that undergo stress, such as armholes, waistbands, or structural seams.
- Exceptional Precision and Control: Unlike a machine, which can sometimes be too fast for delicate work, hand sewing with a backstitch allows for meticulous attention to detail. You have complete control over stitch length, tension, and placement, enabling you to navigate curves, corners, and intricate patterns with ease. This precision is invaluable for custom fittings, intricate appliqués, or hand-finishing seams.
- Versatility Across Projects: From quilting intricate blocks and binding edges to repairing torn seams in your favorite jeans or adding decorative elements to a handmade garment, the backstitch is incredibly versatile. It’s suitable for a wide range of fabrics, from delicate silks to sturdy denims, making it a go-to stitch for nearly any hand sewing task.
- Portability and Accessibility: Hand sewing requires minimal equipment – just a needle, thread, and fabric. This makes it an incredibly portable skill. You can sew on the go, during travel, or even while relaxing on your couch, without needing access to a power outlet or a dedicated sewing space. It’s perfect for small projects, mending tasks, or when inspiration strikes unexpectedly.
- Emergency Mending and Repairs: Life happens, and seams can unravel at the most inconvenient times. Knowing how to execute a strong backstitch means you can quickly and effectively repair garments, preventing further damage and extending their lifespan. It’s an essential survival skill for any well-dressed individual.
- A Sense of Accomplishment: There’s a unique satisfaction that comes from creating something beautiful and durable with your own hands. Mastering a challenging stitch like the backstitch enhances your confidence and deepens your appreciation for the craft of sewing.
Essential Tools & Materials for Your Hand Sewing Project:
Before you begin, gather your supplies. Having the right tools makes the process smoother and more enjoyable, leading to better results. Here’s a detailed look at what you’ll need:
- Fabric: Choose a fabric appropriate for your practice or project. For beginners, a medium-weight cotton or linen blend is ideal, as it’s easy to handle and holds its shape well. Avoid slippery or overly thick fabrics until you’ve gained more experience. Ensure your fabric is clean and pressed smoothly.
- Needle: The type of needle matters. For general hand sewing, a “sharps” needle is a good all-around choice. They have a sharp point and a rounded eye. For finer fabrics, opt for a finer needle, and for heavier fabrics, a sturdier one. The size (e.g., 7, 8, 9) indicates fineness, with higher numbers being finer. Always choose a needle that can easily pass through your fabric without straining the thread.
- Thread: Select an all-purpose polyester thread for most projects. It’s strong, durable, and comes in a wide array of colors. For specialty projects, you might consider cotton thread (for natural fibers), silk thread (for delicate fabrics), or even heavy-duty thread. Make sure your thread color matches your fabric or provides a pleasing contrast if you desire a decorative stitch.
- Scissors: Keep a sharp pair of fabric-only scissors specifically for cutting fabric and thread. Using them on paper dulls the blades quickly, making precise cuts difficult. A small pair of snips or embroidery scissors are also handy for trimming threads close to your work.
- Marking Pen, Pencil, or Chalk: These tools are essential for drawing your stitching line. A tailor’s chalk pencil or a washable fabric marker are excellent choices. Test your marking tool on a scrap piece of your fabric first to ensure it erases or washes out completely without leaving a stain. Accuracy in marking guides your stitches and ensures a straight, professional-looking seam.
- Ruler: A clear sewing ruler or a measuring tape is crucial for accurate measurements and for drawing straight lines. Precision in marking leads to precision in sewing.
- Thimble (Optional but Recommended): A thimble protects your finger (usually the middle finger of your dominant hand) from needle pricks and helps you push the needle through thicker fabrics more easily. It might feel awkward at first, but with practice, it becomes an invaluable tool.
Preparing Your Fabric and Workspace
Proper preparation is key to a successful hand sewing project. A few preliminary steps will make your sewing experience much smoother and more enjoyable, ensuring professional-looking results:
- Pre-wash Your Fabric: If your project involves fabric that might shrink (most natural fibers do), pre-wash and dry it before cutting or sewing. This prevents your finished garment or item from shrinking unevenly or distorting after its first wash.
- Press Your Fabric Smoothly: Iron your fabric thoroughly to remove any wrinkles or creases. A smooth, flat surface is essential for accurate cutting and marking.
- Define Your Stitch Line: Using your ruler and marking tool, draw a clear, precise line on your fabric where you intend to sew. This line will serve as your essential guide, helping you maintain straight stitches and consistent seam allowances. For practice, aim for a straight line about 6-8 inches long.
- Set Up Your Workspace: Ensure you have a well-lit area, preferably with natural light or a good task lamp. A comfortable chair and a flat, stable surface are also important. Organize your tools so they are within easy reach, minimizing interruptions.
Mastering the Machine-Like Hand Stitch (The Backstitch)
Now, let’s delve into the actual steps of creating a strong, machine-like backstitch by hand. This technique, demonstrated effectively in tutorials like those from mary sewing room, involves a series of forward and backward movements that lock the thread securely into place.
Step 1: Threading Your Needle and Knotting Your Thread
First, cut a manageable length of thread – about 18-24 inches is ideal to avoid tangling, especially for beginners. Thread one end of the thread through the eye of your needle. To create a secure knot, wrap the tail end of the thread around your index finger twice, then roll your thumb over the wrapped thread and finger. Slide the loops off your finger while pulling the knot tight. This creates a small, secure knot that won’t slip through the fabric. For extra security, you can make a double knot.
Step 2: Starting Your First Stitch – Anchoring the Thread
To begin your seam, bring your needle up through the back of the fabric, exactly on your marked stitching line. You should emerge on the right side of the fabric. Pull the thread all the way through until the knot catches on the back of the fabric. This first stitch serves as your anchor point and marks the beginning of your seam. Ensure your other hand is holding the fabric firmly to keep it stable.
Step 3: Creating the Backstitch – The Core Technique
Now, you’ll create the actual backstitch. Insert your needle back into the fabric a short distance (e.g., 1/8 to 1/4 inch) *behind* where your thread just emerged. This is the “back” part of the backstitch. While the needle is still in the fabric, bring it up again an equal distance *in front* of where the thread first emerged, effectively skipping over the point where your thread originally came up. The needle should now be on the right side of the fabric again, ready for the next stitch. Pull the thread through gently but firmly, being careful not to pull too tightly and pucker the fabric. The goal is to create neat, evenly spaced stitches that lie flat.
Step 4: Continuing Your Seam – Rhythm and Consistency
Repeat Step 3, always inserting the needle back into the fabric at the end point of the *previous* stitch. Then, bring the needle up an equal distance forward. This creates a continuous, unbroken line of stitches on the top of the fabric, with small, overlapping stitches on the underside. The key is to maintain consistent stitch length and spacing. Aim for stitches that are identical in size, creating a neat, machine-like appearance. Continue this rhythmic motion, going back and forth, until you reach the desired length of your seam or the other end of your marked line.
Step 5: Securing the End of Your Seam
Once you’ve completed your seam, it’s crucial to secure your thread so the stitches don’t unravel. To do this, make a few small stitches directly over the last stitch you made, creating a small knot on the underside of the fabric. You can also form a loop with the thread, pass your needle through it, and pull tight to create a knot. For extra security, repeat this knotting process 2-3 times. Then, using your sharp scissors, carefully trim the excess thread close to the fabric, ensuring you don’t cut into your newly formed seam. Your machine-like hand-sewn seam is now complete!
Tips for Achieving Perfect, Professional Hand Stitches
Mastering the backstitch takes practice, but with these tips, you can significantly improve your results and make the process more enjoyable:
- Practice Makes Perfect: Don’t get discouraged if your first attempts aren’t flawless. Start with scrap fabric and focus on consistency in stitch length and tension. The more you practice, the more your muscle memory will develop.
- Use a Thimble: While it may feel awkward initially, a thimble is your finger’s best friend. It protects your pushing finger and allows you to apply more force to the needle, especially when working with denser fabrics.
- Good Lighting is Essential: Ensure your workspace is brightly lit. Good visibility helps you see your marked lines clearly and maintain precise stitch placement, preventing eye strain.
- Short Thread Lengths: Resist the urge to use very long pieces of thread to avoid re-threading. Long threads are prone to tangling, knotting, and fraying, leading to frustration. An 18-24 inch length is usually perfect.
- Maintain Consistent Tension: Pull your thread through each stitch gently but firmly enough to make it lie flat against the fabric, but not so tight that it puckers the fabric. Consistent tension is crucial for a smooth, even seam.
- Check Your Work Regularly: Periodically pause and examine your stitches from both the top and bottom. This allows you to catch any inconsistencies early and adjust your technique before you’ve sewn too far.
- Pin Your Fabric: If you’re working on a longer seam or a piece that tends to shift, use sewing pins to hold the fabric layers together along your stitching line. Remove them as you sew, before your needle reaches them.
Common Applications of the Backstitch
The beauty of the backstitch lies in its versatility. Once mastered, you’ll find countless ways to incorporate this powerful hand stitch into your sewing projects:
- Garment Construction: Use the backstitch for creating durable seams in clothing, especially when a sewing machine isn’t available or for delicate areas that require precise handwork. It’s excellent for attaching zippers by hand, setting sleeves, or closing linings.
- Quilting: In quilting, the backstitch is indispensable for piecing small blocks, joining binding to the quilt edge, or even for intricate hand quilting designs where machine quilting might be too bulky or difficult.
- Mending and Repairs: This is where the backstitch truly shines for practicality. It’s perfect for repairing torn seams, patching holes in durable fabrics like denim, or reattaching buttons securely. Its strength ensures your repairs will last.
- Embellishments and Details: Beyond its functional strength, the backstitch can also be used decoratively. Create beautiful outlines, script, or small details in embroidery projects.
- Travel Sewing Kits: Since it requires so few tools, the backstitch is the cornerstone of any travel or emergency sewing kit, allowing you to handle unexpected mends on the go.
Hand Sewing vs. Machine Sewing: When to Choose Each
Both hand sewing and machine sewing have their distinct advantages, and understanding when to use each will make you a more versatile and efficient sewer:
- Advantages of Hand Sewing (especially the backstitch):
- Precision and Control: Ideal for intricate details, curves, tight corners, and custom fittings where accuracy is paramount.
- Portability: No power source needed, allowing you to sew anywhere.
- Delicate Fabrics: Less likely to damage or distort delicate fabrics like silk, chiffon, or lace.
- Bulkier Projects: Easier to maneuver large, bulky items like quilts or upholstery that might not fit under a machine’s arm.
- Quietness: Perfect for late-night sewing without disturbing others.
- Durability: The backstitch often creates a seam that is just as strong, if not stronger, than a machine stitch, especially when properly executed.
- Advantages of Machine Sewing:
- Speed: Significantly faster for long, straight seams and large projects.
- Consistency: Machines produce very uniform stitches quickly.
- Specialized Stitches: Offers a wide range of decorative and functional stitches not easily replicated by hand.
- Heavy-Duty Work: Modern machines can handle very thick layers or tough materials with ease.
- Hybrid Approaches: Often, the best approach combines both. You might machine sew the main seams for speed and strength, then hand sew details, finishes, or delicate areas where precision is key. For example, machine-sewing a garment body and then hand-stitching a hem for an invisible finish.
Conclusion: Embrace the Art of Hand Sewing
Learning how to hand sew with the strength and precision of a machine stitch, specifically the backstitch, is more than just learning a technique; it’s about gaining confidence, versatility, and a deeper connection to the craft of sewing. This foundational skill equips you for any sewing challenge, whether it’s a quick repair, an intricate design, or a project where a machine simply won’t suffice. By practicing the steps outlined and paying attention to detail, you’ll soon be creating seams that are not only beautiful but also built to last. So grab your needle, thread, and fabric, and embark on this incredibly rewarding journey. The satisfaction of a perfectly hand-stitched seam is truly unmatched.
*All image credit belongs to mary sewing room via YouTube. Follow and subscribe to her channel for more!