
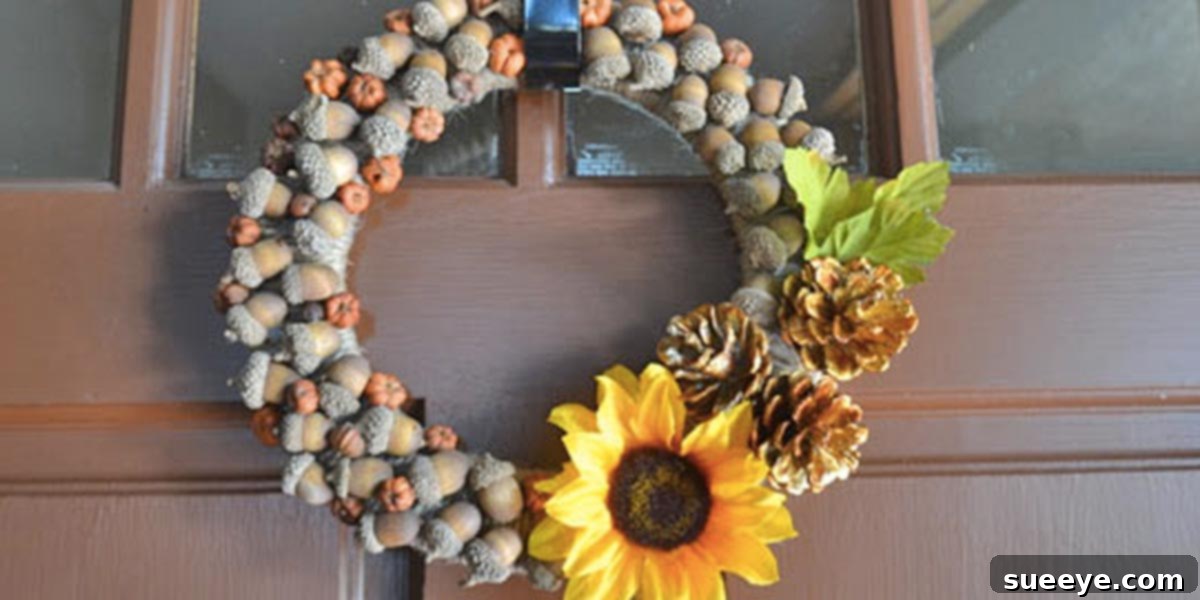
DIY Acorn Wreath: Your Ultimate Guide to Enchanting Fall Decor
As the vibrant hues of summer fade, the crisp air and golden light signal the enchanting arrival of autumn. Fall is a season of cozy comforts, warm gatherings, and, for many, the perfect opportunity to infuse their homes with the rustic beauty of nature. Among the myriad treasures this season bestows, acorns stand out as delightful, versatile, and incredibly budget-friendly elements for charming DIY projects. If you’re someone who appreciates the unique allure of natural decor and enjoys the satisfaction of creating something beautiful with your own hands, then crafting a magnificent DIY acorn wreath is an absolute must this season.
This comprehensive guide is designed to empower you with all the knowledge and inspiration needed to design and assemble a stunning acorn wreath that will warmly welcome fall to your doorstep. We’ll cover everything from the exciting hunt for your natural materials to the meticulous steps of assembly, and even explore creative ways to personalize your masterpiece, ensuring your autumn decor is both unique and sustainable.
The Irresistible Charm of Acorns for Fall Decor
Each season brings its own unique palette and collection of natural wonders. While autumn mesmerizes us with a spectrum of fiery leaves and aromatic pinecones, acorns possess an understated elegance that truly embodies the spirit of the season. Their smooth, polished texture, complemented by their distinctive caps, offers a visual and tactile appeal that is both rustic and refined. Here’s why acorns are an exemplary choice for your next fall DIY endeavor:
1. Nature’s Abundant and Free Gift
One of the most compelling advantages of using acorns in your crafting is their sheer abundance and accessibility. As the mighty oak trees prepare for winter, they generously shower the ground with their seeds. This means you can often find a bountiful supply of acorns in your own backyard, local parks, or nearby wooded areas, making them an entirely free resource. This natural generosity makes acorn wreaths an exceptionally cost-effective way to achieve a luxurious, high-end decorative look without straining your budget.
2. Unrivaled Rustic Aesthetic and Natural Warmth
Acorns possess a distinct, organic beauty that resonates deeply with the cozy essence of autumn. Their earthy spectrum of colors, ranging from deep, rich browns to softer tans, beautifully complements other fall elements. The natural texture and form of acorns instantly introduce a sense of warmth, grounding, and a charming rustic appeal that is often unmatched by mass-produced decorations. They effortlessly evoke feelings of nostalgia and comfort, transforming any space into an inviting autumn haven.
3. Exceptional Versatility in Crafting
Beyond their primary use in wreaths, acorns are remarkably versatile. They can be painted, embellished, strung into garlands, or simply showcased in their natural state. Their sturdy composition makes them easy to handle and integrate into various craft projects, from intricate designs to minimalist arrangements, offering endless creative possibilities for both seasoned crafters and beginners.
4. Sustainable and Eco-Conscious Decorating
Choosing natural materials like acorns for your seasonal decor is a beautiful way to embrace environmental sustainability. By utilizing readily available resources from nature, you reduce your reliance on manufactured goods and minimize your ecological footprint. It’s an act of bringing the serene beauty of the outdoors inside, contributing to a more mindful and eco-friendly approach to home decoration.
Embracing the Joy of Fall DIY Projects
There’s an profound sense of satisfaction that comes from dedicating time to craft seasonal decor. Fall DIY projects, in particular, offer a wonderful blend of creative expression, a deeper connection to nature, and the sheer joy of personalizing your living environment. Crafting an acorn wreath transcends a simple task; it’s an opportunity to:
- Reconnect with Nature: The act of venturing outdoors to gather acorns provides a tranquil escape, allowing you to immerse yourself in the natural beauty of the changing season.
- Unleash Your Creativity: DIY projects serve as an excellent outlet for artistic expression, enabling you to design unique pieces that genuinely reflect your personal style and aesthetic.
- Adorn Your Home Affordably: By leveraging free natural materials, you can significantly reduce decorating expenses, allowing you to achieve sophisticated, high-quality decor without the hefty price tag.
- Forge Cherished Memories: Crafting can be a delightful communal activity, perfect for sharing with family and friends, fostering new traditions, and creating lasting, joyful memories.
- Imbue Your Home with Personality: Handmade decor imbues your living space with unparalleled character, warmth, and a unique story that mass-produced items simply cannot replicate. It makes your home feel truly lived-in, loved, and reflective of your individuality.
Gathering Your Essentials: What You’ll Need
One of the most appealing aspects of this project is its straightforward nature and the minimal number of supplies required. Most items are either freely available or can be easily found at your local craft store. Here’s a detailed breakdown of what you’ll need to begin your crafting journey:
1. Acorns: The Quintessential Element
- Quantity Matters: You’ll need a generous supply! The exact amount depends on the size of your wreath base and your desired density, but preparing several hundred acorns is a good starting point. It’s always prudent to collect more than you anticipate needing.
- Smart Collection Tips: Focus your search beneath oak trees in parks, public gardens, forests, or even your own property. Select acorns that appear intact, firm to the touch, and free from any visible damage or signs of decay.
- Crucial Preparation Steps: Before integrating your collected acorns into your wreath, proper preparation is essential to prevent potential pest infestations and moisture-related issues.
- Initial Cleaning: Gently rinse your acorns in a colander under cool water to remove any lingering dirt, dust, or tiny debris.
- Pest Elimination & Drying (Baking Method): Arrange the clean acorns in a single layer on a baking sheet lined with parchment paper. Bake them at a very low temperature, typically between 170-200°F (80-95°C), for approximately 1-2 hours. This gentle heat effectively eliminates any hidden insects and thoroughly dries the acorns, ensuring they are stable for crafting. Monitor them closely to prevent scorching. Allow them to cool completely before use.
2. Wreath Base: The Foundation of Your Design
The choice of your wreath base significantly influences the final aesthetic and structure of your acorn wreath. All these options are readily available at craft supply stores:
- Styrofoam Wreath Form: Lightweight and incredibly easy to adhere materials to, making it an excellent choice for beginners. Available in a wide array of sizes.
- Straw Wreath Form: Offers a charming rustic texture that can subtly peek through the acorns for an added natural dimension. While slightly messier to work with, it’s an affordable option.
- Grapevine Wreath: A naturally beautiful base that provides a sturdy, organic backdrop. Acorns can be artfully nestled within its existing crevices, enhancing the organic feel of the wreath.
- Wire Wreath Frame: Less commonly used for solid acorn wreaths unless you plan to heavily wrap it with other materials or use a more open design.
Select a size that is appropriate for your intended display location, whether it’s a prominent front door, a cozy mantelpiece, or an accent wall.
3. Adhesive: Ensuring Lasting Beauty
- Hot Glue Gun and Glue Sticks: This is unequivocally the most popular and effective adhesive for attaching acorns. It offers rapid drying time and creates a strong, durable bond. Ensure you have an ample supply of glue sticks on hand.
- Strong Craft Adhesive: Products like E6000 or other industrial-strength craft glues can also be utilized, particularly if you prefer a longer drying time for precise adjustments. However, hot glue is generally favored for its speed and efficiency when working with a large volume of small items.
4. Embellishments: Adding Personal Character (Optional)
While a wreath composed solely of acorns possesses an inherent beauty, incorporating a few carefully chosen embellishments can elevate its design and introduce delightful focal points.
- Miniature Pumpkins or Gourds: Small artificial pumpkins or gourds are perfect for injecting vibrant pops of classic fall color and iconic autumn imagery.
- Pinecones: Integrating small to medium-sized pinecones can introduce an additional layer of natural texture and visual interest, complementing the acorns beautifully.
- Faux Leaves or Berries: Sprigs of vibrantly colored artificial fall leaves or clusters of faux berries can introduce extra hues and a touch of lively contrast to your design.
- Ribbon or Burlap: A decorative bow fashioned from burlap, plaid, or a luxurious satin ribbon can serve as a stylish hanger or a striking focal point, enhancing the overall aesthetic.
- Twine or Jute Cord: For those seeking a more rustic and minimalist hanging solution, twine or jute cord provides an excellent option.
Step-by-Step Guide: Crafting Your Magnificent Acorn Wreath
With all your supplies meticulously prepared, it’s time to embark on the exciting journey of bringing your acorn wreath vision to life. This process is both straightforward and immensely rewarding.
1. Prepare Your Creative Workspace
Begin by laying down newspaper, a drop cloth, or a dedicated craft mat to thoroughly protect your work surface from glue residue. Plug in your hot glue gun and allow it sufficient time to heat up to the optimal temperature. Arrange all your cleaned acorns, prepared embellishments, and tools within easy reach for a smooth workflow.
2. Commence Attaching the Acorns
- Building the First Layer: Start by hot gluing your acorns onto the wreath base. The most effective method is to work in small, manageable sections. Apply a small dot of hot glue to the bottom of an acorn (or its cap, depending on your preferred orientation) and press it firmly onto the wreath base.
- Establishing Direction and Pattern: You have the creative freedom to arrange your acorns in a uniform, concentric pattern for a neat and orderly appearance, or you can vary their orientation for a more organic and free-flowing aesthetic. A good starting point is to create an outer ring, followed by an inner ring, and then progressively fill in the central area.
- Achieving Density: Strive for comprehensive coverage to ensure the wreath base is fully concealed, particularly if its color contrasts sharply with the acorns. Overlapping acorns slightly can help achieve a fuller, richer appearance.
3. Thoughtfully Integrate Embellishments (If Desired)
Once a substantial base layer of acorns has been established, strategically position your chosen embellishments. For items like miniature pumpkins or pinecones, decide if you prefer an evenly distributed arrangement or a more clustered focal point. Apply hot glue to their base and gently press them into the layer of acorns or directly onto the exposed wreath form. Fill any remaining small gaps around these embellishments with smaller acorns to ensure a cohesive look.
4. Meticulously Fill Gaps and Add Finishing Touches
After the main body of the wreath is covered, hold it up and carefully inspect it from various angles and distances. Identify any noticeable gaps, sparse areas, or imperfections. Utilize smaller acorns, or even just acorn caps, to meticulously fill these voids, ensuring a consistently full and luxurious appearance. This is also the ideal moment to attach any final decorative elements, such as a beautifully tied ribbon bow at the top or bottom of the wreath.
5. Install a Secure Hanger
If your chosen wreath base does not include a pre-attached hanger, you’ll need to create one. Use a sturdy piece of decorative ribbon, resilient burlap, or rustic twine. Form a secure loop and either hot glue or firmly tie it to the back of the wreath, taking care to ensure it is perfectly balanced for hanging.
6. Allow Ample Time for Setting
Once your masterpiece is complete, allow it to rest undisturbed for at least an hour. This crucial setting period ensures that all the hot glue has thoroughly cooled and bonded, preventing any acorns or embellishments from dislodging when the wreath is finally hung.
Expert Tips for a Truly Stunning Acorn Wreath
To transform your acorn wreath from simply beautiful to an absolutely breathtaking display, consider incorporating these professional tips:
- Embrace Variety in Size and Orientation: Employing acorns of slightly different sizes and adhering them at varying angles adds significant depth, texture, and visual intrigue. Some acorns can face outwards, some inwards, and others sideways, creating a dynamic effect.
- Strategic Layering for Enhanced Dimension: Do not hesitate to glue some acorns directly on top of others. This layering technique creates a rich, sculptural quality, giving your wreath a luxurious, three-dimensional look.
- Thoughtful Color Palette Integration: While natural acorns boast exquisite earthy tones, you can introduce captivating accent colors. Consider lightly spray painting a few acorns with metallic gold or silver for a touch of refined glamour, or use vibrant orange and deep red to perfectly complement the fall foliage. The popular idea of painting acorns to resemble miniature pumpkins, often seen on platforms like Pinterest, is particularly enchanting!
- Preservation for Longevity: To protect your handcrafted wreath from environmental moisture and to help preserve the natural beauty of the acorns, you can lightly mist the finished piece with a clear matte or satin craft sealant. This step is highly recommended, especially if your wreath will be displayed outdoors (under a covered porch, not exposed directly to rain).
- Incorporate Complementary Seasonal Accents: Strategically integrate small, natural elements such as tiny pinecones, clusters of dried berries, or delicate faux fall leaves. These accents can beautifully break up the uniform texture of the acorns and introduce delightful visual pops of color and form.
- Mindful Storage for Future Seasons: When the fall season concludes, carefully store your acorn wreath in a sturdy, breathable box in a cool, dry environment. Proper storage ensures your beautiful creation will remain pristine and ready to adorn your home for many autumns to come.
Beyond Wreaths: Exploring More Acorn Crafting Ventures
The enchanting versatility of acorns extends far beyond the realm of wreaths. Once you’ve successfully mastered your acorn wreath, you might feel inspired to delve into other creative possibilities:
- Artfully Painted Acorns: As previously mentioned, transforming acorns into miniature pumpkins, whimsical ladybugs, or elegant metallic ornaments through paint can be incredibly rewarding.
- Rustic Acorn Garlands: Carefully drill small holes through the caps of prepared acorns (exercising caution!) and string them together using twine, fishing line, or decorative wire to create a charming garland perfect for adorning a mantelpiece, doorway, or window.
- Elegant Vase Fillers: Simply fill a clear glass vase, bowl, or decorative cloche with an abundant collection of polished acorns for an instant, effortlessly elegant fall centerpiece or accent piece.
- Charming Gift Toppers: Hot glue a few artfully decorated acorns onto wrapped gifts for a thoughtful, natural, and uniquely personalized touch that elevates any present.
- Whimsical Miniature Figures: Unleash your imagination by using acorns as the base for creating tiny animal figures, gnome-like characters, or other whimsical creatures by adding googly eyes, small felt pieces, or twigs.
- Cozy Candle Rings: Arrange a beautiful circle of acorns around the base of pillar candles to create a warm, inviting, and rustic candle display perfect for adding ambiance to any room.
Conclusion: Embrace the Enduring Beauty of Handmade Fall Decor
Creating a DIY acorn wreath is much more than a simple craft project; it is a delightful opportunity to fully embrace the inherent natural beauty of autumn, express your unique artistic flair, and imbue your home with a profound sense of warmth and personalized charm. It stands as a testament to the fact that the most exquisite and impactful decor often originates from the generous gifts of nature combined with a touch of creative spirit and dedicated effort.
So, gather your bounty of acorns, awaken your inner crafter, and immerse yourself in the joyful process of constructing a unique and truly stunning fall wreath. Let your creation gracefully greet every guest with the rustic elegance and heartfelt warmth that only a handmade autumn decoration can provide. Happy crafting and enjoy the magic of fall!