
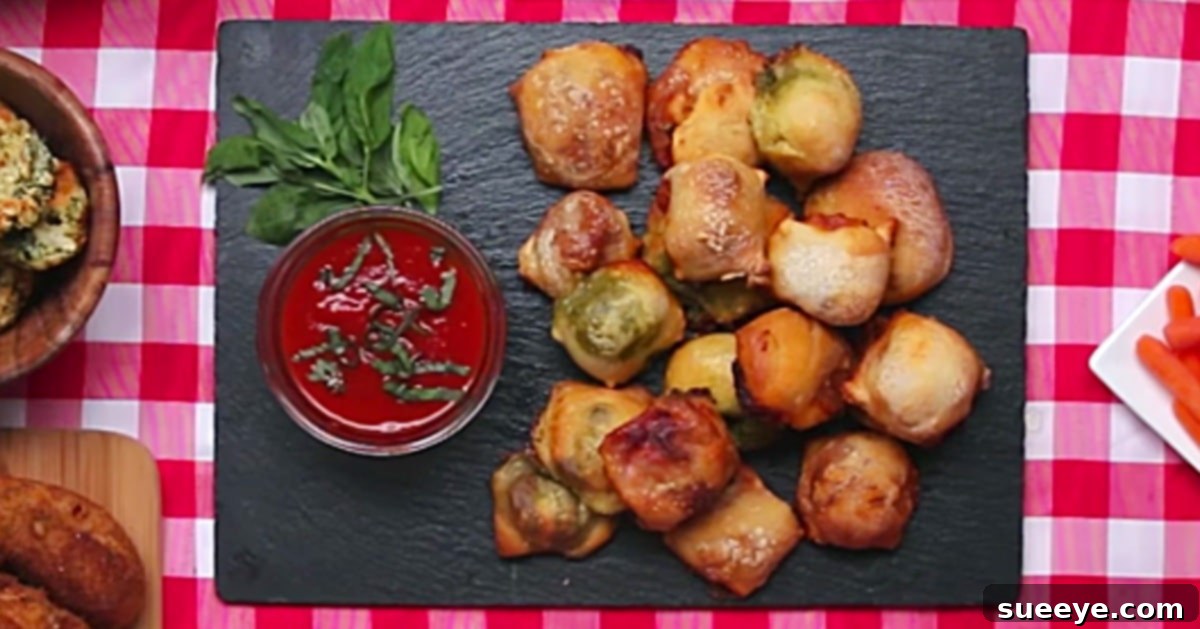
Ice Cube Tray Pizza Party Bites: Your Go-To Recipe for Easy Appetizers
In the vast culinary landscape of quick and creative snacks, a truly revolutionary concept has emerged: the art of transforming everyday kitchen tools into ingenious platforms for delightful bite-sized treats. While browsing for unique ideas, I stumbled upon a game-changing method that utilizes a humble ice cube tray to craft the most adorable and delicious mini pizzas imaginable. These aren’t just any snacks; they are the viral sensation known as Ice Cube Tray Pizza Party Bites, and they are poised to become your new favorite party food.
Forget the days of elaborate appetizers that demand hours of prep time. This recipe promises simplicity, customization, and an undeniable ‘wow’ factor, making it perfect for any occasion – from casual family gatherings to bustling office potlucks. I vividly recall a time when I needed a standout dish for a work event. My usual go-to, a hearty crockpot entree, was already claimed. That’s when these innovative pizza bites presented themselves as the ideal solution. They are not only incredibly easy to make but also offer a fun, interactive way to cater to diverse tastes. Let’s dive into how you can bring these irresistible mini pizzas to life, transforming simple ingredients into a memorable culinary experience.
Why Ice Cube Tray Pizza Bites Are a Party Game Changer
The concept of using an ice cube tray for pizza might sound unconventional, but its brilliance lies in its practicality and efficiency. Each compartment serves as a perfect mold for individual pizza portions, ensuring uniform size and even cooking. This method eliminates the fuss of cutting and shaping, allowing you to produce a large batch of appetizers in a fraction of the time it would take to make traditional mini pizzas. Beyond their ease of preparation, these pizza bites are incredibly versatile. You can customize each little ‘pizza square’ with different toppings, making it simple to accommodate various dietary preferences or adventurous palates. They are a guaranteed crowd-pleaser, appealing to both children and adults alike with their charming size and familiar, comforting flavors.
Gather Your Ingredients and Tools for Pizza Perfection
Before you embark on this delightful culinary adventure, ensure you have all your ingredients prepped and your workspace organized. The beauty of these pizza bites is that they require minimal special equipment, proving that gourmet-level appetizers can indeed be crafted with everyday kitchen items. Here’s a comprehensive list to get you started:
Essential Ingredients:
- Pizza Dough: One can of refrigerated “pop biscuit” pizza dough (such as Pillsbury Grands Flaky Layers Biscuits, flattened and rolled thin, or a similar easy-to-use canned pizza dough). This shortcut is a lifesaver for convenience, but feel free to use store-bought refrigerated pizza dough rolls or even your favorite homemade recipe if you’re feeling ambitious.
- Pesto: 1/4 cup. A vibrant basil pesto adds a layer of sophisticated flavor.
- Tomato Sauce: 1/4 cup. Classic marinara or a simple pizza sauce works best.
- Cheddar Cheese: 1/4 cup, shredded. Adds a sharp, savory note.
- Mozzarella Cheese: 1/4 cup, shredded. Essential for that classic stretchy, gooey pizza experience.
- Red Bell Pepper: 1/4 cup, finely diced. Adds a touch of sweetness and crunch.
- Ham: 1/4 cup, finely diced. A popular savory topping.
- Pineapple: 1/4 cup, finely diced (drained if canned). For those who love a sweet and savory combination.
- Mushrooms: 1/4 cup, finely diced. Earthy and savory.
- Green Bell Pepper: 1/4 cup, finely diced. Offers a slightly bitter, fresh contrast.
- Pepperoni: 1/4 cup, mini or finely chopped. The quintessential pizza topping.
Recommended Tools:
- Standard ice cube tray (silicone trays are excellent for easy removal!)
- Cutting board
- Sharp knife
- Small bowls for organizing toppings
- Rolling pin (optional, but helpful for dough)
- Parchment paper
- Baking sheet
Step-by-Step Guide to Crafting Your Pizza Party Bites
Step 1: Preparing Your Dough Foundation
Begin by unrolling your pizza dough. If you’re using canned biscuit dough, you’ll need to flatten and roll it out into a thin sheet, similar to a standard pizza crust. The goal is to create a sheet of dough large enough to cover your entire ice cube tray with a slight overhang on all sides. Lightly flour your cutting board or work surface to prevent sticking. Carefully lay the rolled-out dough over your clean ice cube tray, gently pressing it into each compartment to create distinct pockets. Ensure the dough extends slightly up the sides of each cube section. This forms the base and partial walls for your mini pizzas.
Step 2: The Art of Filling and Customization
Now comes the fun part: filling! Arrange your prepared fillings in small, separate bowls on your counter. This makes the assembly process smooth and efficient. Start with your ‘wet’ ingredients. Spoon a small amount of pesto into some compartments and tomato sauce into others. Don’t overfill; remember these are bite-sized! Next, add a sprinkle of cheddar cheese and mozzarella cheese into each compartment, layering them over your chosen sauce base. For the remaining toppings, let your creativity shine. Mix and match the finely diced red bell pepper, ham, pineapple, mushrooms, green bell pepper, and pepperoni. This is where you can truly cater to different preferences – perhaps a classic pepperoni, a Hawaiian ham and pineapple, or a vegetarian mushroom and pepper combination. Embrace the variety; not everyone loves ham and pineapple, after all!
Step 3: Sealing and Freezing for Structure
Once all your compartments are filled to perfection, it’s time to seal them. Take another sheet of rolled-out pizza dough and carefully lay it over the top of your filled ice cube tray. Gently press down around the edges of each compartment to seal the top layer of dough to the bottom layer. You can use your fingers or even a rolling pin to lightly press over the grid of the ice tray, creating individual sealed pockets. Trim any excess dough from the edges. This step is crucial for keeping the fillings intact during the freezing and baking process. After sealing, place the entire ice cube tray into the freezer for at least one hour. Freezing helps the pizza bites firm up, making them incredibly easy to pop out of the tray and maintain their shape during baking.
Step 4: Baking Your Golden Pizza Bites
Preheat your oven to 375°F (190°C). While the oven is heating, line a baking sheet with parchment paper. Once your pizza bites have thoroughly frozen (they should be quite solid), carefully turn the ice cube tray upside down over your prepared baking sheet. A gentle twist or a light tap on the back of the tray should release the perfectly formed, frozen pizza bites onto the parchment paper. Arrange them in a single layer, ensuring there’s a little space between each one for even cooking. Bake for approximately 20 to 30 minutes, or until the dough is golden brown and crispy, and the cheese is melted and bubbly. The exact baking time may vary depending on your oven and the thickness of your dough, so keep an eye on them!
Serving Suggestions and Pro Tips
Once your Ice Cube Tray Pizza Party Bites are baked to perfection, allow them to cool for a few minutes before serving. They are best enjoyed warm, when the cheese is still gooey and the crust is crisp. These bites are fantastic on their own, but you can elevate the experience by serving them with an array of dipping sauces, such as warm marinara, creamy ranch, or even a spicy sriracha mayo. For an extra touch, garnish with fresh basil or a sprinkle of Parmesan cheese.
Pro Tips for Success:
- Don’t Overfill: Less is more when it comes to fillings in small compartments. Overfilling can make sealing difficult and lead to messy bites.
- Silicone Trays are Gold: If you have one, use a silicone ice cube tray. They are incredibly flexible, making the frozen bites much easier to pop out without breaking.
- Vary Your Dough: While canned biscuit dough is super easy, feel free to experiment with puff pastry for a flakier bite or even thin-cut bread slices pressed into the molds.
- Endless Topping Possibilities: Consider other toppings like cooked sausage crumbles, finely chopped olives, sun-dried tomatoes, spinach (blanched and squeezed dry), or different cheese blends like provolone or feta.
- Make Ahead: These pizza bites are excellent for meal prepping. Bake them, let them cool, and then store them in an airtight container in the refrigerator for up to 3-4 days. Reheat in the oven or air fryer for best results.
- Freezing Unbaked: You can also freeze the unbaked bites (after step 3) for up to a month. When ready to bake, simply place them on a parchment-lined baking sheet and bake from frozen, adding a few extra minutes to the baking time.
Conclusion: A Bite-Sized Triumph for Any Gathering
These Ice Cube Tray Pizza Party Bites proved to be an absolute sensation at the office potluck, earning rave reviews for their ingenious presentation, delicious taste, and undeniable convenience. They were so simple to make, yet looked incredibly impressive, embodying the perfect balance of effortless preparation and gourmet appeal. Whether you’re hosting a party, preparing for a potluck, or simply looking for a fun and easy snack to enjoy at home, this recipe is a true winner. Get ready to impress your guests and delight your taste buds with these charming, customizable mini pizzas. Happy cooking!