
How to Deep Clean Your Yeti Cup: A Comprehensive Guide to Lasting Freshness
A Yeti cup is more than just a beverage container; it’s an investment in superior insulation, robust durability, and a commitment to keeping your drinks at the perfect temperature for hours. Owners worldwide cherish their Yeti products for their unwavering performance and rugged design, making them a staple for everything from morning commutes to outdoor adventures. However, even the most resilient products require a bit of tender loving care to maintain their peak condition and hygiene. Over time, continuous use can lead to unsightly grime, unpleasant odors, and the accumulation of bacteria, especially around the intricate areas of the lid and its sealing gasket. Neglecting these areas can not only diminish the aesthetic appeal of your cherished cup but also compromise its hygienic integrity and potentially impact the taste of your beverages.
Understanding the importance of regular and thorough cleaning is key to extending the life of your Yeti and ensuring every sip is as fresh as the first. We’ve all been there – that moment when you notice a stubborn stain or a faint smell emanating from what should be a pristine vessel. Fortunately, restoring your Yeti cup to its sparkling glory is a straightforward process, requiring just a few common household items and a little dedication. Inspired by an incredibly helpful video tutorial by Jarvis Outdoors on YouTube, we’ve compiled a comprehensive guide to mastering the art of Yeti cup cleaning. This method focuses on simplicity and effectiveness, tackling the notorious grime that accumulates around the lid and gasket area with ease. Get ready to transform your well-loved Yeti back into a perfectly clean, odor-free companion ready for countless more adventures.
Why Regular Yeti Cup Cleaning is Essential
Maintaining the cleanliness of your Yeti cup goes far beyond simple aesthetics. It’s crucial for several reasons that directly impact your health, the performance of your cup, and the overall longevity of your investment. Ignoring routine cleaning can lead to a host of issues that many users unknowingly encounter.
- Hygiene and Health: Perhaps the most critical reason for regular cleaning is to prevent the buildup of bacteria, mold, and mildew. Beverages, especially those containing sugars like coffee, tea, or juice, leave residues that become a breeding ground for microorganisms. These can lead to unpleasant odors, strange tastes, and, more importantly, potential health risks. The tight seals and hidden crevices of a Yeti lid are particularly susceptible to trapping moisture and organic matter, making them prime locations for germ growth.
- Eliminating Odors and Stains: Persistent odors are a common complaint among users who don’t clean their cups thoroughly. Coffee, protein shakes, or even plain water can leave behind a distinctive smell if allowed to sit or if the cup isn’t dried properly. Similarly, dark beverages can leave stubborn stains that detract from your Yeti’s appearance. Regular cleaning, especially of the gasket and lid components, is the best defense against these issues.
- Preserving Performance and Longevity: The gasket within your Yeti lid is vital for its insulating properties and leak-proof design. Over time, grime and mineral deposits can degrade the material of the gasket, causing it to lose its elasticity and seal effectiveness. This can lead to leaks and a noticeable drop in temperature retention. Proper cleaning helps preserve the integrity of these components, ensuring your Yeti continues to perform as intended for years to come.
- Maintaining Investment Value: A Yeti cup is not a cheap purchase; it’s a premium product designed to last. Treating it with care, including consistent cleaning, protects this investment. A well-maintained Yeti retains its appearance and functionality, reflecting the quality you paid for.
Understanding Your Yeti Cup’s Components for Effective Cleaning
Before diving into the cleaning process, it’s beneficial to understand the different parts of your Yeti cup, particularly its lid, as these are the areas most prone to grime accumulation. While the stainless steel body is relatively easy to clean, the multi-component lid requires a more nuanced approach.
- The Cup Body: Typically made from durable 18/8 stainless steel, the body is designed for insulation and strength. Its smooth surfaces are generally easy to clean, but the interior can develop stains or residues from beverages.
- The Lid: Yeti offers various lid types (e.g., MagSlider, Straw Lid, Chug Cap). Each design, while innovative, often features multiple removable parts for both functionality and ease of cleaning. The key is knowing which parts can be safely disassembled.
- The Gasket: This is a flexible rubber or silicone ring located inside the lid, crucial for creating an airtight, leak-proof seal between the lid and the cup. The gasket’s soft, porous nature, combined with its hidden location, makes it a prime spot for trapping moisture, food particles, and bacteria. It’s often the source of unpleasant smells and stubborn grime.
- MagSlider (on specific lids): This magnetic slider mechanism allows for easy opening and closing of the drinking spout. While convenient, the slider and its tracks can also harbor grime and require separate attention.
The primary challenge in cleaning a Yeti often lies with the lid and its gasket. These components are designed to seal tightly, which, while excellent for preventing spills and maintaining temperature, also creates ideal environments for moisture and residue to become trapped. This makes systematic disassembly and meticulous cleaning of each part absolutely essential for truly sanitizing your Yeti.
Essential Materials for a Sparkling Clean Yeti Cup:
Gathering your supplies beforehand will make the cleaning process smooth and efficient. You likely already have most of these items in your home:
- Warm Water: The foundation for any effective cleaning solution, warm water helps to loosen grime and dissolve soap more effectively than cold water.
- Gentle Dish Soap: A small amount of your regular dish soap is perfect. Look for one that’s mild and free of harsh chemicals, as strong detergents can potentially degrade the lid materials or leave a residue that affects the taste of your drinks.
- Wet Paper Towels: Ideal for initial wiping and removing visible grime, especially from the gasket. Their disposable nature makes them hygienic for tackling mold and bacteria. Alternatively, a clean sponge or soft cloth can be used.
- Clean Towel (for drying): A soft, absorbent towel is essential for drying your cup and its components completely after washing. This step is critical in preventing water spots and inhibiting the growth of mold and mildew.
- Small Brush or Q-tips (Optional but Recommended): For those stubborn spots and hard-to-reach crevices within the lid and gasket, a small brush (like an old toothbrush or a bottle brush for the cup’s interior) or cotton swabs (Q-tips) can be invaluable.
- White Vinegar or Baking Soda (Optional, for stubborn issues): These natural cleaners are excellent for tackling persistent odors, tough stains, or mineral buildup. They can be used for soaking or creating a paste.
- A Small Bowl or Basin: Useful for soaking disassembled lid parts in soapy water or a vinegar solution.
Step-by-Step Guide: How to Deep Clean Your Yeti Cup
Following these steps will ensure every part of your Yeti cup, especially the often-overlooked lid and gasket, is thoroughly cleaned and sanitized. This method, inspired by the practical advice from Jarvis Outdoors on YouTube, is designed for maximum effectiveness and ease.
Step 1: Disassemble the Lid Completely
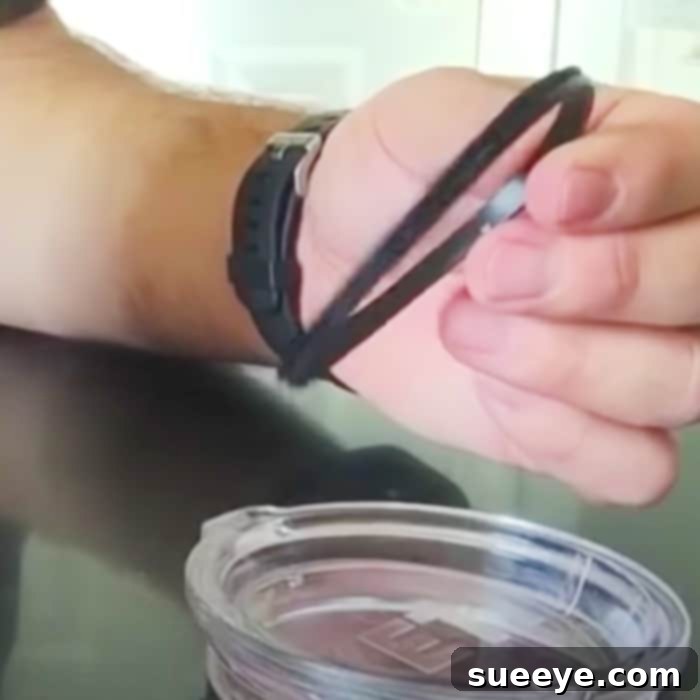
The first and most critical step is to take your Yeti lid apart. Many users overlook this, but grime loves to hide in the sealed areas. Begin by carefully removing the gasket from the lid. This is usually a flexible rubber or silicone ring that sits snugly in a groove around the inner perimeter of the lid. Gently peel it out with your fingers. If your lid has a MagSlider or other removable parts (like a spout cover or a straw attachment), remove those as well. Separating these components allows for a thorough clean of all surfaces.
Step 2: Initial Rinse and Pre-Scrub
Once all parts are disassembled, give them a good initial rinse under warm, running water. This helps to wash away any loose debris, leftover beverage residue, or surface-level grime. For the cup body, you can use a bottle brush to lightly scrub the interior, dislodging any visible particles before the soapy wash. This pre-rinse makes the subsequent cleaning steps more effective.
Step 3: Deep Clean the Gasket
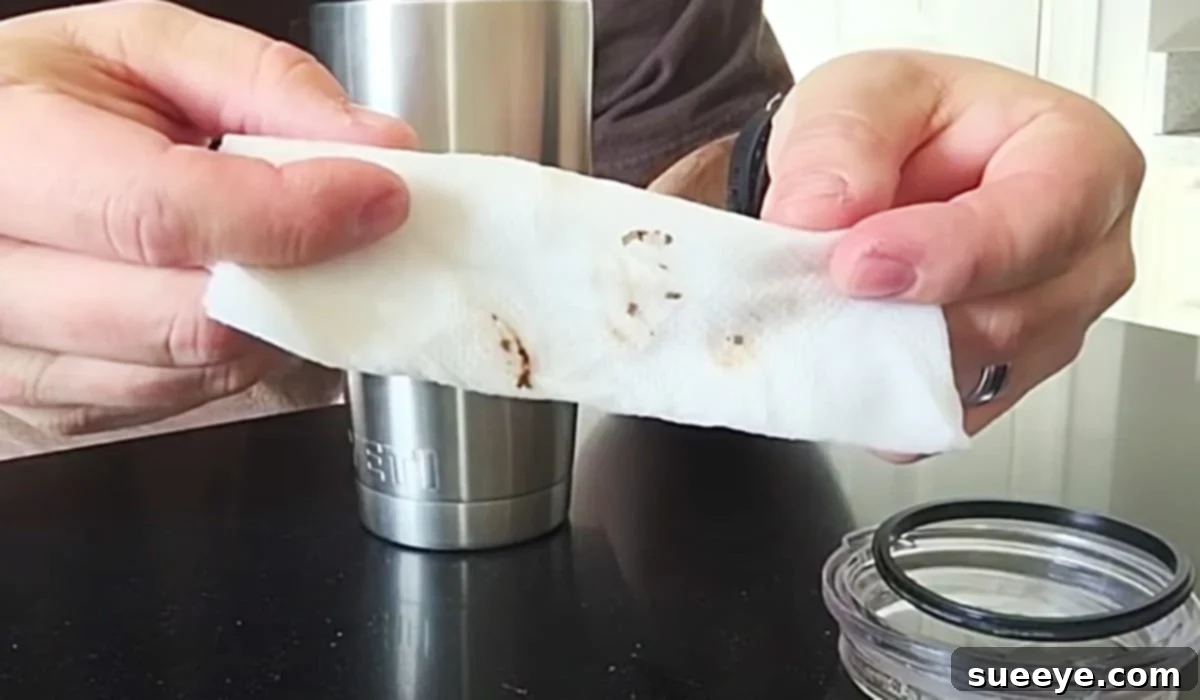
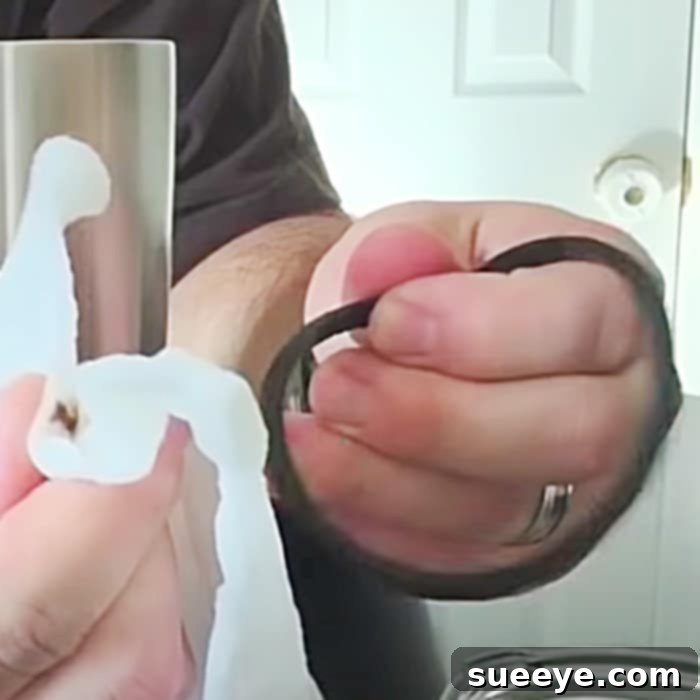
This is where much of the magic happens, as the gasket is a primary culprit for odor and grime. Take the removed gasket and place it in a small bowl with warm, soapy water (using your gentle dish soap). Let it soak for a few minutes to soften any caked-on residue. Then, pick up the gasket and, using a wet paper towel or a small brush (like an old toothbrush or a Q-tip), thoroughly scrub every surface. Pay close attention to the grooves, creases, and any areas where it connects with the lid. You will likely be amazed at how much grunge comes off this seemingly innocuous ring. Rinse it well under running water, inspecting it closely to ensure no grime remains.
Step 4: Clean the Lid Components
Next, focus on the main body of the lid and any other removable parts. Using warm, soapy water and a sponge or small brush, scrub all surfaces of the lid. Don’t forget the underside, especially the channel where the gasket sits. For MagSlider lids, make sure to clean both the slider piece itself and the track it moves along. Q-tips are excellent for reaching into tiny openings and crevices. Ensure you clean the drinking spout thoroughly, as this is where your mouth makes direct contact.
Step 5: Wash the Cup Body
Now, address the main cup body. Pour warm, soapy water into the cup and use a bottle brush or a sponge to scrub the entire interior surface. Pay attention to the bottom and sides where residues can accumulate. Wash the exterior of the cup with soapy water and a sponge, wiping away any smudges or marks. Rinse thoroughly, ensuring no soap remains inside or out.
Step 6: Rinse All Parts Thoroughly
This step is crucial for preventing soap residue and ensuring a pure taste for your next beverage. Rinse every single component – the cup, lid, gasket, and any other parts – under clean, running water. Continue rinsing until you can no longer see or feel any slipperiness from the soap. Any lingering soap can leave an unpleasant aftertaste and potentially attract new grime more quickly.
Step 7: Dry Completely Before Reassembly
Perhaps the most overlooked, yet vital, step in preventing mold and mildew is complete drying. After rinsing, use a clean, dry towel to meticulously dry each component. For the cup body, you can place it upside down on a drying rack. Lay the lid components and the gasket separately on a clean towel or drying rack, allowing them to air dry completely. Ensure there is no moisture left in any crevices, especially within the gasket or lid channels. This might take a few hours, so patience is key. Reassembling wet parts is an open invitation for mildew growth.
Step 8: Reassemble Your Clean Yeti
Once all parts are bone dry, carefully reassemble your Yeti lid. Reattach the gasket, making sure it sits perfectly in its groove to ensure a leak-proof seal. Then, reinsert any MagSlider pieces or other lid components. Double-check that everything is properly aligned and securely in place. Your Yeti is now sparkling clean, odor-free, and ready for its next adventure, ensuring your drinks taste exactly as they should.
Tips for Maintaining a Spotless Yeti Cup
Beyond the deep clean, a few simple habits can keep your Yeti cup in pristine condition day after day:
- Rinse Immediately After Use: The simplest way to prevent grime buildup is to rinse your cup and lid with warm water immediately after you finish your drink. This prevents residues from drying and sticking.
- Air Dry Daily: After a quick rinse, disassemble the lid and allow all parts to air dry completely overnight. Storing a wet cup with its lid on is the fastest way to encourage mold and mildew.
- Avoid Abrasive Cleaners: Harsh scrubbing pads, steel wool, or abrasive chemicals can scratch the stainless steel finish or damage the lid components and gaskets. Stick to soft brushes, sponges, and gentle dish soap.
- Consider a Weekly Deep Clean: Depending on how frequently you use your Yeti and what you drink, aim for a full deep clean (including gasket removal) at least once a week or every other week.
- Dishwasher Safety: While many Yeti cups and lids are now dishwasher safe (check your specific model’s instructions), handwashing the gasket and intricate lid components often provides a more thorough clean, ensuring no hidden areas are missed. Always place lids and gaskets on the top rack if using a dishwasher.
- Baking Soda for Odors: If you notice a lingering smell, a paste made from baking soda and water can be applied to affected areas, left for a few minutes, then scrubbed and rinsed. For the cup interior, fill it with warm water and a tablespoon of baking soda, let it sit overnight, then rinse.
Troubleshooting Common Yeti Cleaning Issues
Even with regular cleaning, some issues can pop up. Here’s how to tackle them:
- Persistent Odors: If your cup still smells after cleaning, try a white vinegar soak. Fill the cup with a 1:1 mixture of white vinegar and warm water, let it sit for several hours or overnight. For the lid and gasket, soak them in the same solution in a bowl. Rinse thoroughly afterward. The vinegar smell will dissipate as it dries.
- Stubborn Stains (inside cup): For coffee or tea stains, a baking soda paste can work wonders. Mix baking soda with a little water to form a thick paste, apply it to the stain, let it sit for 15-30 minutes, then scrub with a bottle brush and rinse. Lemon juice can also help with some stains.
- Mold/Mildew on Gasket: If you discover mold, a more aggressive approach might be needed. After scrubbing with soapy water, you can soak the gasket in a diluted bleach solution (1 teaspoon of bleach per gallon of water) for no more than 15-30 minutes. Rinse it extremely thoroughly multiple times with hot water to ensure all bleach residue is gone. Always exercise caution with bleach and ensure good ventilation. Regular complete drying is the best prevention.
- Mineral Deposits: Hard water can leave mineral deposits, especially around the lid and gasket. White vinegar is excellent for dissolving these. Soak the affected parts in undiluted white vinegar for an hour or two, then scrub and rinse.
The Longevity of Your Yeti Investment
Your Yeti cup is built to endure, designed with high-quality materials to accompany you on countless adventures. However, even the toughest tools require care to perform their best. By committing to a simple, consistent cleaning routine, you’re not just removing grime; you’re actively safeguarding the integrity of its insulation, the functionality of its lid, and the overall aesthetic appeal that made you choose a Yeti in the first place. Think of it as a small investment of time that pays dividends in years of reliable service and refreshing sips.
A well-maintained Yeti means fewer replacements, less waste, and continued enjoyment of your favorite beverages at their ideal temperature, day in and day out. It’s a testament to good stewardship and the simple pleasure of owning a product that feels and performs like new, even after extensive use. Embrace these cleaning practices, and your Yeti will remain a trusted companion, ready for whatever life throws at it.
Conclusion
Cleaning your Yeti cup, particularly its often-neglected lid and gasket, is a straightforward but essential process that significantly contributes to its longevity, hygiene, and overall performance. By following this comprehensive guide, taking the time to disassemble your lid, meticulously clean each component with warm, soapy water, and ensuring everything is thoroughly dried before reassembly, you can effectively eliminate grime, odors, and potential bacteria buildup. This simple routine ensures your cherished Yeti remains a fresh, leak-proof, and highly effective vessel for all your hydration needs. Remember, a little attention goes a long way in preserving your investment. So, take a moment, give your Yeti the clean it deserves, and continue enjoying perfectly temperature-controlled drinks for many years to come, just as Jarvis Outdoors wonderfully demonstrates the simplicity of this vital maintenance.