
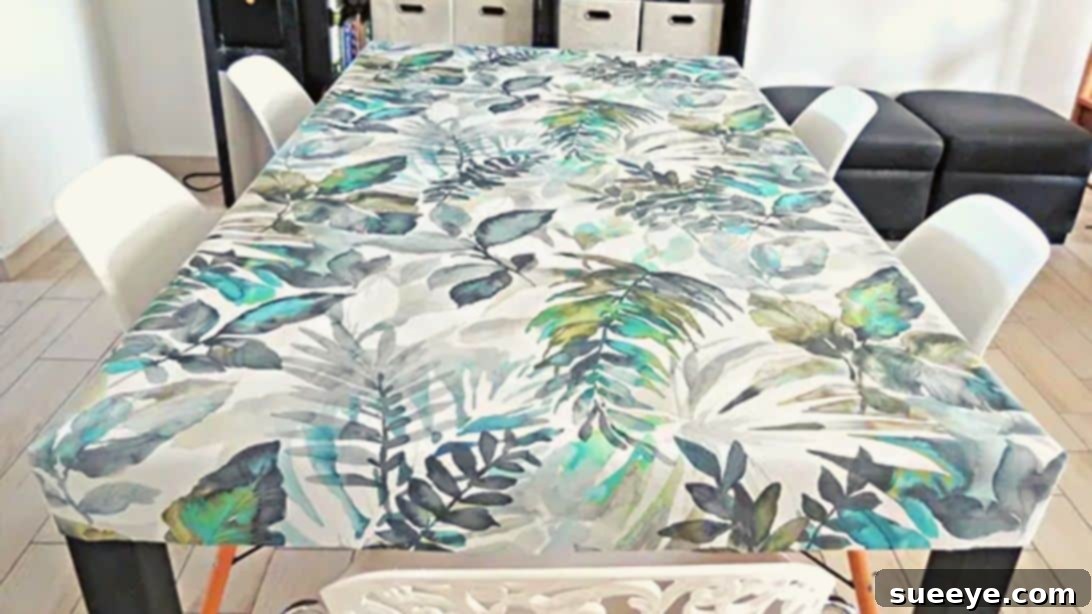
Master the Art of Sewing a Fitted Tablecloth: A Beginner-Friendly DIY Guide
Are you tired of tablecloths that slip, slide, or simply don’t fit your table properly? Do you dream of a neat, custom look for your dining area, craft space, or outdoor patio? Look no further! This detailed guide will walk you through the surprisingly simple process of how to sew a fitted tablecloth that stays perfectly in place, offering both aesthetic appeal and practical protection. Whether you’re a seasoned seamstress or just starting your sewing journey, this project is designed for success.
A fitted tablecloth is a game-changer. It not only provides a clean, tailored appearance but also offers superior protection against spills, scratches, and everyday wear and tear. Imagine effortlessly transforming your table with a stylish cover that remains smooth and wrinkle-free, no matter the activity. This tutorial makes it easy to achieve that professional finish right from your home, using just a few basic sewing tools and clear, concise instructions.
This beginner-friendly sewing project is inspired by the excellent video tutorial from Amaryllis on YouTube. We’ll build upon her foundational steps, expanding on each detail to ensure you gain a comprehensive understanding and confidence throughout the process. You’ll be able to create a multitude of tablecloths in various patterns and colors, perfect for different occasions, as thoughtful handmade gifts, or even to start your own small crafting business. The finished result is not just functional, but undeniably pretty, adding a touch of personalized elegance to any space.
Let’s gather our supplies and dive into creating your very own custom-fitted tablecloth!
Essential Materials for Your Fitted Tablecloth Project
Before you begin, ensure you have all the necessary tools and materials at hand. Quality materials not only make the sewing process smoother but also contribute to the longevity and appearance of your finished tablecloth. Here’s what you’ll need:
- Oilcloth or Laminated Cotton: This is the star of our project. These fabrics are chosen for their water-resistant and easy-to-clean properties, making them ideal for a durable tablecloth. Oilcloth is generally thicker and more rigid, while laminated cotton offers a softer drape with a matte or glossy finish. Consider the pattern and color that best suits your decor. Always purchase a little more than your calculated yardage to account for any errors or pattern matching.
- Masking Tape (or Painter’s Tape): Crucial for temporarily securing your fabric to the table and marking precise cutting lines without damaging your table surface. Choose a tape that is easily removable and doesn’t leave residue.
- Sharp Fabric Pins: Essential for holding fabric layers together, especially at the corners, before sewing. Opt for thin, sharp pins to avoid leaving noticeable holes in your fabric, particularly with laminated materials.
- High-Quality Fabric Scissors: Sharp scissors are non-negotiable for clean, accurate cuts. Dull scissors can fray edges and lead to uneven lines, making the subsequent sewing steps more challenging.
- Matching Thread: Select a thread color that either perfectly matches your fabric or complements it subtly. Polyester thread is generally recommended for its strength and durability, especially for items that will see frequent use and washing.
- Sewing Machine: A standard home sewing machine is perfectly adequate for this project. Ensure it’s in good working order and you’re comfortable with basic stitches.
- Measuring Tape or Ruler: For accurate measurements of your tabletop.
- Iron (Optional but Recommended): While oilcloth/laminated cotton doesn’t typically require pressing during sewing, an iron can be useful for flattening any stubborn creases in the fabric before you begin, using a low heat setting and a pressing cloth to protect the surface.
Step-by-Step Instructions: Crafting Your Fitted Tablecloth
Follow these detailed instructions carefully to ensure a beautifully tailored and perfectly fitted tablecloth.
Step 1: Precise Measuring and Initial Fabric Preparation
Accuracy in this initial step is paramount to achieving a perfect fit. Take your time with measurements and cuts to avoid costly mistakes later on.
- Measure Your Tabletop: Begin by precisely measuring the length and width of your table’s surface. Use a reliable measuring tape to get exact dimensions from edge to edge. Record these measurements carefully.
- Calculate Fabric Yardage: To determine the necessary fabric dimensions, you will need to add an allowance for the sides of the table (the “drop”) and for seam allowances. Add 8 inches (approximately 20 cm) to your measured table length and 8 inches (approximately 20 cm) to your measured table width. This 8-inch addition accounts for a standard 4-inch drop on each side of the table and a 1/4-inch to 1/2-inch seam allowance for finishing the corners. For example, if your table measures 60 inches long by 36 inches wide, your fabric piece should be 68 inches long by 44 inches wide.
- Position the Fabric: Lay your chosen oilcloth or laminated cotton fabric on your table with the wrong side facing up. This allows you to mark and tape without affecting the visible side of your tablecloth. Smooth out any wrinkles or bubbles to ensure the fabric lies completely flat.
- Align and Secure One Corner: Carefully align one corner of the fabric with a corner of your table’s low edge. This alignment establishes your baseline for the rest of the fabric. Once perfectly aligned, use masking tape to firmly secure this corner to the table. This prevents any shifting during the subsequent trimming process.
- Trim the First Two Sides: From your secured corner, carefully cut along the table’s edge for the two adjacent sides. Use your sharp fabric scissors to follow the contour of the tabletop’s low edge precisely. Take slow, deliberate cuts to maintain a straight line. The goal here is to trim off excess fabric that would extend beyond the table’s intended drop.
- Continue Trimming and Taping: Once those first two sides are trimmed, continue around the table, aligning the fabric with the low edge of the table and using masking tape to secure it in place as you go. Systematically trim the remaining two sides, ensuring that all excess fabric beyond the table’s profile is removed. This process essentially creates a fabric “lid” that perfectly matches the top and sides of your table, ready for forming the fitted corners. Ensure the fabric is taut but not stretched when taping, as stretching can lead to an ill-fitting tablecloth.
- Final Fabric Adjustment: After all sides are trimmed and taped, double-check that the fabric is securely taped all around the table perimeter. This ensures the fabric remains in its exact position, preventing any slippage while you prepare for the next step.
Step 2: Pinning, Sewing, and Finishing the Corners
This is where your flat piece of fabric transforms into a three-dimensional, fitted tablecloth. Precision in pinning and sewing will ensure sharp, professional-looking corners.
- Pin the Four Corners: With the fabric still securely taped to the table, carefully go to each of the four corners. You will notice that at each corner, the fabric now forms a sort of “pocket” or excess material that drops down. Pinch this excess fabric at the table corner, bringing the two raw edges together. Place your pins vertically, ensuring they are close enough to the actual table corner to mimic the exact angle of your table. The pins should go through both layers of the fabric, holding them firmly in place. Using vertical pins makes it easier to remove them just before your sewing machine needle reaches them. Repeat this pinning process for all four corners of your tablecloth.
- Remove Fabric and Prepare for Sewing: Once all four corners are securely pinned, carefully remove the entire fabric piece from the table. Try to keep the pinned corners undisturbed.
- Sew the Corner Seams: Take the fabric to your sewing machine. Starting with one pinned corner, carefully sew a straight stitch along the pinned line. As you approach each pin, remove it just before your needle reaches it to prevent damage to your machine or an uneven stitch. A standard straight stitch is sufficient for these seams. Remember to backstitch at the beginning and end of each seam to secure the stitches and prevent unraveling. Aim for a consistent seam allowance, typically 1/4 inch (6mm) to 1/2 inch (12mm) from the raw edge, depending on your preference and the fabric thickness. If you added 8 inches to your initial measurement, a 1/2-inch seam allowance would work well for a clean finish and a 4-inch drop.
- Trim Excess Fabric at Seams: After sewing each corner seam, use your fabric scissors to trim the excess fabric within approximately 1/4 inch (6mm) from the newly sewn seam. This reduces bulk, creates a neater finish, and helps the corners lie flat. Be careful not to cut too close to your stitches.
- Check and Align Bottoms (Optional): Once all four corners are sewn and trimmed, you can optionally try the tablecloth back on the table, wrong side out. This allows you to check if the bottom edges are aligned evenly around the table. If you notice any slight discrepancies or unevenness in the drop, you can carefully trim the bottom hem of the tablecloth to ensure a perfectly straight and consistent bottom edge. This step is crucial for a professional finish.
- Repeat for All Corners: Continue these steps – sewing the pinned line, backstitching, and trimming – for all four corners of your tablecloth. Once all corners are completed, your fitted tablecloth is ready! Turn it right side out, place it on your table, and admire your handiwork.
Why Choose a Fitted Tablecloth? Beyond Just Aesthetics
While the tailored look of a fitted tablecloth is undeniably appealing, its benefits extend far beyond mere aesthetics. Understanding these advantages can inspire you to create several for various purposes and rooms in your home.
- Unmatched Stability: One of the primary frustrations with traditional tablecloths is their tendency to slip, bunch, and pull, especially in high-traffic areas or during meals. A fitted tablecloth, with its snug corners, stays perfectly in place. This stability is particularly beneficial for outdoor dining, craft projects, or busy family meals, preventing spills and keeping your tabletop undisturbed.
- Superior Table Protection: Oilcloth and laminated cotton are excellent barriers against spills, scratches, and heat rings. A fitted design ensures that this protective layer covers not only the top but also the sides of your table, offering comprehensive defense against daily wear and tear. This is invaluable for preserving the condition of cherished wooden tables or extending the life of everyday furniture.
- Clean and Tidy Appearance: The crisp lines and smooth surface of a fitted tablecloth instantly elevate the look of any room. It provides a polished, professional finish that standard tablecloths often lack. This neatness contributes to a more organized and inviting atmosphere, whether it’s your dining room, kitchen, or a dedicated workspace.
- Easy Maintenance: The materials recommended for this project—oilcloth and laminated cotton—are incredibly easy to clean. Most spills can be simply wiped away with a damp cloth, making cleanup after meals or craft sessions a breeze. This low-maintenance aspect saves time and effort, ensuring your table always looks fresh.
- Versatility and Customization: By sewing your own, you have complete control over the design. Choose from an endless array of patterns, colors, and textures to perfectly match your decor, reflect seasonal themes, or express your personal style. You can create different tablecloths for different occasions, adding a touch of personality and flair to your home.
- Durability: Laminated fabrics are known for their resilience. A well-made fitted tablecloth will withstand repeated use and cleaning, proving to be a long-lasting addition to your home. This DIY project offers an economical way to achieve durable, high-quality table coverings without the expense of custom-made options.
Choosing the Right Fabric for Your Project
The success and longevity of your fitted tablecloth largely depend on the fabric you choose. Oilcloth and laminated cotton are excellent choices, but understanding their nuances can help you make the best decision.
- Oilcloth: Traditionally made from cotton duck fabric treated with linseed oil, modern oilcloth is often PVC-coated. It’s renowned for its heavy-duty durability, stiffness, and vibrant, often retro, patterns. Oilcloth is highly water-resistant and incredibly easy to wipe clean, making it perfect for kitchen tables, outdoor settings, or craft tables where mess is common. Its stiffness also helps it hold its shape well for fitted applications.
- Laminated Cotton: This fabric is typically a regular cotton fabric with a thin, clear layer of polyurethane (PUL) or vinyl applied to one side. It offers a softer drape than traditional oilcloth and comes in a much wider variety of prints and weights, as virtually any cotton print can be laminated. Laminated cotton is also water-resistant and easy to clean, making it a versatile choice for both everyday and special occasions. It might be slightly easier to sew for beginners due to its less rigid nature.
When selecting your fabric, consider:
- Table Usage: For heavy-duty use, outdoor tables, or messy children’s craft areas, traditional oilcloth might be the more robust choice. For a softer look and feel, or if you want a wider range of patterns, laminated cotton is ideal.
- Pattern and Color: The beauty of DIY is customization. Choose a pattern that complements your existing decor or makes a bold statement. Don’t be afraid to experiment with florals, geometrics, or classic stripes.
- Care Instructions: Both types of fabric are generally wipe-clean. Avoid machine washing or harsh detergents, as these can degrade the laminate layer. Gentle hand wiping is usually sufficient.
Expert Tips for a Flawless Finish
Even for simple projects, a few professional tips can make a significant difference in the outcome.
- Pre-wash (if applicable): If you choose a non-laminated fabric (though not recommended for this project), always pre-wash and dry it to prevent shrinkage later. For laminated fabrics, a gentle wipe-down is sufficient.
- Use a Walking Foot: If your sewing machine struggles with laminated fabrics (they can be a bit sticky), consider using a walking foot attachment. This foot helps feed both layers of fabric through the machine evenly, preventing puckering and skipped stitches.
- Lengthen Your Stitch: A slightly longer stitch length (e.g., 3.0-3.5 mm) works better with laminated fabrics, as too many needle perforations can weaken the waterproof barrier.
- No-Pin Options: If you find pins leave noticeable holes in your laminated fabric, try using fabric clips (binder clips work well too) instead of pins to hold the corners together before sewing.
- Test Stitch: Always test your stitch length and tension on a scrap piece of your chosen fabric before sewing your actual project. This ensures your settings are correct for the material.
- Pressing Seams (with caution): While oilcloth and laminated cotton don’t typically need pressing like regular fabric, if you find your seams are not lying flat, you can *very carefully* press them open with a low-heat iron and a pressing cloth, making sure the iron doesn’t directly touch the laminated surface. Only do this if absolutely necessary and test on a scrap first.
- Consider a Hem: While the tutorial focuses on simple corner seams, you could add a neat hem around the bottom edge of the tablecloth for an even more polished look. This would require adding an additional 1-2 inches to your fabric calculation for the hem allowance.
Creative Variations and Customization
Once you’ve mastered the basic fitted tablecloth, you might want to explore some creative enhancements:
- Elasticized Edge: For an even more secure fit, especially on outdoor tables, consider adding a strip of elastic to the bottom edge. Create a casing by folding up the hem and threading elastic through, gathering it slightly for a snug fit.
- Ruffled Edge: Add a playful touch by sewing a ruffle along the bottom edge of your fitted tablecloth. This requires creating and gathering a long strip of fabric before attaching it.
- Different Table Shapes: This tutorial focuses on rectangular tables, but the same principles can be applied to round or oval tables. You’d need to measure the circumference and use a pattern-making approach for the curves, but the corner-forming technique can be adapted to create tailored “darts” or seams for any shape.
- Appliqués or Embroidery: For a personalized touch, consider adding appliqués, embroidery, or fabric paint to your laminated cotton tablecloth (ensure materials are suitable for laminated surfaces).
Care and Maintenance for Your Fitted Tablecloth
To ensure your beautiful handmade tablecloth lasts for years, proper care is essential.
- Wipe Clean Regularly: The best way to clean oilcloth and laminated cotton is to simply wipe them down with a damp cloth and mild soap (if necessary).
- Avoid Machine Washing: Do not machine wash, tumble dry, iron directly, or dry clean these fabrics. The harshness of the machine and high heat can damage or strip the laminated coating.
- Spot Treat Stains: For tougher stains, a gentle scrub with a soft brush and a mild detergent solution can be used, followed by a thorough wipe with a clean, damp cloth. Test any cleaning solution on an inconspicuous spot first.
- Storage: When not in use, roll your tablecloth rather than folding it to prevent creasing, especially with stiffer oilcloth.
Creating your own fitted tablecloth is a rewarding project that combines practicality with personal style. With these detailed instructions and the excellent visual guidance from Amaryllis via YouTube, you now have all the tools to craft a durable, elegant, and perfectly fitting cover for any table in your home. Enjoy the process and the satisfaction of a handmade item that truly enhances your living space!
If you loved this sewing project and found it easy to follow, we highly recommend visiting Amaryllis’s YouTube channel for more creative and inspiring DIY content. Her clear tutorials make complex projects accessible to everyone. Subscribe to her channel to stay updated with her latest creations!