
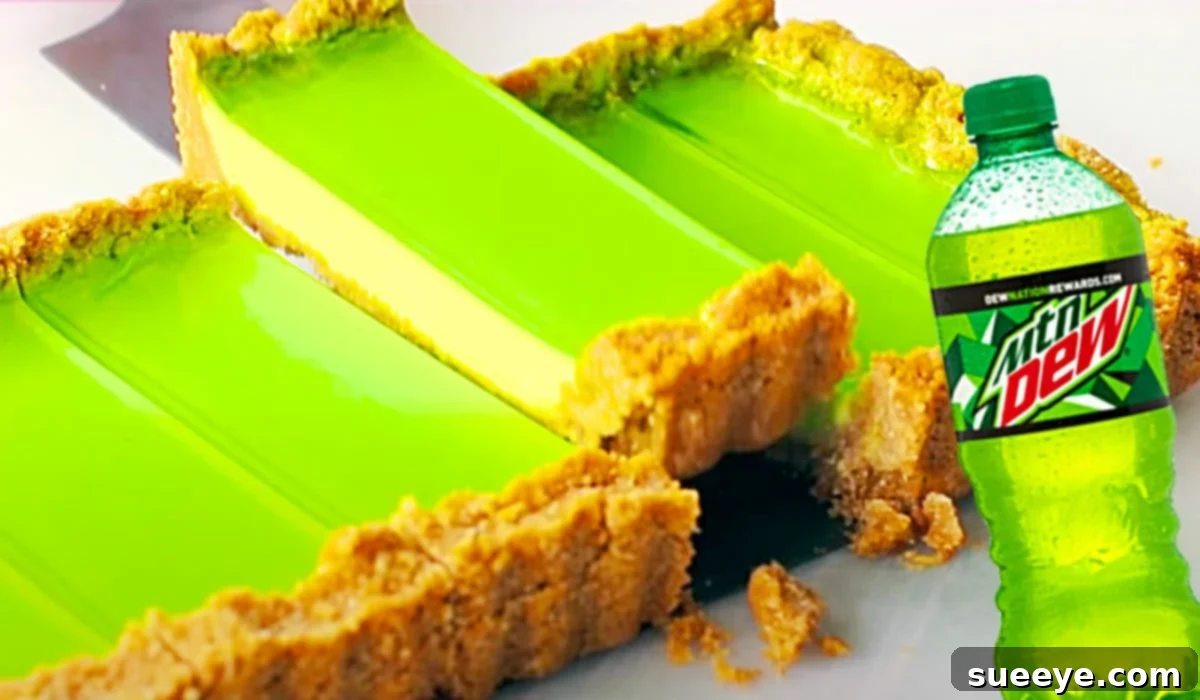
Ultimate Mountain Dew Cheesecake: A Zesty, No-Bake Delight
For any dessert enthusiast, especially a cheesecake lover like myself, the quest for innovative and delightful recipes is an endless journey. So, when I stumbled upon this truly extraordinary Mountain Dew cheesecake recipe by Tastemade on YouTube, my curiosity was instantly piqued. The idea alone was enough to make me clear my schedule and head straight to the kitchen. This isn’t just another cheesecake; it’s a vibrant, zesty, and utterly unique creation that promises to be a conversation starter and a crowd-pleaser.
What makes this recipe truly special is its incredible simplicity and speed. It’s a no-bake wonder, meaning you spend less time hovering over a hot oven and more time enjoying the delicious results. This year, planning for our annual family reunion, I knew I needed something memorable. My family has a collective soft spot for Mountain Dew – it’s practically a staple at every gathering. Combining their favorite soda with my beloved cheesecake seemed like an ingenious stroke of genius.
I envisioned the grand reveal: an ice chest packed not just with chilled Mountain Dew cans, but with this spectacular Mountain Dew cheesecake nestled right on top. The moment I open that chest and unveil this vibrant, green-hued dessert, I can already picture the expressions of surprise and delight. It’s a culinary experience they’ve certainly never encountered before, and I can’t wait to share this refreshing, zesty, and utterly fun treat with them. This cheesecake isn’t just a dessert; it’s an event!
Why a Mountain Dew Cheesecake? Unveiling a Unique Flavor Experience
You might be wondering, “Mountain Dew in a cheesecake? Really?” And the answer is a resounding yes! This recipe takes the iconic citrusy, bubbly flavor of Mountain Dew and transforms it into an unexpectedly sophisticated and incredibly refreshing dessert. The bright lemon-lime notes from the soda, enhanced by actual lemon and orange zest in the filling, cut through the richness of the cream cheese beautifully. It’s a flavor profile that’s both familiar and entirely new, offering a delightful twist on the classic cheesecake.
Beyond its intriguing taste, the visual appeal of this cheesecake is undeniable. The subtle green and yellow food coloring, mirroring the iconic Mountain Dew hue, makes it a festive and eye-catching addition to any dessert table. It’s perfect for casual get-togethers, summer BBQs, or any occasion where you want to impress with something truly out of the ordinary. Plus, as a no-bake recipe, it’s a fantastic option for warmer months when turning on the oven feels like a chore.
Essential Ingredients for Your Mountain Dew Cheesecake
Crafting this remarkable cheesecake requires a thoughtful selection of ingredients, each playing a crucial role in achieving that perfect balance of flavor and texture. From the sturdy base to the creamy filling and the signature glaze, every component is key.
For The Crunchy Graham Cracker Crust:
The foundation of any great cheesecake is its crust, and for this Mountain Dew marvel, we’re sticking with a classic graham cracker base. It’s simple, reliable, and provides the perfect contrast to the smooth filling.
- 300 grams of Graham Crackers: These crunchy biscuits are the heart of your crust. Ensure they are finely crushed for a uniform texture that holds together well. You can use a food processor for efficiency or a ziploc bag and a rolling pin for a bit of stress relief.
- 1/2 cup of Unsalted Butter (Melted): The melted butter acts as the binding agent, holding the graham cracker crumbs together to form a firm, delicious crust. Unsalted butter allows you to control the overall saltiness of the dessert.
For The Creamy & Zesty Cheesecake Filling:
This is where the magic happens! The filling is a delightful blend of creamy, tangy, and subtly sweet flavors, with hints of citrus that beautifully complement the Mountain Dew theme.
- 300 grams of Cream Cheese: Opt for full-fat cream cheese, softened at room temperature. This is essential for a smooth, lump-free filling with the signature rich texture of cheesecake.
- 1/2 drop of Green Food Coloring & 1 drop of Yellow Food Coloring: These aren’t just for show! They help achieve that vibrant, iconic Mountain Dew hue, making the cheesecake visually appealing and on-theme. Adjust quantities slightly to achieve your desired shade.
- Zest of 1 Orange & Zest of 1 Lemon: These citrus zests are vital for boosting the natural lemon-lime notes that Mountain Dew itself possesses. They add a fresh, aromatic brightness that elevates the entire dessert.
- 2 tablespoons of Greek Yogurt: Greek yogurt adds an extra layer of tanginess and helps create a wonderfully creamy texture without making the filling too heavy. It also contributes to the no-bake setting process.
- 1/2 cup of Eagle Brand Milk (Sweetened Condensed Milk): This is a crucial ingredient for a no-bake cheesecake. Sweetened condensed milk not only adds sweetness but also provides the necessary thickness and stability for the filling to set beautifully without baking.
- 1 teaspoon of Vanilla Extract: A touch of vanilla rounds out the flavors, adding a warm, subtle sweetness that balances the citrus and tang.
For The Signature Mountain Dew Glaze:
The crowning glory of this cheesecake is its sparkling, Mountain Dew-infused glaze. It’s the perfect finish, adding a final burst of flavor and a beautiful sheen.
- 1 cup of Mountain Dew Soda: The star ingredient! This will form the base of your glaze, imparting its unique flavor directly onto the cheesecake.
- 1 tablespoon of Powdered Gelatin: Gelatin is what gives the glaze its jiggly, set consistency. It’s essential for creating a firm yet wobbly layer that holds its shape.
Step-by-Step Directions: Crafting Your Mountain Dew Cheesecake Masterpiece
This Tastemade recipe simplifies the art of cheesecake making, proving that you don’t need an oven to create something truly spectacular. Follow these detailed steps to assemble your vibrant Mountain Dew cheesecake with ease.
Step 1: Preparing the Perfect Graham Cracker Crust
Begin by laying the foundation for your cheesecake. A well-made crust is key to both taste and structural integrity.
- Crush the Graham Crackers: Place your 300 grams of graham crackers into a food processor and pulse until very fine crumbs are formed. If you don’t have a food processor, place them in a large zip-top bag and crush them thoroughly with a rolling pin or the bottom of a heavy pan. Ensure there are no large chunks remaining.
- Combine with Butter: Transfer the fine graham cracker crumbs to a medium-sized bowl. Pour in the 1/2 cup of melted unsalted butter. Mix thoroughly with a spoon or your hands until all the crumbs are evenly moistened and resemble wet sand.
- Press into Pan: Lightly grease a 9-inch springform pan (or line with parchment paper for easier removal). Firmly press the buttered graham cracker mixture into the bottom of the prepared pan, extending it slightly up the sides if desired. Use the bottom of a flat glass or a measuring cup to create an even, compact layer. This compression is crucial for a firm crust.
- Chill the Crust: Place the prepared crust into the refrigerator while you prepare the filling. This allows the butter to solidify, setting the crust and preventing it from crumbling when sliced.
Step 2: Mixing the Irresistibly Creamy Cheesecake Filling
Now for the star of the show – the vibrant, zesty, and smooth cheesecake filling. Remember to start with room-temperature cream cheese for the best results.
- Cream the Cream Cheese: In a large mixing bowl, beat the 300 grams of softened cream cheese with an electric mixer on medium speed until it is completely smooth and free of any lumps. This might take 2-3 minutes.
- Add Citrus Zest and Vanilla: Scrape down the sides of the bowl, then add the zest of 1 orange and 1 lemon, along with 1 teaspoon of vanilla extract. Mix until just combined. The citrus aroma will already start to fill your kitchen!
- Incorporate Sweetened Condensed Milk and Yogurt: Pour in the 1/2 cup of Eagle Brand (sweetened condensed milk) and 2 tablespoons of Greek yogurt. Continue to beat on low speed, gradually increasing to medium, until the mixture is fully incorporated and smooth. Be careful not to overmix, as this can incorporate too much air.
- Achieve the Signature Color: Add 1/2 drop of green food coloring and 1 drop of yellow food coloring. Mix well until the color is evenly distributed and resembles the iconic Mountain Dew shade. You can adjust the drops slightly to achieve your desired intensity.
- Pour and Chill: Carefully pour the cheesecake filling over the chilled graham cracker crust in the springform pan. Use a spatula to spread it evenly. Gently tap the pan on the counter a few times to release any air bubbles.
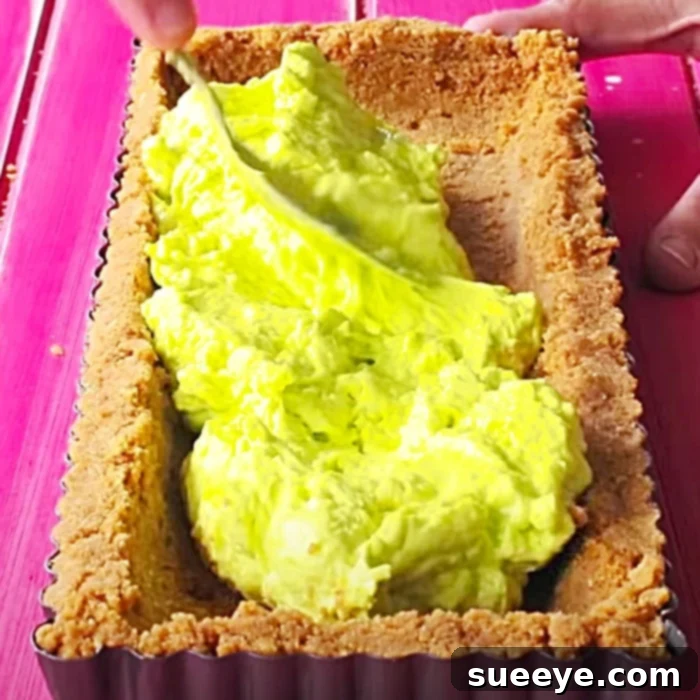
- First Chill: Return the cheesecake to the refrigerator and chill for at least 2-3 hours, or until the filling is firm to the touch. This initial chill is important before adding the glaze, ensuring it doesn’t sink into the filling.
Step 3: Crafting the Dazzling Mountain Dew Glaze
The final touch is the Mountain Dew glaze, which adds another layer of flavor and a beautiful, glistening finish.
- Bloom the Gelatin: In a small bowl, sprinkle 1 tablespoon of powdered gelatin over 1/4 cup of the Mountain Dew soda. Let it sit for 5-10 minutes (this is called “blooming” the gelatin), allowing it to absorb the liquid and soften.
- Heat the Remaining Mountain Dew: In a small saucepan, gently heat the remaining 3/4 cup of Mountain Dew soda over low heat until warm, but not boiling.
- Dissolve Gelatin: Remove the saucepan from the heat. Add the bloomed gelatin mixture to the warm Mountain Dew. Stir continuously until the gelatin is completely dissolved and no granules remain. It’s crucial that the gelatin is fully dissolved for a smooth glaze.
- Cool the Glaze: Let the Mountain Dew glaze cool down to room temperature. It should still be liquid but not warm. If it’s too hot, it will melt the cheesecake filling. If it sets too much, gently rewarm it.
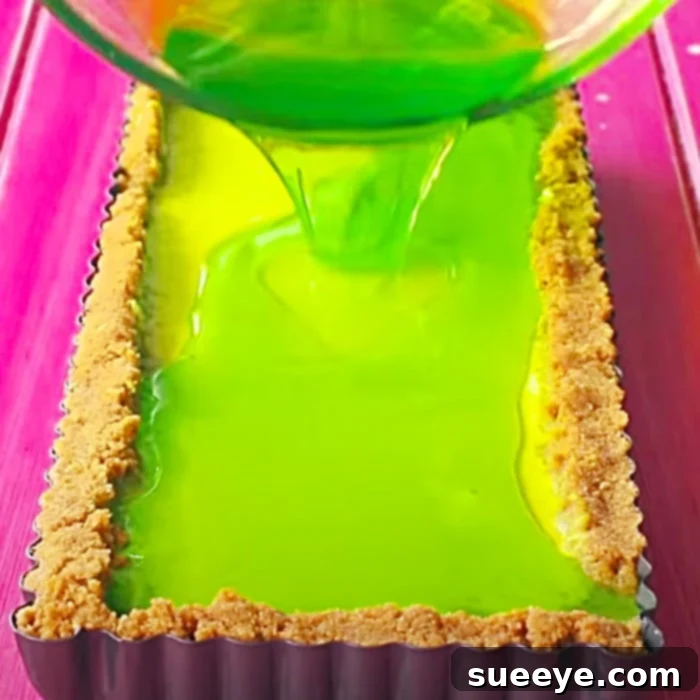
- Apply the Glaze: Once the cheesecake filling has sufficiently chilled and the glaze has cooled, carefully pour the Mountain Dew glaze evenly over the top of the cheesecake.
- Final Chill: Return the cheesecake to the refrigerator for another 3-4 hours, or ideally overnight, to allow both the filling and the glaze to fully set. The longer it chills, the firmer and more delicious it will be.
Tips for Success: Ensuring Your Mountain Dew Cheesecake Shines
To guarantee your Mountain Dew cheesecake turns out perfectly every time, keep these helpful tips in mind:
- Room Temperature Cream Cheese: This is non-negotiable for a smooth, lump-free filling. Take your cream cheese out of the fridge at least 30-60 minutes before you plan to start mixing.
- Don’t Overmix: While you want the filling to be smooth, overmixing can incorporate too much air, which can lead to a less dense texture. Mix just until combined and smooth.
- Proper Chilling is Key: No-bake cheesecakes rely entirely on chilling to set. Be patient and allow sufficient time for each chilling stage. Rushing this step will result in a soft, unset cheesecake.
- Grease Your Springform Pan: Even if your pan is non-stick, a light coating of cooking spray or butter can make it even easier to remove the cheesecake once it’s set.
- Garnish for Extra Flair: Before serving, consider garnishing your cheesecake with a sprinkle of extra citrus zest, a few fresh mint leaves, or even a thin slice of lime or orange for an extra touch of elegance and freshness.
- Storage: Store any leftover cheesecake tightly covered in the refrigerator for up to 3-4 days.
Embrace the Zesty Adventure!
This Mountain Dew cheesecake recipe is more than just a dessert; it’s an experience waiting to happen. It combines the comforting familiarity of a classic no-bake cheesecake with a playful, zesty twist that truly sets it apart. The vibrant colors, the refreshing citrus notes, and the creamy texture all come together to create a treat that is both innovative and utterly delicious. I am so confident that this unique creation will be a massive hit at my family reunion, sparking conversations and delighting taste buds.
Whether you’re looking for a show-stopping centerpiece for your next gathering, a fun project for a weekend afternoon, or simply a refreshing departure from traditional desserts, this Mountain Dew cheesecake is an absolute must-try. Don’t let the unconventional ingredient deter you – embrace the adventure and prepare to be amazed. Give this wonderful recipe a try, and get ready to impress everyone with your culinary creativity!