
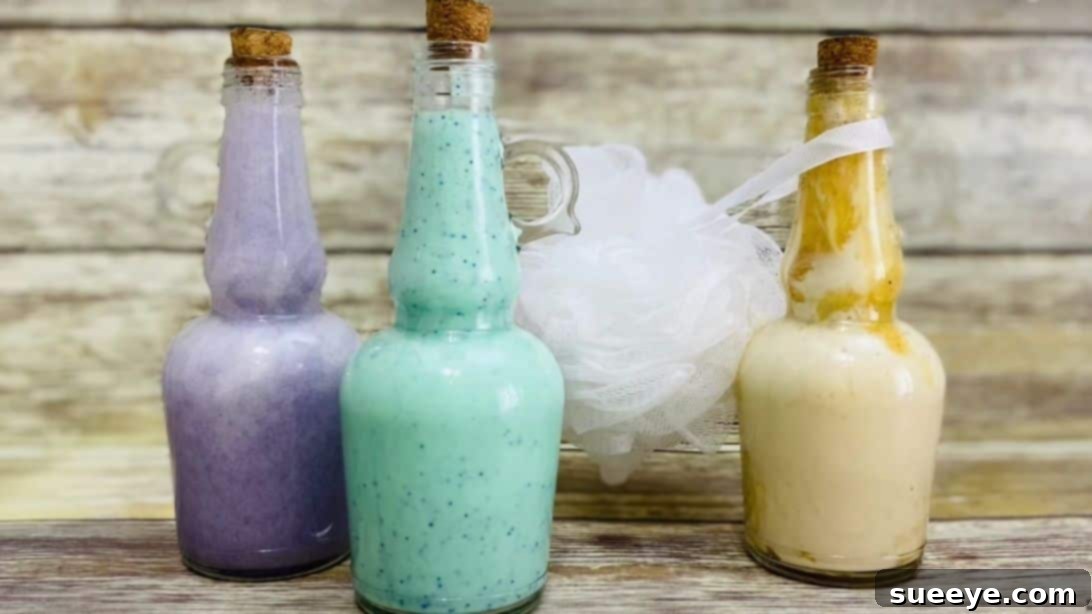
Craft Your Own Luxurious Shower Gels: The Ultimate DIY Guide to Personalized Skincare
Embark on a delightful journey into the world of homemade skincare by learning how to craft your very own shower gels. If you’re a fan of do-it-yourself projects and have explored various creative tutorials, then preparing your custom shower gel is an adventure you won’t want to miss. Far from being a complex task, this process is not only surprisingly easy but also incredibly rewarding and fun!
Making your shower gels offers a myriad of benefits that go far beyond what store-bought products can provide. Imagine having complete control over the ingredients, allowing you to customize scents, textures, and beneficial additives precisely to your preferences and skin needs. Not only are these personalized creations wonderfully long-lasting, but they also prove to be incredibly budget-friendly, often making you reconsider the cost and ingredients of commercial alternatives. We drew inspiration from this fantastic tutorial by Creative Bath Lab on YouTube, and it has become an absolute staple in our skincare routine. We encourage you to dive in, try these recipes, and share your delightful experiences with us!
Why Make Your Own Shower Gels?
Ditching commercial shower gels for homemade versions offers a compelling array of advantages. Here’s why you should consider making the switch:
- Unmatched Customization: Commercial shower gels often come with a limited range of scents and formulations. When you DIY, the possibilities are endless. Choose your favorite essential oils for aromatherapy benefits, select carrier oils that cater to your specific skin concerns (e.g., dry, oily, sensitive), and even adjust the consistency to your liking. Create a energizing citrus blend for morning showers or a calming lavender concoction for evening relaxation.
- Cost-Effective Skincare: Buying high-quality, natural shower gels from stores can be quite expensive. The initial investment in raw ingredients might seem like a lot, but these ingredients are often concentrated and yield multiple batches of shower gel, resulting in significant savings in the long run. You’ll be amazed at how much you can save while still enjoying premium, personalized products.
- Control Over Ingredients: Many commercial products contain harsh chemicals, synthetic fragrances, sulfates, parabens, and dyes that can irritate the skin, strip its natural oils, or cause allergic reactions. By making your own, you have complete transparency and control over what goes onto your skin. Opt for natural, gentle, and nourishing components, ensuring a cleaner, healthier bathing experience.
- Eco-Friendly Choice: Reducing your environmental footprint is easier with DIY products. By purchasing ingredients in bulk and reusing your own containers, you can significantly cut down on plastic waste associated with single-use commercial bottles. It’s a small step that contributes to a greener planet.
- A Fun and Rewarding Hobby: Crafting your own beauty products is not just practical; it’s an enjoyable and creative hobby. The process of mixing ingredients, experimenting with scents, and watching your creations come to life can be incredibly satisfying. It’s a wonderful way to unwind and express your personal style through skincare.
Essential Ingredients Explained
Understanding the role of each ingredient is key to successful shower gel making. Here’s a breakdown of the core components you’ll encounter in these recipes:
Gel Base Ingredients: The Foundation of Your Shower Gel
- Distilled Water: This is the primary solvent and ensures a clean, stable product. Using distilled water prevents the introduction of minerals or impurities found in tap water, which can affect the stability and shelf life of your shower gel.
- Guar Gum: A natural thickener derived from guar beans. Guar gum helps create the characteristic gel consistency of shower gels, providing a luxurious feel and preventing separation of ingredients. It’s an excellent natural alternative to synthetic thickeners.
- Liquid Surfactant: Surfactants are cleansing agents responsible for creating lather and removing dirt and oils from the skin. There are many types of liquid surfactants, such as Coco Glucoside, Decyl Glucoside, or Sodium Cocoyl Isethionate, which are derived from natural sources and are known for being mild and gentle on the skin. Always choose a gentle, skin-friendly surfactant for your DIY projects.
- Preservative (Optional but Highly Recommended): Any product containing water is susceptible to microbial growth (bacteria, mold, yeast). While optional for very small batches used immediately, a broad-spectrum preservative is crucial for extending the shelf life of your shower gel, especially if you plan to store it for more than a few days. Common natural-derived preservatives include Geogard ECT or Optiphen Plus. Always follow the manufacturer’s recommended usage rate.
Ingredients for Rich & Moisturizing Shower Gel
- Gel base: The pre-prepared foundation combining distilled water, guar gum, and surfactant.
- Melted Butter (Kokum Butter): Kokum butter is deeply moisturizing and easily absorbed by the skin without feeling greasy. It’s known for its ability to restore skin elasticity and can help heal dry, cracked skin.
- Carrier Oil (Vitamin E Oil): Vitamin E oil is a powerful antioxidant that helps to nourish and protect the skin from environmental damage. It also acts as a natural conditioner, leaving skin soft and smooth. Other excellent carrier oils include jojoba, almond, or grapeseed oil.
- Fragrance Oil (Vanilla Lace): Fragrance oils are used to impart a pleasant scent to your shower gel. Vanilla Lace offers a warm, comforting aroma. Always use skin-safe fragrance oils designed for bath and body products, or opt for essential oils for natural fragrance and therapeutic benefits.
- Liquid Surfactant: An additional amount to ensure optimal cleansing and lather.
Ingredients for Mint Fresh Shower Gel
- Gel base: Your foundational blend.
- Carrier Oil (Hempseed Oil): Hempseed oil is rich in essential fatty acids, making it an excellent moisturizer that doesn’t clog pores. It can help soothe inflammation and is beneficial for various skin types, including sensitive and acne-prone skin.
- Mint Oil (Essential Oil): Provides a refreshing, invigorating scent and a cooling sensation on the skin. Peppermint essential oil is a popular choice for its stimulating properties.
- Fragrance Oil (Peppermint, Teakwood, Fierce, & Birch): A blend of fragrance oils to create a complex, fresh, and masculine or gender-neutral scent profile. Peppermint adds an extra minty kick, while teakwood, fierce, and birch contribute earthy, woody, and robust notes.
- Liquid Surfactant: To boost cleansing power and lather.
- Jojoba Seeds: These tiny, spherical beads provide gentle exfoliation, helping to slough off dead skin cells and leaving skin feeling smooth and renewed. They are environmentally friendly compared to plastic microbeads.
- Aqua Blue Food Coloring: For aesthetic appeal, giving the gel a cool, refreshing appearance. Ensure you use cosmetic-grade colorants.
Ingredients for Clear Sparkling Gel
- Distilled water: The pure base for your clear gel.
- Guar gum: The thickening agent to achieve the gel consistency. Using a precise amount is crucial for clarity.
- Fragrance oil (optional): A small amount to add a subtle scent, ensuring it doesn’t cloud the gel.
Essential Equipment for DIY Shower Gels
Before you begin, gather these basic tools to ensure a smooth and precise crafting process:
- Heat-resistant Beakers or Glass Measuring Cups: For accurately measuring liquids and mixing ingredients.
- Digital Scale: Essential for precise measurements of ingredients, especially guar gum and butters, for consistent results.
- Small Whisk or Spatula: For stirring and emulsifying ingredients.
- Immersion Blender (optional, but helpful): Can be used for quick and thorough emulsification, especially for the gel base.
- Clean, Sterilized Bottles or Containers: For storing your finished shower gel. Pump bottles or squeeze bottles are ideal.
- Gloves and Safety Goggles: Recommended for handling raw ingredients, especially surfactants and essential oils, to protect your skin and eyes.
Detailed Directions: Crafting Your Custom Shower Gels
Crafting the Core Gel Base
The gel base is the fundamental building block for all your personalized shower gel creations. Follow these steps carefully to ensure a smooth and stable foundation:
- Prepare the Water: Begin by pouring precisely 5 ounces (approximately 150ml) of high-quality distilled water into a clean, heat-resistant beaker or a similar measuring cup. Using distilled water is crucial for preventing impurities that could affect the stability and shelf life of your final product.
- Incorporate Guar Gum: Gently sprinkle 1 teaspoon (about 3 grams) of guar gum over the surface of the distilled water. It’s important to sprinkle it slowly and evenly to prevent clumping. Guar gum is a natural thickener that will give your gel its characteristic consistency.
- Emulsify Thoroughly: Using a mini whisk or a small immersion blender, thoroughly emulsify the guar gum and water mixture. Blend until the guar gum is completely dissolved and no lumps remain, and the mixture begins to thicken into a clear, uniform gel. This step requires patience to achieve the desired smooth texture.
- Add Preservative (Highly Recommended): At this stage, add about a quarter teaspoon (approximately 1.5ml) of your chosen broad-spectrum preservative. While this step is technically optional for very small batches intended for immediate use, it is *highly recommended* to include a preservative. This vital ingredient significantly extends your shower gel’s shelf life and prevents the growth of mold, bacteria, and yeast, ensuring your product remains safe and effective for longer. Stir gently to incorporate.
- Slowly Introduce Liquid Surfactant: Finally, slowly and carefully stir in approximately 2½ ounces of liquid surfactant. It is crucial *not* to emulsify or blend this mixture aggressively with a whisk or immersion blender at this stage. Vigorous mixing can create excessive foam, making it difficult to achieve a smooth, pourable gel. Stir gently until the surfactant is fully incorporated and the mixture is cohesive. Your basic gel base is now complete and ready for customization!
Recipe 1: Rich and Moisturizing Shower Gel
Indulge your skin with this luxurious, hydrating formula, perfect for dry or sensitive skin types.
- Combine Base Ingredients: In a clean bowl, combine 4½ tablespoons (65 grams) of your freshly prepared gel base. Add 1½ tablespoon (20 grams) of melted kokum butter, 2 teaspoons (10ml) of vitamin E carrier oil, and 1 teaspoon (5ml) of vanilla lace fragrance oil.
- Emulsify: Using a whisk or immersion blender, thoroughly emulsify these ingredients together until the mixture is smooth, homogenous, and beautifully blended. Ensure the butter is fully incorporated without any separation.
- Incorporate Surfactant: Slowly and gently stir in the remaining 2½ tablespoons (40ml) of liquid surfactant. Remember to stir, not blend aggressively, to avoid excessive foam. Continue stirring until the mixture is uniform and has a luxurious, creamy consistency. Pour into your desired container.
Recipe 2: Mint Fresh Shower Gel
Awaken your senses with this invigorating and exfoliating mint-infused shower gel, ideal for a refreshing start to your day.
- Blend Base and Oils: In a separate mixing bowl, combine 4½ tablespoons (65 grams) of your gel base with 1½ tablespoon (20 grams) of hempseed carrier oil, ¼ teaspoon (3ml) of mint essential oil, and 1 teaspoon (5ml) of your chosen fragrance oil blend (peppermint, teakwood, fierce, & birch).
- Emulsify for Uniformity: Whisk or blend these ingredients until they are thoroughly emulsified and smoothly integrated. The essential and fragrance oils should be evenly dispersed throughout the base.
- Add Final Touches: Slowly stir in 2½ tablespoons (40ml) of liquid surfactant, followed by 1 teaspoon of jojoba seeds for gentle exfoliation, and 1 drop of aqua blue food coloring for a vibrant, refreshing hue. Continue stirring gently until all components are evenly distributed. For an opaque white gel, you can optionally add a bit of glycerin at this stage, stirring until the desired color is achieved.
Recipe 3: Clear Sparkling Gel
For a minimalist yet elegant option, this clear gel is simple, pure, and beautifully sparkling.
- Measure Water: Pour 2.6 ounces (75ml) of distilled water into a clean beaker.
- Add Guar Gum: Carefully sprinkle ¼ teaspoon (1 gram) of guar gum over the water. Sprinkle slowly to prevent clumps.
- Emulsify to Clarity: Use a whisk or immersion blender to thoroughly emulsify the guar gum and water until a clear, lump-free gel forms. Ensure it’s perfectly smooth.
- Scent (Optional): If desired, add just a tiny bit of fragrance oil for a subtle scent. Stir gently to incorporate. It’s crucial to note that adding any more ingredients, especially those with color or opacifiers, will turn the gel cloudy, compromising its sparkling clarity. Keep it simple for the best results.
Tips for Success and Troubleshooting
To ensure your DIY shower gel crafting experience is as smooth and successful as possible, consider these helpful tips:
- Accurate Measurements are Key: Especially for ingredients like guar gum and preservatives, precise measurements are critical. Use a digital scale for dry ingredients and small liquid amounts to maintain consistency and effectiveness.
- Cleanliness is Paramount: Always use sterilized tools and containers to prevent contamination, especially when working with water-based products. This helps prolong shelf life and ensures product safety.
- Adjusting Consistency: If your gel is too thin, you can add a tiny bit more guar gum (pre-dissolve in a small amount of water before adding). If it’s too thick, carefully add small increments of distilled water, stirring well after each addition until desired consistency is reached.
- Scent Blending: Don’t be afraid to experiment with essential oil blends! Always research safety guidelines for essential oils and perform a patch test if using new oils. Start with a small amount and gradually add more until you achieve your desired fragrance strength.
- Patch Testing: Before using any new homemade product extensively, always perform a patch test on a small area of skin (e.g., inner forearm) to check for any allergic reactions or sensitivities.
- Storing Your Gels: Store your homemade shower gels in airtight containers, away from direct sunlight and extreme temperatures. Pump bottles are ideal as they minimize product exposure to air and contaminants.
- Shelf Life: With a proper preservative, your shower gel should last approximately 3-6 months. Without a preservative, it should be used within 1-2 weeks and ideally stored in the refrigerator. Always discard if you notice any changes in color, scent, or texture.
Safety and Storage Considerations
While making your own products is rewarding, safety should always be your top priority. Here’s what to keep in mind:
- Ingredient Sourcing: Purchase your raw materials from reputable suppliers who provide high-quality, cosmetic-grade ingredients.
- Handling Raw Materials: Some raw ingredients, like concentrated surfactants or certain essential oils, can be irritants. Always wear gloves and eye protection when handling them.
- Water Contamination: As mentioned, water is prone to microbial growth. Always use distilled water and incorporate a preservative. Avoid introducing water into your product once it’s made (e.g., don’t dip wet fingers directly into the main container).
- Labeling: Clearly label your containers with the product name, date of creation, and main ingredients. This helps track freshness and identifies contents.
All image credit for this inspiring tutorial belongs to Creative Bath Lab via YouTube. We highly recommend visiting and following her channel for more incredible DIY beauty insights and tutorials!
Now that you have all the knowledge and detailed instructions, it’s time to unleash your creativity and craft your very own easy DIY shower gels using just a few simple ingredients. Enjoy the process of creating custom, nourishing, and budget-friendly products that elevate your daily routine!