
DIY Scarecrow Bird Feeder: A Charming Autumn Garden Project
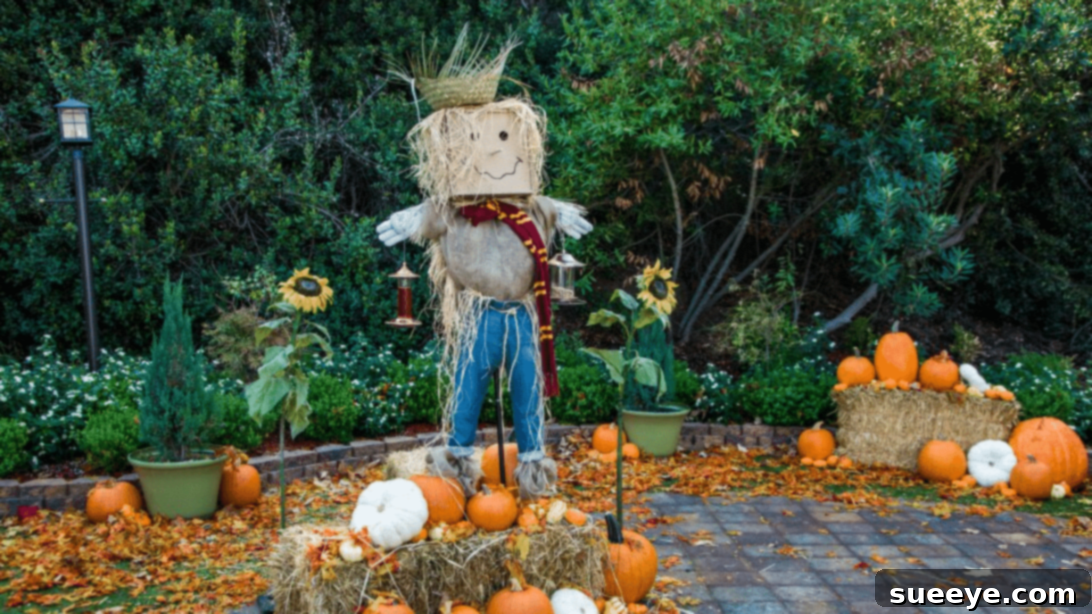
As the leaves begin to turn golden and a crisp coolness fills the air, there’s no better time to infuse your outdoor spaces with the heartwarming spirit of Fall. If you’re someone who loves to embrace seasonal decorating with enthusiasm, then you’re in for a treat! We’re excited to share a truly delightful and unique DIY idea that combines rustic charm with practical functionality: a charming scarecrow bird feeder. Forget ordinary bird feeders or simple scarecrows; this project, inspired by a creative concept from Hallmark Channel on YouTube, allows you to craft a whimsical garden sentinel that not only enhances your autumn decor but also provides a welcoming sanctuary for your feathered friends.
This engaging DIY scarecrow bird feeder is more than just a decoration; it’s an opportunity for fun family bonding. Gather your loved ones and spend a memorable afternoon creating something beautiful and beneficial for your garden. What makes this project even more appealing is its versatility. While it perfectly embodies the cozy essence of the entire Fall season, its classic scarecrow design also makes it a fantastic addition to your Halloween decorations, offering a friendly, not spooky, touch. Imagine your garden adorned with this handcrafted character, attracting local birds while adding a touch of personalized charm to your yard.
Ready to bring this adorable scarecrow to life? We’ll guide you through each step, from gathering your supplies to adding the finishing touches. Once you’ve mastered the basics, feel free to unleash your creativity and personalize your scarecrow bird feeder to perfectly match your unique style and garden aesthetic.
You might also enjoy exploring these related DIY ideas:
- Easy Repurposed DIY Lamp Bird Bath Tutorial
- Super Easy DIY Pumpkin Kegs
Why a Scarecrow Bird Feeder for Your Garden?
Scarecrows have long been iconic symbols of autumn and harvest, standing guard in fields as guardians of crops. This project takes that traditional imagery and gives it a heartwarming twist, transforming a sentinel into a welcoming host for birds. Unlike plain, functional bird feeders that might blend into the background, this scarecrow adds a significant decorative element to your garden, acting as a focal point and conversation starter. It’s a testament to creative recycling and bringing character to your outdoor living space.
As the weather cools, birds often seek reliable food sources. By providing a well-stocked bird feeder, you’re not only helping local wildlife but also inviting nature closer to your home. Watching various bird species visit your handcrafted scarecrow can be a source of immense joy and a wonderful educational opportunity for children to learn about local fauna. This project truly embodies the spirit of nurturing both nature and your artistic side, making your garden a haven of both beauty and biodiversity.
Gathering Your Materials: What You’ll Need
Before embarking on any DIY project, ensuring you have all your materials organized and ready is crucial. This not only streamlines the crafting process but also prevents interruptions. Most of these items can be found at local craft stores, hardware stores, or even in your own shed!
- Wooden Birdhouse: This will form the head of your scarecrow. Choose one that’s sturdy and has a flat base for stability. You can opt for a pre-painted one or leave it natural for a rustic look. Ensure it’s large enough to comfortably accommodate the facial features.
- Gardening Gloves: These will serve as the scarecrow’s hands. Any pair of old or new gardening gloves will work, adding to the authentic scarecrow aesthetic.
- Straw Hat: Essential for that classic scarecrow look. A wide-brimmed straw hat will complete the headpiece perfectly. Look for one that fits snugly over the birdhouse.
- ¼ inch Dowel: This small wooden rod will be used for the scarecrow’s nose. Its size makes it ideal for creating a prominent yet fitting facial feature.
- Drill and ¼ inch Drill Bit: Necessary for creating precise holes in the birdhouse for the eyes and nose. Always exercise caution and wear safety glasses when using power tools.
- Paddle Bit (for larger holes if needed): Depending on the type of bird feeders you plan to hang and how you wish to attach the arms, a paddle bit might be useful for making larger holes. However, for this specific project, the ¼ inch bit should suffice for the facial features.
- Bird Feeders: Two small, lightweight bird feeders will hang from the scarecrow’s arms. Consider feeders that are easy to refill and clean, and that complement the rustic theme.
- Bird Feeding Hanging Kit: This kit typically includes stakes and a shepherd’s hook or similar structure to support the main body of the scarecrow and its feeders. Ensure it’s robust enough to hold the entire assembly.
- 1 roll of 36″ wide Burlap Fabric: Burlap will create the scarecrow’s body and arms, providing that authentic, textural appearance. The 36-inch width allows for ample material to create volume.
- 36″ long Rope: This will be used as the scarecrow’s belt, adding a functional and decorative element. Natural fiber rope works best for a rustic feel.
- Black Paint or a large Black Sharpie: For drawing the scarecrow’s iconic smile and possibly outlining the eyes. A permanent marker offers precision, while paint allows for bolder lines.
- Wood Glue: Crucial for securing the dowel (nose) and ensuring other wooden components stay firmly in place. Choose a waterproof wood glue for outdoor durability.
- Pencil: For marking drilling points and sketching the smile before committing with paint or marker.
- Hot Glue and Glue Gun: Indispensable for quickly and securely attaching fabric, straw, and the hat. Make sure you have plenty of glue sticks on hand.
- Scissors: For cutting burlap fabric and straw. A sharp pair is essential for clean cuts.
- Straw or Hay, optional: Used for stuffing the burlap body and adding realistic texture around the hat and gloves. If you don’t have straw, consider other natural stuffing materials or even crumpled newspaper (though straw is best for aesthetics).
Step-by-Step Guide: Crafting Your Scarecrow Bird Feeder
With your materials ready, let’s dive into the creative process. Take your time with each step, and remember that perfection isn’t the goal; personal charm is!
Step 1: Laying the Foundation – Setting Up the Base and Face
Begin by installing the lawn stakes of your bird feeding hanging kit firmly into the ground in your desired garden spot. Choose a location that is visible but also safe for birds, away from heavy foot traffic or potential predators. Ensure the stakes are stable and can support the weight of the scarecrow and full bird feeders. Next, take your wooden birdhouse. Using your pencil, carefully mark two spots for the scarecrow’s eyes and one for its nose. These holes should be proportionate to the size of your birdhouse and spaced appropriately to give your scarecrow a friendly expression. With your drill and ¼ inch drill bit, carefully create the three marked holes. Always drill slowly and steadily to avoid splitting the wood. Once the holes are drilled, insert the ¼ inch dowel into the hole designated for the nose. Push it firmly until it’s halfway through or to your desired length.
Step 2: Bringing the Face to Life and Securing the Birdhouse
Now, it’s time to secure the dowel nose. Apply a generous amount of wood glue around the base of the dowel where it meets the birdhouse, both inside and outside if accessible. Allow the glue to dry completely according to the manufacturer’s instructions; this will ensure the nose remains firmly in place through various weather conditions. While the glue dries, grab your black paint or large black Sharpie. Using your pencil marks as a guide, draw a cheerful, wide smile on the birdhouse, completing your scarecrow’s face. You can experiment with different expressions to give your scarecrow a unique personality. Once the face is complete and the glue is dry, carefully attach the birdhouse (now your scarecrow’s head) to the top of the bird feeding hanging kit. Most kits have a designated attachment point, often a hook or a flat platform. Ensure it’s securely fastened and level.
Step 3: Dressing Your Scarecrow and Adding the Feeders
This is where your scarecrow truly takes shape! Drape the 36-inch wide burlap fabric over the bird feeding kit’s structure to form the scarecrow’s body and arms. You can use hot glue to secure the burlap in strategic places, creating a general body shape. Next, take your 36-inch long rope and tie it around the burlap ‘waist’ to create a belt, cinching the fabric and adding a nice detail. Now comes the fun part: stuffing! If you’re using straw or hay, carefully push it into the burlap, especially in the arm areas, to give your scarecrow volume and a realistic, plump appearance. Don’t be afraid to stuff it generously! Add some straw around the top of the birdhouse, spilling out from under where the hat will sit, to give the illusion of hair. Finally, place the straw hat on top of the birdhouse and secure it with hot glue, ensuring it won’t blow away in the wind. Insert your gardening gloves into the ends of the burlap ‘arms’, securing them with a touch of hot glue if necessary. Lastly, hang one bird feeder from each of the scarecrow’s arms, ensuring they are balanced and accessible for birds. Fill them with your favorite birdseed, and your charming scarecrow bird feeder is complete!
Personalizing Your Scarecrow Bird Feeder
The beauty of DIY lies in customization. While the basic instructions provide a solid foundation, there are countless ways to make your scarecrow bird feeder truly your own. Consider adding small fabric patches, buttons, or even a mini bandana to its neck for extra character. You could paint the birdhouse in a vibrant autumn color like orange, deep red, or even a whimsical blue. Give your scarecrow a unique name and create a small, hand-painted sign to hang nearby. For Halloween, you could drape some faux spiderwebs around it or add a tiny friendly ghost accessory. Don’t limit yourself to just straw; you can experiment with different types of stuffing or even attach faux leaves and berries for a truly autumnal feel. This is your chance to let your creativity shine and craft a scarecrow that perfectly reflects your personal style and garden’s ambiance.
Maintenance and Care for Longevity
To ensure your scarecrow bird feeder remains a delightful fixture in your garden for many seasons, a little care and maintenance go a long way. Regularly check the bird feeders and refill them as needed, ensuring birds always have a fresh supply of food. Clean the bird feeders every few weeks to prevent mold and bacterial growth, which can be harmful to birds. You can do this by simply removing them, scrubbing with warm soapy water (using a bird-safe soap), rinsing thoroughly, and allowing them to dry completely before refilling and reattaching.
Inspect the scarecrow itself periodically for any signs of wear and tear, especially after heavy rain or strong winds. Re-secure any loose burlap, straw, or accessories with hot glue. If your birdhouse or other wooden components are unsealed, consider applying a clear, outdoor-grade sealant to protect them from the elements, extending their life and preserving their appearance. During extreme weather conditions or the off-season, you might consider bringing your scarecrow indoors or storing it in a sheltered area to protect it from harsh sun, rain, or snow, ensuring it’s ready to greet the next Fall season with charm.
Benefits Beyond Beauty: The Impact of Your DIY Project
Creating this scarecrow bird feeder offers a multitude of benefits that extend far beyond its visual appeal. Environmentally, you’re contributing to local ecosystems by providing a crucial food source for birds, especially as natural food sources become scarcer in colder months. This simple act supports biodiversity and brings the joy of bird watching right to your doorstep. Aesthetically, it transforms your garden into a whimsical, inviting space, enhancing curb appeal and creating a talking point for visitors. The rustic charm of the scarecrow blends seamlessly with the natural beauty of autumn foliage, making your yard a picturesque scene.
On a personal level, engaging in DIY projects like this can be incredibly therapeutic. The process of planning, creating, and seeing your vision come to life provides a sense of accomplishment and creative fulfillment. For families, it’s an invaluable opportunity for children to develop fine motor skills, learn about nature, and experience the satisfaction of contributing to a shared project. This scarecrow bird feeder truly encapsulates the essence of fall: warmth, community, and a connection to the natural world.
*All these images are credited to Hallmark Channel via YouTube. We encourage you to visit their channel, subscribe, and explore more inspiring DIY ideas!
Embrace the Autumn Spirit with Your Easy DIY Scarecrow Bird Feeder
There you have it – a comprehensive guide to creating a captivating and functional scarecrow bird feeder that will undoubtedly become a cherished part of your fall and Halloween decor. This project is a wonderful way to express your creativity, connect with nature, and add a unique, handmade touch to your garden. Whether you’re an experienced crafter or a beginner looking for a rewarding weekend project, this DIY scarecrow bird feeder promises enjoyment for everyone involved. So, gather your materials, call your family, and get ready to create a heartwarming addition to your outdoor space that celebrates the beauty of autumn and the joy of giving back to nature.