
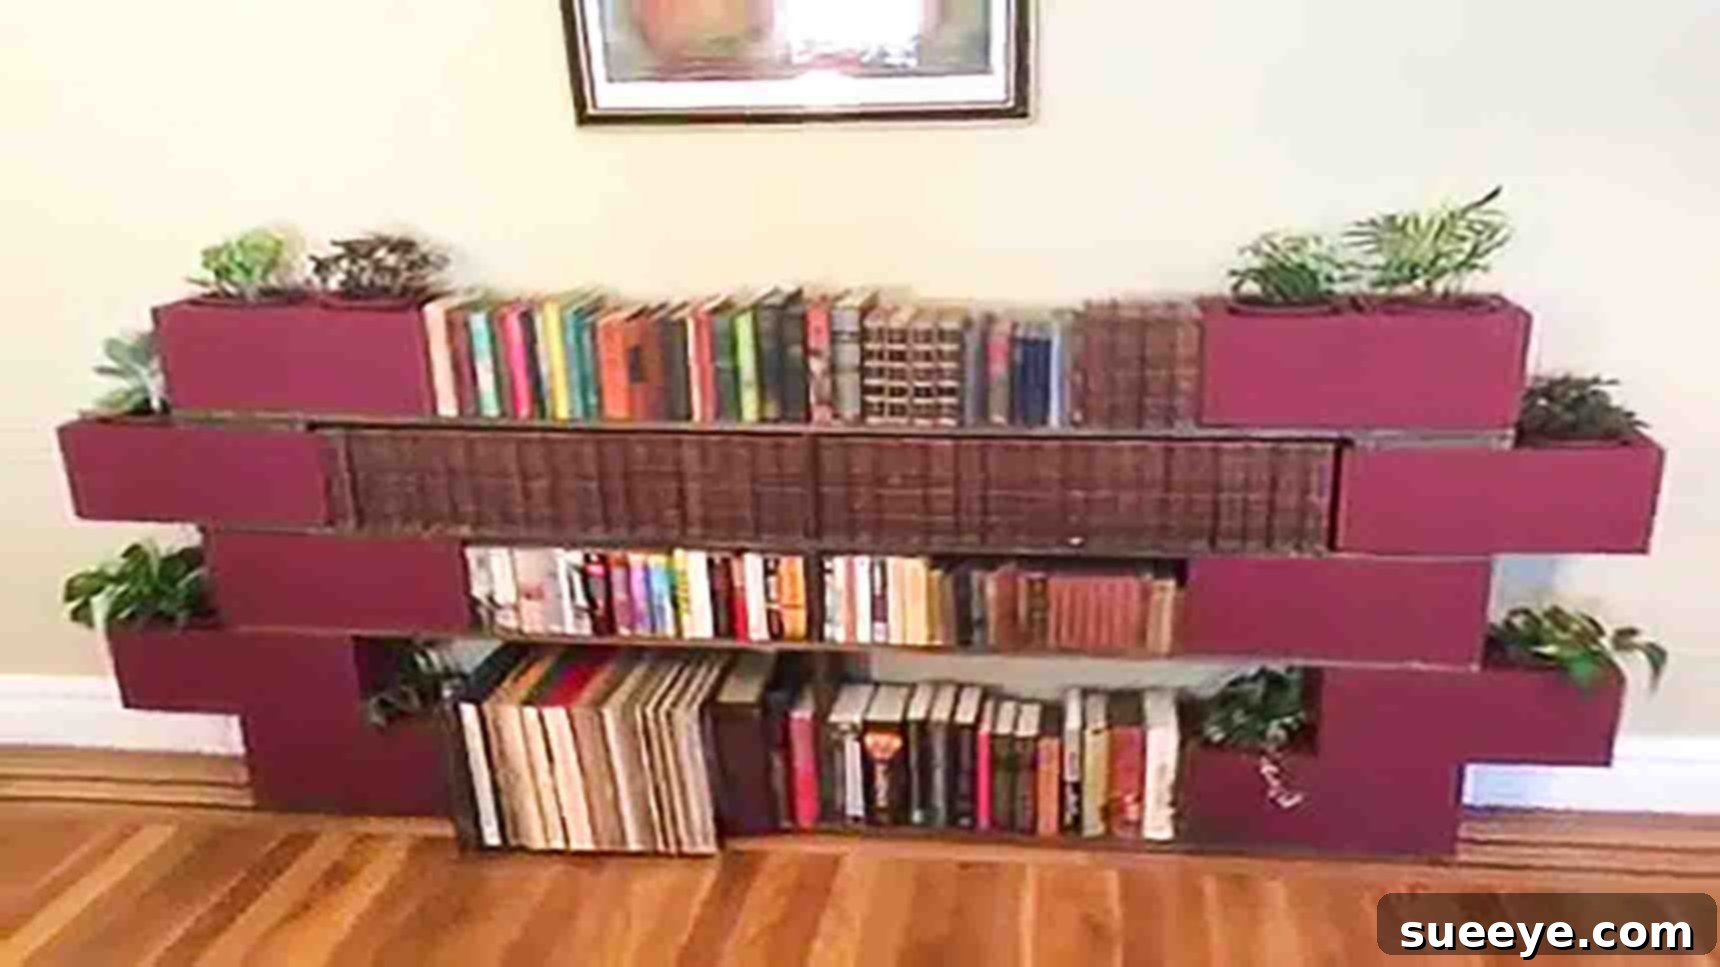
Build Your Own Stylish Cinder Block Bookshelf: A No-Tools DIY Project
Are you searching for an incredibly easy and impactful DIY project to elevate your living space? Look no further! This ingenious cinder block bookshelf, inspired by the brilliant tutorial from Elizabeth Logsdon on YouTube, is a game-changer. Forget about power tools, nails, or screws – this project redefines simplicity and accessibility. All you need are some readily available cinder blocks, sturdy wooden boards, and a touch of creativity, perhaps some vibrant potted plants for decoration. If your book collection is growing beyond its current confines, this innovative shelving system offers a fantastic, eye-catching way to display your literary treasures. Dive into our comprehensive guide below to learn the step-by-step process and transform your space today.
Why Choose a Cinder Block Bookshelf? Unleash Style and Functionality
In the realm of DIY home decor, the cinder block bookshelf stands out as a true marvel of versatility and practical design. Its surging popularity isn’t just a trend; it’s a testament to its numerous advantages for modern homeowners and renters alike. This isn’t merely a storage solution; it’s a statement piece that blends industrial charm with personalized aesthetics.
One of the primary draws of this project is its unparalleled simplicity. The “no nails, no screws” approach means anyone, regardless of their DIY experience, can tackle this project with confidence. It eliminates the need for specialized tools, complex measurements, and frustrating assembly instructions that often accompany store-bought furniture. This makes it an ideal weekend project, allowing you to achieve a significant home upgrade without significant time investment or a steep learning curve.
Beyond ease of construction, a cinder block bookshelf offers exceptional robustness and durability. Cinder blocks are inherently strong and stable, providing a solid foundation for even the heaviest book collections. Unlike some modular furniture that can wobble or sag over time, this structure is built to last, offering reliable support for years to come. This inherent strength also makes it an excellent choice for displaying heavier items like record players, art pieces, or a collection of potted plants.
Another significant benefit is cost-effectiveness. Cinder blocks and common lumber are relatively inexpensive materials, especially when compared to purchasing pre-made bookshelves of similar size and sturdiness. This project empowers you to create custom furniture on a budget, allowing you to allocate more of your resources to other aspects of your home decor or even expand your book collection! You can often find cinder blocks at local hardware stores or even sometimes salvaged from construction sites, making it an eco-friendly choice as well.
The customization potential is virtually limitless. While the core structure remains simple, you have complete control over the aesthetic. Paint the cinder blocks any color to match your existing decor, from vibrant hues to subtle pastels, or even a sleek matte black for a contemporary look. Stain the wooden boards to highlight their natural grain, or paint them for a contrasting effect. This level of personalization ensures your bookshelf isn’t just functional but also a true reflection of your personal style.
Finally, this type of shelving is incredibly versatile and adaptable. Need to move? Disassemble it in minutes and reassemble it in your new space. Want to expand? Simply add more blocks and boards. It can be configured in various ways – as a tall, slender unit, a wide media console, or even an L-shaped corner piece. This adaptability makes it perfect for renters who need easily movable and non-permanent furniture solutions, as well as homeowners looking for flexible design options.
Gathering Your Essential Supplies: Materials Checklist
Before embarking on your bookshelf construction, gather all the necessary materials. Thoughtful preparation ensures a smooth and efficient building process. Here’s a detailed list of what you’ll need, along with some considerations for your choices:
- 10 pcs. 8 x 8 x 16″ Cinder Blocks: These are the structural backbone of your shelf. Ensure they are clean and free of debris for best painting results. The standard size offers excellent stability.
- 5 pcs. 1 x 8″ Boards (6′ long): These will form the shelves themselves. Choose a wood type that appeals to you – pine is common and affordable, but you could opt for oak or maple for a more premium feel. Ensure the boards are straight and free from warps.
- Primer: A good quality primer is crucial for preparing the porous surface of the cinder blocks. It helps the paint adhere better, provides a more even finish, and reduces the number of paint coats needed.
- Paint (Color of Your Choice): This is where your creativity shines! Choose an interior latex or acrylic paint in a color that complements your room’s aesthetic. Consider a semi-gloss or satin finish for easier cleaning.
- Wood Stain (Shade of Your Choice): Select a wood stain that enhances the natural beauty of your chosen boards. Light stains can brighten a space, while darker stains add warmth and sophistication. Alternatively, you could paint the boards instead of staining them.
- 10 pcs. Flower Pots and Plants: These decorative elements bring life and color to your bookshelf. Choose plants that thrive in your home’s lighting conditions. Succulents, small ferns, or trailing plants work wonderfully in the cinder block holes.
- Paintbrush and/or Roller: A good quality paintbrush for edges and corners, and a roller for larger flat surfaces of the cinder blocks, will make the painting process much quicker and yield a smoother finish.
- Measuring Tape: Essential for precise placement and cutting of boosters or additional supports.
- Saw (Optional, for Boosters): If you need to cut boards for boosters or other custom sizes, a handsaw or miter saw will be necessary.
- Protective Drop Cloths or Tarps: To protect your flooring and surrounding areas from paint and stain drips.
- Gloves: To protect your hands during painting and staining.
Step-by-Step Construction Guide: Building Your Dream Bookshelf
With your materials gathered and your creative vision in mind, it’s time to bring your cinder block bookshelf to life. Follow these detailed steps carefully for a smooth and satisfying build.
Step 1: Preparation and Base Setup – Priming, Painting, and Staining
The foundation of a great-looking bookshelf lies in meticulous preparation. Start by cleaning your cinder blocks thoroughly, removing any dust or loose debris. This ensures proper adhesion of the primer and paint. Once clean and dry, apply your primer.
Applying Primer: Begin by priming all sides of your cinder blocks. Due to the porous nature of cinder blocks, two coats of primer are highly recommended. Allow the first coat to dry completely according to the manufacturer’s instructions before applying the second. This step is crucial for achieving an even paint finish and ensuring vibrant color payoff.
Painting the Blocks: Once the primer is fully dry, proceed with painting the cinder blocks in your chosen color. Again, two coats are usually necessary to achieve full coverage and a rich, consistent hue. Ensure each coat dries thoroughly before applying the next. Patience here will pay off in the final aesthetic.
Staining the Wooden Boards: While your blocks are drying, turn your attention to the wooden boards. Apply your chosen wood stain evenly to all surfaces of the boards. Use a cloth or brush, wiping off excess stain to prevent blotchiness. For a deeper color, you can apply a second coat after the first has dried. If you prefer a painted look for your boards, follow a similar process of priming and painting as you did for the blocks.
Initial Assembly: Once all painted and stained components are completely dry (this is critical to avoid smudges and damage), you can begin the physical assembly. Choose the spot where your shelf will live. Place one of the prepared wooden boards directly on the floor or carpet. This will serve as the base of your first, lowest shelf. Next, carefully place one cinder block on each end of this board. Position them so they are flush with the front and ends of the wooden board, creating a stable and even base. Ensure they are perfectly aligned for structural integrity and visual appeal.
Step 2: Building the First Tier – Creating the Tallest Section
The first tier of your bookshelf is designed to be the tallest, providing ample space for oversized books, cherished record albums, or larger decorative items. This section will utilize a clever staggering technique to enhance stability without the need for fasteners.
Staggering the Blocks: On top of the two base cinder blocks you just placed, carefully position two more cinder blocks. Instead of placing them directly on top, stagger them slightly. Position each new block so it sits just over the halfway mark of the block below it, extending slightly outwards. This overlapping method locks the blocks together, preventing tipping and ensuring a secure structure. Experiment slightly to find the sweet spot where they feel most stable when you gently test them.
Adding the First Shelf Board: Once the staggered blocks are securely in place, carefully lay another 6-foot wooden board on top of them. Ensure this board is centered and level. A key design element here is to keep the outer holes of the upper cinder blocks exposed. These exposed holes will later be perfect receptacles for your decorative potted plants, adding a touch of natural beauty to your creation.
Step 3: Crafting Taller Shelves and Integrating Boosters
Now, let’s create a slightly taller shelf for books that may exceed the height of a single cinder block. This involves a smart use of “boosters” to achieve the desired elevation.
Inner Support Blocks: Directly on top of the newly placed board, and specifically on the inside edges, place two more cinder blocks. These blocks will act as internal supports for the next level. Position them thoughtfully, ensuring they align with the structure below.
Adding the Next Shelf: Place another 6-foot wooden board on top of these two inner cinder blocks. This forms your second functional shelf. At this point, you’ll notice the height is similar to the first tier, which is where our boosters come into play.
Creating and Placing Boosters: Take your fifth 6-foot wooden board. This board is designated for creating custom boosters. Measure and cut two 8 x 8-inch square pieces from this board. These smaller wooden squares will subtly increase the height of your next shelf. Carefully place these two boosters on the inner halves of the top two cinder blocks you just positioned. They should sit securely and evenly.
Final Shelf and Top Blocks: Place the fourth 6-foot board directly on top of these boosters. This creates your third shelf, now slightly elevated thanks to the boosters. Finally, for structural completion and a cohesive look, place the last two cinder blocks on top of this board, aligning them with the base structure. These blocks not only secure the top shelf but also provide additional decorative opportunities.
Step 4: Adding Structural Support and Finishing Touches
The final steps involve adding crucial central support and bringing your bookshelf to life with decorative elements.
Crafting the Central Spine: The remainder of your fifth 6-foot board (the one used for boosters) will now be utilized to create a central spine. This spine will slide between the main shelves, offering additional support, especially for longer boards or heavier loads, and preventing any potential sagging over time. Measure the distance between your shelves carefully to ensure a snug fit for these vertical pieces. Cut several pieces of the remaining board to fit snugly as vertical supports in the center of your longer shelves. Once cut, carefully slide these pieces into place, ensuring they are plumb and stable. They should sit firmly between the boards, distributing weight evenly.
Integrating Plants and Arranging Books: With the structure complete and stable, it’s time for the aesthetic elements. Carefully place your potted plants into the exposed holes of the cinder blocks. Experiment with different plant heights and foliage types to create visual interest. Finally, the most satisfying step: begin arranging your books! Organize them by color, size, genre, or author – whatever brings you joy. Don’t forget to leave some space for other decorative items like small sculptures, picture frames, or unique trinkets to personalize your stunning new DIY cinder block bookshelf.
Customization Ideas to Make It Truly Yours
The beauty of a DIY cinder block bookshelf lies in its infinite potential for personalization. While the core structure is simple, your creative touches can transform it into a unique piece that perfectly complements your home’s aesthetic.
- Color Palette Exploration: Don’t limit yourself to a single paint color for your cinder blocks. Consider painting each tier a different shade for an ombré effect, or use two contrasting colors for a bold statement. You could even stencil patterns onto the blocks once the base coat is dry.
- Wood Finishes: Beyond staining, consider whitewashing your wooden boards for a rustic, farmhouse look, or applying a dark, rich paint for a sleek, modern finish. You could even use reclaimed wood for the shelves to add character and an eco-friendly touch.
- Adding a Backing: For a more finished look or to prevent items from falling behind, attach a piece of plywood, pegboard, or even a decorative fabric panel to the back of the shelf. This also allows for creative displays or hidden storage.
- Integrated Lighting: Enhance the ambiance and highlight your displayed items by incorporating LED strip lights underneath the shelves. Battery-operated options are excellent for a no-wiring solution, or opt for plug-in strips for continuous illumination.
- Mobility with Casters: If you anticipate needing to move your bookshelf frequently, consider attaching heavy-duty casters to a sturdy wooden base upon which the entire structure rests. This transforms your stationary shelf into a mobile display unit.
- Configurational Creativity: Don’t feel bound by a linear design. Experiment with L-shaped configurations for corners, or create multiple smaller units to function as bedside tables or side tables. You can even build two identical units and place them back-to-back to create a room divider that offers accessible storage from both sides.
- Alternative Block Materials: While cinder blocks are standard, explore other sturdy masonry blocks or even decorative concrete blocks for a different texture or look, ensuring they can safely bear weight.
Tips for Success and Longevity of Your Cinder Block Bookshelf
To ensure your DIY cinder block bookshelf is not only beautiful but also safe and durable, keep these essential tips in mind throughout the building process and for ongoing maintenance:
- Ensure a Level Surface: Before starting assembly, verify that the floor where you intend to place your bookshelf is level. An uneven surface can compromise the stability of the entire structure. Use shims if necessary to correct any significant slanting.
- Prioritize Stability: Always place the heaviest items on the lower shelves. Distribute weight evenly across each shelf to prevent any undue stress on the structure. The staggered block technique is key for stability, so always ensure blocks overlap sufficiently.
- Consider Wall Anchoring (Optional but Recommended): Especially if you have small children or pets, or if your bookshelf is very tall, consider anchoring the top of the unit to a wall stud. This greatly enhances safety by preventing accidental tipping. Simple L-brackets and wall anchors are usually sufficient.
- Proper Drying Times: Do not rush the drying process for primer, paint, and stain. Fully cured surfaces are more durable, less prone to chipping, and prevent smudging during assembly. Humidity can affect drying times, so plan accordingly.
- Protect Your Floors: Cinder blocks can be abrasive. To prevent scratches or marks on your flooring, place felt pads or furniture sliders underneath the bottom cinder blocks.
- Regular Cleaning: Dust your shelves and blocks regularly. For painted blocks, use a damp cloth with a mild cleaner for any smudges, being careful not to rub too hard to avoid damaging the paint finish.
- Inspect Periodically: Over time, shifting or settling can occur. Periodically inspect your bookshelf for any signs of instability, loose blocks, or sagging boards, and make adjustments as needed.
Beyond Books: Versatile Uses for Your Cinder Block Shelf
While designed primarily for books, the adaptability of this cinder block shelf extends far beyond literary storage. Its sturdy construction and customizable aesthetic make it perfect for a myriad of other functions throughout your home or even in a creative workspace.
- Display Unit for Collectibles: Showcase your treasured collections, from vintage cameras and action figures to travel souvenirs and antique trinkets. The open design allows for excellent visibility from multiple angles.
- Art and Craft Supply Organizer: Transform it into a highly functional storage unit for art supplies, fabrics, yarns, or tools. The different shelf heights can accommodate various container sizes, keeping your creative space tidy and inspiring.
- Media Console: Configure a lower, wider version to house your television, sound system components, and media collection. The robust nature of cinder blocks can easily support heavy electronics.
- Plant Paradise: Elevate your indoor garden! Utilize all the exposed cinder block holes and the sturdy shelves to create a multi-tiered plant stand. This is particularly effective in spaces needing a touch of greenery, and the industrial look complements natural elements beautifully.
- Kitchen or Pantry Storage: In a rustic or industrial-style kitchen, this shelf can serve as open pantry storage for cookbooks, dry goods in attractive canisters, small appliances, or even display dishes.
- Entryway Organizer: A smaller, more compact version can function as an entryway bench with shoe storage below and hooks mounted on the wall above, providing a practical welcome area.
- Kids’ Room Storage: It’s durable enough for toys and books in a child’s room. Paint it in bright, playful colors to match their decor.
Conclusion: Your New Favorite DIY Project Awaits!
There you have it – a comprehensive guide to building a stunning, functional, and highly customizable cinder block bookshelf without the fuss of nails or screws. This project, brought to life through the clever inspiration of Elizabeth Logsdon, is a testament to how simple materials can be transformed into beautiful and practical home furnishings. Whether you’re a seasoned DIY enthusiast or a complete beginner, the ease, affordability, and sheer satisfaction of creating something this substantial with your own hands are unparalleled.
Not only will your new bookshelf provide essential storage for your beloved books and cherished decor, but it will also add a distinctive touch of industrial-chic charm to any room. It’s a design that evolves with you, offering endless possibilities for rearrangement, expansion, and personalization. So, roll up your sleeves, gather your materials, and embark on this rewarding journey. We encourage you to share your unique creations and inspire others to discover the joy of DIY. Happy building!