
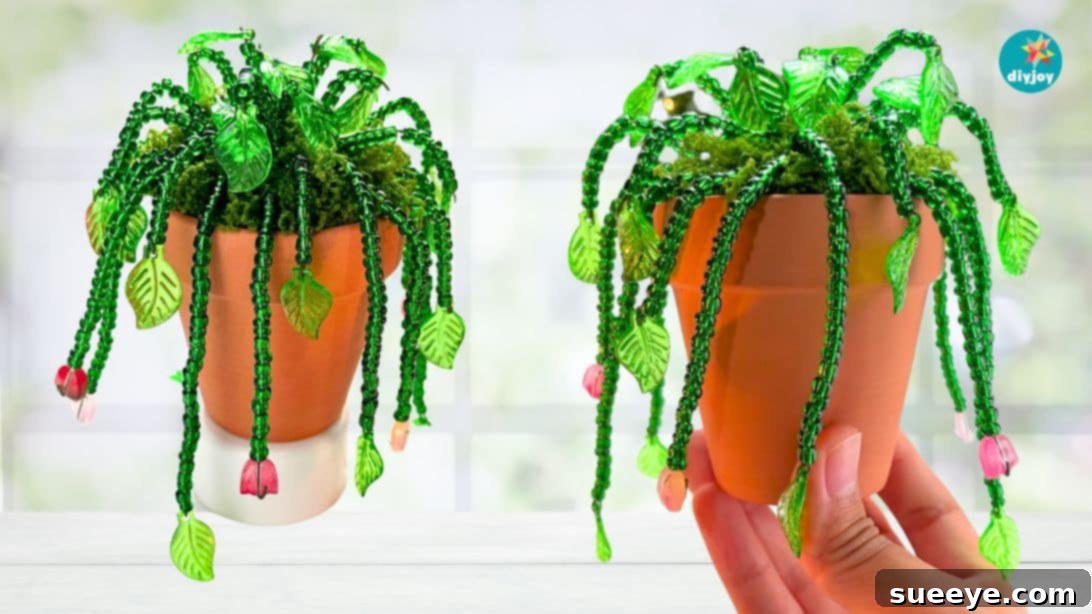
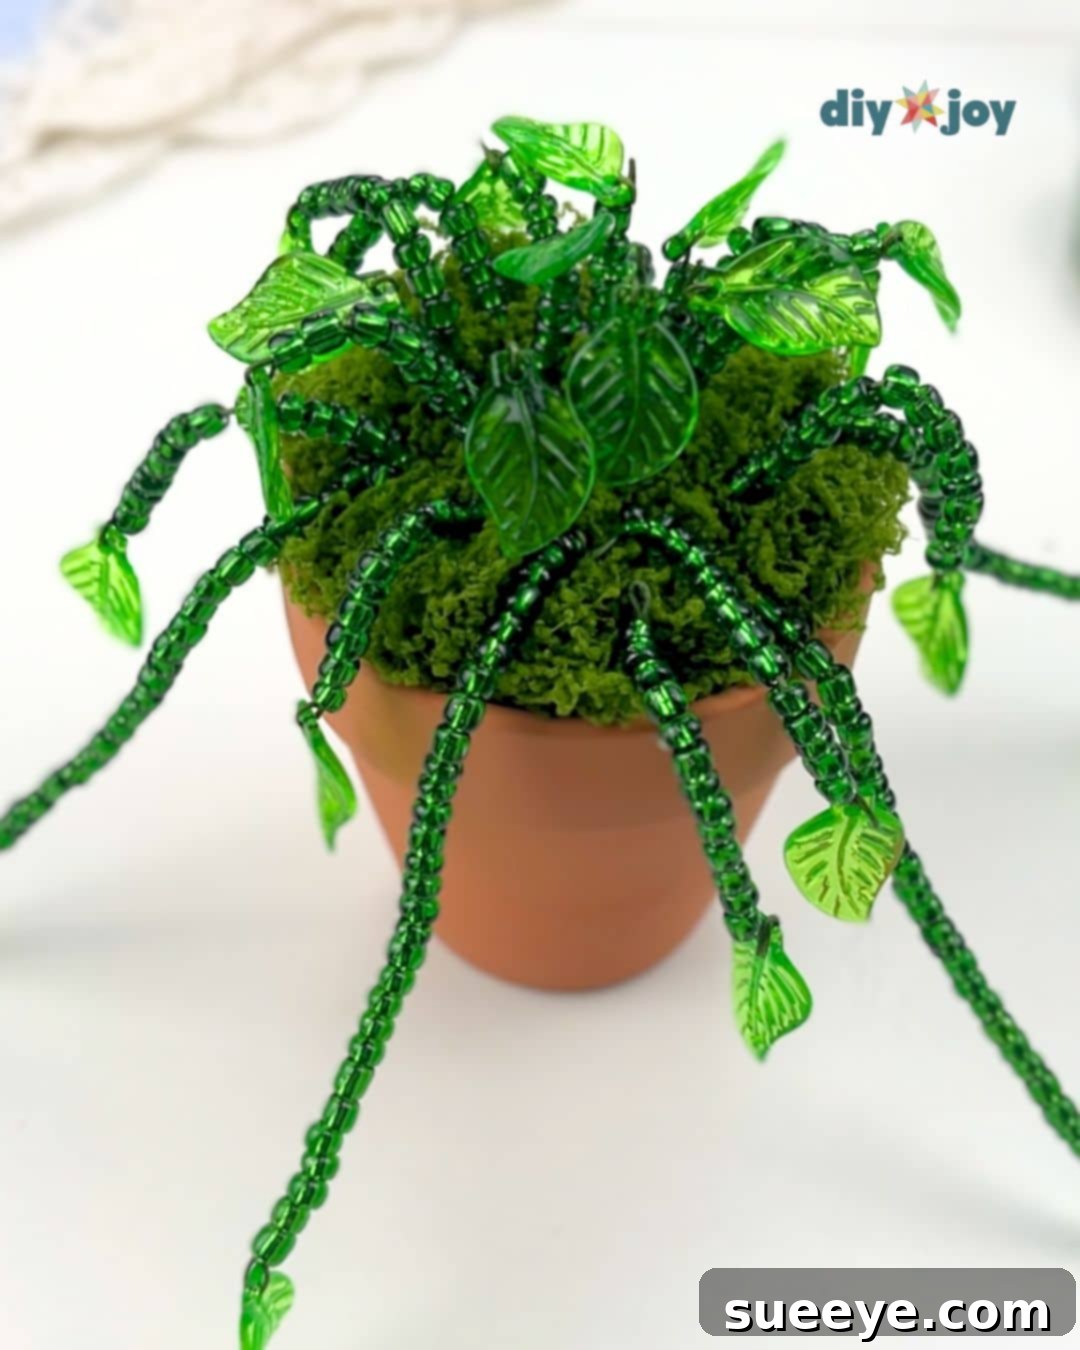
Searching for that perfect touch to personalize your workspace or add a unique accent to any room? Look no further than enchanting DIY beaded plants! These delightful creations are not only incredibly customizable but also radiate a captivating charm, especially when kissed by sunlight. Imagine a cascade of shimmering beads transforming into an instant suncatcher as they hang near your window, casting dazzling reflections across your walls. If you have an assortment of beads waiting to be transformed, or you’re simply eager to embark on a rewarding craft project, crafting your own mini beaded plant decor is an absolute must-try. It’s a fantastic way to create a vibrant, maintenance-free piece of art that truly reflects your style.
RELATED: Explore Another Popular Beaded Vine Desk Plant Tutorial Here
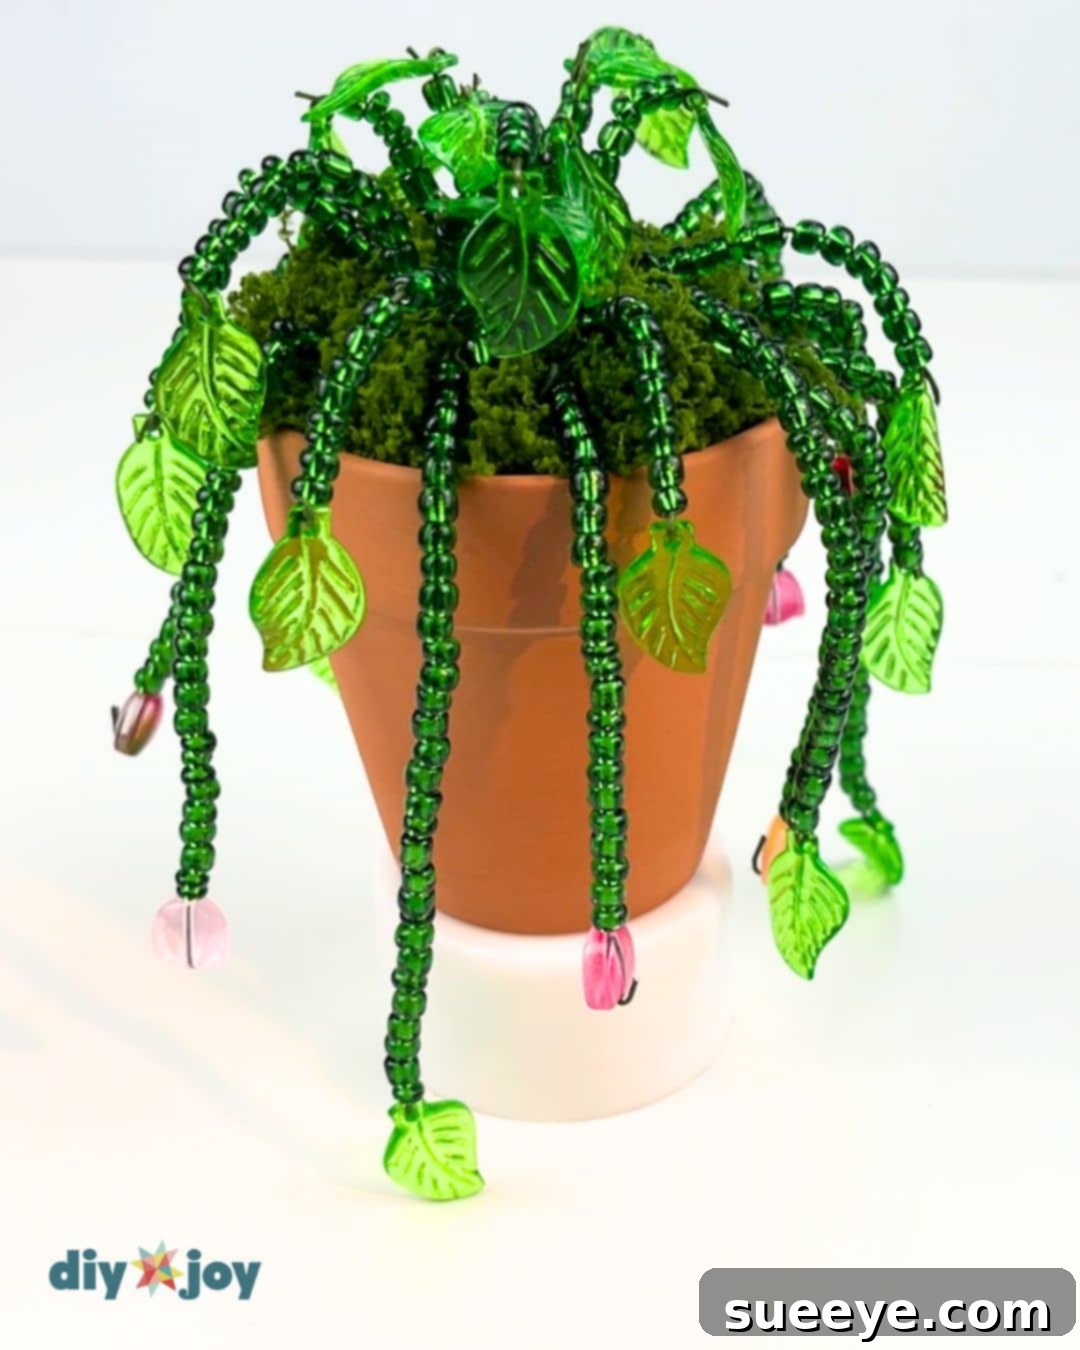
My journey with beaded plants began with a simpler design, focusing on small leaf beads and classic green glass beads for a straightforward vine effect. This time, however, I yearned for something more imaginative and unique. Drawing inspiration from the whimsical beauty of a strawberry plant, where lush leaves and sweet fruits gracefully emerge from delicate stems, I envisioned a similar structure for my new creation. While I didn’t have specific strawberry beads on hand, my crafting stash offered a perfect alternative: charming tulip beads originally intended for my chicken wire suncatcher project. This adaptability is one of the joys of DIY – transforming available materials into something entirely new and beautiful.
Should you be fortunate enough to discover strawberry beads, whimsical charms, or any other fruit-inspired embellishments at your local craft store or through online retailers, I wholeheartedly encourage you to incorporate them! They will undoubtedly elevate your faux plant, adding an extra layer of authenticity and personality. Keep reading to unveil the comprehensive, step-by-step tutorial below, or watch the accompanying video to learn precisely how to craft this adorable tiny desk plant – a true standout among creative table decor ideas, promising to bring a smile to your face every single day.
Craft Your Own Sparkle: A Guide to Making a Beaded Vine Desk Plant
Bringing a touch of perpetual spring to your desk or shelves has never been easier or more enchanting. This project guides you through creating a stunning beaded vine plant that requires zero watering, thrives in any light condition, and offers a personalized glimmer to your space. Whether you’re a seasoned crafter or just starting, this tutorial is designed to be straightforward and rewarding.
Follow these detailed steps to craft your very own DIY tiny beaded plant, perfect for enlivening any office desk, bookshelf, or windowsill. Get ready to add some sparkle!
-
Prepare the Pot with Styrofoam Base
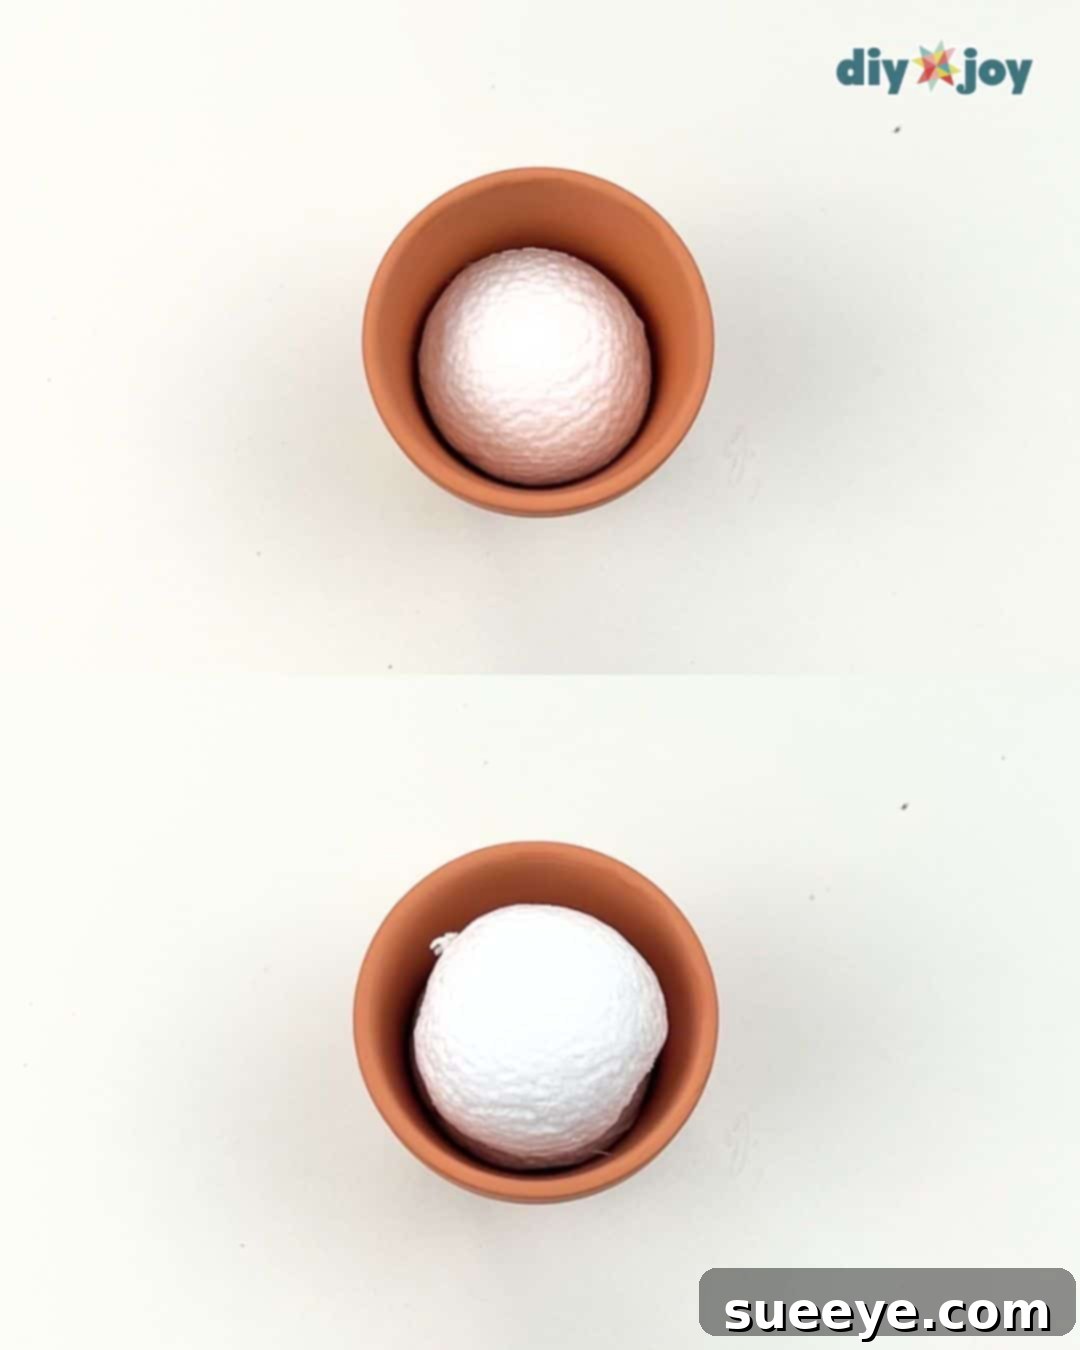
Begin by creating a stable foundation for your beaded plant. Take one round piece of styrofoam and firmly place it inside your mini terracotta pot. This will serve as the primary anchor for your stems. Next, cut the second piece of styrofoam in half and carefully position these halves on top of the first piece, aiming for a slightly mounded effect. To ensure these pieces remain securely in place and prevent any shifting as you add your beaded stems, use a length of floral wire to gently thread through and around them, binding them together. This creates a solid, stable base that will securely hold your delicate beaded vines.

-
Cover the Styrofoam with Faux Moss
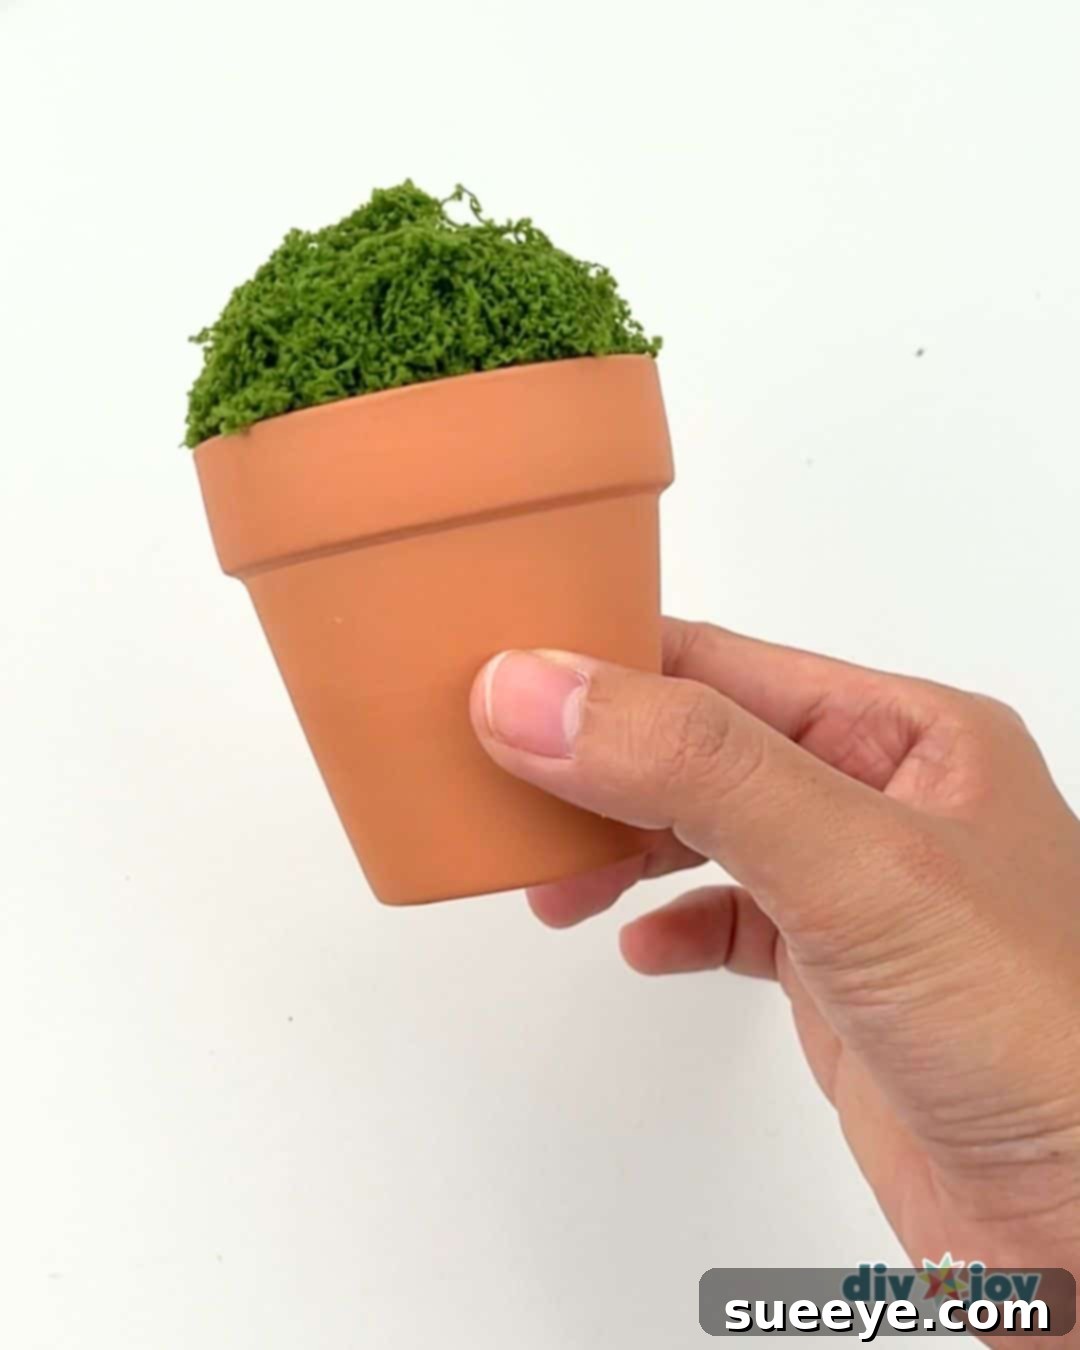
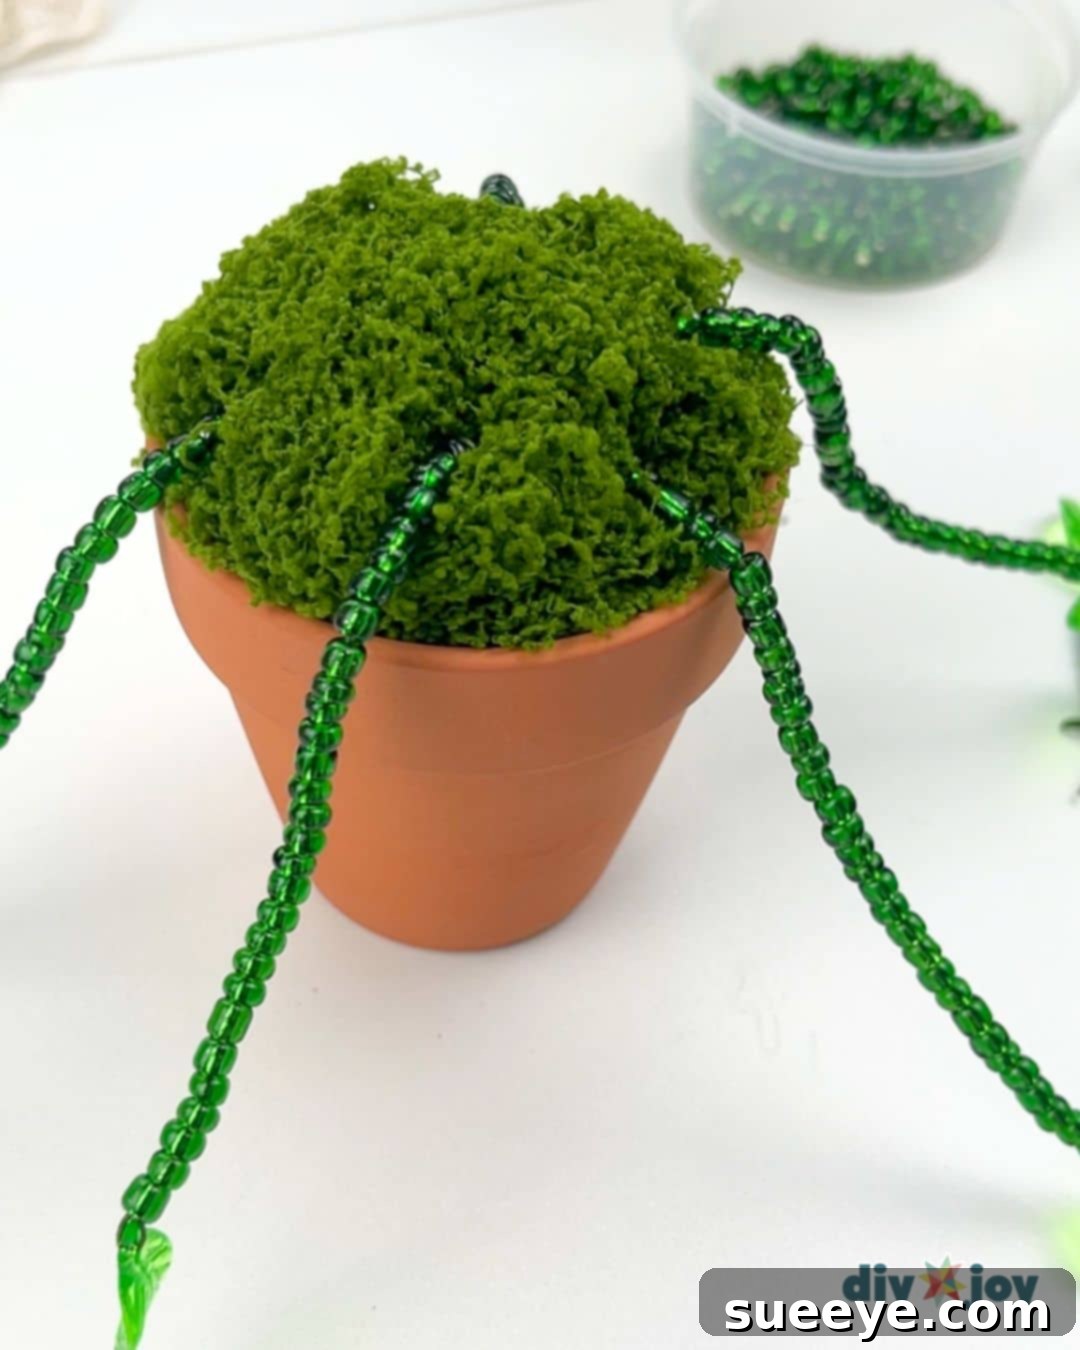
Once your styrofoam base is stable, it’s time to give your plant a natural, earthy look. Take a generous amount of fake moss and meticulously cover the entire visible surface of the styrofoam. Press it down gently but firmly to ensure it adheres well and hides the white styrofoam completely. The moss not only adds to the aesthetic appeal, mimicking real soil, but also provides a soft, visually pleasing bed for your beaded stems to emerge from. You can use a dab of hot glue if you find the moss isn’t staying put, especially around the edges.
-
Craft Individual Leaf Stems
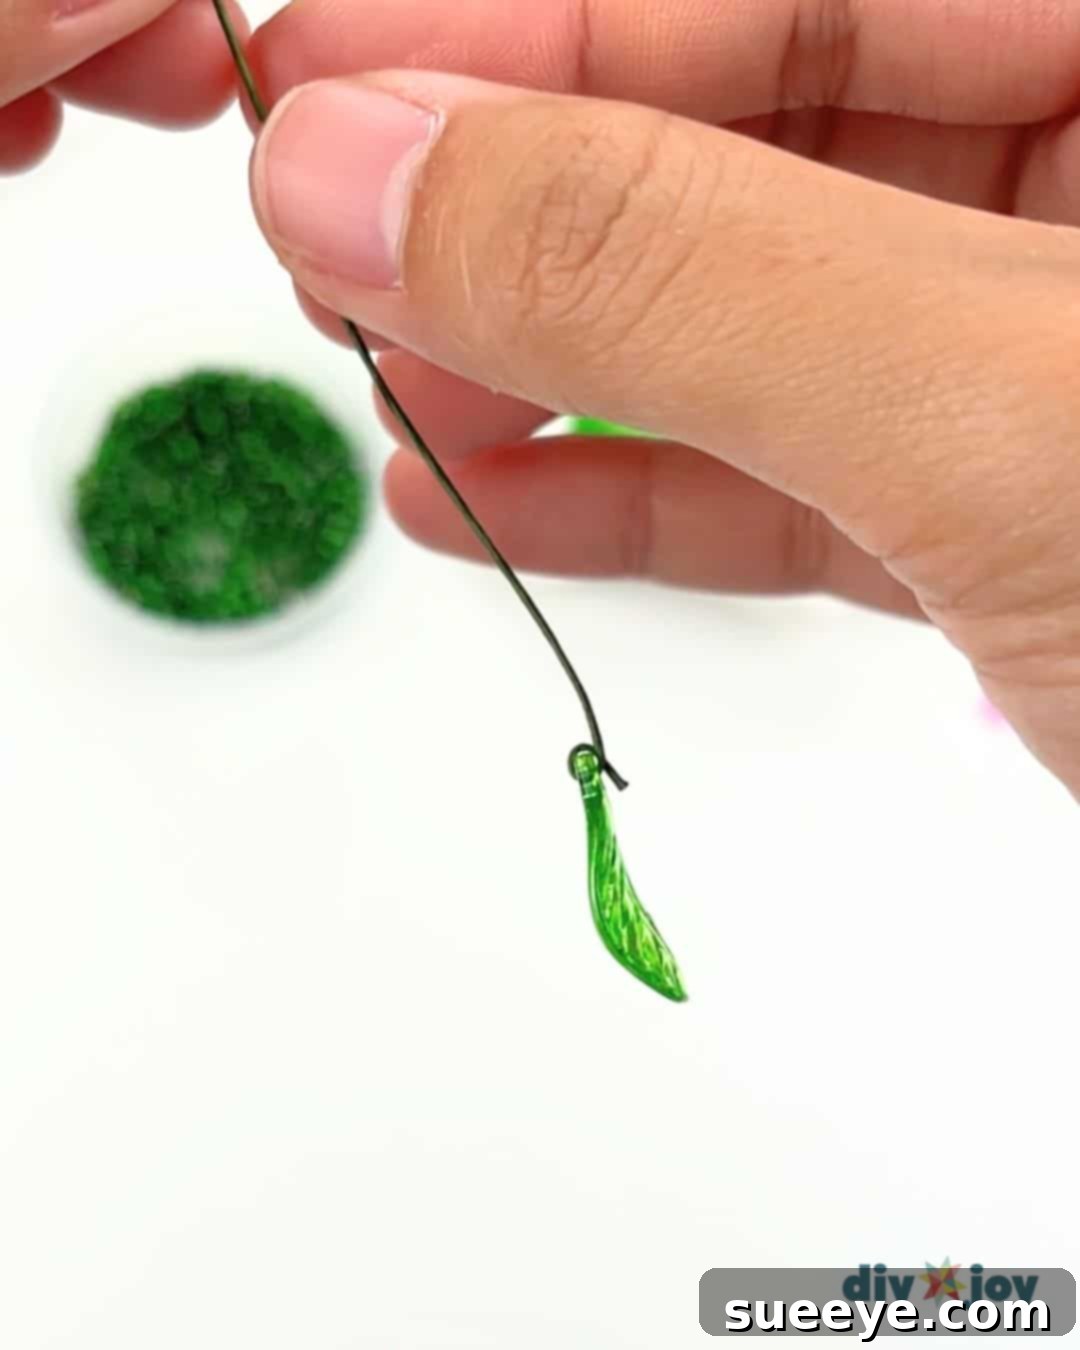
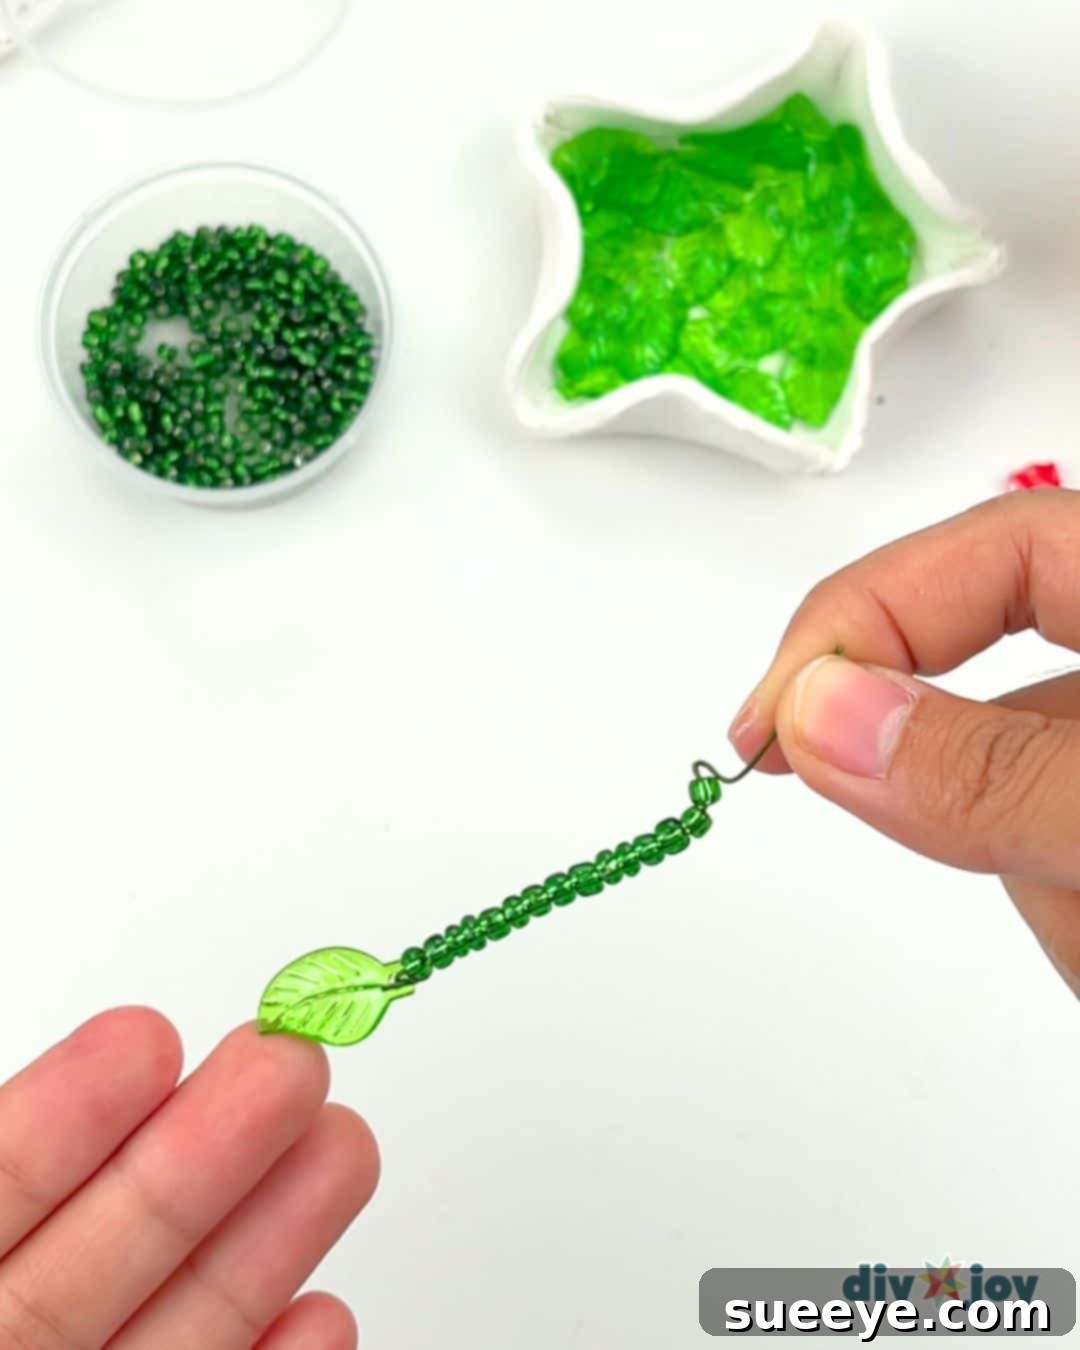
Now, let’s begin creating the foliage. Select a leaf-shaped bead and thread it onto a length of floral wire. To secure the bead firmly and create a neat finish, carefully curl one end of the floral wire into a small, tight loop just below the bead. This loop will prevent the bead from sliding off and provides a decorative element. Ensure the loop is snug against the bead without being overly tight. Repeat this process for all the leaf stems you plan to create, aiming for a variety of leaf types or green shades for visual interest.
-
Fill the Wires with Glass Beads
With your leaf beads secured, it’s time to add the “vine” effect. Begin filling the floral wire with your chosen green glass beads. Thread them on until you have a string of beads, making sure to leave a few inches of bare wire at the top. This bare section will be crucial for inserting the stem into the styrofoam. To keep the glass beads from sliding off the bottom, bend the very end of the wire into a small, secure hook or a tight loop, similar to how you secured the leaf bead. This creates a beautifully beaded stem ready for arrangement. Consider using different shades of green or even clear beads for added depth.
-
Assemble Your Flower or Fruit Stems
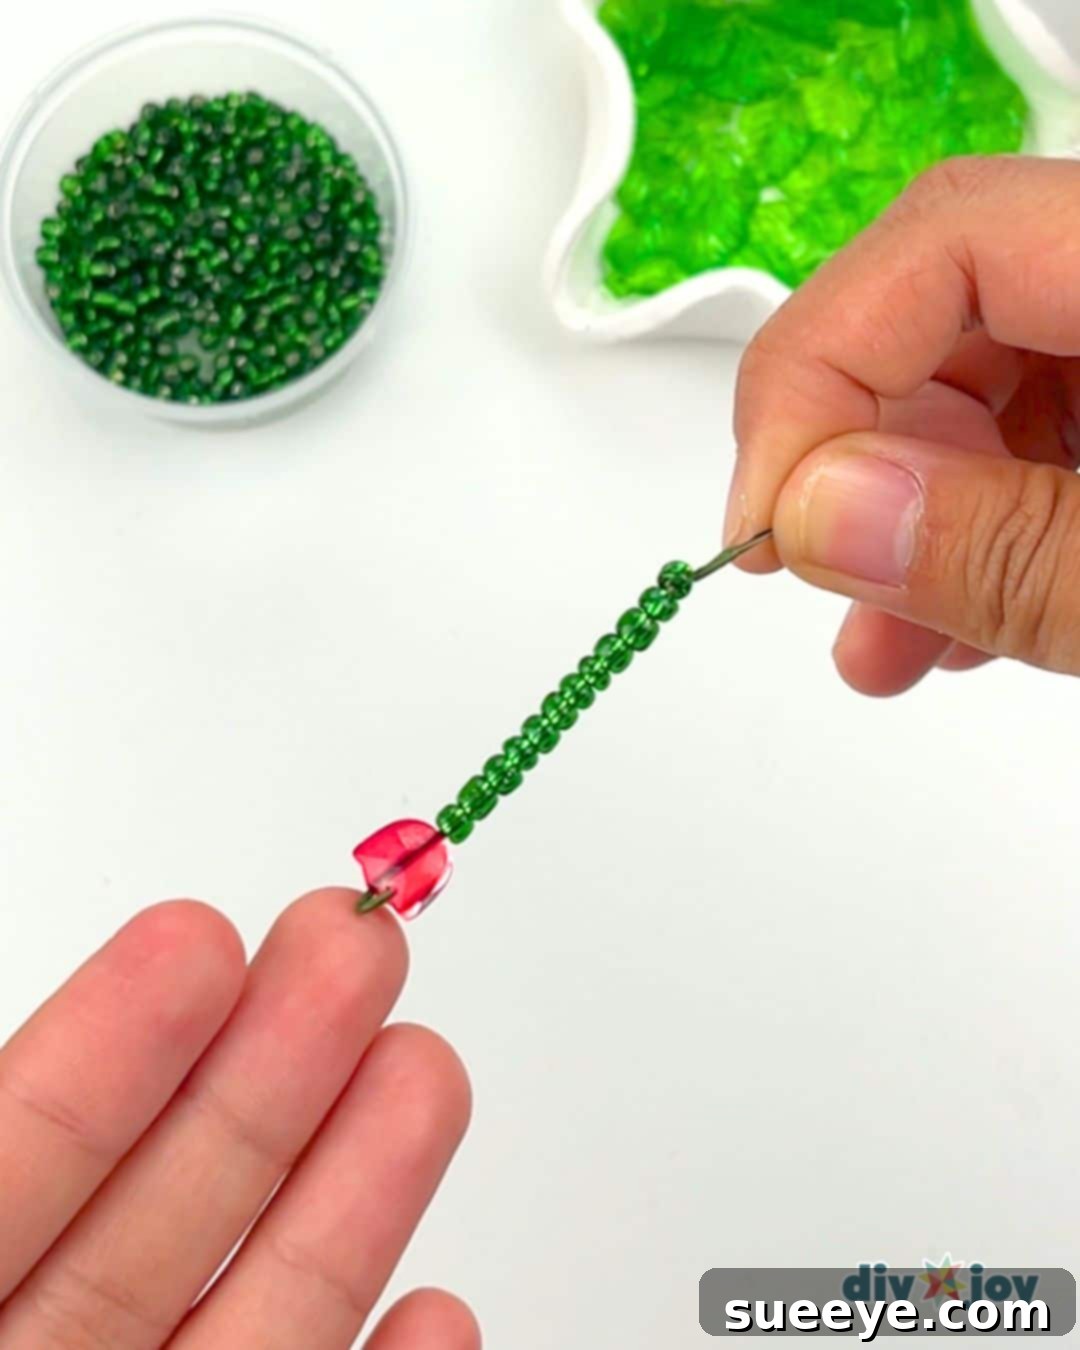
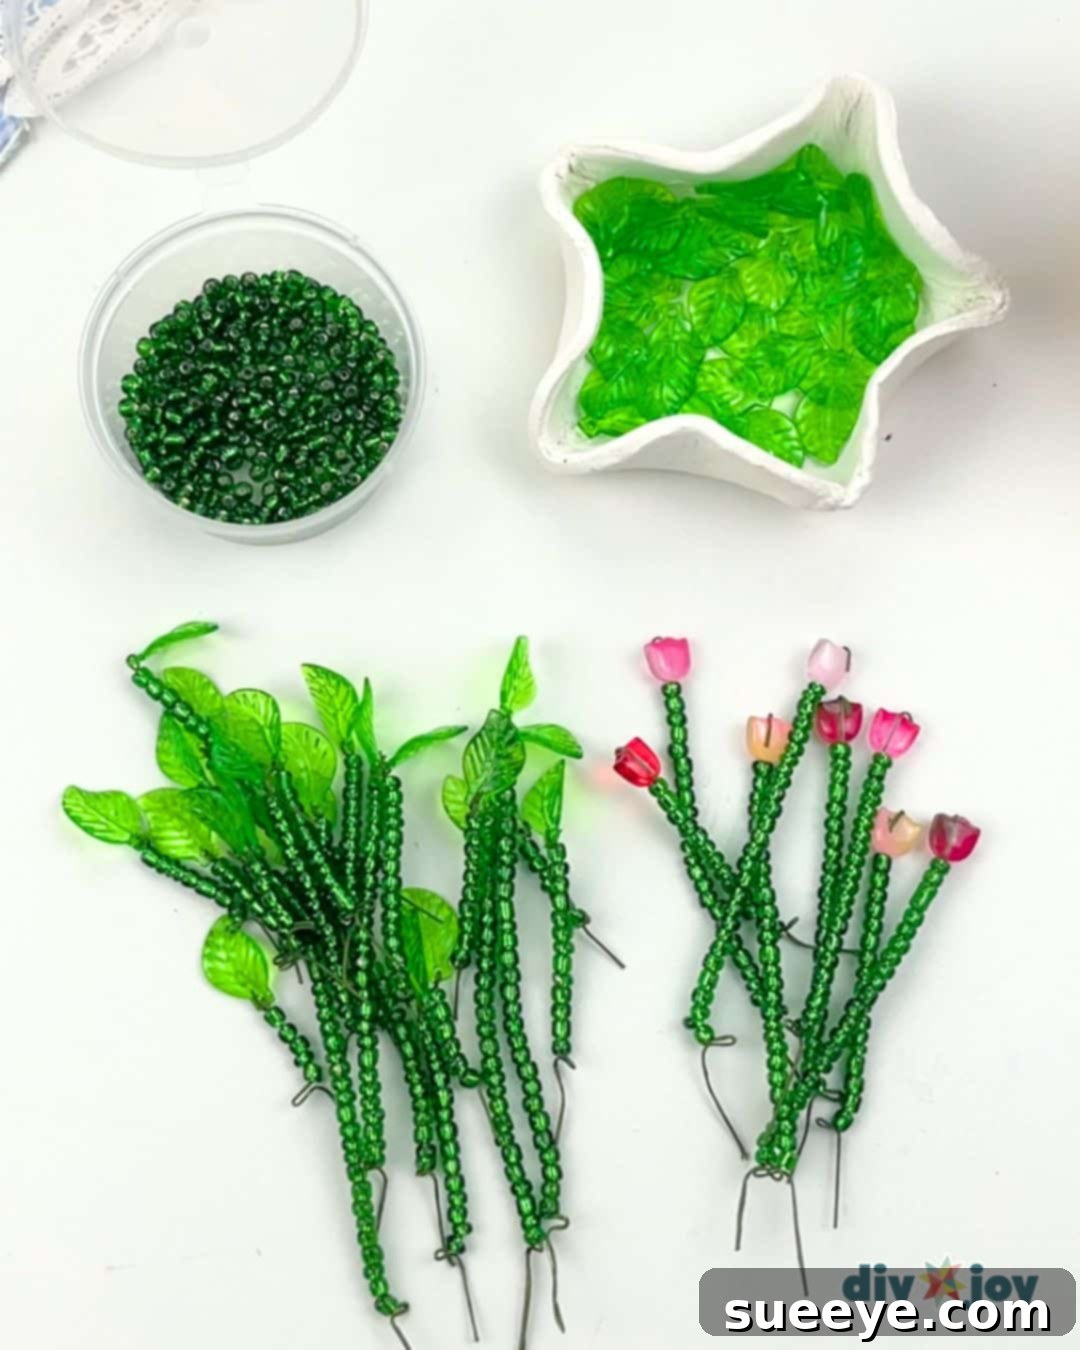
To add pops of color and replicate the “strawberry” inspiration, repeat the same bead-threading and securing process with your flower beads, strawberry beads, or any other fruit/charm beads you’ve chosen. Just like with the leaf stems, ensure you leave a few inches of bare wire at the top for insertion and secure the bead at the bottom with a small loop. Creating several of these will add a delightful contrast and focal points to your plant. Experiment with different colors if you’re not going for a specific fruit theme, perhaps vibrant reds, sunny yellows, or serene blues.
-
Create a Variety of Stem Lengths
To give your beaded plant a natural, organic appearance, it’s essential to create stems of varying lengths. Use your wire cutters to cut floral wire into different dimensions before you start adding beads. Some stems should be quite long, designed to gracefully drape over the pot’s edge, while others should be shorter, intended to stand upright and fill the center of the arrangement. This variation in length will add depth, movement, and realism to your faux plant, making it look much more dynamic and appealing.
-
Insert the Long Cascading Stems
Now, it’s time to bring your plant to life! Start with the longest beaded stems you’ve created. Carefully insert the bare end of each long stem into the styrofoam base, pushing it in firmly until it feels secure. Strategically place these longer stems around the outer edges of the pot, ensuring there are natural spaces in between each piece. Once inserted, gently bend the wire stems so they artfully cascade downwards, mimicking the elegant fall of a real vine plant. This initial layer establishes the overall shape and flow of your beaded creation.
-
Add the Shorter Filler Stems
With the outer, cascading stems in place, begin filling in the middle section of your pot with the shorter beaded stems. Insert these stems into the styrofoam, positioning the shortest ones predominantly in the very center. This technique builds volume and creates a lush, full appearance, making your beaded plant look rich and vibrant from all angles. Arrange them to stand upright or gently curve inwards, adding to the natural look and feel of the foliage.
-
Integrate the Flower/Fruit Stems for the Final Touch
For the grand finale, artfully insert your flower or fruit-inspired beaded stems into the arrangement. Place these colorful accents strategically among the green foliage, ensuring they are visible and contribute to the overall balance and visual appeal of your plant. You can cluster them for a dense bloom effect or scatter them sparingly for subtle pops of color. Once all your stems are in place, gently adjust any wires to perfect the arrangement. Congratulations, your stunning DIY beaded plant is now complete! Display it proudly on your table, hang it near a window to catch the light, or gift it to a loved one for a truly unique handmade present.
Tools You’ll Need
- Sharp scissors or wire cutters (for floral wire)
- Optional: Hot glue gun (for securing moss)
- Optional: Pliers (for bending wire loops more easily)
Materials for Your Beaded Plant Project
- Leaf-shaped beads (various green shades recommended)
- Green glass beads (for vine segments, round or faceted)
- Floral wire (various gauges for stability and flexibility)
- Flower beads or strawberry/fruit-themed charms (for accents)
- Fake moss (preserves natural aesthetic)
- 2 round styrofoam pieces (or a larger piece to cut)
- Mini terracotta pot (or any small decorative pot)

Expert Crafting Tip: Embrace Your Inner Artist!
Never hesitate to experiment with different bead shapes, sizes, colors, and arrangements. Your unique artistic vision is what will truly make your beaded plant a one-of-a-kind masterpiece. Don’t be afraid to deviate from the “rules” and discover what truly resonates with your style!
Unlock More Creativity: Ideas & Variations for Your Beaded Plant
Once you’ve mastered the basic technique, the possibilities for customization are virtually endless. Let your imagination soar with these creative enhancements:
- Decorate the Pot for Extra Personality. The mini terracotta pot is a blank canvas! Infuse it with character by painting it in vibrant colors – think cheerful polka dots, elegant stripes, delicate floral patterns, or even a metallic finish for a modern touch. You could also try decoupage with pretty paper, add glitter, or use stencils to create intricate designs. A personalized pot adds another layer of charm to your beaded creation, making it truly unique.
- Transform It into a Hanging Garden. Elevate your beaded plant by turning it into a charming hanging decoration. Simply attach a piece of natural jute twine, a delicate chain, or even some braided yarn to the rim of the pot. Ensure it’s securely fastened and balanced. Hang it in a sunny window, by a doorway, or even from a shelf bracket to create a beautiful, light-catching mobile that adds vertical interest to your decor.
- Create a Whimsical Fridge Magnet. For a delightful and unexpected accent, transform your mini beaded plant into a refrigerator magnet. Once your plant is assembled, simply glue a strong craft magnet to the back of the terracotta pot using a durable adhesive. Allow it to dry completely, and then proudly display your miniature garden on your refrigerator or any magnetic surface, adding a handmade touch to your kitchen or office.
- Experiment with a Kaleidoscope of Beads. The true magic of this project lies in bead experimentation. Venture beyond simple green glass beads. Try using faceted crystal beads for extra sparkle, frosted glass for a softer look, seed beads for intricate detail, or incorporate unique charms like tiny animals, stars, or geometric shapes. Play with diverse color palettes – perhaps a gradient of blues and purples for a fantasy garden, warm autumnal tones, or a monochrome scheme for minimalist elegance. Each bead choice tells a different story.
- Seasonal & Thematic Designs. Adapt your beaded plant for different seasons or holidays. Use red and gold beads for a festive Christmas display, pastel colors for an Easter theme, or bright oranges and blacks for a subtle Halloween touch. You could also create themed plants, like a “beach plant” with blue and sandy-colored beads and tiny shell charms, or a “forest plant” with earthy greens and brown accents.
- Gift-Giving Perfection. A handmade beaded plant makes an incredibly thoughtful and personalized gift. It’s perfect for housewarmings, birthdays, teacher appreciation, or just to brighten someone’s day. Customize the colors and style to match the recipient’s personality or home decor, making it an even more cherished present.
Care & Maintenance for Your Faux Plant
One of the greatest advantages of a beaded plant is its virtually maintenance-free nature. Unlike real plants, it never needs watering, sunlight, or pruning. However, to keep it looking its best and sparkling brightly, occasional dusting is recommended. A soft brush, a can of compressed air, or a damp cloth (carefully avoiding getting the moss wet) can gently remove any accumulated dust. This simple step ensures your beautiful creation continues to shimmer and delight for years to come.
Discover More Easy & Inspiring Craft Ideas
Loved creating this beaded plant? Dive into our collection of other fun and accessible DIY projects perfect for adding handmade charm to your home or for unique gift-giving!
Seasonal Crafts
Make the Cutest DIY Christmas Ornament With a Tuna Can
Seasonal Crafts
Sparkle and Shine: DIY Christmas Ornaments | Glitter Foam
General Crafts
Decorate Your Tree With Adorable 5-Minute Santa Gnome Ornaments
Watch the Viral Beaded Plant Video Tutorial Here!
Prefer to learn by watching? Dive into our comprehensive video tutorial that walks you through each step of crafting your beaded vine plant. See the techniques in action and get visual tips for creating your perfect desk decor. Click below to watch and craft along!
Creating your own DIY beaded plant is more than just a craft; it’s an opportunity to infuse your space with personal flair, a touch of shimmer, and the enduring joy of a handmade creation. This unique desk decor piece serves as a constant reminder of your creativity and can brighten even the dullest of days. With no watering required and endless possibilities for customization, it’s the perfect project for crafters of all skill levels. So, gather your beads, unleash your imagination, and start crafting a sparkling statement piece today!