
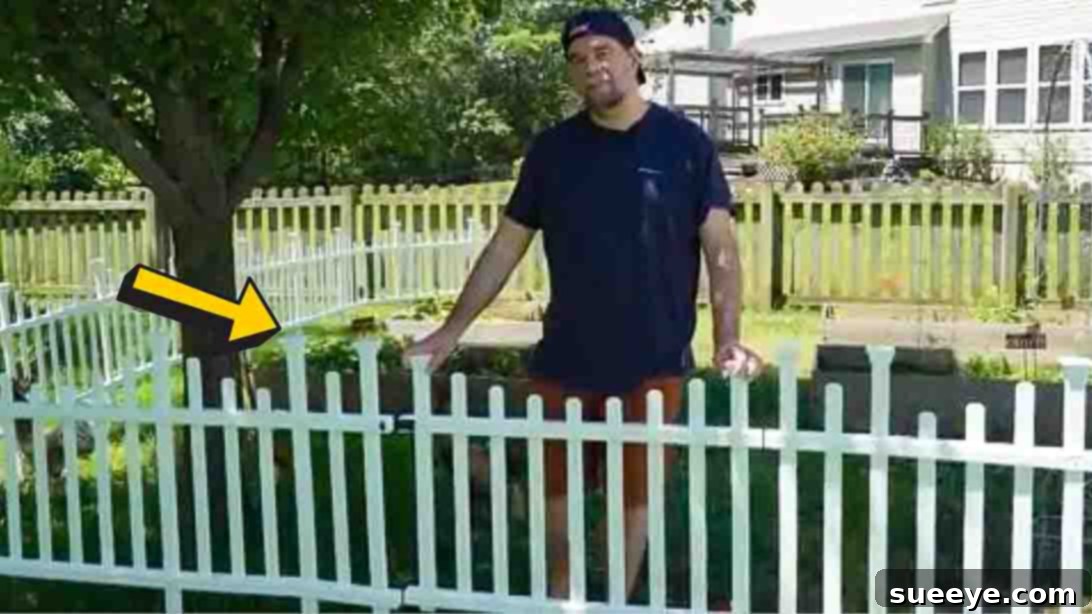
DIY No-Dig Garden Fence: Transform Your Yard with Effortless Style and Functionality
Imagine being able to significantly enhance your garden’s appeal and practical functionality in just a few hours, all without the strenuous effort of digging, pouring concrete, or extensively disturbing your existing landscape. This comprehensive, step-by-step guide, inspired by the brilliant insights from Blackberry Hill House on YouTube, will empower you to install a stunning and practical garden fence with unparalleled ease. The mere thought of installing a new fence often conjures images of heavy labor, complex measurements, and specialized tools, which can be daunting for even the most enthusiastic homeowner.
However, this innovative no-dig approach revolutionizes the entire process. It not only saves you valuable time and effort but also significantly minimizes any negative impact on your garden’s delicate ecosystem, making it an ideal choice for environmentally conscious gardeners. By choosing a no-dig fence, you preserve soil health, protect existing plant roots, and avoid the messy aftermath of traditional fence installation. This method offers a seamless blend of convenience and ecological responsibility.
Whether you’re a seasoned green thumb searching for a swift and impactful weekend project or a beginner eager to make a noticeable improvement to your outdoor space, this DIY no-dig garden fence tutorial is perfectly tailored for you. Forget the back-breaking work traditionally associated with fence construction. By the time you complete this guide, you will have constructed a visually appealing and highly functional fence that not only elevates your garden’s charm but also offers practical benefits, such as defining garden beds, protecting plants from small critters, or creating clear pathways. Prepare to transform your garden with minimal exertion and maximum satisfaction, creating a beautiful and defined outdoor sanctuary.
RELATED: Looking for more inspiring outdoor DIY projects? Don’t miss this fantastic guide on how to build a DIY Platform Deck From Pallets and Fence Pickets for another rewarding endeavor.
Why Choose a No-Dig Garden Fence? Unbeatable Advantages for Every Gardener
The concept of a “no-dig” fence extends far beyond mere convenience; it offers a multitude of compelling benefits that make it an increasingly popular and superior choice for many homeowners and garden enthusiasts. Understanding these advantages will help you fully appreciate why this installation method is gaining such widespread appeal.
- Effortless and Rapid Installation: This is arguably the most significant advantage. Traditional fencing requires extensive post-hole digging, precise post setting with concrete, and often the use of specialized tools or professional help. A no-dig fence system, particularly those like the Zippity vinyl picket fence featured in this guide, completely eliminates this arduous labor. You simply assemble the fence panels and tap their integrated stakes into the ground, making it an accessible project for individuals of any skill level, from novice DIYers to experienced landscapers.
- Exceptional Time-Saving: With no heavy excavation or lengthy drying times for concrete, you can often complete a significant section of fencing, or even an entire garden perimeter, in just a few hours. This makes it a perfect weekend project, allowing you to enjoy your newly enhanced garden almost immediately without dedicating days to construction.
- Minimal Soil Disturbance and Eco-Friendly: For avid gardeners, preserving soil health, preventing erosion, and protecting existing plant roots are paramount concerns. Traditional fence posts can severely disrupt delicate root systems, alter soil structure, and disturb beneficial microorganisms. No-dig fences gently penetrate only the topsoil or simply rest on the surface, leaving your garden’s established ecosystem largely undisturbed. This is a significant triumph for environmentally conscious gardeners who prioritize sustainable practices.
- Outstanding Flexibility and Portability: Unlike permanent, deeply anchored fences, no-dig options are remarkably easier to reposition, reconfigure, or even completely remove if your garden layout changes, your needs evolve, or if you decide to move to a new home. This inherent adaptability offers a level of design freedom and versatility that fixed, permanent fences simply cannot match, allowing you to experiment with different garden aesthetics.
- Cost-Effective Solution: While initial material costs can vary depending on the style and length, the elimination of professional installation fees or the need to rent specialized excavation equipment often makes no-dig fences a far more budget-friendly option in the long run. The simplicity of the DIY process directly translates into reduced overall expenses.
- Enhanced Aesthetics and Practical Functionality: Beyond their straightforward installation and practical benefits, these fences beautifully define garden beds, clearly delineate pathways, and crisply mark property lines. They serve as an effective deterrent for small animals, protect delicate plants from accidental damage, and add a clean, classic, and manicured border that significantly boosts your home’s curb appeal and overall outdoor charm.
- Perfect for Beginners: If you’re new to home improvement or garden DIY projects, this is an excellent starting point. The straightforward steps, minimal tool requirements, and quick, visible results help build confidence, making significant garden improvements accessible to everyone, regardless of prior experience.
Selecting the Ideal No-Dig Fence System for Your Garden
While this tutorial specifically highlights the use of a vinyl picket fence system, it’s beneficial to understand the broader range of no-dig fence options available. These systems come in various styles and materials, each suited to different aesthetic preferences, functional needs, and budget considerations. The Zippity 30″ vinyl picket fence is an excellent example of a pre-fabricated kit specifically designed for ease of installation and long-lasting durability.
- Vinyl Picket Fences (like Zippity): These are exceptionally popular and renowned for their low maintenance requirements, superb weather resistance, and timeless, classic aesthetic. Vinyl fences will not rot, rust, or require periodic painting or staining, making them a truly “set it and forget it” solution. Their interlocking design and integrated ground stakes are perfectly engineered for hassle-free, no-dig applications, offering a clean, crisp look that complements any garden style.
- Metal Fences: Often crafted from durable materials such as aluminum or powder-coated steel, metal no-dig fences can offer a more contemporary, sleek, or even ornate decorative look. They are incredibly durable and strong but might require slightly more effort to drive their often thicker ground spikes into tougher soil conditions. They are excellent for a more robust garden border.
- Small Wooden Panels: Some no-dig systems feature small, interconnected wooden panels that come with attached stakes. While these offer a wonderfully natural and rustic aesthetic that blends seamlessly with garden environments, they typically require more ongoing maintenance, such as regular staining or sealing, to protect them from weathering and prolong their lifespan.
When choosing the best no-dig fence for your specific needs, consider its primary purpose: Is it purely decorative to enhance visual appeal? Is it intended to keep small pets within a designated area or deter nuisance wildlife? Will it define a raised garden bed or a sprawling vegetable patch? Answering these questions will help you decide on the most appropriate height, material, style, and overall design that perfectly aligns with your garden goals and personal taste.
Essential Materials and Tools for Your No-Dig Garden Fence Project
One of the most appealing aspects of this DIY project is the incredibly minimal list of tools and materials required. You won’t need to invest in heavy machinery or specialized, expensive equipment; just a few essential items will be sufficient to get the job done efficiently and effectively.
- Zippity 30″ Vinyl Picket Fence Kit: This is the absolute cornerstone of our project. These user-friendly kits typically come complete with pre-assembled panels and cleverly integrated ground stakes, specifically engineered for hassle-free, no-dig installation. The 30-inch height is particularly versatile and perfect for a wide range of applications, including defining garden borders, providing protection for delicate flower beds, or simply creating charming decorative accents within your landscape. Be sure to accurately measure your desired perimeter to purchase a sufficient number of fence sections to cover the entire area.
- Rubber Mallet or Hammer: While a standard metal hammer can certainly be used, a rubber mallet is highly recommended as the preferred tool. A rubber mallet provides the necessary force to firmly drive the fence stakes into the ground without the risk of damaging, denting, or marring the pristine vinyl panels. If you opt for a regular hammer, it is crucial to place a protective piece of scrap wood or a thick cloth over the top of the fence panel where you are striking to shield it from direct impact.
- (Optional but Recommended) Measuring Tape: This tool is incredibly useful for precise planning, accurately marking your fence lines, and ensuring consistent spacing between sections for a professional and uniform appearance.
- (Optional but Recommended) String Line and Small Stakes: For achieving perfectly straight fence lines, especially over longer distances, stretching a string line between two small stakes provides an invaluable visual guide. This helps maintain accuracy and prevents unwanted wavering.
- (Optional) Level: A small spirit level can be used periodically to confirm that each fence section is perfectly plumb (vertical) and visually appealing. This ensures a professional and aesthetically pleasing finish.
- (Optional but Highly Recommended) Safety Gloves and Glasses: As with any DIY project, prioritizing safety is paramount. Wearing sturdy safety gloves will protect your hands from potential scrapes or blisters, and safety glasses will shield your eyes from any unexpected debris or errant strikes, ensuring a safe and comfortable working experience.
Step-by-Step Directions: Installing Your No-Dig Garden Fence with Ease
Follow these straightforward and easy-to-understand steps to effortlessly bring your vision of a beautifully fenced garden to life. This process is specifically designed to be highly approachable, efficient, and ultimately rewarding, ensuring a stunning outcome.
Step 1: Meticulous Planning of Your Layout and Initial Fence Assembly
Before you even think about starting the installation, dedicate some essential time to thorough planning. Begin by accurately determining the exact areas where you intend to install your fences. Visualize the perimeter, the graceful curves, or the crisp, straight lines you wish to create. For a truly professional and clean look, it’s highly advisable to mark your intended fence line with precision. You can use a measuring tape in conjunction with a string line stretched tightly between small stakes, or even temporary landscape spray paint, to clearly delineate the path. This crucial preliminary step ensures your fence will be installed precisely where you want it and is invaluable for accurately calculating the total number of fence sections required for your project.
Once your layout is clearly defined, carefully unbox your Zippity fence kit. Take a moment to thoroughly review the specific assembly instructions provided by the manufacturer. Most Zippity fence systems feature panels that may require a minor assembly step, such as securely attaching decorative caps or connecting two half-sections together. Perform this initial assembly on a flat, clean, and stable surface, ensuring that all components are securely and correctly fitted according to the manufacturer’s guidelines before you proceed to the garden for installation.
Step 2: Expertly Installing the First Fence Section
With your first fence section meticulously assembled, carefully position it at the designated starting point of your planned perimeter. Ensure that this initial section is precisely aligned with your previously marked line. Using your trusted rubber mallet (or a hammer with a protective wood block, if you chose that option), begin to gently but firmly tap the integrated ground stakes into the soil. It is vital to apply even pressure to the top of the fence panel, alternating your taps across the entire width of the panel. This technique ensures that the panel descends uniformly and straightly into the ground. Crucially, avoid hitting one side significantly harder than the other, as this can cause the panel to tilt unevenly or potentially damage the vinyl material.
As you carefully tap the stakes, periodically pause to check that the fence section remains perfectly straight and level using your spirit level. This continuous checking is absolutely crucial for achieving the desired overall aesthetic and professional appearance of your finished fence. If the ground in your area is particularly hard or rocky, you might need to apply a bit more consistent force; however, always remain mindful of protecting the delicate fence material from excessive impact. The ultimate goal is to drive the stakes deep enough into the ground so that the fence feels robust, sturdy, and exceptionally well-anchored, typically until the decorative base of the fence rests firmly and snugly on the ground surface.
Step 3: Seamlessly Connecting and Extending Your Fence Line
Now, retrieve your next fully assembled fence section. Most high-quality no-dig fence systems, including the Zippity brand, incorporate a remarkably simple interlocking mechanism or precisely designed clasps that are intended to connect adjacent panels seamlessly. Carefully align the clasp or the designated connecting points of the new fence section with the corresponding features on the previously installed section. Gently push or slide them together until they either audibly click into place or fit snugly and securely, forming a continuous line. This robust connection is absolutely key to creating a truly continuous, stable, and visually coherent fence line, allowing you to extend your fence indefinitely around the entirety of your garden perimeter.
Once the sections are securely connected, some kits may include small screws or additional fasteners designed to further enhance their stability. If your kit includes these, locate the designated pre-drilled holes (if any) and use the provided screws to firmly attach the sections to one another. This vital step significantly adds to the overall structural integrity, helping to prevent the fence sections from separating over time, especially in areas prone to strong winds or where active pets might interact with the fence. After making the connection, utilize your mallet to tap the stakes of the newly added section into the ground, diligently repeating the precise process outlined in Step 2 to ensure it is perfectly level, straight, and thoroughly secure.
Continue this systematic process – connecting a new section, securing it firmly, and carefully tapping its stakes into the ground – until you have successfully completed your entire desired fence perimeter. Pay extra meticulous attention when approaching corners; some advanced systems may offer specific corner pieces for a clean turn, while others might require slight, careful adjustments to achieve a neat and professional-looking angle. Always remember to step back periodically and visually assess your progress, ensuring that the entire fence line remains consistently straight, level, and aesthetically pleasing from all vantage points.
Step 4: Adding Final Touches and Savoring Your Achievement
Once all the fence sections are successfully installed and securely connected, take a moment to perform a thorough final inspection. Walk along the entire length of your newly installed fence, carefully checking for any sections that might feel even slightly wobbly or unstable. Ensure that all ground stakes are firmly and deeply seated in the soil. Make any minor necessary adjustments for perfect alignment or level, using your mallet as needed. Finally, clear away any debris, packaging materials, or tools from the installation area, leaving your garden spotless. Your DIY no-dig fence is now officially complete, ready to significantly enhance both the beauty and the practical functionality of your cherished garden space!
Expert Tips for a Flawless No-Dig Fence Installation
Even with a project as straightforward as installing a no-dig fence, a few additional expert tips can make your installation process even smoother and ensure a more professional, long-lasting finish:
- Thorough Ground Preparation is Key: While you’re not digging deep holes, it’s beneficial to clear any major surface debris, sizable rocks, or particularly stubborn roots from along your intended fence line. This preparatory step will significantly ease the process, allowing the fence stakes to penetrate the soil more evenly and securely.
- Optimal Soil Conditions: Work on Dry Soil: Installing your fence when the soil is relatively dry and somewhat soft will be considerably easier than attempting to drive stakes into waterlogged, muddy, or excessively hard, compacted ground. If your soil is unusually dry, consider lightly moistening the ground with a garden hose the day before installation; this can help soften the soil without making it muddy.
- Utilize a Level Consistently: Particularly on longer, straight fence runs, it’s crucial to periodically check the vertical alignment of your fence sections with a small spirit level. This ensures that your fence sections aren’t leaning and that the entire fence line appears perfectly straight, plumb, and much more appealing to the eye.
- Patience During Assembly: Don’t Rush: While the entire project is designed to be quick, take your time when assembling each individual fence section. Ensuring that all components are correctly and securely fitted before you begin installation will prevent frustrating issues and rework later in the process.
- Protect the Fence Top: If, for any reason, you decide to use a metal hammer instead of a recommended rubber mallet, always remember to place a protective block of wood or a thick, folded cloth over the very top of the fence post before striking. This simple precaution will effectively prevent unsightly dents, cracks, or other damage to the vinyl material.
- Plan for Gates: If your garden design requires access points, investigate whether your chosen no-dig fence system offers matching gate sections. Planning for these during your initial layout phase will ensure a cohesive and functional design.
Creative Ways to Utilize Your New No-Dig Garden Fence
Beyond its primary function of simply bordering your garden, these remarkably versatile no-dig fences can serve a multitude of creative purposes, adding both significant beauty and enhanced practicality to your entire outdoor living space:
- Elegantly Define Flower Beds: Create crisp, clean, and elegant borders for your vibrant annuals, perennials, and shrubs. This helps to keep decorative mulch neatly in place and prevents accidental trampling of delicate plantings by foot traffic or playful pets.
- Effectively Protect Vegetable Patches: Shield your precious homegrown crops from the unwelcome attention of curious pets or small garden wildlife, such as rabbits or groundhogs. A well-placed fence ensures your hard-earned harvest remains undisturbed and thriving.
- Create Structured Pathways: Line garden paths with your new fence to give them a beautifully structured, manicured, and defined look. This not only enhances visual appeal but also helps to guide visitors gracefully through your landscape, preventing them from straying onto garden beds.
- Establish Temporary Pet Enclosures: For small, well-behaved pets, these fences can be quickly and easily deployed to create temporary safe zones or play areas within your yard, offering them a secure space without permanent alteration to your landscape.
- Decorative Accents and Highlights: Utilize shorter sections of the fence to artistically highlight specific specimen plants, cherished garden sculptures, serene water features, or any other focal points in your garden design, drawing attention to their beauty.
- Visually Contain Children’s Play Areas: While not a safety barrier for larger children or vigorous play, these fences can effectively and visually delineate a specific play space in the yard, helping to keep toys and activities contained within a designated zone.
Maintaining Your No-Dig Vinyl Picket Fence for Lasting Beauty
One of the most significant and celebrated advantages of vinyl fencing, particularly no-dig systems like Zippity, is its remarkably low maintenance profile. However, a little proactive care and attention can go a very long way in preserving its pristine appearance and structural integrity for many years to come.
- Regular Cleaning Routine: Over time, vinyl surfaces can naturally accumulate dirt, dust, pollen, and even develop mildew or algae growth, particularly in shady or damp areas. A simple wash with a garden hose and a soft-bristled brush or cloth, along with a mild household soap solution (like dish soap), will typically suffice to keep your fence looking sparkling fresh. Always avoid using abrasive cleaners, harsh chemicals, or high-pressure washers, which can potentially damage the vinyl surface.
- Periodically Check Connections: It’s a good practice to periodically inspect the connections between adjacent fence sections, especially if screws or specific fasteners were used during installation. Over time, due to natural expansion and contraction or external forces, these connections might slightly loosen. Tighten any loose fasteners or re-engage any interlocking mechanisms to ensure the entire fence line remains consistently secure and stable.
- Monitor Ground Stability: After periods of heavy rainfall, significant ground shifting, or prolonged dry spells that can cause soil contraction, check that the fence stakes are still firmly seated in the soil. If you notice any wobbling or slight lifting, gently re-tap the stakes into the ground with your rubber mallet to maintain optimal stability and alignment.
- Consider Winter Care (for colder climates): In regions that experience heavy snowfall or prolonged freezing temperatures, it is wise to clear any significant accumulation of snow away from the fence line. Preventing excessive pressure from heavy snow or the formation of thick ice buildup around the panels can help prolong the life of your fence. While vinyl is generally very durable and weather-resistant, extreme conditions can sometimes exert undue stress.
Your Beautiful, Functional Garden Awaits! Final Thoughts
Congratulations! You have successfully learned how to install a fantastic DIY no-dig garden fence, effectively transforming your outdoor space with minimal physical effort and maximum visual impact. This incredibly rewarding project, brought to life through the helpful and inspiring guidance of Blackberry Hill House, stands as clear proof that creating a truly beautiful and highly functional garden doesn’t have to be a daunting or overwhelming task. You’ve embraced a smart, efficient, and environmentally friendly approach that respects your garden’s soil while simultaneously delivering a crisp, clean, and aesthetically pleasing boundary.
Now, take a well-deserved step back and truly admire your handiwork. Whether you’ve meticulously bordered a vibrant flower bed, effectively protected a thriving vegetable patch, or simply added a charming decorative element that enhances your garden’s character, your new no-dig fence is a testament to clever, accessible DIY. It showcases how thoughtful planning and simple tools can yield impressive results. So, grab your mallet, unleash your creativity, and revel in the profound satisfaction of a garden that has been beautifully enhanced by your own capable hands. We strongly encourage you to watch the full video tutorial from Blackberry Hill House for detailed visual, step-by-step instructions and even more inspiration to elevate your outdoor projects!