
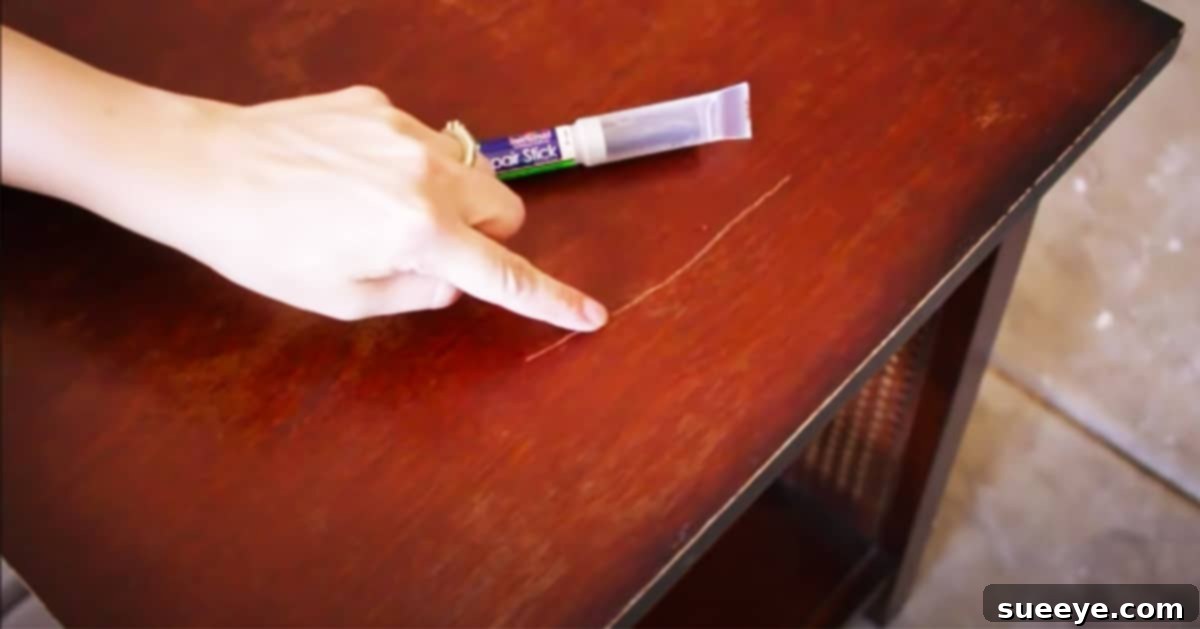
Every piece of furniture tells a story, and sometimes, that story includes a few unintended chapters written in the form of scratches. Whether from an accidental bump, a pet’s playful moment, or the inevitable wear and tear of daily life, those unsightly marks can quickly detract from the beauty and value of your beloved pieces. But before you despair and consider costly professional refinishing or even replacing a scratched item, know that many common furniture blemishes can be effectively treated with simple, do-it-yourself techniques.
Restoring your furniture to its former glory doesn’t have to be a daunting task. With a little know-how and a few readily available supplies, you can often make those scratches disappear, or at least significantly less noticeable, giving your furniture a new lease on life. We’ve compiled a selection of 5 ingenious, easy-to-implement tips, inspired by the practical wisdom of channels like Pneumatic Addict on YouTube, that will empower you to tackle common furniture scratches with confidence. Let’s delve into these clever hacks that can save your furniture and your budget.
Understanding Furniture Scratches: What Are You Dealing With?
Before diving into repairs, it’s helpful to understand the nature of the scratch. Not all scratches are created equal, and identifying the type will help you choose the most effective repair method:
- Surface Scratches (Scuffs): These are usually very light, affecting only the top protective clear coat or finish. They often appear as white or light marks because the scratch hasn’t penetrated the wood stain itself.
- Medium Scratches: These go deeper than surface scratches, sometimes reaching the wood stain but not necessarily the raw wood. The color might be slightly lighter than the surrounding area.
- Deep Scratches and Gouges: These penetrate through the finish and stain, exposing the raw wood beneath. They are usually very noticeable and may feel rough to the touch. These often require a filling material in addition to color restoration.
Once you’ve assessed the damage, you’re ready to select the perfect DIY solution from the arsenal below.
1. Banish Minor Scratches with a Furniture Marker
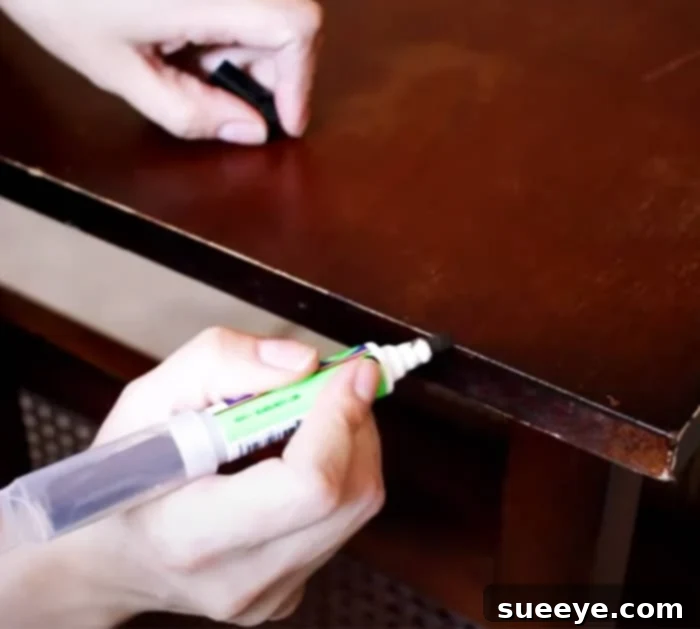
One of the most common areas to show wear and tear on furniture is along the edges and corners. These spots often get bumped, rubbed, or faded, revealing a lighter wood underneath. This is where a furniture marker, also known as a wood stain marker or touch-up pen, becomes an indispensable tool. These markers contain a translucent stain or pigment designed to blend seamlessly with your existing wood finish, effectively camouflaging minor imperfections.
How It Works: Furniture markers work by depositing color into the scratched or faded area, effectively re-staining the exposed wood fibers to match the surrounding finish. They are particularly effective for surface scratches and worn edges where the wood itself is not deeply gouged but has lost its color.
Application Tips:
- Clean the Area: Ensure the furniture surface is clean and free of dust and debris before application.
- Choose the Right Shade: Furniture markers come in a variety of wood tones. Select a shade that closely matches your furniture’s finish. When in doubt, it’s safer to go slightly lighter and build up the color.
- Apply Sparingly: Rub the marker gently over the faded or scratched area. For best results, use light, even strokes.
- Blend Immediately: Before the stain dries completely, use a clean, soft cloth or a paper towel to gently wipe away any excess and blend the color into the surrounding wood. This prevents harsh lines and ensures a natural look.
- Repeat if Necessary: For deeper fading or scratches, you might need to apply a second thin layer after the first has dried, building up the color gradually until it matches.
Furniture markers are an excellent, quick fix for enhancing the appearance of scuffs and worn edges, making them practically invisible without altering the overall finish of your furniture.
2. The Natural Solution: Soft Nuts for Small Scratches
For those annoying small scratches and superficial wear on real wood furniture, nature offers a surprisingly effective and eco-friendly solution: soft nuts like walnuts or pecans. This age-old hack is revered for its simplicity and remarkable results on genuine wood surfaces.
The Science Behind It: Walnuts and pecans are rich in natural oils and tannins. When rubbed firmly into a scratch, these oils penetrate the wood fibers, nourishing them and helping them to swell slightly, which can diminish the appearance of the scratch. The natural pigments in the nuts also help to stain the exposed raw wood, blending it with the surrounding finish. This method is particularly suitable for scratches that are light to medium deep, where the wood is exposed but not heavily damaged.
Which Nuts to Use:
- Walnuts: These are the most commonly recommended due to their ideal oil content and natural brown hue.
- Pecans: Similar to walnuts, pecans also work well for their oil and color properties.
- Almonds: Can also be used, especially for lighter wood tones.
Note: Avoid using nuts that have been salted or roasted, as these might introduce unwanted flavors or chemicals. Stick to raw, unsalted nuts. Also, this method is best for real wood and may not yield the same results on laminate or synthetic finishes.
Step-by-Step Application:
- Prepare the Nut: Crack open a fresh walnut or pecan. You’ll want to use the inner kernel, which is soft and oily.
- Rub Firmly: Take a piece of the nut kernel and rub it firmly and directly over the scratch. Use enough pressure for the oils to be released and penetrate the wood. Rub along the grain of the wood for better blending.
- Observe the Magic: As you rub, you should see the scratch begin to darken and disappear or become significantly less noticeable. The natural oils and color will fill and blend.
- Let it Sit: Allow the oils to penetrate the wood for 5-10 minutes. This gives the wood time to absorb the natural elements.
- Buff Clean: With a clean, soft cloth (microfiber works great), gently buff the treated area. This will remove any excess oil and polish the surface, leaving a smooth, restored finish.
This natural remedy is incredibly effective for minor imperfections and offers an organic, non-toxic way to revitalize your wooden furniture. Always test on an inconspicuous area first, especially if you have an unusual wood type or finish.
3. Tackling Deep Gouges with a Wood Repair Fill Stick
When you encounter deeper scratches, nicks, or even small gouges that have penetrated through the finish and into the raw wood, a simple marker or nut might not be enough. For these more substantial imperfections, a wood repair fill stick is your go-to solution. These handy tools are essentially soft, crayon-like sticks made from wax, resin, or putty, designed to fill and color deep damage.
What is a Fill Stick? A fill stick provides a solid material that can physically fill the void created by a deep scratch or gouge. Unlike markers that only add color, fill sticks add substance, restoring the smooth surface of your furniture. They are available in various wood shades, allowing you to match your furniture’s color closely.
Ideal for:
- Deep scratches that expose raw wood.
- Dents and small gouges.
- Areas where a significant amount of material has been removed.
Detailed Application Process:
- Clean the Damaged Area: Ensure the scratch or gouge is clean and dry. Remove any loose wood particles or debris.
- Warm the Fill Stick (Optional but Recommended): For easier application and better adhesion, gently warm the tip of the fill stick. You can do this by holding it near a flame from a match or lighter for a few seconds. Be careful not to melt it completely or burn it. Warming makes the wax softer and more pliable, allowing it to penetrate and fill the scratch more effectively.
- Apply the Filler: Rub the softened fill stick firmly and directly into the scratch or gouge. Work it into the damaged area, making sure the material fills the void completely. You can apply it in layers if necessary, pressing down to ensure it adheres well.
- Scrape Off Excess: Once the scratch is adequately filled, you’ll likely have some excess filler around the edges. Use a plastic scraper, an old credit card, or a putty knife (held at a shallow angle) to carefully scrape away the excess material. Work gently so as not to damage the surrounding finish or pull the filler out of the scratch.
- Buff and Blend: After removing the excess, buff the treated area with a clean, soft cloth. This will help to blend the filler with the surrounding finish, remove any residue, and restore a smooth surface. If the color isn’t a perfect match, you can sometimes use a furniture marker over the filled area to fine-tune the shade.
Fill sticks are an excellent solution for more significant damage, providing both structural repair and color restoration, making those deep imperfections virtually disappear.
4. The Household Remedy: Vinegar and Cooking Oil Mixture for Fine Scratches
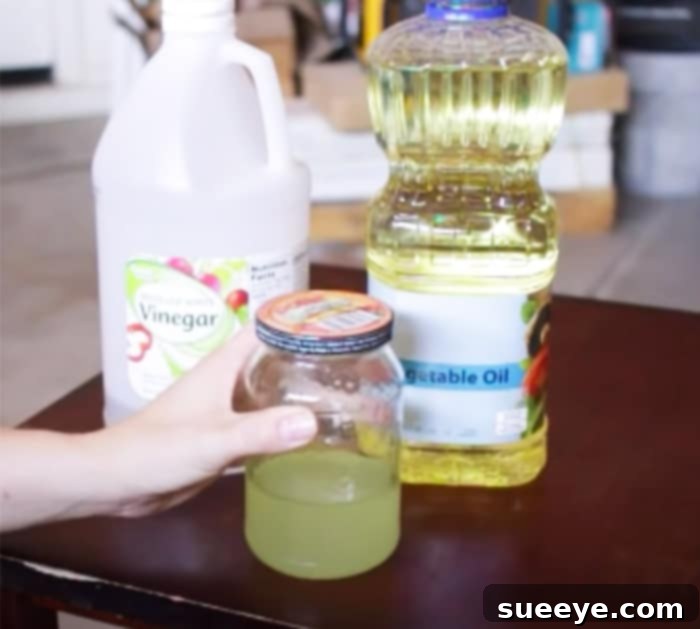
For furniture pieces suffering from an accumulation of numerous fine scratches, a dull finish, or general wear that makes the surface look tired, a simple concoction from your kitchen pantry can work wonders: a mixture of vinegar and cooking oil. This natural and inexpensive solution can deeply nourish the wood, diminish the appearance of fine scratches, and restore a healthy luster to your furniture.
Why It Works:
- Cooking Oil: Oils like olive oil or vegetable oil moisturize the wood, helping to swell the fibers slightly and thereby reducing the visibility of minor scratches. They also add a natural sheen and depth to the wood.
- Vinegar: White vinegar acts as a gentle cleaner, cutting through grime and residue that might be dulling the finish. It also helps the oil penetrate the wood more effectively and can restore a balanced pH to the wood surface.
This method is particularly effective for furniture with many small, superficial scratches rather than deep gouges. It’s a great way to revitalize older pieces or maintain the beauty of newer ones.
Preparation and Application:
- Gather Ingredients: You’ll need white vinegar (not apple cider or flavored vinegar) and a common cooking oil, such as olive oil or vegetable oil.
- Mix the Solution: In a jar or small bowl, combine 3 parts cooking oil with 1 part white vinegar. For example, if you use 3 tablespoons of oil, add 1 tablespoon of vinegar.
- Shake Well: Secure the lid on the jar and shake vigorously to thoroughly mix the oil and vinegar. The mixture might separate over time, so give it a good shake before each use.
- Apply with a Soft Rag: Dip a soft, clean cloth (a microfiber cloth or an old cotton t-shirt works perfectly) into the oil mixture. Wring out any excess so the cloth is damp but not dripping.
- Rub into Furniture: Rub the oil mixture gently over the scratched surface of your furniture. Work in sections and always rub in the direction of the wood grain. The oil will penetrate the wood, and the vinegar will help clean the surface. You should see fine scratches start to blend in and the wood’s luster return.
- Allow to Penetrate: Let the mixture sit on the furniture for about 10-15 minutes, allowing the wood to absorb the oils and benefits.
- Buff for Shine: With a separate clean, dry soft cloth, buff the entire treated surface until it shines and feels smooth. This removes any oily residue and brings out the natural beauty of the wood.
This simple, homemade polish can dramatically improve the appearance of tired, scratched furniture, leaving it looking nourished and rejuvenated. Always test this mixture on an inconspicuous area first to ensure compatibility with your furniture’s finish.
5. Restoring Widespread Damage with a Coat of Toner
Sometimes, furniture surfaces are in particularly rough condition, not just with individual scratches but with widespread fading, discoloration, or numerous minor dings that affect the overall appearance. In such cases, applying a coat of toner can be a transformative solution. Toner, in the context of furniture repair, is a translucent coating that contains a small amount of dye or pigment. It’s designed to add color while allowing the wood grain to show through, effectively blending imperfections and evening out the finish.
What is Furniture Toner? Unlike opaque paints that cover the wood entirely, or stains that penetrate raw wood, toner sprays a fine mist of colored lacquer or shellac. This translucent layer sits on top of the existing finish, adding a uniform tint that can mask minor scratches, blend in areas of discoloration, and restore a consistent, appealing look to the entire piece. It’s a fantastic option for reviving an old, tired finish without the extensive work of stripping and completely refinishing the furniture.
Ideal Use Cases:
- Furniture with extensive surface scratches that are too numerous for individual touch-ups.
- Areas of uneven fading due to sun exposure or general wear.
- Minor discoloration or ‘ding’ marks that detract from the overall aesthetic.
- When you want to subtly shift the color tone of your furniture (e.g., make it slightly darker or warmer) while maintaining its transparency.
Application Best Practices:
- Clean and Prepare: Thoroughly clean the furniture surface to remove all dirt, grease, and old wax. A light sanding with very fine grit sandpaper (e.g., 220-400 grit) can help the toner adhere better, but ensure you clean off all dust afterwards.
- Choose the Right Tone: Toners come in various wood shades. Select one that is close to your original furniture color or the desired outcome. Always test the toner on an inconspicuous area (like the underside of a table or inside a drawer) to ensure the color and effect are what you expect.
- Ventilate Well: Toners, especially spray toners, can have strong fumes. Work in a well-ventilated area, preferably outdoors or in a garage with open doors, and wear appropriate respiratory protection.
- Apply Thin Coats: The key to successful toning is applying multiple thin, even coats rather than one thick one. Hold the spray can about 8-10 inches away from the surface and move it in a steady, overlapping motion.
- Build Up Color: Allow each coat to dry completely according to the manufacturer’s instructions (usually 15-30 minutes) before applying the next. You can build up the color gradually until you achieve the desired depth and uniformity. This layering approach allows you to control the final look and prevent an overly dark or uneven finish.
- Finish with a Clear Coat (Optional): For added durability and protection, especially on high-traffic surfaces, you can apply a clear topcoat (lacquer or polyurethane) after the toner has fully cured.
Using toner is an advanced DIY technique that can dramatically refresh and unify the appearance of heavily worn or scratched furniture, making it look professionally restored with less effort than a full refinishing project.
Prevention is Key: Maintaining Your Furniture’s Pristine Condition
While these repair hacks are incredibly effective, the best strategy for furniture care is prevention. By adopting a few simple habits, you can significantly reduce the likelihood of scratches and prolong the life and beauty of your cherished pieces:
- Use Protective Barriers: Always place coasters under drinks, placemats under plates, and tablecloths or runners on table surfaces to guard against spills, heat, and direct contact that can cause scratches or water rings.
- Felt Pads for Furniture Legs: Attach felt pads to the bottom of all furniture legs, especially chairs, tables, and ottomans. This prevents scratching floors when furniture is moved and reduces noise.
- Lift, Don’t Drag: When moving furniture, always lift it rather than dragging it across the floor. This protects both your furniture and your flooring.
- Mind Your Objects: Be conscious of what you place on furniture surfaces. Avoid sliding heavy or abrasive objects, and consider using decorative trays or mats for items like keys, remote controls, or decor pieces that might otherwise cause micro-scratches.
- Pet Protection: If you have pets, consider furniture covers or training them to avoid scratching. Keep pet nails trimmed to minimize accidental damage.
- Regular Cleaning and Dusting: Dust can be abrasive. Regularly dust your furniture with a soft, clean cloth (microfiber is excellent) to prevent dust particles from scratching the surface when wiped. Use appropriate furniture cleaners or polishes that nourish the wood rather than harsh chemicals.
- Control Humidity: Extreme fluctuations in humidity can cause wood to expand and contract, potentially leading to cracks or stress on the finish. Maintain a relatively stable humidity level in your home, especially for valuable wooden pieces.
- Avoid Direct Sunlight: Prolonged exposure to direct sunlight can fade finishes and make them more susceptible to damage. Use curtains or blinds to protect furniture from harsh UV rays.
By incorporating these preventive measures into your routine, you can keep your furniture looking its best and minimize the need for extensive repairs down the line.
Conclusion: Empowering Your Furniture’s Comeback
Furniture scratches are an almost inevitable part of life, but they don’t have to be a permanent blight on your beloved pieces. As demonstrated by these five simple yet powerful DIY methods, many common furniture imperfections can be effectively remedied with readily available materials and a bit of patience. From the quick touch-up of a furniture marker to the nourishing power of walnuts, the filling capabilities of a repair stick, the restorative blend of vinegar and oil, or the comprehensive coverage of a toner, you now have a versatile toolkit to tackle a wide range of scratches.
These hacks not only help restore the aesthetic appeal of your furniture but also contribute to its longevity, saving you the expense and hassle of professional repairs or replacements. While it can be challenging to make heavily damaged furniture look absolutely new without a complete refinishing, these tricks can dramatically improve its condition, blending away unsightly marks and rejuvenating the overall finish. Remember to always test any new method on an inconspicuous area first, and don’t be afraid to experiment to find the perfect solution for your specific furniture and scratch type.
Embrace the satisfaction of DIY furniture restoration, breathe new life into your cherished pieces, and let them continue to tell their story, now with fewer visible scars. Your furniture, and your home, will thank you for the extra care.