
Mastering the Invisible Join: Achieve Flawless Quilt Binding
For many quilters, the final step of adding binding to a cherished project can feel like a daunting task, often delaying the satisfaction of a completed quilt. While the creativity of piecing and quilting brings immense joy, the binding process, particularly achieving a neat and tidy join, can be a significant stumbling block. However, fear not! This comprehensive guide will walk you through an incredibly easy and effective invisible join method for your quilt binding, ensuring a professional, seamless finish every time. Inspired by the expert insights from American Patchwork & Quilting on YouTube, this technique will transform the way you approach quilt binding, making those final stitches a pleasure, not a chore.
The beauty of the invisible join lies in its ability to make the meeting point of your binding strips virtually undetectable. Instead of a bulky, obvious seam, your binding will flow smoothly around the entire perimeter of your quilt, giving it a polished, store-bought quality. This method is not only aesthetically pleasing but also contributes to the overall durability and longevity of your quilt. Say goodbye to visible overlaps and hello to perfectly blended edges that enhance the craftsmanship of your handmade textile art. By following the detailed steps outlined below, you’ll gain the confidence to tackle any quilt binding with ease, achieving results you’ll be proud to showcase.
Essential Materials for Your Invisible Binding Join
Before embarking on this rewarding quilting journey, ensure you have all the necessary tools at hand. Having your materials prepared beforehand will streamline the process and allow for a smooth, uninterrupted workflow.
- Your Quilting Project: This includes your completed quilt top, batting, and backing, already quilted and squared up, ready for binding.
- Binding Strips: Typically, these are cut 2.5 inches wide, sewn together end-to-end to create one continuous strip long enough to go around your entire quilt. Ensure you have a little extra length for the overlap required by the invisible join method.
- Fabric Ruler: A clear acrylic ruler is essential for accurate measuring and marking, particularly when trimming and drawing your diagonal seam line. A 6×24 inch ruler is ideal for cutting binding strips, while a smaller ruler (e.g., 2.5×6 inches) is useful for marking the join.
- Pins: Quilting pins are crucial for securing your binding strips in place, especially when aligning the ends for the invisible seam. Opt for sharp, fine pins that won’t distort your fabric.
- Sharp Fabric Scissors: Precision is key in quilting, and a sharp pair of fabric scissors will ensure clean, accurate cuts, minimizing fraying and making your seams lie flatter.
- Fabric Marking Tool: A pencil, fabric chalk, or a washable fabric marker will be needed to mark the cutting and sewing lines on your binding strips. Choose a tool that is visible on your binding fabric but can be easily removed.
- Sewing Machine: A reliable sewing machine with a fresh needle and appropriate thread (matching your binding fabric) is indispensable for stitching your binding securely.
- Iron and Ironing Board: While not listed in the original, an iron is vital for pressing seams flat, which contributes significantly to a professional finish and is implicitly part of the “finger press” instruction.
Step-by-Step Guide to an Easy Invisible Binding Join
This method assumes you have already sewn your binding strip all the way around your quilt, leaving an unsewn overlap at the beginning and end. This overlap is critical for creating the seamless join. If you’re new to attaching binding, ensure your binding is machine-sewn to the front of your quilt, leaving about 8-10 inches unsewn at the start and end of your strip to accommodate this technique. The corners should also be mitered and sewn, leaving just the final join.
Step 1: Preparing the Binding Ends for a Perfect Overlap
The initial step involves carefully preparing the unsewn ends of your binding strip to ensure a precise, invisible connection. Accuracy at this stage is paramount for the success of the entire join.
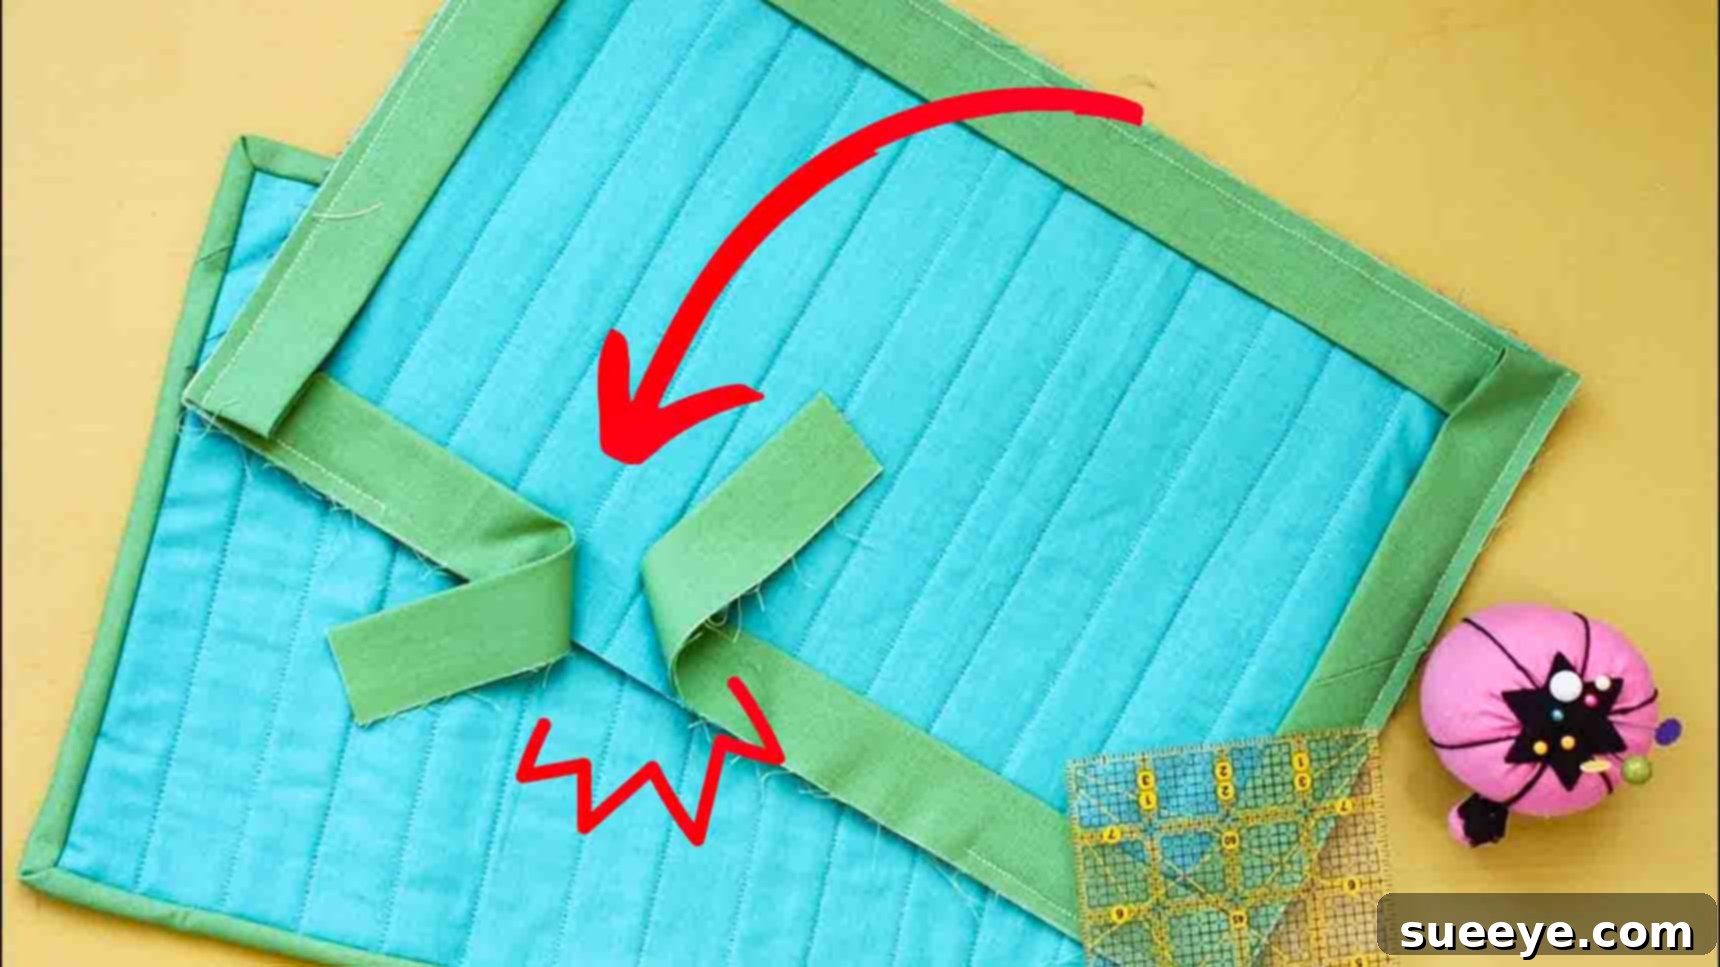
First, ensure your binding is machine-sewn all the way around the quilt, with the exception of an overlap where the beginning and end of your binding strip meet. You should have two unsewn lengths of binding, each approximately 6-8 inches long, extending from the quilt edge. Since you cut your binding strips two and a half inches wide (a standard width for double-fold binding), you need to account for this measurement in your overlap.
Take one of the unsewn binding ends and lay it flat against the quilt. Now, take the other unsewn binding length and place it directly on top of the first, creating an overlap. It’s important that these pieces are not twisted and are lying as flat as possible against the quilt. This overlap provides the necessary room to manipulate and trim the binding for a perfect diagonal seam.
Using your fabric ruler, measure from the raw edge of the bottom binding strip, across the overlap, exactly two and a half inches (or whatever width your binding strips were cut). This measurement marks where your binding will be trimmed. Once you’ve precisely located this 2.5-inch point, use your pencil or chosen fabric marking tool to draw a clear line across the top binding strip at this mark. This line indicates where you will make your first trim.
Carefully get your sharp fabric scissors and trim the excess binding right on this marked line. This cut should be perfectly straight and perpendicular to the edge of the binding strip. This careful trimming ensures that when the two ends are joined, they will integrate smoothly with the rest of your binding.
Step 2: Creating the Seamless Diagonal Join
With your binding ends perfectly trimmed, the next step is to create the diagonal seam that will make your binding truly invisible. This technique relies on a precise diagonal cut and seam to reduce bulk and create a smooth transition.
Gently turn your quilt to comfortably access the area where your binding ends meet. Take the two unsewn lengths of binding that you’ve just prepared. Here’s the critical part: align the two ends with right sides together, placing them perpendicular to each other. Imagine forming an ‘L’ shape with the ends. One end will lay horizontally, and the other vertically on top of it, creating a corner where they intersect. It is absolutely crucial that you do not twist these pieces. If the binding strips are twisted at this stage, your final binding piece will also be twisted, leading to an uneven and unsightly finish. Ensure both strips are lying flat and straight before alignment.
Once aligned perpendicularly, use a small ruler and your fabric marking tool to draw a diagonal line from one corner of the intersection to the opposite corner where the two pieces meet. This line will typically run from the top-left corner to the bottom-right corner (or vice versa, depending on how you’ve aligned them) of the overlapping square created by the two perpendicular strips. This diagonal line represents your sewing line. Drawing this line on the wrong side or the back of the fabric can often be easier and clearer.
To prevent any shifting while sewing, securely fasten the two layers with a few pins along and near the diagonal line. These pins will hold the fabric steady as you take it to your sewing machine. Using a standard stitch length (around 2.0-2.5 mm), carefully sew directly on the diagonal line you just drew. Remember to backstitch at the beginning and end of your seam to secure it.
After sewing, remove the pins. Before trimming, you can gently open the seam to check that it lies flat and forms a perfect straight line. If satisfied, trim off the excess fabric from the corner, leaving a quarter-inch seam allowance from your newly sewn diagonal seam. This reduces bulk and allows the seam to press open neatly.
Finally, finger press the seam open, or for a more crisp finish, take it to your ironing board and iron the seam flat and open. This step is crucial for making the join lie perfectly flat and truly invisible. Now, you can go ahead and complete sewing the rest of that binding seam to the quilt, either by machine or by hand, to fully secure your flawless binding.
Why Choose the Invisible Binding Join Method?
Beyond the satisfaction of completing a project, opting for an invisible binding join offers several distinct advantages that elevate the overall quality and aesthetic of your quilt:
- Professional Finish: The seamless appearance mimics high-end, professionally finished quilts, making your handmade creations look even more exquisite.
- Enhanced Durability: A diagonal seam, when pressed open, distributes tension more evenly across the binding strip, potentially making the join stronger and less prone to fraying or splitting than a straight seam.
- Reduced Bulk: Straight seams can create a noticeable lump where the binding strips meet. The diagonal seam, coupled with trimming the excess, significantly minimizes bulk, allowing the binding to lie flatter and smoother.
- Aesthetic Appeal: Without a visible seam, the eye can effortlessly glide along the continuous line of your binding, appreciating the entire design of your quilt without interruption.
- Confidence Boost: Mastering this technique empowers quilters to tackle binding with greater assurance, transforming a once-dreaded step into an enjoyable part of the creative process.
Expert Tips for a Perfect Invisible Join
To further ensure your success with this invisible binding join method, consider these additional tips:
- Practice Makes Perfect: If you’re new to this technique, consider practicing on scrap binding pieces before working on your actual quilt. This allows you to perfect your measurements and sewing without fear of mistakes on your main project.
- Consistent Seam Allowance: Throughout the entire binding process, maintain a consistent seam allowance. This applies not only to the invisible join but also to attaching the binding to the quilt edge and sewing down the final fold. Consistency leads to a more uniform and attractive finish.
- Quality Tools: Invest in good quality rulers, sharp scissors, and a reliable marking tool. Precision tools lead to precise results.
- Take Your Time: Rushing through the binding process can lead to errors. Take your time with each measurement, mark, and stitch. The extra few minutes spent will pay off in a beautifully finished quilt.
- Pressing is Key: Do not underestimate the power of pressing. Pressing seams open at the invisible join, and pressing the binding around the quilt, helps to create crisp edges and a flat, professional appearance.
- Watch the Video: While this guide is comprehensive, watching the American Patchwork & Quilting tutorial provides a visual demonstration that can clarify any steps and offer additional nuances.
Complete Your Quilt with Confidence and Style
The binding is the frame for your beautiful quilt, and an invisible join ensures that frame is perfectly seamless. No longer will the final step be a source of frustration. With this easy-to-follow tutorial, inspired by the expertise of American Patchwork & Quilting, you now possess the knowledge and technique to create a flawless, professional finish on all your quilting projects. Embrace the invisible join and add that extra touch of perfection that truly sets your handmade quilts apart. Happy quilting!