
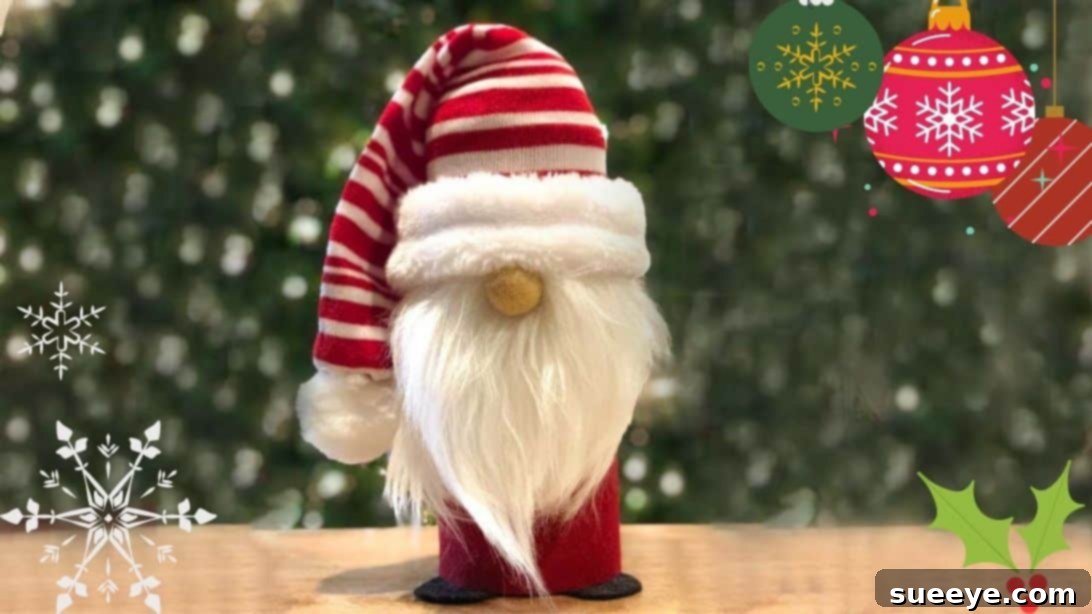
The holiday season is truly magical, filled with warmth, joy, and the sparkle of festive decorations. While store-bought ornaments are lovely, there’s a unique charm that comes from adding handmade touches to your home. This year, why not embrace your creative side and craft some utterly adorable DIY Christmas gnomes? These whimsical figures have captured hearts worldwide, symbolizing good luck and bringing a cozy, festive spirit wherever they stand.
What makes this particular Christmas gnome craft so fantastic? For starters, it’s incredibly simple, even for those who claim to have “no crafting skills.” You’ll be amazed at how quickly you can bring these little characters to life – often in under 10 minutes once you have your materials ready! Not only is it fast, but it’s also wonderfully affordable. Many of the supplies can be sourced from your local dollar store, or you can even repurpose items you already have lying around, making it a budget-friendly way to deck your halls.
Imagine a family of these cute gnomes gracing your mantelpiece, perched on a shelf, or adding a playful touch to your Christmas tree display. They’re guaranteed to infuse your home with that quintessential Christmas vibe. Don’t let any worries about perfection hold you back; this tutorial is designed for ease and enjoyment. You absolutely don’t need to be a crafting expert to create a charming gnome that looks professionally made. We’re thrilled to share this delightful DIY Christmas gnome tutorial, inspired by the creative genius of Patti J. Good from YouTube.
Why DIY Christmas Gnomes? The Magic of Homemade Decor
In a world of mass-produced goods, creating your own Christmas decorations offers a refreshing sense of accomplishment and personality. DIY Christmas gnomes are not just crafts; they are miniature expressions of your festive spirit. Here’s why diving into gnome-making this holiday season is a fantastic idea:
- Unmatched Personalization: Unlike store-bought items, handmade gnomes can be customized to perfectly match your existing decor, color scheme, or even a specific holiday theme. Choose fabrics, colors, and embellishments that resonate with your personal style.
- Budget-Friendly Festivity: Holiday decorating can quickly become expensive. This DIY project is a fantastic alternative, allowing you to create beautiful, high-quality decorations without breaking the bank. Utilizing dollar store finds and upcycled materials means you can craft multiple gnomes for the cost of one store-bought item.
- A Relaxing & Rewarding Activity: Crafting can be incredibly therapeutic. The simple, repetitive actions of cutting, gluing, and assembling can be a wonderful way to unwind during the busy holiday season. The joy of seeing your creation come to life is immensely satisfying.
- Perfect for All Skill Levels: This particular gnome tutorial is designed with simplicity in mind. If you can cut fabric and use a glue gun, you can make these gnomes. It’s an ideal project for beginners and a quick, enjoyable one for seasoned crafters.
- Wonderful Handmade Gifts: A handmade gnome makes a heartfelt and unique gift for friends, family, teachers, or coworkers. It shows thought and effort, and who wouldn’t love a charming little guardian gnome for their home?
- Family-Friendly Fun: Gather the family around for a crafting session! While adult supervision is recommended for hot glue guns, older children can assist with cutting felt, arranging beards, and choosing embellishments, making it a memorable holiday activity for everyone.
- Eco-Conscious Crafting: By repurposing items like socks, containers, and scrap fabric, you’re embracing sustainability and reducing waste, which is a wonderful bonus during the consumer-heavy holiday season.
Gather Your Gnome-Making Essentials: What You’ll Need
One of the best aspects of this DIY Christmas gnome project is the accessibility of its materials. You likely have some of these items at home already, and anything you don’t have can be easily found at a craft store, a discount retailer, or even a dollar store. Remember, creativity knows no bounds, so feel free to experiment with different textures and colors!
- Faux Fur: Essential for the gnome’s characteristic fluffy beard. A small piece, about 3×3 inches, will suffice per gnome. Look for longer pile fur for a more dramatic beard.
- Stuffing: Polyester fiberfill is ideal for creating the gnome’s soft, rounded cap. A small amount goes a long way.
- Felt (Body Wrap): One piece measuring approximately 6 3/8 x 11 inches. This will wrap around the gnome’s body container. Choose a festive color like red, green, grey, or white.
- Sock with Faux Fur Edge (or just a regular sock + separate faux fur): This forms the gnome’s hat. A sock with a pre-attached faux fur cuff adds extra charm and simplifies the design. If you don’t have one, a regular sock works perfectly, and you can add a separate faux fur strip later.
- Bead or Felt Ball: This will be the gnome’s adorable little nose. A wooden bead (approx. 1/2 to 3/4 inch diameter) or a tightly rolled felt ball works best.
- 2 pcs Felt (Feet): Two small pieces, about 2 x 1 1/2 inches each, for the gnome’s feet. These should ideally match the body felt or be a contrasting color.
- String: A small length of string, twine, or thin ribbon is needed to cinch the top of the hat.
- Pompom: A festive pompom for the very tip of the gnome’s hat. Choose a size that complements your gnome.
- Gift Container (or similar sturdy base): This forms the gnome’s body and gives it weight and stability. Small plastic containers, tins, or even a sturdy cardboard tube cut to size can work.
- Lint Brush: To gently tidy up any loose fibers from the felt and faux fur, ensuring a neat finish.
- Glue Stick (Optional): Useful for temporarily holding felt pieces in place before hot gluing.
- Glue Gun and Glue Sticks: Your primary tool for this project! A low-temp glue gun is recommended for safety, especially if crafting with children.
Step-by-Step Gnome Creation Guide: Bringing Your Festive Friend to Life
Now that you have all your materials, let’s dive into the fun part: assembling your very own Christmas gnome! Follow these detailed instructions carefully, and don’t be afraid to take your time and enjoy the creative process.
Step 1: Crafting the Gnome’s Foundation – Body & Beard
The first step involves creating the sturdy base and signature beard that will give your gnome its character and stability.
- Prepare the Faux Fur Beard: Take your piece of faux fur. Using sharp scissors, cut it into a roughly 3-inch long rectangular or slightly tapered shape. For a more natural-looking beard, gently curve the bottom edge. Once cut, take a lint brush or a fine-toothed comb and lightly brush the fur to separate the fibers and remove any loose strands, giving it a fuller, softer appearance.
- Measure and Mark for the Nose: Fold your trimmed faux fur beard in half lengthwise to find its center point. Gently part the fur in the middle along this line. This creates a natural opening for the gnome’s nose.
- Attach the Nose: Apply a small dab of hot glue to the center, about half an inch down from the top edge where you parted the fur. Carefully press your chosen bead or felt ball onto the glue, holding it firmly until the glue sets. Ensure the nose is securely attached and centered within the beard.
- Prepare the Gnome’s Body Container: Take your chosen gift container. This will provide the structure and weight for your gnome. Apply a line of hot glue along one short edge of your 6 3/8 x 11 inch felt piece. Carefully attach this edge to the container, ensuring it’s straight.
- Wrap and Secure the Felt Body: Continue applying hot glue in sections around the container, tightly wrapping the felt around it until the entire container is covered. Overlap the edges slightly and secure the final seam with a strong line of hot glue, pressing down firmly to create a neat, seamless finish.
- Refine the Felt Body: Gently brush the felt-covered body with a lint brush. This helps to remove any stray felt fibers or lint, giving your gnome’s body a smooth, clean texture.
- Create and Attach the Feet: Take your two smaller felt pieces (2 x 1 1/2 inches). Round one end of each piece with your scissors to create a foot shape. Apply hot glue to the straight end of each felt foot and securely attach them to the underside of the container, positioning them towards the front to give your gnome a stable and charming stance. Allow the glue to dry completely.
- Attach the Beard to the Body: Apply a generous line of hot glue along the top, straight edge of the prepared faux fur beard (the edge opposite the curved bottom). Carefully position this edge at the top front of your felt-covered body container, just above where the feet would be. Press down firmly to ensure the beard is securely attached and hangs naturally over the body.
Step 2: Bringing Your Gnome to Life – Hat & Finishing Touches
With the body and beard in place, it’s time to add the iconic gnome hat and complete your festive creation.
- Prepare the Hat Base: Take the cap or lid of the container you used for the body. This will serve as the base for the hat. Apply a small amount of hot glue to the top of the cap and securely attach a small amount of polyester stuffing. This will give the gnome’s hat a nice, rounded, and full shape when the sock is pulled over it.
- Prepare the Sock for the Hat: Take your chosen sock. If it doesn’t have a faux fur edge, you can attach a strip of faux fur or a different textured fabric around the cuff later for added detail. First, cut off the heel of the sock cleanly.
- Create the Hat Top: Turn the sock inside out. Take the end where you just cut the heel and tie a strong piece of string or twine tightly around it, about half an inch from the edge. This will create a gathered, pointed top for the hat. Trim any excess sock fabric above the string, leaving a small fringe if desired.
- Attach the Pompom: Turn the sock right side out again. Apply a dab of hot glue to the very tip of the hat (where you tied the string) and firmly press your chosen pompom onto it. This adds a charming finishing touch to your gnome’s cap.
- Assemble the Hat: Apply a continuous line of hot glue around the rim of the container lid (the one with the stuffing attached). Carefully pull the prepared sock hat over the lid and press the bottom edge of the sock firmly onto the glue, sealing it all the way around. Ensure the sock is centered and evenly distributed over the lid and stuffing.
- Final Assembly: Once the glue for the hat is dry and secure, place the newly assembled hat (with its lid) back onto the gnome’s body container. Gently smooth out the stuffing beneath the hat to ensure a uniform and pleasing shape. Adjust the hat to sit at an angle or straight, whatever gives your gnome the most personality!
Tips for Personalizing Your Christmas Gnome
While the basic tutorial provides a fantastic foundation, don’t stop there! Here are some ideas to make your gnomes truly unique and reflective of your style:
- Fabric Fun: Experiment with different felt colors for the body and various sock patterns or textures for the hat. Plaid, stripes, or even sparkly socks can add a playful twist.
- Beard Variations: Instead of faux fur, consider using yarn (brushed out for a softer look), wool roving, or even strips of white felt for the beard.
- Hat Embellishments: Add mini bells, small pinecones, faux berries, tiny leaves, or even buttons to the hat. A small patch of contrasting felt or a ribbon bow can also add charm.
- Accessories: Give your gnome a miniature accessory! A tiny wrapped present, a mini candy cane, a small snowflake cutout, or a little sign with a festive message can make them even more endearing.
- Gnome Families: Make gnomes of different sizes by using various containers and adjusting the felt and sock dimensions. Create a whole family of gnomes to display together!
- Weighted Base: If your container is light, you can add some dried rice, beans, or sand inside before sealing the felt body to give your gnome more stability and weight, making it less likely to tip over.
Displaying Your Handmade Gnomes
Once your charming Christmas gnomes are complete, it’s time to find them the perfect spot to spread holiday cheer! Their versatile size and adorable appearance make them suitable for a variety of festive displays:
- Mantelpiece Magic: Arrange a cluster of gnomes on your fireplace mantel, perhaps alongside twinkling fairy lights, evergreen garlands, and other festive accents.
- Shelf Sitters: Gnomes are perfect for perching on bookshelves, window sills, or tiered trays, adding a touch of whimsy to any room.
- Table Centerpieces: Create a focal point for your holiday dining table by grouping several gnomes with candles, ornaments, and natural elements like pinecones and branches.
- Welcome Wagon: Place a gnome or two on an entryway console table or even on a covered front porch to greet guests with festive cheer.
- Gift Toppers: For an extra special touch, attach a small gnome to the top of a wrapped gift instead of a traditional bow. It’s a gift within a gift!
- Kids’ Room Decor: These soft, friendly figures are perfect for adding holiday cheer to a child’s bedroom or play area.
Caring for Your DIY Christmas Gnomes
To ensure your handmade gnomes last for many holiday seasons to come, a little care goes a long way:
- Gentle Cleaning: If your gnome collects dust, use a lint roller or a soft, dry cloth to gently wipe it clean. Avoid harsh chemicals or excessive moisture.
- Storage: When the holidays are over, store your gnomes in a dry, cool place away from direct sunlight. A sturdy box or container will protect them from getting crushed or damaged. You might even wrap them individually in tissue paper to preserve their shape and keep them dust-free.
DIY Christmas Gnome: A Heartwarming Holiday Tradition
Crafting these adorable DIY Christmas gnomes is more than just a project; it’s an invitation to infuse your home with personal charm and holiday cheer. From the satisfaction of creating something beautiful with your own hands to the joy of seeing these little characters bring smiles to faces, the experience is truly rewarding. This easy, affordable, and quick tutorial empowers anyone, regardless of their crafting background, to add a touch of handmade magic to their festive decorations.
So, gather your materials, put on some festive music, and let your creativity flow. Whether you make one special gnome or a whole family of them, these handmade treasures are sure to become cherished parts of your annual holiday traditions. We encourage you to try this delightful project and share the joy of DIY. Happy crafting, and may your home be filled with the wonderful spirit of Christmas!
*A special thank you to Patti J. Good from YouTube for the inspiring tutorial. Be sure to follow her channel for more creative gnome ideas and crafting inspiration!