
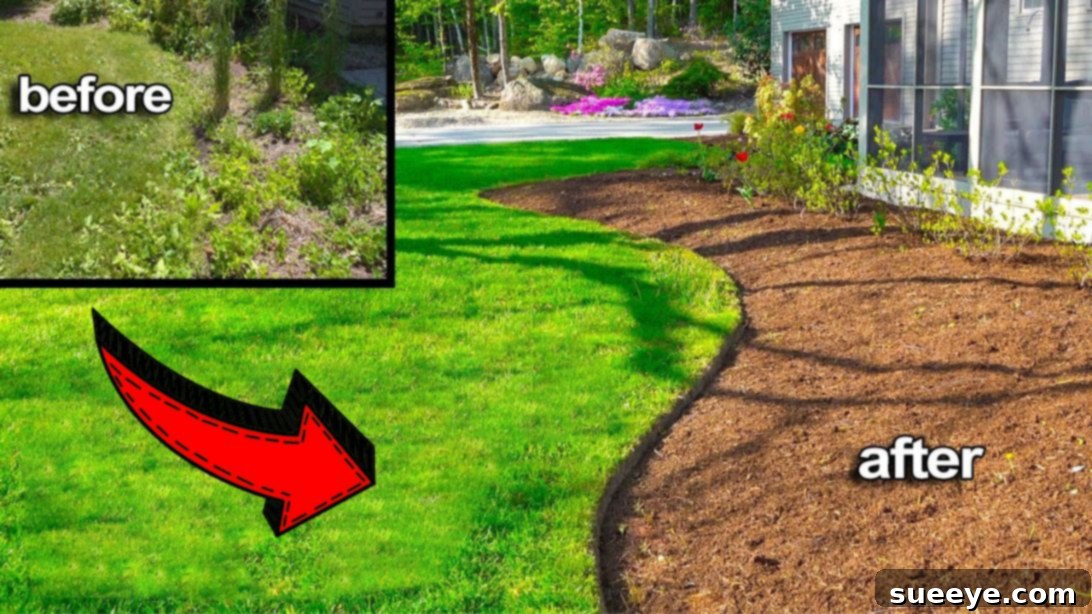
A beautifully manicured lawn with crisp, defined edges instantly elevates the aesthetic appeal of any home. While achieving that professional, clean-cut look might seem like a daunting task reserved for seasoned landscapers or expensive equipment, the truth is far simpler. Inspired by an incredibly practical video tutorial from Silver Cymbal on YouTube, we’ve discovered one of the most straightforward and effective ways to create stunning lawn edges using nothing more than a common garden shovel. Many homeowners, myself included, often assume such precision requires specialized tools or complex techniques. However, this method proves that even beginners can achieve remarkable results with just a few simple steps. I personally tested this technique at home, and the transformative outcome was genuinely impressive, making it my go-to strategy for maintaining immaculate lawn borders from now on.
Transform Your Lawn: Achieve Crisp, Professional Edges with a Shovel – The Easy Way
Creating clean, sharp edges between your lawn and garden beds or pathways is a fundamental step in achieving a polished landscape design. It’s more than just aesthetics; well-defined edges contribute to the health and manageability of your garden. This comprehensive guide will walk you through a beginner-friendly method, popularized by Silver Cymbal, that promises professional-looking results without the need for expensive tools or extensive experience. Get ready to redefine your outdoor space with clarity and style.
Why Clean Lawn Edges Matter for Your Home
The impact of well-maintained lawn edges extends far beyond mere visual appeal. They serve multiple functional purposes that contribute to a healthier, tidier, and more valuable property. Understanding these benefits can motivate you to integrate this simple yet powerful technique into your regular lawn care routine.
- Enhanced Curb Appeal: First impressions are everything. Crisp lawn edges create a sense of order and intentionality, significantly boosting your home’s curb appeal and making your property stand out. It signals a well-cared-for home, which can even increase its perceived value.
- Clear Definition of Spaces: Edges act as natural dividers, clearly separating your lawn from garden beds, driveways, or walkways. This visual delineation makes your landscape appear more organized and professionally designed, preventing the common problem of grass encroaching into flowerbeds or pathways.
- Prevention of Grass Invasion: One of the most practical benefits is preventing grass from creeping into areas where it doesn’t belong. A properly edged trench creates a physical barrier that discourages turf roots from spreading into your garden beds, saving you countless hours of weeding and re-planting.
- Easier Mowing and Maintenance: Defined edges simplify routine lawn maintenance. With a clear boundary, you can mow closer to your beds without damaging plants, and string trimming becomes more efficient and precise, reducing the likelihood of missed spots or uneven cuts.
- Professional and Polished Look: There’s an undeniable elegance that clean lines bring to a landscape. They give your garden a structured and finished appearance, akin to framing a beautiful painting. This attention to detail transforms an ordinary yard into an extraordinary outdoor living space.
- Improved Garden Health: By keeping grass out of your garden beds, you ensure that your plants receive adequate water and nutrients without competition from invasive lawn grasses. This focused environment promotes healthier growth for your flowers, shrubs, and vegetables.
Essential Tools for Perfect Edging
The beauty of this method lies in its simplicity and the minimal tools required. You likely already own most of these items, proving that professional results don’t demand a hefty investment in specialized equipment. Here’s a detailed look at what you’ll need:
- Straight-Edge Shovel or Spade: This is your primary tool. While any shovel can technically dig, a straight-edge shovel or a sharp spade is crucial for creating clean, precise cuts. Its flat blade allows for crisp lines and easier penetration into the soil, making it ideal for defining boundaries. Ensure the blade is relatively clean and sharp for best results.
- String Trimmers (Weed Eater): After establishing your initial edge, string trimmers are essential for fine-tuning and maintaining the neatness of your newly created border. They provide the final polish, ensuring a consistently smooth and even line along your lawn’s perimeter.
- Rake: A garden rake is indispensable for clearing away loose soil, sod, and debris that you remove during the edging process. It helps smooth out the newly exposed soil surfaces in your garden beds and ensures a clean foundation before any mulch application.
- Mulch: While not strictly a tool for the edging process itself, mulch is vital for finishing your defined beds. It not only enhances the aesthetic appeal but also serves practical purposes such as suppressing weeds, retaining soil moisture, and regulating soil temperature, contributing to healthier plant growth.
- Optional: Garden Gloves and Safety Glasses: Always recommended for any gardening task to protect your hands from blisters and your eyes from flying debris, especially when using power tools like string trimmers.
Step-by-Step Guide to Achieving Smooth Lawn Edges
Follow these detailed steps to transform your lawn with perfectly sculpted edges. This method emphasizes precision and efficiency, ensuring satisfying results with minimal effort.
1. Prepare Your Lawn: The Initial Mow
Before you even pick up your shovel, it’s crucial to mow your lawn. A freshly mowed lawn provides a clear canvas, allowing you to accurately visualize and define where your new edges will be. Taller grass can obscure your view, making it difficult to create a straight or smoothly curved line. Aim for your usual mowing height to get the best perspective on your lawn’s natural boundary.
2. Define the Rough Edge: The Primary Shovel Cut
With your lawn mowed, it’s time to start defining the perimeter. Take your straight-edge shovel or spade and begin inserting it into the ground. The key here is consistency and angle. Insert the shovel at a slight angle (around 10-15 degrees) away from the lawn, pushing it down with your foot until it reaches a desired depth – typically 3-4 inches. Once inserted, lift the shovel slightly by the handle and move it directly next to the previous cut. Repeat this motion, working your way along the entire edge you wish to define. Focus on maintaining a consistent angle and depth to create a uniform, initial cut line. This first pass establishes the “rough edge” and begins to separate the lawn from the area you intend to transform.
3. Create the Trench: The Back Cut
After establishing your rough edge, the next step is to create a small trench or clear separation. This is achieved with a “back cut.” Position your shovel at a 45-degree angle, facing away from your newly defined lawn edge and towards the bed or pathway area. Jam the shovel down along the rough edge, using the angle to effectively cut and lift away pieces of sod, soil, and grass. These pieces should be removed from the area, creating a small, clean trench. This trench is essential for preventing grass re-growth into your beds and provides a clear, sharp visual boundary. Ensure you remove all loose sod and debris to leave a clean, well-defined channel.
4. Clean Up and Refine the Area
Once the trench is established, it’s time for thorough cleanup. Carefully remove any remaining weeds, stray grass, or plant roots that shouldn’t be there. Use your rake to smooth out the soil surface in the newly defined garden bed or alongside the pathway. This step ensures a tidy foundation and prepares the area for the next stage. A clean and even surface is critical for the finished look.
5. Apply Mulch: The Finishing Layer
Now that your edges are clearly defined and the area is clean, it’s time to add mulch. Mulch isn’t just for aesthetics; it plays a vital role in weed suppression, moisture retention, and soil health. Spread an even layer of your chosen mulch (wood chips, bark, shredded leaves, etc.) within the newly defined bed, ensuring it fills the trench slightly and creates a gentle slope down from the lawn edge. Aim for a depth of 2-4 inches, but remember to keep the mulch a few inches away from plant stems or tree trunks to prevent moisture-related issues.
6. Precision Trimming: Perfecting the Line
With the mulch in place, use your string trimmers to give the lawn edge its final, crisp finish. Hold the trimmer at an angle parallel to your newly created trench. Carefully trim any errant grass blades that might be hanging over or obscuring the defined edge. This step removes any last imperfections and creates that impeccably sharp line that truly makes your lawn pop. Take your time to ensure a smooth, even finish.
7. Personalize Your Landscape: Planting as Desired
The final step is to personalize your newly edged garden beds. With clean boundaries and fresh mulch, your beds are now ready for planting. Whether you choose vibrant flowers, lush shrubs, or edible herbs, the defined edges provide a beautiful framework for your horticultural creations. This transforms a simple lawn boundary into a striking feature that enhances your entire outdoor living space.
Maintenance Tips for Lasting Pristine Edges
Achieving beautiful lawn edges is one thing; maintaining them is another. Regular upkeep will ensure your hard work lasts and your landscape continues to impress.
- Regular Re-Edging: Depending on how quickly your grass grows, plan to re-edge your lawn every 4-8 weeks. This doesn’t require a full re-digging; often, a quick pass with the shovel or string trimmer is enough to redefine the line.
- Prompt Weed Control: Don’t let weeds establish themselves in your newly edged beds. Pull them promptly, especially any grass runners attempting to cross the barrier.
- Replenish Mulch: Mulch decomposes over time. Top up your mulch layers annually or biannually to maintain its aesthetic and functional benefits.
- Monitor Grass Growth: Keep an eye on the growth of your lawn. If it starts to spread aggressively, a more rigorous re-edging might be necessary.
- Consider an Edging Tool for Speed: While this shovel method is excellent for initial setup, for very large areas or for those who want to speed up maintenance, a manual or powered lawn edger can be a time-saving investment.
Common Mistakes to Avoid for Best Results
Even with a simple method, a few pitfalls can hinder your success. Being aware of these common mistakes will help you achieve the best possible results.
- Inconsistent Depth or Angle: The most common error. Uneven depth or varying shovel angles will result in a wavy, unprofessional-looking edge. Strive for consistency throughout.
- Rushing the Process: Edging requires patience and attention to detail, especially for the initial cut. Rushing can lead to uneven lines and frustrating results.
- Not Clearing Debris Thoroughly: Leaving sod chunks or weeds behind can lead to quick re-growth, undermining your efforts to create a clean boundary.
- Over-Mulching: While mulch is good, too much, especially against plant stems, can suffocate plants or lead to rot. Maintain appropriate depths and distances from plant bases.
- Using a Dull Shovel: A dull shovel will tear through the grass and soil, making clean cuts almost impossible. Ensure your shovel is reasonably sharp before starting.
- Ignoring Safety Gear: Especially when using string trimmers, eye protection is non-negotiable to prevent injuries from flying debris.
Frequently Asked Questions About Lawn Edging
How often should I edge my lawn?
For a consistently pristine look, most experts recommend edging your lawn every 4-8 weeks during the growing season. However, this can vary depending on your grass type and how quickly it grows. A quick touch-up might be all that’s needed between full re-edging sessions.
Can I use other tools besides a shovel for edging?
Absolutely! While the shovel method is highlighted for its simplicity and effectiveness, especially for beginners and initial definition, there are other tools. Manual edgers (half-moon edgers), electric edgers, and gas-powered edgers can all be used. This shovel technique is an excellent foundation that can be maintained with other tools once the primary line is established.
What kind of mulch is best for my garden beds?
The “best” mulch depends on your specific needs and aesthetic preferences. Popular choices include shredded bark (cedar, pine, cypress), wood chips, compost, and shredded leaves. Organic mulches decompose over time, enriching the soil, while inorganic mulches (like gravel) are more permanent but don’t add nutrients. Consider local availability and cost.
Is this method suitable for curved edges?
Yes, this shovel method is highly effective for creating beautiful curved edges. Instead of drawing a straight line, you simply follow your desired curve with each shovel cut, maintaining consistency in angle and depth. It might require a bit more practice than straight lines, but the results are equally stunning.
How deep should the trench be?
A typical trench depth of 3-4 inches is generally sufficient. This depth is effective for creating a clear visual break and preventing most grass roots from crossing into your garden beds. The width of the trench can be adjusted based on your aesthetic preference and the tools you are using to clean it out.
This simple yet highly effective method for achieving clean lawn edges, as demonstrated by Silver Cymbal, truly demystifies what many consider a complex landscaping task. With just a straight-edge shovel, some string trimmers, a rake, and mulch, you can transform your lawn’s appearance from ordinary to impeccably manicured. The beauty of this technique lies in its accessibility – it requires no specialized skills or expensive equipment, making it perfect for any homeowner looking to enhance their outdoor space.
By investing a little time and effort into defining your lawn edges, you’re not just improving aesthetics; you’re also creating a more manageable and healthier garden environment. Take the plunge, try this method, and prepare to be delighted by the professional results you can achieve right in your own backyard. Don’t forget to visit Silver Cymbal’s YouTube channel for more insightful gardening tricks and subscribe to stay updated with his valuable content!
Happy edging, and enjoy your beautifully transformed landscape!