
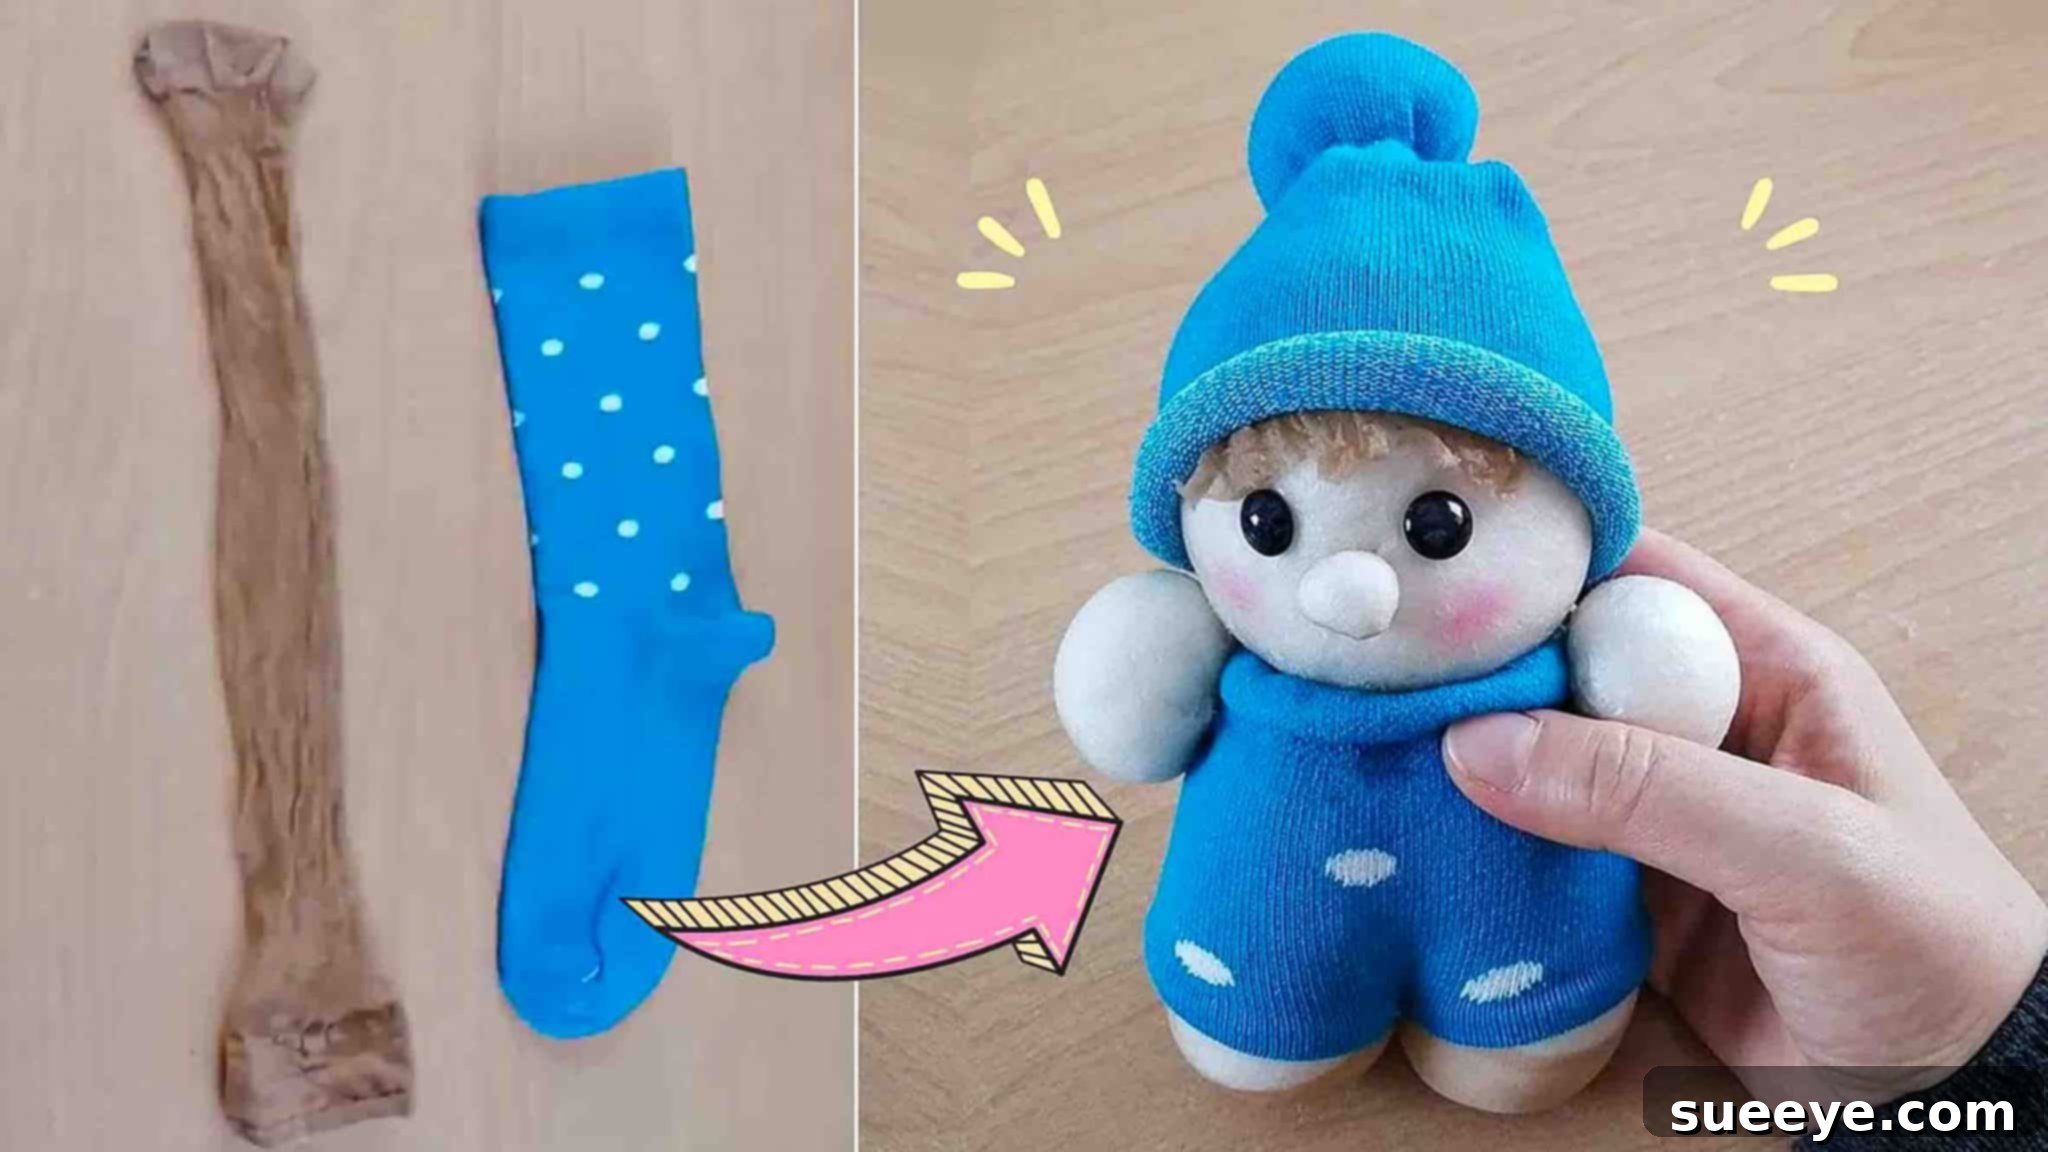
Ultimate Beginner’s Guide to Crafting Adorable DIY Sock Dolls
Welcome to the wonderful world of doll making! If you’ve ever dreamt of creating your very own plush companion but felt daunted by complex patterns, you’re in the right place. This comprehensive guide will walk you through crafting an adorable sock doll, perfect for beginners and seasoned crafters alike. Not only is this project incredibly satisfying, but it also offers a fantastic opportunity to breathe new life into those solitary socks that have lost their partners, transforming them into a cherished, handmade treasure.
Creating a DIY sock doll is more than just a craft; it’s an exercise in creativity, sustainability, and mindfulness. It’s a chance to step away from screens, engage your hands, and produce something tangible and full of character. Whether you’re making a gift for a loved one, a new playmate for a child, or simply a charming decoration for your home, the unique personality of a handmade sock doll shines through. This tutorial, inspired by the simple elegance of designs like those from Colorful Crafts on YouTube, simplifies the process, making it accessible and enjoyable for everyone.
Forget about intricate patterns and expensive materials. Our method focuses on using readily available items, predominantly a single sock and a few basic sewing supplies. By following these clear, step-by-step instructions, you’ll discover how rewarding it is to craft a cute, soft doll from scratch. Prepare to unleash your inner artist and embark on a delightful journey of repurposing and creation!
Why Make a Sock Doll? More Than Just a Craft
The appeal of making a sock doll goes far beyond its simplicity. Here are just a few compelling reasons why this project should be your next creative endeavor:
- Eco-Friendly Repurposing: Give new purpose to old socks that might otherwise end up in landfill. It’s a wonderfully sustainable craft.
- Budget-Friendly: Most materials needed are likely already in your home, making it an incredibly economical hobby.
- Beginner-Friendly: Requiring only basic sewing skills, it’s an excellent entry point into the world of fabric crafts and doll making.
- Unique & Personalized Gifts: A handmade sock doll makes for a truly unique and heartfelt gift. Each doll carries a piece of the creator’s personality.
- Child-Safe & Durable: When made with care, sock dolls are soft, cuddly, and can withstand hours of play, making them perfect companions for children.
- Stress Relief & Mindfulness: The repetitive motion of sewing and the focus required for crafting can be incredibly therapeutic and relaxing.
- Boost Creativity: From choosing the sock pattern to designing the doll’s face, there are endless opportunities to infuse your unique style.
Gathering Your Materials: The Essentials
Before we dive into the fun part, let’s ensure you have all the necessary supplies. Gathering everything beforehand makes the crafting process much smoother and more enjoyable.
- One Sock: Choose a clean sock. Any pattern or color works, but thicker socks (like athletic socks) tend to yield a sturdier doll. Single socks are perfect for this!
- Nude Stocking (or Pantyhose): A small section will be used for the doll’s head and body base. Nude tones are ideal for a natural skin appearance, but you can experiment with other colors for fantastical creatures.
- Cotton Fiber (or Polyester Stuffing): This will give your doll its plump, cuddly form. Ensure it’s clean and free from allergens if the doll is for a child.
- Needle and Thread: A standard sewing needle and strong all-purpose thread matching your sock color (or a neutral color like white or black) will suffice.
- Two Buttons: These will become your doll’s expressive eyes. Choose buttons that are appropriately sized for the doll’s head. Black buttons offer a classic look, but feel free to explore other colors for unique effects.
- Pink Crayon or Blush: For adding a touch of rosy charm to your doll’s cheeks.
- Scissors: Sharp fabric scissors are recommended for clean cuts.
Directions: Crafting Your Sock Doll Step-by-Step
Now, let’s bring your sock doll to life! Follow these detailed instructions carefully for the best results.
Step 1: Forming the Body, Legs, and Arms
This initial stage focuses on creating the core structure of your doll – the head, body, legs, and arms – using the stocking and cotton fiber.
- Prepare the Doll’s Core: Begin by taking a generous amount of cotton fiber. Gently stuff it into a section of the nude stocking. Continue adding fiber until you achieve a firm but squeezable form, representing the doll’s main body. The amount of stuffing will determine the doll’s final size and plumpness.
- Secure the Stuffing: Once you are satisfied with the stuffing, gather the opening of the stocking and tie it securely with a piece of thread. This prevents the cotton fiber from escaping and gives you a neat, enclosed shape. You can double-knot it for extra security.
- Define the Head and Body: Visually divide the stuffed stocking into two sections: a smaller top portion for the head and a larger bottom portion for the body. Wrap a piece of thread tightly around the middle section, creating a clear demarcation between the head and the torso. This thread acts as a temporary guide for the next step.
- Create the Legs: Thread your needle. Starting from the middle section where you just tied the thread (at the base of the head), run the needle and thread *down through the center* of the stuffed stocking, pulling the thread all the way through to the bottom. Once you reach the bottom, bring the needle back up, just slightly to one side of your initial entry point, effectively creating a ‘stitch’ that will define one leg. Run the needle down again on the other side, pulling the thread to divide the bottom into two distinct leg shapes. This process creates a subtle indentation that will define the legs. Repeat this step twice to reinforce the leg separation, ensuring they are even. Secure the thread with a knot but *do not cut it yet*, as you’ll use it for the next part of the body.
- Dress Your Doll: Now it’s time to add the doll’s clothing. Take your chosen sock and place it over the stuffed stocking (the body part, below the head). Measure how much of the sock you’ll need to cover the body, allowing a small overlap for stitching. Cut the sock cleanly according to your desired measurement. Gently slide the cut sock piece onto the stuffed stocking, ensuring it sits snugly and evenly over the body.
- Attach the Clothing: Using the same needle and thread from creating the legs (or a fresh length if you prefer), carefully stitch the sock clothing onto the doll’s body. Use small, neat stitches around the top edge of the sock to secure it firmly to the stocking body. This ensures the clothing stays in place. Once the sock is securely attached, tie off the thread with a few knots and trim the excess.
- Crafting the Arms: Grab another piece of your nude stocking. Cut out three pieces: one small circle (which will be used for the nose later) and two medium-sized circular or oval pieces for the arms. Take the two medium pieces and stuff each generously with cotton fiber, forming two small, plump shapes that will serve as the arms.
- Secure the Arms: Tie off each stuffed arm piece securely with a piece of thread to contain the cotton fiber. Trim any excess stocking fabric close to the knot.
- Attach the Arms: Using your needle and thread, sew one stuffed arm onto each side of the doll’s body, just below the neck area. Position them symmetrically. Use strong stitches to ensure they are firmly attached and can withstand gentle play. Double-check that they look balanced and proportionate to the doll’s body.
Step 2: Adding the Head Details and Facial Features
Now for the most exciting part: bringing your doll’s face to life and giving it personality! This step focuses on the hat, nose, eyes, and blush.
- Create the Hat: Take the remaining piece of your original sock (the top portion if you cut the bottom for the clothing). Gently stuff the top part with a small amount of cotton fiber to give it some volume and shape. This will form the doll’s hat. Secure the opening by tying a thread tightly around it, creating a neat, gathered edge.
- Attach the Hat: Carefully place this stuffed sock piece onto the doll’s head. Adjust its position until you are happy with how it looks. You can either stitch it gently in place with a few hidden stitches or leave it untethered if you prefer a removable hat. Stitching ensures it stays securely on the head.
- Add the Nose: Remember the small circular piece of stocking you cut earlier? Stuff it with a tiny bit of cotton fiber to create a miniature ball. This will be the doll’s nose. Position it carefully in the center of the doll’s face and sew it securely in place using small, discreet stitches. Ensure it’s centered and looks proportionate.
- Attach the Eyes: Select your two chosen buttons for the eyes. Position them symmetrically above the nose, ensuring they are evenly spaced and give your doll a friendly expression. Using your needle and thread, sew each button firmly onto the doll’s face. Make several passes through the buttonholes and the doll’s head to ensure they are very secure, especially if the doll is for a child.
- Give Your Doll Rosy Cheeks: For a final touch of sweetness, take a pink crayon or a blush stick. Gently rub or dab a small amount onto the doll’s cheeks, just below the eyes. Blend it slightly with your finger for a natural, soft blush effect. This simple addition truly brings the doll’s face to life and adds to its charming appeal.
Customization Ideas: Making Your Sock Doll Truly Unique
The beauty of a DIY sock doll lies in its potential for personalization. Once you’ve mastered the basic technique, the possibilities for customization are endless!
- Hair: Add yarn for hair! You can stitch strands of yarn directly onto the head, creating braids, pigtails, or even a full head of flowing locks. Different yarn textures and colors can drastically change your doll’s character.
- Clothing: While we used a sock for clothing, you can design and sew miniature outfits from scrap fabric. Think tiny dresses, pants, scarves, or even a vest. Embroidery or fabric markers can add details like pockets or patterns.
- Facial Expressions: Beyond buttons, consider embroidering eyes with different expressions (sleeping, winking) or adding a stitched smile. Felt pieces can be used for eyebrows or even eyelashes.
- Accessories: Tiny bows, beads (securely sewn for safety), ribbons, or even miniature glasses can add charming details. You could create a tiny purse or a small book for your doll to hold.
- Embellishments: Use fabric paint, sequins, or small patches to decorate the doll’s clothes or body. Consider adding a small bell inside for a gentle rattle sound.
- Theme Dolls: Create dolls based on themes – a superhero doll, an animal-themed doll (e.g., add felt ears), or a holiday-specific doll.
Caring for Your Handmade Sock Doll
To ensure your cherished sock doll remains a beloved companion for years to come, a little care goes a long way. Since these dolls are often made with a mix of fabrics and delicate stitching, machine washing is generally not recommended. For most minor messes, spot cleaning with a damp cloth and mild soap is usually sufficient. Gently dab the stained area and allow it to air dry completely. For a deeper clean, carefully hand wash the doll in cool water with a gentle detergent, making sure to support its shape. Rinse thoroughly and then gently squeeze out excess water before allowing it to air dry, preferably laid flat on a clean towel. Avoid wringing or twisting, which can distort its shape and damage the stitching. With proper care, your handmade sock doll will retain its charm and cuddliness.
Conclusion: Your New Companion Awaits!
Congratulations! You’ve successfully completed your very own DIY sock doll. From a simple sock and a few basic materials, you’ve crafted a unique, adorable, and deeply personal companion. This project is a testament to the joy of handmade creations, the satisfaction of repurposing, and the simple pleasure of bringing something new and delightful into the world.
We hope this tutorial has inspired you to continue exploring the vast world of crafting. Each stitch you made, each button you attached, contributed to the distinctive character of your doll. Now, share your creation with pride! These charming sock dolls make perfect gifts, comforting companions, or delightful decorative pieces for any room. So go ahead, give your new friend a name, and let the adventures begin!