
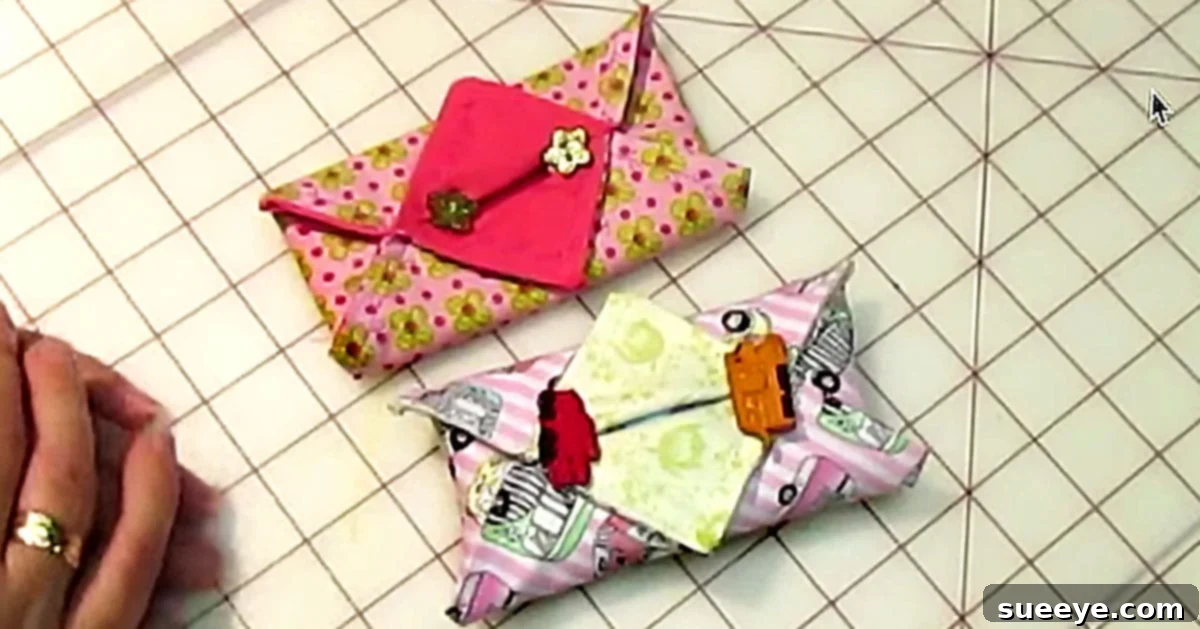
DIY Fabric Tissue Holders: Your Next Favorite Sewing Project
Are you looking for a quick, simple, and incredibly rewarding sewing project? Look no further than the humble yet highly practical fabric tissue holder! These charming little creations are not only a breeze to make, but they also serve a multitude of purposes, making them an absolute must-have for anyone who appreciates thoughtful craftsmanship and everyday convenience.
Imagine a world where your tissue packs are always neat, never mangled at the bottom of your bag, and always presented with a touch of elegance. That’s precisely what a DIY fabric tissue holder offers. Beyond their practical appeal, they make exquisite, heartfelt gifts for a myriad of occasions. Think festive treats for teachers or work colleagues at Christmas, a comforting gesture for a sick friend, a thoughtful send-off for someone embarking on a vacation, or a unique birthday present that truly shows you care. Even as a simple ‘thank you’ or a stocking stuffer, these fabric cozies hit all the right notes.
Why Craft Your Own Fabric Tissue Holders? More Than Just a Cover
The beauty of crafting your own fabric tissue holder lies in its unparalleled versatility and personal touch. Scraps of bright, cheerful print fabric are absolutely perfect for this project, serving a dual purpose: they expertly conceal those often unsightly plastic tissue packs while simultaneously injecting a burst of color and personality into your daily essentials. You can create them to perfectly complement your home decor, match the interior of your car, or even brighten up your office space.
But the benefits extend far beyond aesthetics. Here’s why you should embrace the art of making fabric tissue holders:
- Ultimate Practicality: Say goodbye to crumpled, torn tissue packets! A fabric holder keeps your tissues pristine, protected from spills, and easily accessible. No more digging through your purse only to find a shredded mess.
- Personalized Style: Express yourself! Choose fabrics that reflect your personality, mood, or the recipient’s taste. From whimsical patterns to sophisticated solids, the design possibilities are endless.
- Fantastic Gift Idea: Handmade gifts carry a special weight. These holders are inexpensive to make but rich in sentiment, making them ideal for any occasion. They’re gender-neutral, universally useful, and always appreciated.
- Eco-Friendly Crafting: This project is a fantastic way to utilize small fabric scraps that might otherwise go to waste. It promotes sustainable crafting and gives new life to leftover materials.
- Beginner-Friendly: Even if your sewing skills are minimal, you can absolutely master this project. It primarily involves sewing relatively straight lines using basic straight and zigzag stitches, making it perfect for novice sewers eager to build confidence.
- Cost-Effective: Compared to store-bought gifts, the cost of materials for a fabric tissue holder is negligible, especially if you’re using fabric scraps. This allows you to create multiple gifts without breaking the bank.
I can personally attest to the transformative power of these little fabric marvels. I used to be notorious for carrying kleenex packets in my purse, and inevitably, they would end up falling out of their flimsy plastic holder, becoming mangled and lost at the bottom of my bag. Since I started using my little fabric tissue holder, that problem has vanished! My tissues stay intact, clean, and ready for use. Issue solved, indeed!
Choosing Your Fabric: A World of Creative Possibilities
One of the most exciting aspects of making fabric tissue holders is the sheer freedom you have in selecting your materials. This project truly shines when you embrace variety and creativity in your fabric choices.
Types of Fabric
While almost any woven fabric will work, some are better suited than others:
- Quilting Cotton: This is by far the most popular choice for its ease of use, wide range of patterns, and durability. It’s perfect for beginners.
- Flannel: For a softer, cozier feel, flannel works wonderfully, especially for gifts intended for comfort or during colder months.
- Linen Blends: These offer a more sophisticated, textured look, perfect for a more elegant finish.
- Denim Scraps: Small pieces of lightweight denim can give a rustic, sturdy feel to your holder.
Don’t be afraid to mix and match! The beautiful coordination of different fabric designs for each holder adds to the simplicity and charm of making them. Consider themes:
- Seasonal Prints: Festive patterns for Christmas, spooky designs for Halloween, or floral prints for spring.
- Themed Fabrics: Sports teams, animal prints, favorite characters – tailor it to the recipient’s interests.
- Color Coordination: Match the fabric to your purse, car interior, or even a specific outfit.
- Scrap Buster: This project is an absolute lifesaver for those small fabric remnants that are too good to throw away but too small for larger projects. Dive into your scrap bin and let your imagination run wild!
The key is to select fabrics that are not too thick, as this can make turning the holder inside out and achieving crisp seams more challenging. Medium-weight cotton is generally ideal.
Gathering Your Supplies: What You’ll Need
Before you embark on your sewing adventure, ensure you have all the necessary tools at hand. The beauty of this project is that it requires very few specialized items, making it accessible even if your sewing toolkit is modest.
- Fabric Scraps: You’ll need two coordinating pieces, roughly 7 inches by 6 inches each. The exact dimensions can vary slightly depending on the size of your tissue packs, but this is a good starting point.
- Matching Thread: Choose a polyester all-purpose thread that either matches your fabric or provides a pleasing contrast.
- Sewing Machine: Any basic sewing machine capable of straight and zigzag stitches will do.
- Fabric Scissors: Sharp scissors are essential for clean cuts.
- Pins or Fabric Clips: To hold your fabric pieces together securely while sewing.
- Ruler and Fabric Marker/Chalk: For accurate measuring and marking your cut lines.
- Iron and Ironing Board: Crucial for pressing seams open and creating crisp edges, which makes a huge difference in the final appearance.
- Seam Ripper (Optional but Recommended): For those inevitable “oops” moments – every sewer needs one!
- Standard Pocket Tissue Pack: To use as a guide for sizing and to ensure a perfect fit for your finished holder.
Step-by-Step Guide to Crafting Your Own Fabric Tissue Holder
Ready to create? Follow these simple steps, and you’ll have a charming fabric tissue holder in no time. While the original content references a video tutorial, these written instructions will guide you through the process, making it easy to follow along.
Step 1: Prepare Your Fabric
- Cut Your Fabric: Take your chosen fabric scraps. For a standard pocket tissue pack, you will need two pieces of fabric. A common dimension is approximately 7 inches (width) by 6 inches (height) for each piece. If using a single piece of fabric, it would be around 7 inches by 12 inches. For this guide, let’s assume two pieces for easier matching of prints.
- Press Your Fabric: Iron both pieces of fabric thoroughly to remove any wrinkles. This ensures accuracy in measuring and cutting.
Step 2: Hem the Short Edges
- Fold and Press: Take one of your 7×6 inch fabric pieces. Along one of the 6-inch edges, fold the raw edge over by about 1/4 inch towards the wrong side of the fabric and press firmly.
- Fold Again: Fold the same edge over again, this time by about 1/2 inch, enclosing the raw edge. Press once more. This creates a neat double-fold hem.
- Stitch the Hem: Using your sewing machine, stitch along the inner folded edge of the hem. Repeat this process for one short edge of the second fabric piece as well. You will now have two fabric pieces, each with one neatly hemmed 6-inch edge.
Step 3: Assemble the Holder
- Lay Out Fabric: Lay one of your hemmed fabric pieces right side up. This will be your main outer fabric or one side of the holder.
- Position Second Piece: Take the second hemmed fabric piece. Place it on top of the first piece, right side down. Align the unhemmed 7-inch raw edges of both pieces. The hemmed edges will overlap in the middle.
- Create the Overlap: The hemmed edges should now be overlapping in the center. The amount of overlap should be enough to create a snug pocket for your tissues. Typically, the total width of the holder (after seams) will be around 6 inches, so the overlap creates the opening. Pin the overlapping sections, ensuring they are even and flat.
- Pin All Around: Carefully pin all four raw edges of the layered fabric pieces together. Make sure the hemmed edges are aligned and not skewed.
Step 4: Stitch and Finish
- Sew the Perimeter: Using a 1/4 inch (or slightly larger, depending on desired snugness) seam allowance, stitch around all four sides of the pinned rectangle. Start and end with a backstitch to secure your seams.
- Trim Corners: Before turning, carefully trim the excess fabric from the corners, cutting diagonally close to the stitching line (but not through it). This reduces bulk and helps create sharp corners.
- Turn Right Side Out: Gently turn the fabric holder right side out through the opening created by the overlapping hemmed edges. Use a blunt object (like a chopstick or a turning tool) to push out the corners gently, ensuring they are as sharp as possible.
- Press for Perfection: Give your newly turned fabric tissue holder a final, thorough press with an iron. This will flatten the seams and make your holder look professional and crisp.
- Insert Tissues: Slide a standard pocket tissue pack into the opening. Adjust as needed. Voila! Your beautiful, handmade fabric tissue holder is complete.
For those who prefer visual learning, watch how ArtsAndCrafts4You makes these in her step-by-step tutorial so you can start making them too!
Tips for Sewing Success (Even for Beginners!)
Don’t worry about having superb sewing skills. If you can sew a relatively straight line using a straight and zigzag stitch, you’re all set to go! Here are a few extra tips to ensure your project turns out perfectly:
- Practice Straight Lines: If you’re new to sewing, practice sewing straight lines on scrap fabric before you start. This builds confidence.
- Use Quality Thread: A good quality polyester thread will be stronger and less prone to breaking.
- Press, Press, Press: Ironing your fabric before cutting and pressing your seams after each step are absolutely critical. It makes a huge difference in the crispness and overall professional look of your finished item.
- Pin Thoroughly: Don’t skimp on pins! They keep your layers of fabric from shifting, especially when dealing with multiple pieces and overlaps.
- Go Slow: There’s no rush. Sew at a comfortable speed, especially when you’re turning corners or working with tricky fabrics.
- Choose Simple Fabrics First: Begin with quilting cotton. Avoid slippery silks or stretchy knits until you’ve gained more experience.
Beyond the Basics: Customization and Embellishments
Once you’ve mastered the basic fabric tissue holder, the door opens to endless possibilities for customization. Get creative and make each holder truly unique:
- Embellishments: Add a small decorative button, a pretty piece of lace along the opening, or a tiny embroidered motif. These small details can elevate your holder significantly.
- Monograms: Personalize with an initial using embroidery or fabric paint for a truly bespoke gift.
- Different Sizes: While this guide focuses on standard pocket tissues, you can easily adjust the dimensions to fit larger travel packs or even smaller, half-size packs. Always measure your specific tissue pack first!
- Appliqué: Sew on small fabric shapes (stars, hearts, animals) for a playful touch.
- Quilted Look: If you’re feeling adventurous, you could lightly quilt your fabric pieces before assembly for added texture and softness.
Caring for Your Fabric Tissue Cozy
To keep your handmade fabric tissue holder looking its best, care is simple. Most cotton holders can be machine washed in cold water on a gentle cycle. Tumble dry on low or air dry, then give it a quick press with an iron to restore its crisp shape. Avoid high heat to prevent shrinking or fading, especially with vibrant prints.
Conclusion: Happy Sewing!
DIY fabric tissue holders are not only practical and useful; they’re absolutely adorable! The ease of making them, combined with the immense satisfaction of creating something beautiful and functional with your own hands, makes this an incredibly rewarding project. Whether you’re crafting them for yourself, as thoughtful gifts, or simply as a fun way to use up fabric scraps, these little cozies are sure to bring a smile to anyone’s face.
So, gather your materials, fire up your sewing machine, and start creating! You’ll be amazed at how quickly you can whip up a batch of these charming, indispensable accessories. Happy sewing!