
In a world increasingly driven by mass-produced goods, there’s a unique satisfaction in creating something with your own hands, especially when it involves giving new life to forgotten treasures. Old license plates, with their weathered charm and distinct typography, are more than just historical markers; they are fantastic canvases for creative upcycling projects. Imagine transforming one of these nostalgic relics into a functional, stylish, and utterly unique piece of home decor. This exact sentiment struck me when I stumbled upon an ingenious DIY idea by Alley Picked on YouTube: a dustpan crafted from a vintage license plate. It was love at first sight! The concept was brilliantly original, combining practicality with a charming retro aesthetic that instantly spoke to my passion for vintage finds and sustainable living. My husband, with his knack for woodworking, and I immediately knew this would be our next exciting weekend endeavor. We had recently been on an antique hunting adventure in New Braunfels, Texas, unearthing several beautiful license plates from the Fifties that were just begging for a purpose beyond mere display. This project presented the perfect opportunity to turn those cherished finds into something truly special and functional.
This comprehensive guide will walk you through the process of crafting your very own license plate dustpan, transforming a simple piece of metal into a delightful and useful item for your home or business. It’s an ideal project for anyone looking to add a touch of vintage character, embrace sustainable practices through upcycling, or simply enjoy the rewarding experience of a hands-on DIY craft. Get ready to gather your tools and unleash your creativity, breathing new life into a piece of automotive history!
Essential Materials for Your DIY License Plate Dustpan Project
Before diving into the creative process of making your unique dustpan, ensuring you have all the necessary materials will make your crafting experience smooth, efficient, and enjoyable. Most of these items are readily available, and you might even have some lying around your workshop or garage, emphasizing the upcycled nature of this project.
- A Vintage License Plate: This is undoubtedly the star of our project! Look for plates with interesting colors, distinctive fonts, or states that hold personal significance for you. The condition can vary; a little wear, tear, or even some rust can actually add to its authentic vintage charm and character.
- Small Pieces of Wood for the Base and Handle: You’ll need two distinct, sturdy pieces of wood. One will serve as the support block that the license plate securely attaches to, forming the back of the dustpan. The other piece will become the comfortable handle. Reclaimed wood pieces, such as scraps from previous projects or salvaged timber, are perfect for maintaining the eco-friendly, upcycled theme.
- Wood Screws: A selection of small to medium-sized wood screws will be needed to securely attach the license plate to the wooden base and to assemble the handle (especially if you choose a multi-part handle design). Choose screws that are long enough to hold firmly but not so long that they protrude excessively or split the wood.
- A Drill with Screwdriver Bit: An indispensable tool for this project, essential for creating pilot holes in both the metal and wood, and for efficiently driving the screws. A cordless drill offers convenience, portability, and ease of use for most DIYers.
- A Hammer: A basic but versatile tool, useful for gently shaping and reinforcing the bend in the license plate or for making any minor adjustments to the wooden components.
- Measuring Tape or Ruler: For accurate measurements of your wood pieces and to ensure the license plate is bent evenly and symmetrically, which is crucial for a functional dustpan.
- Marker or Pencil: For precisely marking cutting lines, drilling spots, or screw placement on both the wood and the license plate.
- Safety Gloves and Eye Protection: Always prioritize safety when working with tools and metal. Safety gloves will protect your hands from potentially sharp edges of the license plate, and eye protection is crucial when drilling or hammering.
- Optional: Sandpaper and Wood Finish: For smoothing any rough edges on the wood, preventing splinters, and enhancing the overall appearance and longevity of your wooden components. You might consider wood stain, paint, or a clear sealant.
- Optional: Metal Snips or Shears: While not typically required for this specific design if you’re using a standard plate, these could be useful if you need to trim the license plate for a specific aesthetic or size.
Step-by-Step Guide: Crafting Your Retro License Plate Dustpan
Transforming a flat piece of metal into a functional and charming dustpan is a surprisingly straightforward process, especially with the right guidance. This project, inspired by Alley Picked’s excellent tutorial on YouTube, simplifies the steps, making it accessible for DIY enthusiasts of all skill levels. Let’s get started on creating this awesome retro project idea!
Step 1: Preparing Your License Plate for Bending
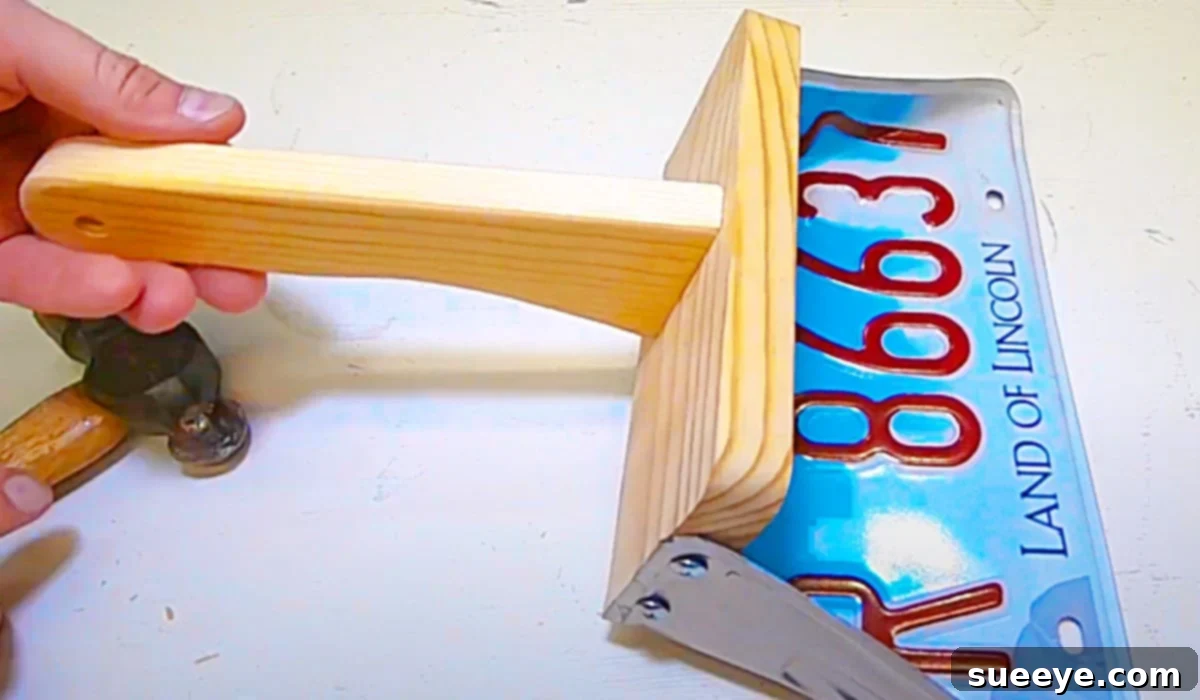
The first crucial step is to prepare your chosen license plate. Begin by gently cleaning it thoroughly to remove any dirt, grime, or surface debris that may have accumulated over the years. This not only makes the plate easier to work with but also gives you a clearer view of its unique character. Next, you need to decide which edge will form the front lip or scoop of your dustpan. This edge will need to be bent upwards to create the functional collection area. To achieve a clean, straight bend, place the license plate on a sturdy workbench with a straight edge or use a clamped piece of wood as a guide. Align your chosen bending line – typically 1 to 2 inches from the bottom edge of the plate, depending on how deep you desire your dustpan’s scoop to be. Carefully and slowly bend the license plate upwards. You can use a hammer with a protective block of wood (to prevent marring the plate) to gently tap along the crease, ensuring a sharp, even fold. The objective is to achieve an angle of approximately 90 degrees, forming the distinctive front wall of your dustpan. Patience and precision in this step will result in a professional-looking and effective scoop.
Step 2: Securing the License Plate to the Wooden Base
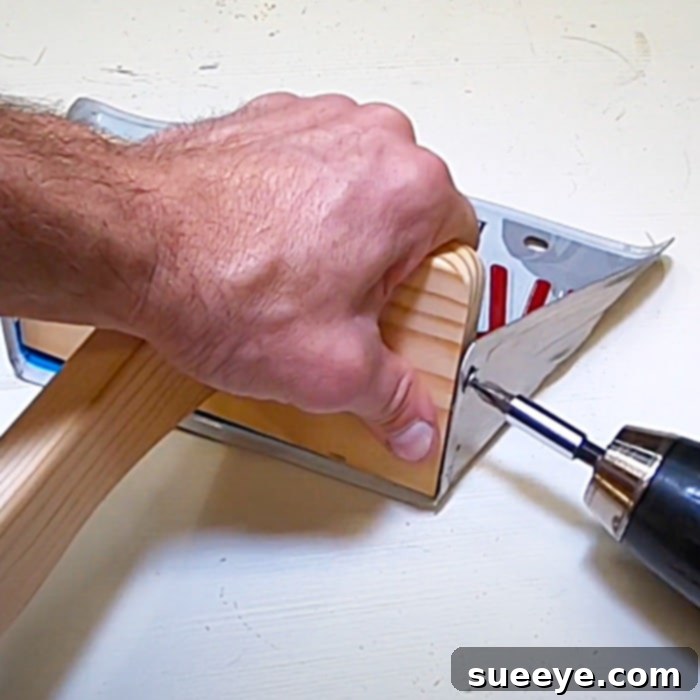
Once your license plate is perfectly shaped with its characteristic scoop, it’s time to securely attach it to the main wooden support block. This block will form the sturdy back and base of your dustpan. Select one of your small pieces of wood; it should be slightly wider than your license plate for adequate support and thick enough to securely hold screws without splitting. Position the bent license plate against the front face of this wooden block, ensuring the newly formed bent lip points outwards, creating the essential scoop function. Carefully align the top edge of the bent portion of the license plate with the bottom edge of your wooden base. Using your drill, pre-drill small pilot holes through the license plate and into the wood. This critical step prevents the wood from splitting and significantly eases the process of driving the screws. Once the pilot holes are accurately drilled, secure the license plate firmly to the wooden base using several wood screws. Place screws at both ends of the attachment line and possibly one or two in the middle for maximum stability and a durable hold. Ensure the screw heads are flush or slightly recessed so they don’t snag on debris or interfere with the dustpan’s function later.
Step 3: Crafting and Attaching the Wooden Handle
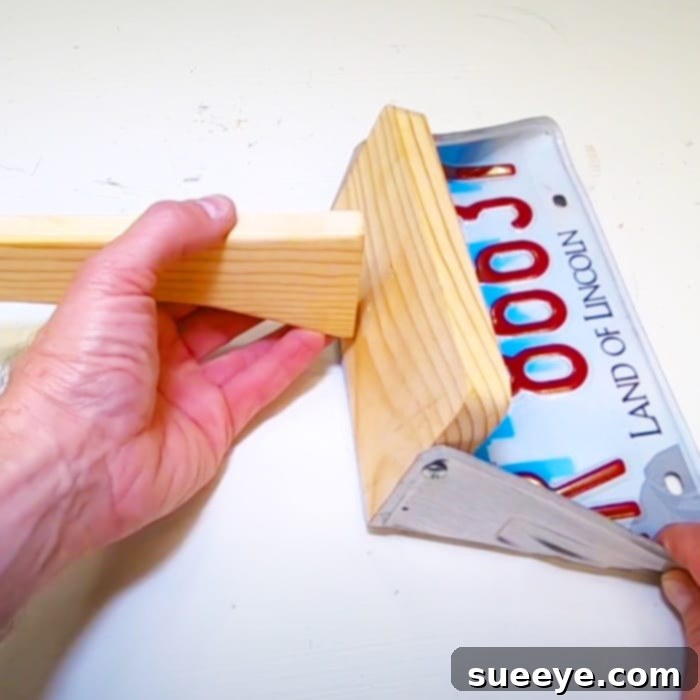
Now, let’s focus on the handle, which will complete both the functionality and the aesthetic appeal of your dustpan. Take your second piece of wood. This piece should be comfortable to hold and proportionate to the size of your dustpan. You can shape it slightly, rounding the edges with sandpaper for a more ergonomic and pleasant grip. For a more elaborate handle, you might consider cutting a specific decorative shape, or even attaching a wooden dowel for a more traditional look. Once you’re completely satisfied with the handle’s form, align it with the back of the wooden base to which you’ve just attached the license plate. The handle can either extend directly upwards from the back of the base or be angled slightly for better ergonomics and ease of use, depending on your personal preference. Again, utilize your drill to pre-drill pilot holes through the handle and into the main wooden base. Secure the handle firmly with two or more appropriate wood screws, ensuring it is stable and will not wobble during use. Give it a good, firm tug to test its strength and stability – it needs to withstand regular sweeping!
Step 4: Finishing Touches and Customization (Optional but Highly Recommended)
With the main construction phase complete, you now possess a fully functional license plate dustpan! However, a few thoughtful finishing touches can significantly elevate its appearance, enhance its durability, and truly make it your own. If you used raw wood, consider sanding all the wooden surfaces smooth to prevent splinters and give it a polished, refined look. You can then apply a wood stain to highlight its natural grain, paint it to match your decor, or apply a clear sealant to protect the wood from moisture, dirt, and general wear, thereby extending its lifespan and maintaining its aesthetic appeal. For an extra touch of personalization, you might consider adding decorative elements to the handle, such as a rustic leather strap for easy hanging, or even stenciling a small design or your initials onto the wood. This final step allows you to infuse your personality into the dustpan, making it a perfectly customized item for your home or a wonderfully thoughtful, handmade gift.
And just like that, in a few easy and engaging steps, your unique, retro-inspired license plate dustpan is ready to tackle messes with unparalleled style! This project not only repurposes an old, forgotten item but also adds a fantastic touch of personality, history, and charm to any space. It’s an incredibly satisfying DIY endeavor that beautifully demonstrates how functional and visually appealing items can be crafted from unexpected and often overlooked materials.
The Undeniable Charm of Upcycling: Why a License Plate Dustpan is More Than Just a Cleaning Tool
Beyond its obvious utility for sweeping up crumbs and dust, a dustpan meticulously crafted from a vintage license plate embodies several wonderful and increasingly valued qualities. Firstly, it stands as a powerful testament to the beauty and effectiveness of upcycling. Instead of a unique piece of metal ending up in a landfill, slowly deteriorating, it is given a second life, fulfilling a new, practical purpose. This act of repurposing significantly reduces waste and actively promotes sustainable practices, which is not only good for the planet but also sparks immense creativity in finding innovative uses for discarded or overlooked items.
Secondly, its inherently unique aesthetic makes it an instant conversation starter. Each license plate carries its own distinct narrative – hailing from a different state, representing a particular year, or featuring unique colors, fonts, and numbers. This inherent individuality ensures that no two license plate dustpans will ever be exactly alike, making each one a truly bespoke item. It effortlessly adds a touch of quirky, vintage charm to your home, whether it’s proudly displayed in a rustic-themed kitchen, a cozy home workshop, a vibrant art studio, or even a minimalist modern space seeking an eclectic and unexpected accent. It evokes a strong sense of nostalgia, subtly reminding us of classic road trips, iconic vintage cars, and perhaps simpler, bygone eras.
Furthermore, undertaking this DIY project is an incredibly empowering experience. The profound satisfaction derived from creating something genuinely useful and beautiful with your own hands is immense and deeply rewarding. It builds confidence in your crafting abilities, encourages a problem-solving mindset, and inspires you to look at everyday objects with a fresh, creative, and innovative perspective. It’s a project that can be enjoyed solo, offering a moment of mindful creation and personal accomplishment, or it can be undertaken with family and friends, transforming it into a memorable and enjoyable bonding activity.
Essential Tips for Success and Safety When Working with License Plates
While crafting a license plate dustpan is a relatively straightforward and accessible project, keeping a few key tips in mind can significantly enhance both the success of your outcome and, crucially, your safety throughout the process.
- Safety First and Foremost: Always wear robust safety gloves when handling license plates, as their edges can be surprisingly sharp and prone to causing cuts. Eye protection is also highly recommended and often overlooked, but it is absolutely essential when drilling, hammering, or performing any task that might produce flying debris.
- Thorough Cleaning is Key: Before you embark on any bending or drilling, meticulously clean your license plate. Old plates, especially those that have seen years of use, can accumulate a significant amount of dirt, grime, and even residues that are best removed for a clean working surface and a better final product.
- Precision in Bending the Plate: Take your time and be deliberate when bending the license plate. A clean, sharp, and even bend is paramount for the dustpan’s effectiveness in scooping debris. Utilize a straight edge (like a sturdy piece of wood or a metal ruler) and clamps to help guide your bend and maintain consistency. If you happen to have access to a sheet metal brake, even a small, handheld one, it would yield the most professional and crisp result.
- Pilot Holes Are Your Indispensable Friend: Always pre-drill small pilot holes before driving screws into wood, especially when working close to the edges. This simple step is vital for preventing the wood from splitting and makes the screw insertion process much easier, smoother, and more secure.
- Choosing the Right Wood: Opt for a hardwood or a sturdy softwood for both the base and the handle of your dustpan. Materials like oak, maple, or even good quality pine will ensure superior durability and longevity for your finished product. Reclaimed wood can be fantastic for character, but always inspect it carefully for hidden nails, screws, or weak spots.
- Consider Handle Comfort: Pay attention to the ergonomics and comfort of your handle. Sanding down any sharp edges, rounding corners, and creating a comfortable grip will make your dustpan a pleasure to use for years to come.
- Apply a Protective Finish: While optional, applying a protective finish to the wooden components is highly recommended. A wood stain will enhance its natural beauty, paint can customize its look, and a clear sealant will protect it from moisture, dirt, and general wear and tear, significantly extending the life of your dustpan.
- Finding Vintage License Plates: Great places to source authentic vintage license plates include local antique shops, bustling flea markets, salvage yards, specialty online marketplaces, or even by simply asking around in older communities or family members who might have old plates stored away.
Beyond the Dustpan: Exploring More Creative Uses for License Plates
Once you’ve experienced the profound joy and satisfaction of creating this license plate dustpan, you might find yourself looking at these old metal rectangles in an entirely new and inspired light. The possibilities for creatively repurposing license plates are vast, varied, and truly imaginative. They can be carefully flattened and artfully arranged to serve as unique, eye-catching wall art, cut into intricate shapes for distinctive jewelry pieces, or even ingeniously formed into small decorative boxes or organizers. Many crafters transform them into charming birdhouses, personalized signs for garages, workshops, or “man caves,” or even integrate them as unique accents into furniture pieces. The key to unlocking their potential is to see beyond their original, singular purpose and fully embrace their versatility as a crafting material. This license plate dustpan project serves as an excellent entry point into the exciting and sustainable world of license plate crafts, opening up a plethora of ideas for your next creative DIY adventure.
Embrace the Retro Charm and Unmatched Functionality of Your New Dustpan
This project is a fantastic example of how simple, often overlooked materials, combined with a bit of creativity and practical skill, can lead to something truly special and impactful. The license plate dustpan isn’t just a basic cleaning tool; it’s a unique statement piece, a conscious sustainable choice, and a tangible testament to the enduring appeal and timelessness of vintage design. It’s robust enough to effortlessly handle everyday cleaning tasks in your home, workshop, or garage, yet it possesses enough stylistic flair and character to be proudly displayed rather than hidden away in a closet. Whether you’re a seasoned DIYer with years of crafting experience or just embarking on your creative journey, this project offers an incredibly rewarding experience with a charming, practical, and truly distinctive outcome.
So, why not give it a try? Dust off those old license plates you’ve been saving, gather your tools, and embark on a creative journey that will result in a dustpan that’s not only super cute and efficient but also brimming with personality, a rich history, and a unique story of its own. Happy crafting, and enjoy your beautifully upcycled creation!