
Transform Your Walls: The Ultimate Guide to DIY Hot Glue & Watercolor Canvas Art
Are you looking to infuse your living space with personality and charm without breaking the bank? DIY wall art is more than just a trend; it’s a fantastic way to express your creativity, personalize your home, and save a significant amount compared to buying expensive pieces from boutiques like Anthropologie or Home Goods. Forget generic mass-produced decor; it’s time to craft unique masterpieces that truly reflect your style.
One incredibly accessible and captivating technique that has gained immense popularity is combining hot glue and watercolors on canvas. This method creates beautiful, textured art pieces with vibrant colors and intriguing patterns, making it perfect for both seasoned crafters and absolute beginners. The beauty of this approach lies in its simplicity, affordability, and the stunning results it consistently delivers. It’s an art form that transforms ordinary canvases into extraordinary visual statements.
The Irresistible Appeal of DIY Wall Art
Creating your own wall art offers a multitude of benefits beyond mere aesthetics. It’s a journey of self-expression, a therapeutic escape, and a smart financial choice.
Personalization and Unique Style
Your home should tell your story. Mass-produced art, while sometimes appealing, rarely captures the essence of your individual taste. DIY wall art allows you to curate pieces that resonate deeply with your personal style, color palette, and desired ambiance. Imagine adorning your walls with art created by your own hands, pieces that hold a special memory or an emotion. These unique creations become conversation starters and truly make your house feel like a home.
Budget-Friendly Decor Solutions
One of the most compelling reasons to embrace DIY wall art is the cost savings. High-quality art can be incredibly expensive. By choosing to create your own, you drastically cut down on expenses. Canvases are often available in multi-packs at craft stores like Michael’s, especially during sales, making them incredibly affordable. Couple that with basic art supplies like hot glue and watercolors, and you have the ingredients for stunning decor that costs a fraction of retail prices. This method makes high-end looking art accessible to everyone.
A Creative Outlet and Stress Reliever
Engaging in creative activities has been scientifically proven to reduce stress, improve mood, and foster a sense of accomplishment. The act of planning, sketching, gluing, and painting can be incredibly meditative and rewarding. It’s a wonderful way to unwind after a long day, disconnect from digital screens, and tap into your inner artist, regardless of your perceived skill level. This project is about the process as much as the final product.
Sustainable and Repurposed Art
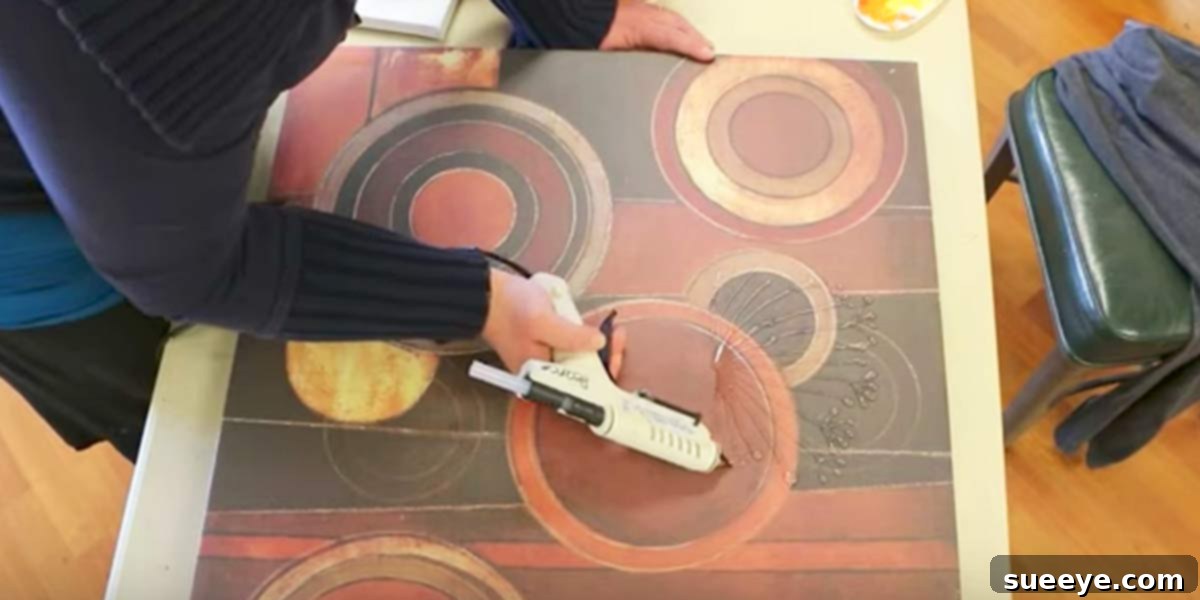
Do you have old, “ugly” art pieces collecting dust in a closet? Or perhaps some canvases from a past project that didn’t quite work out? This hot glue and watercolor technique is an excellent way to repurpose and recycle. Instead of buying new canvases, you can simply paint over existing ones, giving them a new lease on life. This eco-conscious approach not only saves money but also contributes to reducing waste, making your art journey even more fulfilling.
The Magic Duo: Hot Glue and Watercolor
The synergy between hot glue and watercolor paint is what makes this art technique so special and mesmerizing. The hot glue, once dried, acts as a raised barrier, creating outlines and textures that resist the flow of watercolor. This “resist” effect causes the vibrant liquid pigments to pool and spread within the confines of the glue lines, resulting in a stained-glass like appearance or intricate, defined patterns that are hard to achieve with other mediums.
My own journey with this technique began quite by accident. While experimenting with different glue effects on canvas, I discovered the unique way watercolors interacted with the dried glue, creating stunning, unexpected results. This serendipitous discovery opened up a world of creative possibilities.
Getting Started: What You’ll Need
Gathering your materials is the first step towards creating your hot glue and watercolor masterpiece. The good news is, you likely have many of these items already, or they are easily found at any craft store.
Essential Materials:
- Canvases: Various sizes and shapes work wonderfully. Multi-packs are often on sale. Don’t hesitate to use old canvases you want to cover!
- Hot Glue Gun and Glue Sticks: A standard craft hot glue gun is perfect. Make sure you have plenty of glue sticks.
- Liquid Watercolor Paints: These provide vibrant, translucent colors that spread beautifully. Pan watercolors can also be used, simply dilute them with water.
- Paintbrushes: A variety of sizes, from fine-tipped for detail to broader brushes for filling larger areas.
- Pencil and Eraser: For sketching your design onto the canvas.
- Protective Surface: Newspaper, an old tarp, or a craft mat to protect your workspace from glue and paint.
- Container for Water: For rinsing brushes.
- Paper Towels or Cloth: For dabbing brushes and cleaning up spills.
Optional Embellishments:
- Glitter: Can be added to wet glue or paint for extra sparkle.
- Stencils: For creating precise shapes or patterns.
- Permanent Markers: To add fine details after the paint is dry.
- Acrylic Sealer Spray or Varnish: To protect your finished artwork.
Step-by-Step Guide: Crafting Your Hot Glue Masterpiece
Ready to create? Follow these simple steps to bring your hot glue and watercolor canvas art to life.
1. Preparation is Key
Set up your workspace in a well-ventilated area. Lay down your protective surface to guard against any glue drips or paint splatters. If you’re working with children, ensure an adult supervises the hot glue gun usage at all times to prevent burns. Safety first!
2. Design Your Vision
Using a pencil, lightly sketch your desired design onto the canvas. This is where your imagination can truly run wild! You can create intricate mandalas, abstract patterns, whimsical flowers (a personal favorite, especially for kids!), geometric shapes, landscapes, or even inspirational typography. Don’t worry about perfection; the glue and paint will add character. For younger artists, you can draw the design for them to trace.
3. Applying the Hot Glue
Carefully trace over your pencil lines with the hot glue gun. Hold the gun steadily and apply a consistent bead of glue. You can vary the thickness of your lines to create different effects – thicker lines will create more pronounced barriers, while thinner lines offer delicate details. Experiment with layering glue to build texture and dimension. Allow the glue to dry completely, which usually only takes a few minutes. For children, particularly younger ones, I often draw the flowers or shapes they desire, and then I go around their drawing with the hot glue, ensuring they don’t get burned while still involving them in the creative process.
4. Adding Watercolor Magic
Once the hot glue is completely dry and cool to the touch, it’s time for the vibrant watercolors. Dip your paintbrush into the liquid watercolor paint and apply it within the areas created by your glue lines. Watch as the paint beautifully spreads and pools, creating stunning washes of color. The glue will prevent the colors from bleeding into each other, allowing you to use multiple colors adjacent to one another without muddying the palette. You can layer colors, create gradients, or even dab areas with water for a lighter, more translucent effect. This is the stage where the magic truly unfolds!
5. Drying and Finishing Touches
Allow your painted canvas to dry thoroughly. Depending on the amount of paint used and the humidity, this can take a few hours. Once dry, you can add extra details with permanent markers or even a fine-tipped glue gun for very delicate textures. To protect your artwork from dust and fading, consider spraying it with an acrylic sealer or a clear varnish, especially if it will be displayed in a high-traffic area or direct sunlight. We were all really proud of our art pieces; they turned out fabulous!
Ideas & Inspiration for Your Hot Glue Art
The possibilities with hot glue and watercolor are endless. Here are a few ideas to spark your creativity:
Floral Fantasies
As mentioned in my own experience, hot glue flowers are a wonderful starting point. You can create intricate petals, leaves, and stems, then fill them with lush greens, vibrant reds, yellows, and purples. They make cheerful and inviting pieces of art.
Abstract Expressions
Let go of traditional forms and create abstract designs. Swirls, dots, zigzags, and random lines can all be outlined with hot glue, then filled with a kaleidoscope of watercolors for a modern, energetic look.
Geometric Wonders
Using a ruler, sketch precise geometric shapes – triangles, squares, circles, hexagons – and outline them with glue. Fill these sections with contrasting or complementary colors for a bold, contemporary piece.
Personalized Gifts
Handmade art makes incredibly thoughtful gifts. Create a piece incorporating a loved one’s favorite colors, a significant date, or a design that holds special meaning. These personalized gifts are cherished far more than store-bought items.
Seasonal & Holiday Themes
This project is fantastic for holiday vacations or any time boredom strikes! Design pumpkins and autumn leaves for fall, snowflakes and festive scenes for winter, or vibrant spring blooms. It’s a great way for parents, aunts, uncles, and bored kids to spend quality time together creating something beautiful.
Making it a Family Affair: Fun for All Ages
This project is uniquely suited for family crafting sessions. It caters to different skill levels, allowing everyone to participate and create something they’re proud of. Younger children can draw simple shapes, while adults or older kids can handle the hot glue gun and help with the painting. The process encourages teamwork, communication, and shared joy in creation.
Remember to always prioritize safety, especially when using the hot glue gun with children. Prepare the workspace, explain the steps clearly, and provide plenty of encouragement. The resulting masterpieces will not only decorate your walls but also become cherished memories of time spent together.
Beyond Canvas: Exploring Other Hot Glue Art Possibilities
While canvases are a perfect medium, the versatility of hot glue art extends far beyond! Many artists are experimenting with hot glue to create incredible textures and designs on various surfaces. A quick search on Pinterest will reveal a treasure trove of inspiration:
- Phone Covers: Decorate plain phone cases with intricate hot glue patterns before painting or spraying them.
- Shoes & Accessories: Embellish shoes, headbands, or even purses with raised hot glue designs.
- Jewelry: Create unique pendants or earrings by forming shapes with hot glue and adding color.
- Mixed Media: Incorporate hot glue elements into other craft projects for added dimension.
Artists like Amy Pearce often share captivating tutorials that demonstrate innovative ways to use hot glue in art. Her step-by-step guides can provide further inspiration and techniques for those looking to expand their hot glue art repertoire. It’s truly amazing all of the hot glue art ideas that are available to us!
Tips for Success & Common Pitfalls to Avoid
To ensure your hot glue and watercolor art project is a resounding success, keep these tips in mind:
- Don’t Overdo the Glue: While texture is great, excessively thick glue lines can sometimes look clunky. Aim for consistent, medium-thick lines for most designs.
- Patience with Drying: Always let the hot glue dry completely before painting, and allow the paint to dry fully before handling or sealing. Rushing these steps can lead to smudges or less defined results.
- Experimentation is Key: Don’t be afraid to try new things! Mix colors, apply paint differently, or experiment with various glue patterns. Some of the best discoveries happen by accident.
- Utilize Sales & Repurpose: Michael’s and other craft stores frequently offer sales on canvases and art supplies. Stock up when prices are low, or better yet, use those existing “ugly art pieces” you want to paint over. It’s a great way to recycle and repurpose something that is no longer useful to you, giving it a beautiful second life.
- Work in Sections: If your design is large or complex, consider working on one section at a time, especially with the watercolors, to manage bleeding and drying times.
Unleash Your Inner Artist Today!
DIY hot glue and watercolor canvas art is a wonderfully rewarding project that combines affordability with boundless creative potential. Whether you’re a seasoned artist or picking up a paintbrush for the first time, this technique offers a satisfying path to creating personalized home decor. It’s an opportunity to save money, express your unique style, and enjoy a therapeutic creative process—alone or with loved ones.
So, grab your glue gun, uncork your watercolors, and let your imagination take flight. The stunning, one-of-a-kind art you create will not only beautify your space but also serve as a testament to your own creative spirit. What will you design first?