
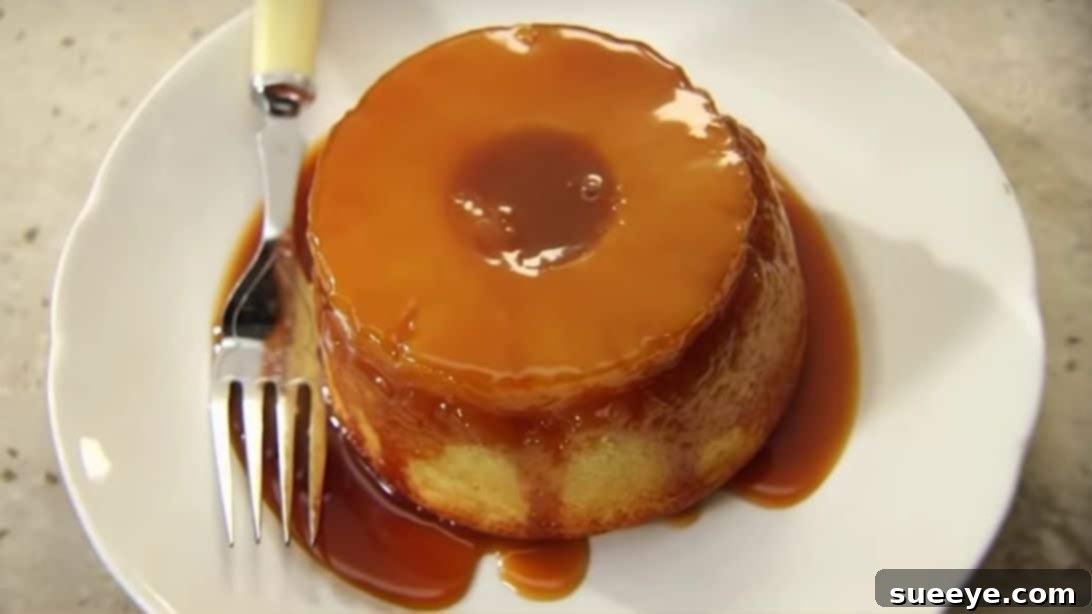
Irresistible Mini Pineapple Upside-Down Cakes: A Martha Stewart Inspired Recipe for Elegant Indulgence
Elevate your dessert game with these charming individual pineapple upside-down cakes, a timeless treat perfected for modern tables.
Who can resist the allure of a perfectly caramelized pineapple upside-down cake? It’s a classic for a reason – that golden-brown sugar crust, the juicy pineapple rings, and a tender cake base create an unforgettable dessert experience. But what if we told you there’s a way to make this beloved treat even more captivating? We’re talking about individual, mini pineapple upside-down cakes, a delightful adaptation inspired by the culinary brilliance of Martha Stewart herself.
Unlike traditional large cakes that require slicing and serving, these individual portions are designed for effortless elegance. Each guest receives their own charming ramekin-sized dessert, making them perfect for dinner parties, brunches, or simply a sophisticated personal treat. Not only do they look incredibly adorable, but they also offer a delightful balance of flavors and textures, enhanced by a luscious caramel rum sauce. This recipe promises not just a dessert, but an experience – from the fragrant aroma filling your kitchen to the first exquisite bite. If you’re ready to impress your taste buds and your guests, let’s dive into the procedures for crafting these miniature masterpieces.
Why Choose Individual Pineapple Upside-Down Cakes?
Opting for individual pineapple upside-down cakes offers numerous advantages over their larger counterparts. First and foremost, they provide perfect portion control, ensuring everyone gets just the right amount of sweetness without the guesswork of slicing. This makes them ideal for events where presentation is key, as each cake serves as a mini work of art on its own plate. They are also incredibly hygienic for gatherings, as there’s no communal cutting or serving. Furthermore, the individual baking process often results in more evenly cooked cakes with consistently moist interiors and beautifully caramelized tops. Imagine the joy of flipping each cake to reveal its glistening pineapple crown – a moment of pure culinary magic for every single serving.
Understanding the Classic: What Makes an Upside-Down Cake Special?
The concept of an upside-down cake dates back centuries, rooted in various cultures’ methods of cooking fruit with sugar and butter at the bottom of a pan. The American pineapple upside-down cake gained widespread popularity in the early 20th century, particularly after canned pineapple became readily available. What makes this dessert truly special is its unique construction: the fruit and a rich caramelized topping are placed at the bottom of the pan, with the cake batter poured over them. During baking, the fruit and sugar mixture caramelize beautifully, infusing the cake with its distinctive flavor and creating a stunning, glossy top layer once inverted. It’s a dessert that celebrates simplicity, visual appeal, and the delightful combination of tangy fruit with sweet, buttery cake.
Ingredients: Crafting Perfection from Scratch
For the Cake Base: The Foundation of Flavor
- ½ cup Dark brown sugar: Essential for that deep, molasses-rich caramel flavor. Its moisture helps create a softer topping.
- 8 tbsp. unsalted butter (1 stick): Provides the luscious, buttery richness that binds the caramel. Using unsalted butter allows you to control the overall saltiness.
- Pinch of salt: A small but mighty ingredient that balances the sweetness and enhances all other flavors in the caramel.
- Butter for the ramekins: Crucial for greasing the ramekins, ensuring your cakes release effortlessly and beautifully.
- 6 slices Pineapple: Fresh pineapple is highly recommended for its vibrant flavor and firm texture, providing a delightful tangy contrast to the sweet cake.
For the Cake Batter: A Tender, Moist Foundation
- 1 stick Butter (½ cup), softened: Room temperature butter is key for creaming properly with sugar, incorporating air for a light texture.
- 1 cup Granulated sugar: Sweetens the cake and helps create a fine crumb structure when creamed with butter.
- 1 Vanilla bean, scraped: For an unparalleled depth of vanilla flavor. You’ll use the tiny seeds directly in the batter.
- 2 Whole large eggs: Provide structure, richness, and moisture to the cake. Ensure they are at room temperature for better emulsification.
- 1 ¾ cups Cake flour: Lower in protein than all-purpose flour, cake flour results in a wonderfully tender and delicate crumb, perfect for this elegant dessert.
- 1 ¾ tsp Baking powder: The primary leavening agent, responsible for giving the cake its lift and airy texture.
- ½ tsp Salt: Balances the sweetness and strengthens the gluten structure in the cake.
- ½ cup Milk: Adds essential moisture to the batter, contributing to a tender and rich cake.
For the Caramel Rum Sauce: The Dazzling Finishing Touch
- ¾ cup Granulated sugar: The base for our homemade caramel, transforming into a deep amber delight.
- ¼ cup Hot water: Carefully added to the caramelized sugar to create a smooth, pourable sauce.
- 1 cup Heavy cream: Adds luxurious richness and helps to stabilize the caramel sauce, preventing it from seizing.
- 1 tsp Vanilla extract: Enhances the sweetness and depth of the caramel with its warm, aromatic notes.
- 2 tbsp. Rum: Provides a wonderful, sophisticated warmth and complexity to the sauce. (Can be omitted or substituted with a non-alcoholic extract for a family-friendly version.)
- 1 tbsp. Cold butter: Swirled in at the end to add an extra layer of richness, gloss, and a silky smooth finish to the sauce.
Directions: Crafting Your Mini Pineapple Masterpieces
Step 1: Preparing the Exquisite Caramel Base and Pineapple Layout
Begin by creating the luscious caramel base that will adorn the top of your cakes. In a medium saucepan, combine the 8 tablespoons of unsalted butter, ½ cup of dark brown sugar, and a tiny pinch of salt. Place the saucepan over medium-low heat. Stir occasionally as the butter melts and the sugar dissolves. Continue to cook, stirring gently, until the mixture is fully melted, bubbling, and has transformed into a rich, amber-hued caramel. It should be smooth and glistening. Once achieved, immediately remove from heat to prevent burning.
Next, prepare your ramekins. Generously grease 6 individual 10-ounce ramekins with butter. This is a critical step to ensure your cakes release perfectly without sticking. For the pineapple, precision is key. Take 6 slices of fresh pineapple and cut them to approximately ¼ inch thickness. Using a cookie cutter that matches the inner diameter of your ramekins, cut out neat, uniform pineapple rounds. Then, use a smaller cookie cutter to remove the tough core from the center of each pineapple round, creating that iconic ring shape. This meticulous preparation ensures a beautiful and consistent presentation for each cake.
Now, carefully spoon about 1 to 2 tablespoons (or more, depending on your preference) of the warm, caramelized sugar mixture into the bottom of each greased ramekin. Spread the caramel evenly to coat the base. Gently place one prepared pineapple slice on top of the caramel in each ramekin, ensuring it sits flat and centered. Set these aside while you prepare the cake batter.
Step 2: Mixing the Tender Cake Batter and Baking to Golden Perfection
Preheat your oven to 350°F (175°C). In a large mixing bowl, using an electric mixer, cream together the softened 1 stick of butter and 1 cup of granulated sugar. Beat on medium-high speed until the mixture is light, fluffy, and pale yellow, typically 3-5 minutes. This creaming process incorporates air, which is vital for a tender cake structure. Scrape down the sides of the bowl as needed.
Carefully slice open your vanilla bean lengthwise and scrape out the fragrant, tiny seeds with the back of a knife. Add these precious vanilla seeds to the creamed butter and sugar. Then, add the 2 whole eggs, one at a time, beating well after each addition until fully incorporated. The mixture should appear smooth and emulsified. In a separate medium bowl, whisk together the 1 ¾ cups of cake flour, 1 ¾ teaspoons of baking powder, and ½ teaspoon of salt. This ensures the leavening agent and salt are evenly distributed throughout the flour.
Now, it’s time to combine the wet and dry ingredients. Gradually add the dry flour mixture to the wet batter, alternating with the ½ cup of milk. Begin and end with the dry ingredients. Mix on low speed, just until combined and no streaks of flour remain. Be careful not to overmix, as this can develop the gluten too much, resulting in a tough cake. The batter should be smooth and pourable.
Using a scoop or a spoon, carefully divide the cake batter evenly among the 6 prepared ramekins, filling each about two-thirds full. Gently tap the ramekins on the counter a few times to release any air bubbles and help level the tops. Place the ramekins on a baking sheet for easier transfer to and from the oven. Bake in the preheated 350°F (175°C) oven for approximately 30 to 35 minutes, or until a wooden skewer or toothpick inserted into the center of a cake comes out clean. The cakes should be golden brown and spring back when lightly touched. Remove from the oven and let them cool on a wire rack for about 5-10 minutes in their ramekins before attempting to unmold.
Step 3: Crafting the Delectable Caramel Rum Sauce and the Grand Unmolding
While your cakes are baking or cooling slightly, prepare the rich caramel rum sauce. In a clean, heavy-bottomed pot or saucepan, carefully melt ¾ cup of granulated sugar over medium heat. Do not stir initially; instead, swirl the pot gently to help the sugar melt evenly. Watch carefully as it will begin to liquefy and turn amber. Once all the sugar has melted and achieved a beautiful golden-brown caramel color, immediately remove it from the heat.
This next step requires caution. Carefully and slowly pour ¼ cup of hot water into the hot caramel while whisking continuously. The mixture will bubble vigorously and steam. Keep whisking until smooth. Return the pot to medium-high heat. Slowly pour in 1 cup of heavy cream, whisking constantly. Continue to stir gently until the sauce thickens to a creamy consistency, typically taking a few minutes. Remove from heat.
Stir in the 1 teaspoon of vanilla extract, 2 tablespoons of rum, and 1 tablespoon of cold butter. The cold butter will add a beautiful sheen and extra richness to the sauce. Stir until the butter is completely melted and incorporated. Allow the caramel rum sauce to cool slightly; it will thicken further as it cools.
Now for the grand reveal! While the cakes are still warm (this helps them release cleanly), carefully run a thin knife around the edge of each ramekin to loosen the cake. Place a serving plate upside down over a ramekin, then, holding the plate and ramekin firmly together, quickly and confidently flip them over. Gently lift the ramekin to reveal your beautifully caramelized pineapple upside-down cake. If any pineapple or caramel sticks, gently coax it out with a spoon and place it back on the cake. Repeat with the remaining cakes.
To serve, generously spoon or pour the warm caramel rum sauce over each individual cake. The sauce will cascade down the sides, adding an irresistible glistening finish and an extra layer of flavor. These mini pineapple upside-down cakes are best enjoyed warm, perhaps with a scoop of vanilla bean ice cream or a dollop of whipped cream.
Tips for Perfection: Ensuring Every Cake is a Success
- Room Temperature Ingredients: For both the cake batter and the caramel base, ensuring butter and eggs are at room temperature allows for better emulsification and a smoother, more uniform batter/caramel.
- Don’t Overmix the Batter: Once the dry and wet ingredients are combined, mix only until just incorporated. Overmixing develops gluten, leading to a tough, dense cake.
- Precise Pineapple Prep: Uniform thickness of pineapple slices ensures even cooking and a beautiful presentation. Using cookie cutters for the rounds and cores makes them look professional.
- Caramel Caution: Making caramel requires attention. Sugar can burn quickly. Keep an eye on it, and ensure to use a heavy-bottomed pot to prevent scorching. When adding hot water/cream, do so slowly and carefully as it will bubble intensely.
- Timely Unmolding: Unmold the cakes while they are still warm, but not piping hot. If they cool completely in the ramekins, the caramel can solidify and stick. Waiting 5-10 minutes after baking is usually ideal.
- Grease Ramekins Generously: This is a simple step that makes all the difference in cleanly releasing your beautiful cakes.
Variations and Substitutions: Get Creative with Your Cakes
- Fruit Alternatives: While pineapple is classic, feel free to experiment with other fruits like thinly sliced apples, peaches, plums, or even berries. Adjust cooking times if needed.
- Non-Alcoholic Sauce: If you prefer to skip the rum, simply omit it from the caramel sauce. You can add an extra ¼ teaspoon of vanilla extract or a touch of almond extract for a different flavor profile.
- Spiced Caramel: Add a pinch of cinnamon, nutmeg, or cardamom to your caramel base or sauce for a warm, spiced twist, especially delightful with apple variations.
- Gluten-Free Option: You can substitute the cake flour with a good quality gluten-free all-purpose flour blend (one that contains xanthan gum) for a gluten-free version of this dessert.
- Citrus Zest: Grate a little orange or lime zest into the cake batter for a brighter, more aromatic flavor that pairs wonderfully with pineapple.
Frequently Asked Questions (FAQs)
- Can I use canned pineapple instead of fresh?
- Yes, you can. Ensure to drain the canned pineapple slices very well before using them to avoid excess moisture, which can make the cake soggy. Fresh pineapple generally offers a brighter flavor and firmer texture.
- What if I don’t have ramekins? Can I use a muffin tin?
- You can use a large muffin tin (jumbo size would be best) or even a standard 9-inch round cake pan for a larger single cake. If using a muffin tin, adjust baking time down to about 20-25 minutes. If making a large cake, baking time will be significantly longer (around 40-50 minutes).
- My cake stuck to the ramekin when I tried to unmold it. What went wrong?
- Common reasons for sticking include not greasing the ramekin thoroughly enough, not letting the cakes cool for the right amount of time (either too hot or too cold), or not running a knife around the edges before flipping. Ensure generous greasing and flip while still warm.
- How far in advance can I make these cakes?
- These cakes are best enjoyed on the day they are made, especially when warm with the fresh sauce. However, you can bake the cakes a day in advance and store them covered at room temperature. Reheat gently in the oven or microwave before serving and adding the sauce.
- Can I make the caramel rum sauce ahead of time?
- Yes, the caramel rum sauce can be made up to 2-3 days in advance and stored in an airtight container in the refrigerator. Gently reheat it over low heat on the stovetop, stirring frequently, or in the microwave in short bursts, before serving.