
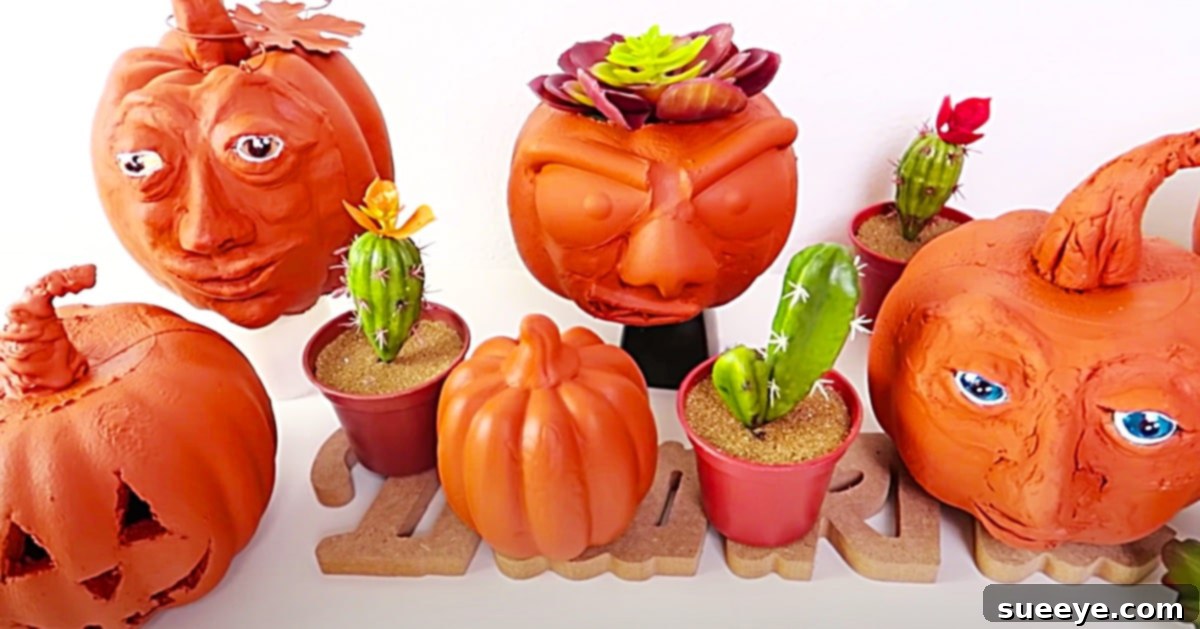
Transform Your Fall Decor: Easy Dollar Tree Faux Terracotta Pumpkins DIY
There’s an undeniable magic that sweeps through our homes and porches as autumn leaves begin to fall and the air turns crisp. This year, my porch Fall display truly became a labor of love, a vibrant testament to the season’s beauty. The moment my extended family, fresh from California, drove up to see it, their expressions of joy and nostalgia for small-town America brought tears to their eyes. It’s moments like these that fuel my passion for crafting, always seeking new projects even when my current list seems endless – a sentiment many fellow crafters will surely understand!
My latest discovery, which I simply had to integrate into my autumn wonderland, is a brilliant tutorial for creating Dollar Tree faux terracotta pumpkins. This clever and budget-friendly craft, shared by In The Event With Karem on YouTube, instantly captured my imagination. The idea of transforming inexpensive Dollar Tree finds into elegant, rustic decor pieces was irresistible. These faux terracotta pumpkins add a touch of timeless charm and handcrafted warmth that perfectly complements any fall setting, proving that stunning seasonal decor doesn’t have to break the bank.
Why Faux Terracotta Pumpkins Are Your Go-To Fall DIY
Terracotta, with its earthy tones and classic appeal, has been a timeless choice for planters and decor for centuries. Its rustic charm evokes a sense of natural beauty and understated elegance. However, genuine terracotta can be heavy, fragile, and often pricey, especially for larger decorative pieces like pumpkins. This is where the magic of faux terracotta comes in. By mimicking the look and feel of traditional terracotta using readily available and inexpensive materials, you can achieve the same sophisticated aesthetic without any of the drawbacks. These Dollar Tree faux terracotta pumpkins are not only lightweight and durable but also incredibly affordable, making them an ideal choice for expanding your fall display without stretching your budget. They offer the perfect blend of trendiness and classic charm, allowing you to personalize your decor with unique, handmade accents that truly stand out.
Gather Your Crafting Essentials: Materials For Dollar Tree Terracotta Pumpkins
One of the most appealing aspects of this project is how accessible the materials are. Many items can be found at your local Dollar Tree, making this an incredibly budget-friendly endeavor. Before you embark on your creative journey, gather these essential supplies:
- Carvable Pumpkins (from Dollar Tree): These lightweight foam or plastic pumpkins provide the perfect blank canvas for your designs. Look for various sizes to add visual interest to your display.
- Play-Doh (from Dollar Tree): An unexpected hero, Play-Doh is used to sculpt the initial facial features and textures onto your pumpkins, offering a flexible and easy-to-mold medium.
- All-purpose Caulk (from Dollar Tree): This is key for adding texture and dimension, mimicking the natural imperfections of real terracotta. It adheres well and provides a durable, sculptable surface.
- Glass Beads (from Dollar Tree): These small beads can be pressed into the caulk to create unique textural elements, adding an extra layer of visual interest and a subtle sparkle to your faux terracotta.
- Pumpkin Decor Kit (from Dollar Tree): These kits often contain pre-made eyes, noses, or mouths that can serve as a fantastic base or inspiration for your pumpkin faces, saving you time and effort.
- Black Permanent Pen (or Paint): For adding crisp details, outlines, or expressive features to your pumpkin faces after they’ve been painted.
- White Ornament Pen (or Paint): Ideal for highlights, pupils, or subtle embellishments that bring your pumpkin’s personality to life.
- Mod Podge (or Varnish Sealant): Essential for sealing your finished pumpkins, protecting the paint and any added textures, and ensuring your creations last for seasons to come.
- Terracotta Rustoleum Textured Spray Paint (or Terracotta Acrylic Paint): The star of the show! This specialized spray paint provides a convincing terracotta finish. If unavailable, a terracotta-colored acrylic paint from craft stores like Michael’s can be used, possibly mixed with baking soda for texture.
- Paper Clay: An alternative or addition to Play-Doh and caulk, paper clay offers a fine, smooth modeling medium for intricate details or a different kind of texture.
- A Hot Glue Gun: Indispensable for securely attaching various elements and ensuring everything stays in place.
- Glue Sticks: Keep a good supply for your hot glue gun.
Step-by-Step Guide: Crafting Your Terracotta Masterpieces
The beauty of this project lies in its simplicity and the creative freedom it offers. In The Event With Karem’s detailed video tutorial guides you through each step, making it accessible for crafters of all skill levels. Here’s a breakdown of the process to help you get started:
Step 1: The Foundation – Preparing Your Dollar Tree Pumpkins
Begin by selecting your carvable Dollar Tree pumpkins. These come in various sizes and shapes, allowing for a dynamic display. If your pumpkins have any existing stems or embellishments you don’t wish to keep, carefully remove them. Ensure the surface of each pumpkin is clean and dry, providing an optimal base for the materials you’re about to apply. This initial preparation ensures that your sculpted features and paint adhere properly, leading to a more professional and durable finish. Think about the overall arrangement you envision for your finished pumpkins – will they be grouped together, or stand alone? This can influence the types of faces and textures you choose for each.
Step 2: Giving Them Personality – Crafting Expressive Faces
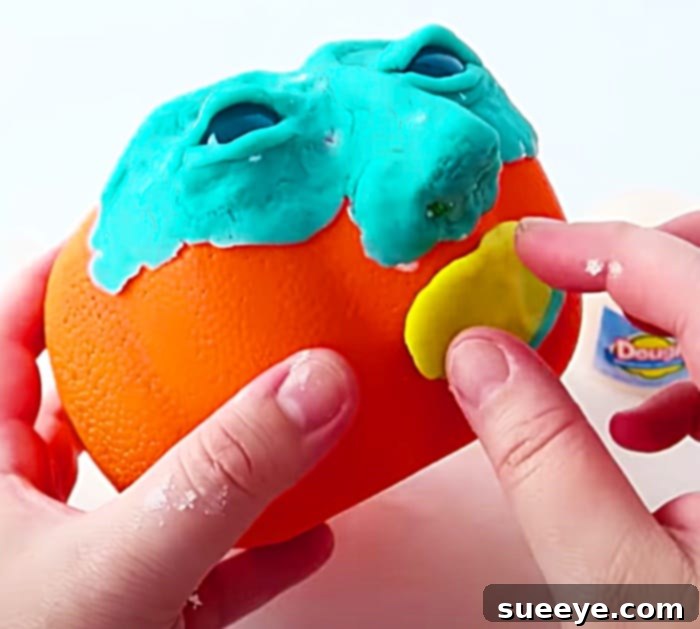
This is where your pumpkins truly come to life! You’ll start by sculpting faces using Play-Doh. The malleable nature of Play-Doh makes it incredibly easy to form eyes, noses, mouths, or even subtle expressions. For those who prefer a little guidance, the Dollar Tree pumpkin decor kits can be a fantastic starting point; use the kit pieces as a base, then build around them with Play-Doh for added dimension. Once you’re happy with the Play-Doh forms, reinforce and refine them using all-purpose caulk. The caulk adds durability and a more rugged, terracotta-like texture. Apply it over the Play-Doh and directly onto the pumpkin surface to create seamless features. Don’t be afraid to experiment with different expressions – whimsical, spooky, or even simply abstract textures can all look fantastic. While the caulk is still wet, you can press glass beads into it to create interesting patterns or highlight specific features, adding a unique shimmer to your faux terracotta surface. Allow the caulk to dry completely, which may take several hours depending on thickness and humidity.
Step 3: The Terracotta Transformation – Painting Magic
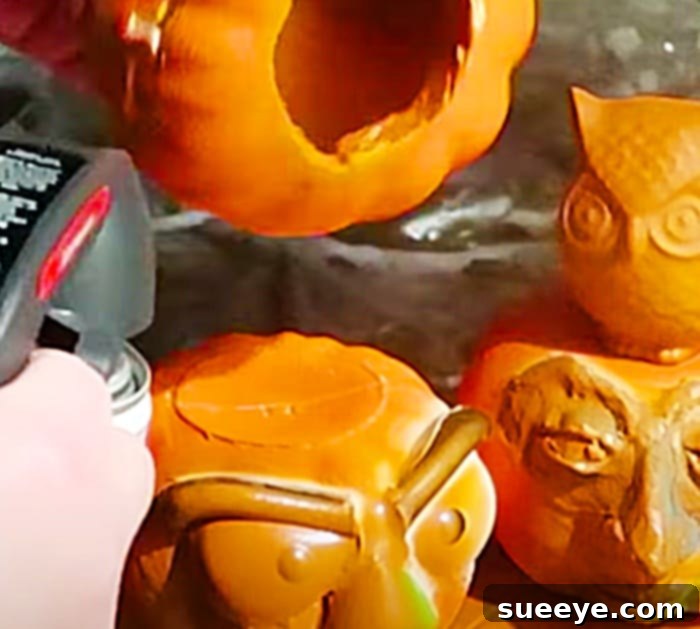
Once all your sculpted faces and textures are dry and firm, it’s time for the magical transformation: painting! The recommended Terracotta Rustoleum Textured Spray Paint is ideal for achieving that authentic matte, slightly gritty terracotta look. Make sure to spray in a well-ventilated area, covering your workspace to protect against overspray. Apply the paint in light, even coats, allowing each coat to dry according to the manufacturer’s instructions before applying the next. Several thin coats will provide a more uniform and durable finish than one thick coat, which can drip or obscure details. If you’re using terracotta acrylic paint, you might consider mixing a small amount of baking soda into it to create a similar textured effect, applying it with a brush or sponge for a natural, rustic appearance. Ensure complete coverage over all sculpted areas and the entire pumpkin surface. This step truly brings the faux terracotta effect to life, giving your pumpkins their distinctive earthy charm.
Step 4: Adding Details and Durability
With the terracotta paint fully dry, you can now add finer details that enhance your pumpkin’s character. Use a black permanent pen or paint to outline eyes, mouths, or create intricate patterns. A white ornament pen or paint is perfect for adding highlights, such as the sparkle in an eye, or for creating subtle distressed effects that mimic aged terracotta. If you used paper clay for any details, this is also the stage to ensure it’s fully integrated and painted. Finally, to protect your beautiful creations and ensure they withstand the elements (especially if displayed outdoors), apply a generous coat of Mod Podge or a clear varnish sealant. This protective layer will seal the paint and any added embellishments, giving your pumpkins a durable finish that will last throughout the autumn season and for many years to come.
Elevating Your Fall Decor: Styling Your New Terracotta Pumpkins
Now that your charming faux terracotta pumpkins are complete, it’s time to integrate them into your fall decor. Their rustic elegance makes them incredibly versatile. Cluster pumpkins of varying sizes together on your porch steps alongside potted mums, hay bales, and corn stalks for a classic harvest display. Indoors, they can become a stunning centerpiece for your dining table, perhaps nestled among some faux autumn leaves, candles, or even real small gourds. Consider placing them on a mantelpiece, bookshelf, or as accents in a cozy reading nook. The subtle, earthy tones of terracotta complement a wide range of fall color palettes, from rich oranges and deep reds to muted greens and creams. Don’t be afraid to mix and match them with other textures like burlap, plaid, or knitted throws to create a truly inviting and multi-dimensional autumn aesthetic. Their handmade quality adds a unique touch that store-bought decor simply can’t replicate.
Beyond the Basic: Creative Variations and Personal Touches
While the classic terracotta look is beautiful, this DIY project offers endless possibilities for personalization. Feel free to experiment with different paint colors. Instead of traditional terracotta, imagine these pumpkins in shades of muted sage green, charcoal grey, or even a soft cream for a more modern farmhouse feel. You could also try a distressed white wash over the terracotta paint to achieve a weathered, antique look. Add metallic accents with gold or copper paint to highlight certain features or create intricate designs. Instead of faces, consider using stencils to apply autumn motifs like leaves, acorns, or simple geometric patterns. For a truly unique touch, incorporate natural elements such as dried moss, small twigs for stems, or twine bows tied around the pumpkin tops. The joy of DIY is that each piece can reflect your personal style and creativity, making your fall display truly one-of-a-kind. These simple variations can transform a basic Dollar Tree pumpkin into a bespoke piece of art, showcasing your individual flair.
Why DIY? The Joy of Crafting on a Budget
In a world often dominated by mass-produced goods, there’s profound satisfaction in creating something with your own hands. This Dollar Tree faux terracotta pumpkin project is a perfect example of how DIY can enrich your life and your home. Beyond the significant cost savings, which allow you to achieve a high-end look for mere dollars, there’s the unique pleasure of crafting. Each pumpkin you create will carry a piece of your personality and effort, resulting in decor that feels deeply personal and meaningful. It’s a wonderful activity to do solo for a mindful break, or with family and friends, creating lasting memories along with beautiful decor. The sense of accomplishment when you see your finished display, knowing every charming detail was brought to life by your hands, is truly unparalleled. It reinforces the idea that true beauty and value aren’t solely determined by price tags, but by creativity, ingenuity, and a little bit of elbow grease.
Conclusion: Embrace the Spirit of Fall with Handmade Charm
I absolutely adore how these Dollar Tree faux terracotta pumpkins have transformed my fall display. Their rustic elegance and the warmth they add are simply captivating. This project is a testament to the incredible potential hidden within everyday, budget-friendly items. With a little creativity and guidance from tutorials like the fantastic one by In The Event With Karem on YouTube, you can craft beautiful, personalized decor that rivals high-end pieces.
So, why not embrace the spirit of the season by adding a touch of handmade charm to your home? Gather your supplies, unleash your creativity, and embark on this rewarding DIY journey. Not only will you save money, but you’ll also create cherished decor pieces that resonate with the cozy, inviting essence of autumn. Happy crafting, and may your fall display be filled with unique beauty and heartfelt warmth!