
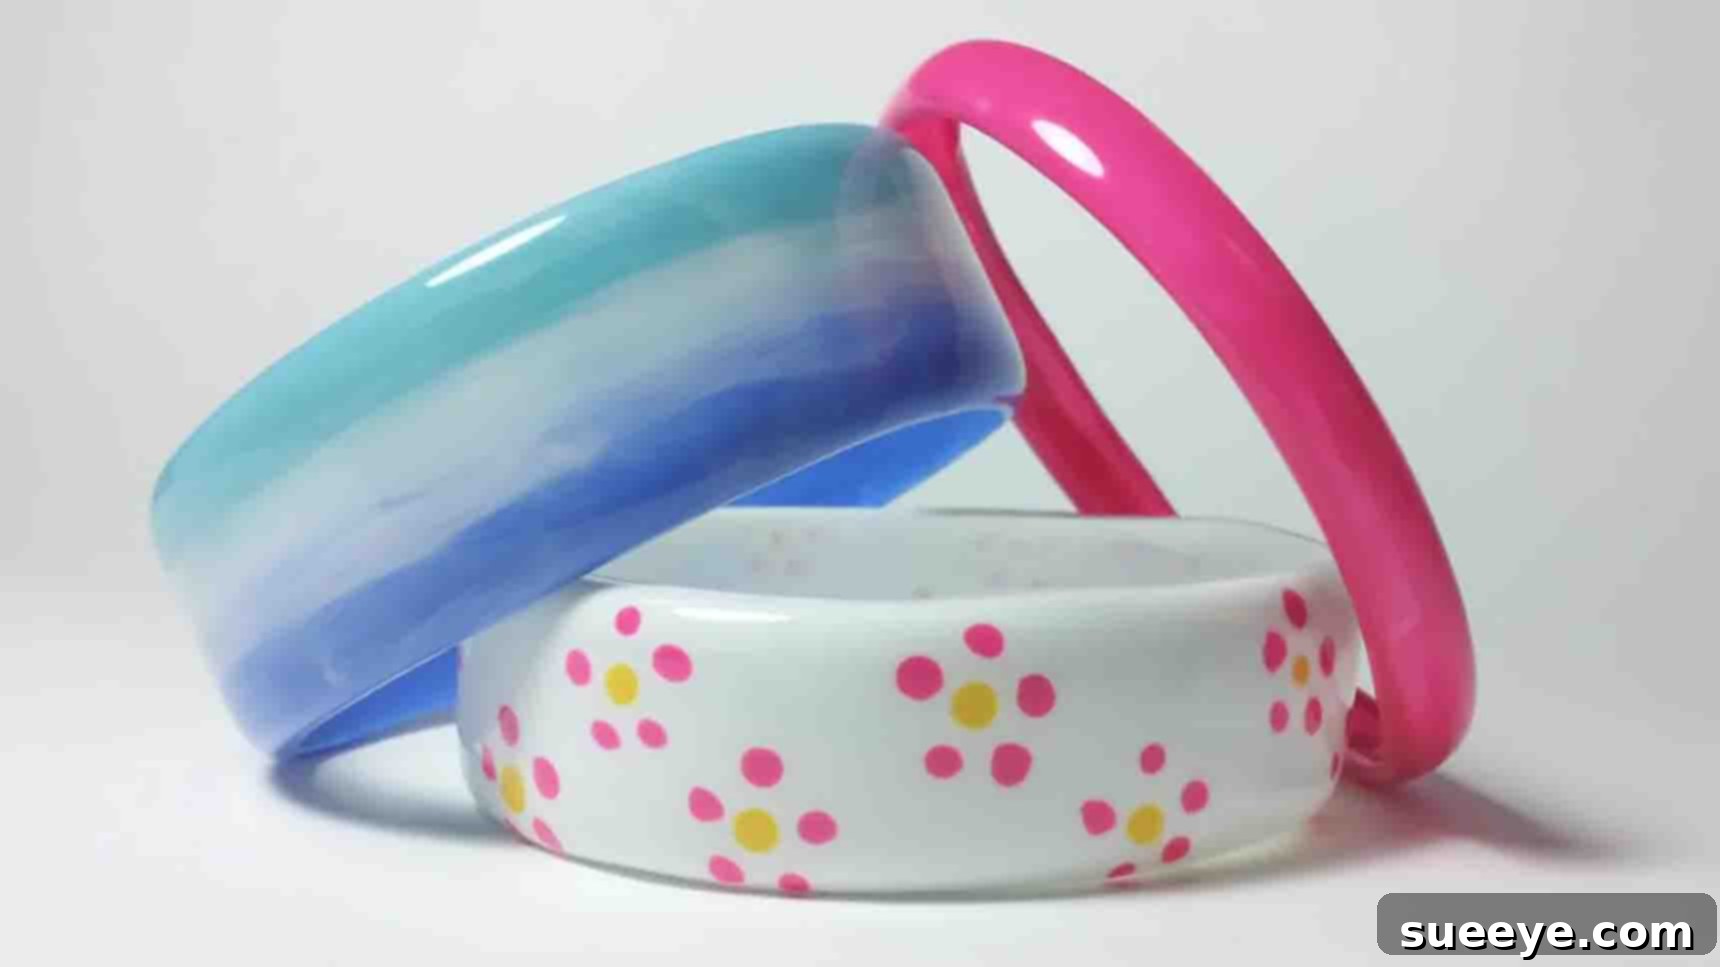
Transform Plastic Bottles into Chic Bracelets: An Ultimate DIY Guide
In a world increasingly conscious of its environmental footprint, finding creative ways to repurpose everyday waste has become not just a hobby, but a powerful statement. Imagine turning something as ubiquitous as a plastic bottle, often discarded without a second thought, into a stylish, personalized fashion accessory. This isn’t just a fantasy; it’s an incredibly rewarding reality that blends creativity with sustainability!
This comprehensive guide, inspired by the brilliant tutorial from INNOVA Crafts on YouTube, will walk you through the fascinating process of crafting exquisite, statement bracelets from recycled plastic bottles. Not only will you elevate your personal style with unique, handmade jewelry, but you’ll also contribute meaningfully to environmental sustainability by diverting plastic from landfills. This project is a fantastic opportunity to unleash your inner artist, bond with friends or family over a shared crafting session, and make a tangible difference. Get ready to transform trash into treasure and wear your eco-conscious commitment with pride!
Why Choose Upcycled Plastic Bottles for Fashion?
The global issue of plastic waste demands innovative solutions. Billions of plastic bottles are consumed annually, with a significant portion ending up in oceans or landfills, where they can take hundreds of years to decompose. By embracing upcycling, you actively participate in reducing this colossal environmental burden. Crafting with recycled plastic bottles offers numerous benefits beyond just sustainability:
- Champion Eco-Friendly Fashion: Significantly reduce your carbon footprint and promote a circular economy by giving plastic a new, stylish life. Each bracelet is a small step towards a greener planet.
- Cultivate Unique Style: Create one-of-a-kind bracelets that truly reflect your personality and aesthetic. Unlike mass-produced jewelry, your handmade pieces will be infused with character and a story.
- Embrace Cost-Effective Crafting: Utilize materials you already have, turning what would typically be waste into valuable resources. This makes it an incredibly budget-friendly and accessible hobby for everyone.
- Unleash Creative Expression: The possibilities are endless! Experiment with a vast array of colors, patterns, and embellishments to design pieces that are uniquely yours, limited only by your imagination.
- Engage in a Rewarding Activity: Perfect for crafters of all ages and skill levels, it’s an enjoyable project to undertake solo for a moment of mindful creation, or collaboratively with loved ones for shared fun and lasting memories.
Ready to embark on this eco-chic crafting adventure and make your own stylish statement? Let’s gather our tools and materials to begin crafting!
Essential Materials for Your DIY Plastic Bottle Bracelets
Before diving into the creative process, ensure you have all the necessary items at hand. The beauty of this project lies in its simplicity and the accessibility of its materials; most are likely already in your home or easily acquired:
- Plastic Bottles: The primary ingredient! Opt for clear PET plastic bottles, such as those used for soda, water, or juice. These are generally easier to cut and shape. Ensure bottles are thoroughly washed with soap and water, and completely dry, with all labels and adhesive residue removed. The smoother the bottle’s surface, the better for your bracelet base.
- Masking Tape or Electrical Tape: This invaluable tool acts as a precise guide for cutting. By wrapping it around the bottle, you ensure your cuts are straight and uniform, leading to a professional-looking bracelet base. It’s also easy to apply and remove without leaving sticky residue.
- Sharp Scissors or Craft Knife: A good pair of sharp scissors is crucial for making clean, controlled cuts through the plastic. If using a craft knife, prioritize safety: always cut on a self-healing mat or protected surface, and keep fingers clear of the blade’s path. This allows for intricate cuts, if desired.
- Iron (with medium temperature setting): The iron plays a transformative role in softening and smoothing the sharp, freshly cut edges of the plastic, making your bracelet safe and comfortable to wear. Always use an iron on a stable, heat-resistant surface, and ensure it’s set to a medium temperature to avoid overheating the plastic.
- Nail Polish or Acrylic Paint: Your palette for creativity! Choose a diverse range of vibrant nail polishes for a glossy, quick-drying finish, or acrylic paints for their extensive color options and versatility. Acrylics can be mixed and layered to achieve unique shades and textures.
- Optional: Clear Coat/Varnish: To protect your painted designs from chipping, fading, and wear, and to give your bracelets a professional, long-lasting finish, a clear acrylic spray sealant or a simple nail top coat is highly recommended. It adds durability and a beautiful sheen.
- Optional: Embellishments: Elevate your designs further with decorative elements like glitter, small beads, sequins, fabric scraps, or even charms attached with a strong craft adhesive. These additions can add texture, sparkle, and unique character to your creations.
With all your materials neatly organized and ready, let’s proceed to the detailed step-by-step directions to bring your eco-chic bracelets to life!
Step-by-Step Directions to Craft Your Eco-Chic Bracelets
Step 1: Prepare and Cut Your Plastic Base with Precision
The foundation of your bracelet begins with careful preparation and precise cutting of the plastic bottle. Accuracy in this stage is key for a well-formed bracelet.
- Thoroughly Clean and Dry Your Bottle: Start by completely washing the plastic bottle with warm soapy water. Remove all labels and any sticky residue. It’s vital that the bottle is bone dry before you begin, as moisture can interfere with cutting and future painting.
- Determine Your Bracelet’s Width: Decide on the desired width for your bracelet. Standard widths typically range from 1 to 2 inches (2.5 to 5 cm), but feel free to experiment with narrower or wider bands for different styles.
- Mark Your Cut Line with Tape: To ensure a perfectly straight and even cut, wrap a strip of masking tape or electrical tape around the bottle at the precise height you’ve chosen for your bracelet’s width. Take your time to apply the tape smoothly and without wrinkles, as this will be your invaluable cutting guide.
- Carefully Cut the Plastic Ring: Using your sharp scissors, begin cutting the plastic bottle along the edge of the tape. Maintain a steady hand and cut slowly to achieve the cleanest possible edge. Once the desired section is cut free from the bottle, carefully remove the tape. You should now have a continuous plastic ring.
- Inspect for Sharpness: Gently run your finger along both cut edges of the plastic ring. It’s normal for them to feel quite sharp at this stage. These will be meticulously smoothed in the subsequent step, ensuring comfort and safety.
Step 2: Smooth and Shape the Edges for Ultimate Comfort and Safety
This crucial step transforms a potentially sharp and uncomfortable plastic ring into a wearable, ergonomic bracelet. It’s where the magic of finishing happens!
- Preheat Your Iron: Place your iron on a stable, heat-resistant surface, such as an ironing board or a protected countertop. Set it to a medium temperature. Avoid using excessively high heat, as this can cause the plastic to melt too quickly, bubble, or deform unevenly.
- Gently Smooth the First Edge: Take one of your plastic rings. Carefully and lightly place one of the freshly cut edges onto the hot surface of the iron. As you do this, gently and continuously spin the plastic ring with your other hand. The gentle heat will cause the plastic edge to soften and curl slightly inward, effectively rounding and smoothing it into a more pleasant contour.
- Achieve a Perfectly Rounded Finish: Continue to spin the plastic against the iron until the edge is no longer sharp to the touch and has a smooth, slightly rounded appearance. This process is essential for making the bracelet comfortable against your skin and gives it a more polished, professional, and refined look.
- Repeat for the Second Edge: Once one edge is perfectly smoothed and cool enough to handle, repeat the exact process for the other cut edge of the plastic ring. Ensure both edges are equally smooth and rounded. Allow the plastic to cool completely and solidify its new shape before proceeding to the next step.
- Crucial Safety Note: Always exercise extreme caution when working with a hot iron to prevent burns. Keep your fingers away from the hot plate. It’s also advisable to work in a well-ventilated area, as heating plastic can sometimes produce a mild, temporary odor.
Step 3: Unleash Your Creativity with Dazzling Decoration
Now comes the most exciting and expressive part of the process – transforming your plain plastic base into a vibrant, personalized fashion statement!
- Choose Your Artistic Medium: Decide whether you’ll primarily use nail polish or acrylic paint for your decoration. Nail polish offers a glossy, typically quicker-drying finish with a built-in brush, while acrylic paints provide a broader spectrum of colors, allow for mixing, and can be layered for complex effects.
- Prepare Your Artistic Workspace: Lay down newspaper, old magazines, or a protective plastic sheet on your work surface to prevent any paint spills or stains. This ensures an easy cleanup process.
- Apply Your Base Coat (Optional but Recommended): If desired, begin by applying a solid base color to your entire bracelet. This can provide a uniform background for subsequent designs or serve as a standalone, minimalist look. Allow this base coat to dry completely before adding any further layers or details.
- Design Your Masterpiece: This is where your creativity truly shines! Using brushes, toothpicks, or the nail polish applicator, paint intricate patterns, bold geometric shapes, elegant stripes, playful polka dots, abstract swirls, or any design that speaks to your personal style. Experiment with color blocking, ombré effects, or even marbling techniques for unique textures.
- Consider Embellishments: While the paint is still slightly wet (or after it dries, using a strong craft adhesive), you can sprinkle fine glitter, attach tiny beads, affix small sequins, or even glue on fabric scraps for added texture and sparkle. Ensure any added embellishments are securely attached.
- Allow for Thorough Drying: Patience is a virtue in this step! Ensure all layers of paint and any added embellishments are completely and thoroughly dry before handling the bracelet extensively or applying a sealant. This might take several hours, especially with thicker layers of acrylic paint or multiple layers of nail polish.
- Optional: Seal Your Design for Durability: For enhanced protection, increased durability, and a professional, long-lasting finish, apply a clear acrylic spray sealant or a high-quality clear nail top coat over your dried design. This protective layer helps prevent chipping, scratching, and keeps your colors vibrant for longer.
Tips for Success and Inspiring Creative Variations
To ensure your DIY recycled plastic bottle bracelets are not only beautiful but also durable, comfortable, and truly unique, keep these expert tips in mind and consider exploring various creative avenues to expand your crafting horizons:
- Embrace Practice: If this is your first foray into plastic bottle crafting, it’s always a good idea to perform a practice cut and edge-smoothing on a scrap piece of plastic before working on your actual bracelet base. This helps you get a feel for the material and tools.
- Experiment with Bottle Characteristics: Different plastic bottles come with varying curves, thicknesses, and even subtle textures. Explore how soda bottles, mineral water bottles, or even certain juice bottles can yield distinct bracelet forms and aesthetics. Their inherent shapes can inspire unique designs.
- Master Layering Techniques: For a more complex, vibrant, and professional-looking finish, paint several thin layers of color rather than one thick layer. This technique helps prevent cracking, ensures even color distribution, and often results in a more luminous depth of color.
- Utilize Stencils and Stamps: For intricate, repeatable patterns or precise graphic elements, consider using small stencils or rubber stamps with acrylic paint. This can help achieve clean lines and consistent designs, even for those who prefer not to freehand.
- Explore Heat Shrinking (Advanced Technique): For a different texture and a more robust, slightly smaller bracelet, you can very carefully apply a heat gun (from a safe distance and with strong ventilation) to the plastic. This causes it to shrink and thicken. This advanced technique requires practice and extreme caution, as the plastic can easily deform or burn if overheated.
- Discover Alternative Adornments: Beyond traditional paint, consider wrapping your bracelets in colorful yarn, embroidery floss, or elegant fabric strips. You could also adhere small mosaic pieces, polymer clay elements, or even incorporate wire wrapping for a truly unique, mixed-media piece.
- Create Cohesive Sets: Design a collection of bracelets that complement each other in color palette, theme, or design elements. These can be worn together as a stack or given as thoughtful, personalized gifts. Make matching sets for you and your closest friends or family members!
- Prioritize Safety: Always supervise children closely when they are involved in crafting, especially when using sharp objects like scissors or a craft knife, and certainly when operating heat tools like an iron. Ensure excellent ventilation when painting or using sealants to avoid inhaling fumes.
Caring for Your Upcycled Plastic Bracelets
To ensure your beautiful, handmade bracelets remain in excellent condition, continue to make a fashion statement, and provide lasting enjoyment, a little mindful care goes a long way:
- Gentle Cleaning Protocol: If your bracelets become dirty or smudged, simply wipe them clean with a soft, slightly damp cloth. Avoid using harsh chemical cleaners, abrasive scrubbers, or solvents, as these can damage the paint, sealant, or the plastic itself, leading to discoloration or deterioration.
- Avoid Extreme Heat Exposure: While the plastic was intentionally shaped with heat during the crafting process, prolonged or excessive exposure to direct sunlight, high temperatures (such as leaving them in a hot car), or direct heat sources can cause the plastic to warp, soften, or lose its shape over time. Store them in cool, shaded areas.
- Thoughtful Storage Solutions: To prevent scratches, dust accumulation, and to maintain their pristine condition, store your bracelets in a jewelry box, a soft fabric pouch, or on a dedicated bracelet stand. Avoid storing them in a cluttered drawer where they might be scratched by other items.
- Re-Seal for Longevity: If, after extended wear, you notice that the paint begins to chip, fade, or show signs of wear, you can easily revitalize your bracelet by cleaning it and then reapplying a fresh layer of clear top coat or sealant. This will refresh the design and extend its life.
Conclusion: Wear Your Commitment to Sustainability with Pride
Crafting recycled plastic bottle bracelets is much more than just a fun and engaging DIY project; it’s a profound statement of personal style, boundless creativity, and deep environmental responsibility. Each unique piece you lovingly create not only adds a distinctive, personal touch to your wardrobe but also serves as a vibrant conversation starter about the critical importance of recycling, upcycling, and sustainable living.
Inspired by the fantastic tutorial from INNOVA Crafts, you now possess the comprehensive knowledge, practical skills, and creative confidence to transform ordinary, discarded plastic into extraordinary, fashionable works of art. Embrace the enjoyable challenge, immerse yourself in the creative process, and wear your commitment to a greener, more beautiful planet with undeniable pride. We encourage you to share your stunning creations with the world, inspiring others to look at what might seem like waste not as an end, but as a boundless beginning for something new, innovative, and truly wonderful. Happy crafting, and let your unique style shine through your sustainable artistry!