
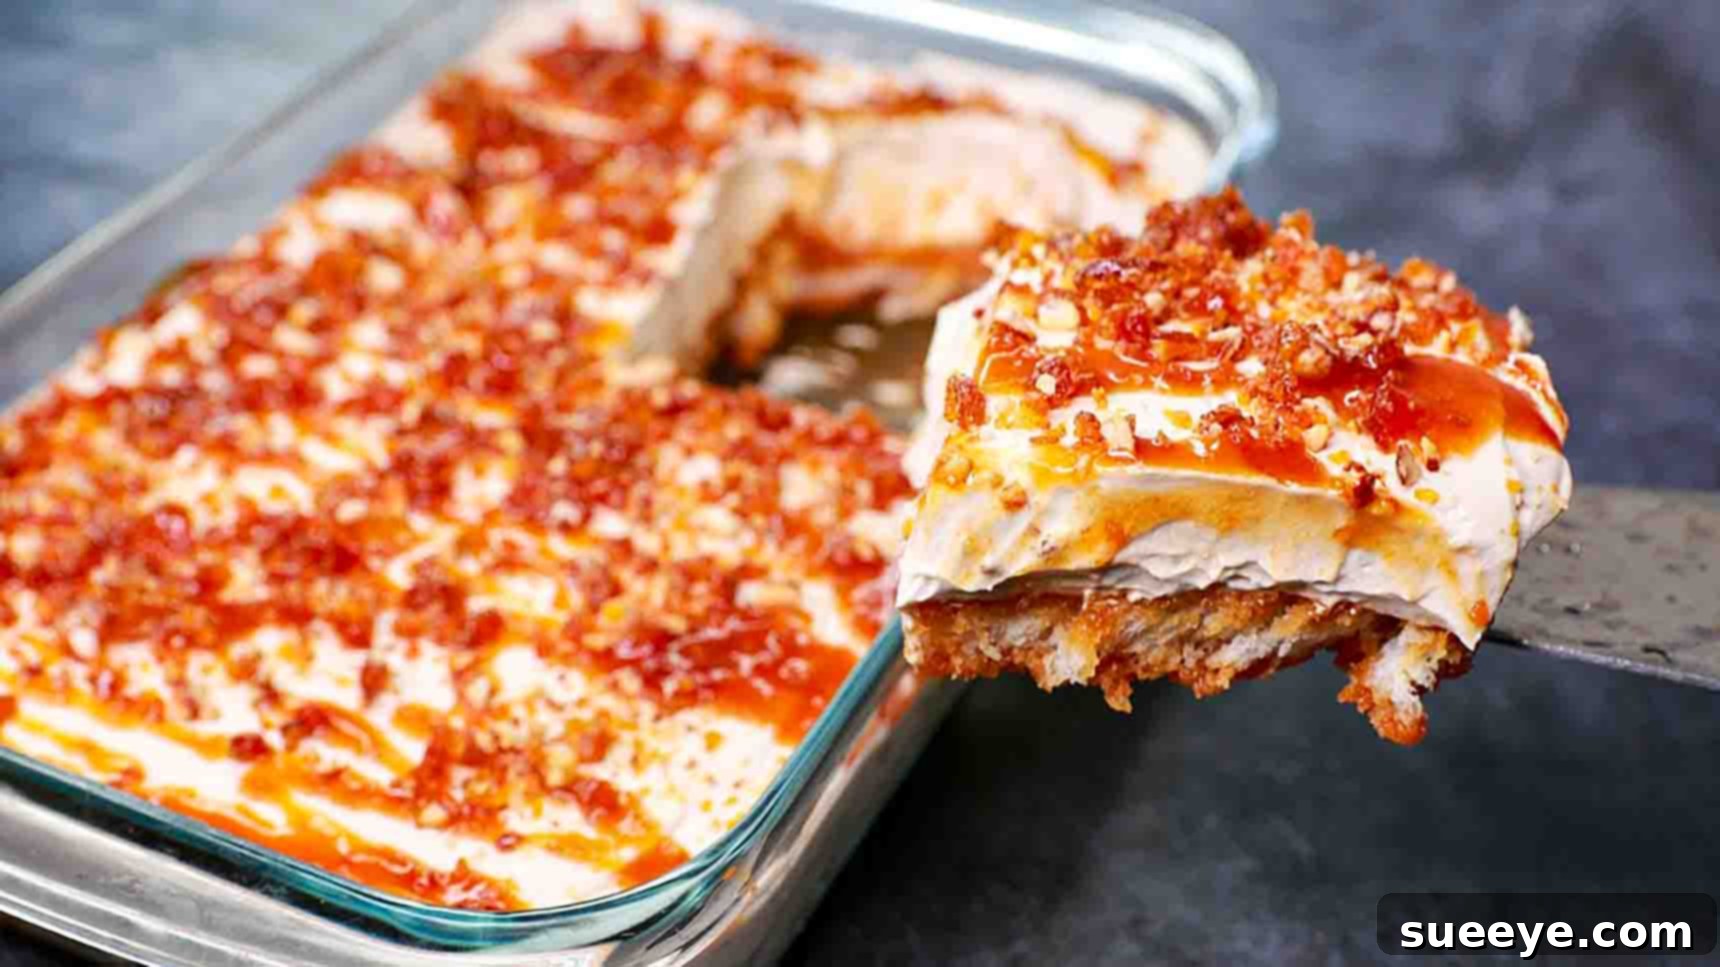
No-Oven Butterscotch Bread Pudding: Your New Favorite Easy Dessert
Are you searching for a dessert that’s not only incredibly delicious but also remarkably easy to prepare without heating up your kitchen? Look no further! This delightful no-oven butterscotch bread pudding recipe is a game-changer for anyone craving a sweet treat with minimal effort. Forget about complicated baking steps or the need for eggs; this recipe delivers a wonderfully soft, luxuriously creamy, and absolutely irresistible pudding that will become a staple in your dessert repertoire. Perfect for busy weeknights, special gatherings, or simply satisfying a sweet tooth, this recipe brings the comforting flavors of butterscotch directly to your table.
Inspired by Yummy’s innovative approach on YouTube, we’ve refined and expanded this recipe to ensure a smooth, enjoyable cooking experience and a truly spectacular result. Get ready to impress your family and friends with a dessert that tastes gourmet but comes together with surprising ease. Say goodbye to your oven for this one – all the magic happens right on your stovetop and in your fridge!
Why This No-Oven Butterscotch Bread Pudding is a Must-Try
This recipe stands out for several compelling reasons, making it an ideal choice for both novice and experienced home cooks:
- Effortless Preparation: No oven means no preheating, no monitoring baking times, and less hassle. It’s perfect for warm weather or when you simply want a quick dessert solution.
- Egg-Free Delight: For those with dietary restrictions or simply looking for an alternative, this recipe omits eggs without compromising on texture or flavor, resulting in a perfectly soft and custardy pudding.
- Rich, Authentic Butterscotch Flavor: We guide you through making homemade butterscotch praline and sauce from scratch, ensuring a deep, authentic flavor that store-bought versions can’t match.
- Creamy, Dreamy Texture: The combination of whipped cream and butterscotch sauce creates an incredibly smooth and luscious texture that melts in your mouth.
- Family-Friendly: This dessert is a universal crowd-pleaser, loved by kids and adults alike. It’s comforting, satisfying, and utterly delicious.
- Customizable: While fantastic on its own, this recipe also serves as a wonderful base for various additions and customizations, allowing you to personalize it to your taste.
Ingredients You’ll Need
Gathering your ingredients is the first step towards creating this delightful dessert. We’ve broken down the list by component to make preparation even easier. High-quality ingredients are key to the best flavor!
For the Homemade Butterscotch Praline:
- 1/4 cup Granulated Sugar: Forms the base of our caramel praline, providing sweetness and crunch.
- 1 tsp Water: Helps the sugar dissolve evenly and prevents crystallization during caramelization.
- 1 tbsp Cashew Nuts: Adds a lovely nutty crunch and complements the butterscotch flavor beautifully. You can chop them roughly or keep them whole.
For the Rich Butterscotch Sauce:
- 1/2 cup Granulated Sugar: The primary sweetener and caramel base for our luscious sauce.
- 1 tbsp Water: Again, crucial for dissolving the sugar and achieving a smooth caramel.
- 4 tbsp Unsalted Butter: Essential for that signature rich, buttery taste of butterscotch. Using unsalted butter allows you to control the saltiness.
- 1/2 cup Whipping Cream (heavy cream, at least 35% fat): Contributes to the sauce’s luxurious creaminess and helps stabilize the caramel.
For the Creamy Bread Pudding Base:
- 1/2 cup Whipping Cream (heavy cream, at least 35% fat): Whisked to stiff peaks, this forms the light and airy backbone of our pudding.
- 3 – 4 tbsp Butterscotch Sauce (from the batch you just made): Adds intense butterscotch flavor and a beautiful swirl to the whipped cream mixture.
- Bread Slices: The star of the pudding! You’ll need about 4-6 slices, depending on their size and thickness. Day-old bread works exceptionally well as it absorbs the sauce better. Brioche, challah, or plain white bread are excellent choices.
Essential Kitchen Tools
Having the right tools makes the cooking process smooth and enjoyable. Here’s what you’ll need:
- Non-stick pan or heavy-bottomed saucepan (for caramel)
- Parchment paper or silicone mat
- Rolling pin or meat tenderizer (for crushing praline)
- Medium-sized mixing bowl
- Electric hand mixer or whisk
- Spatula or spoon
- Baking dish or serving dish (preferably glass or ceramic, approximately 8×8 inches or similar)
Step-by-Step Directions to Your Delicious No-Oven Dessert
Follow these detailed steps carefully to create a truly exceptional butterscotch bread pudding. Precision in caramelization is key, so pay close attention!
Step 1: Crafting Your Butterscotch Praline and Sauce
Begin with the Butterscotch Praline:
In a clean, dry non-stick pan or heavy-bottomed saucepan, combine 1/4 cup of granulated sugar and 1 teaspoon of water. Place the pan over medium heat. Allow the sugar to dissolve completely and then begin to caramelize. It’s crucial not to stir the mixture once it starts boiling, as this can cause crystallization. Instead, gently swirl the pan to ensure even melting. Watch it closely; the sugar will first turn clear, then light amber, and finally a rich golden-brown. Once it reaches a beautiful amber color, which should take about 5-7 minutes, immediately remove it from the heat.
Quickly, but carefully, add 1 tablespoon of cashew nuts to the caramelized sugar, stirring them briefly to ensure they are well coated. Cook for just 1 minute off the heat, allowing the residual warmth to toast the nuts slightly. Immediately pour this hot mixture onto a piece of parchment paper or a silicone mat spread on a heat-proof surface. Spread it thinly to cool faster. Let it cool completely until it hardens and becomes brittle, which usually takes about 10-15 minutes at room temperature.
Once cooled and hard, break the butterscotch praline into smaller pieces. Transfer these pieces into a sturdy zip-top bag and use a rolling pin or a meat tenderizer to crush them into coarse crumbs. Set this crunchy praline aside; it will be used for sprinkling over our finished pudding.
Next, Prepare the Luscious Butterscotch Sauce:
Using the same pan (or a clean one), add 1/2 cup of granulated sugar and 1 tablespoon of water. Place it over medium heat and repeat the caramelization process as before. Again, resist stirring and simply swirl the pan gently. As the sugar begins to turn a beautiful amber color, be ready to lower the heat to low if it starts browning too quickly to prevent burning – a burnt caramel tastes bitter. The goal is a rich, golden hue.
Once the sugar has caramelized to your desired golden color, carefully add 4 tablespoons of unsalted butter. The mixture will bubble vigorously as the butter melts; stir continuously until the butter is fully incorporated and the mixture is smooth. Next, gradually pour in 1/2 cup of whipping cream while continuously stirring. Be cautious as the mixture will bubble and steam. Continue to cook and stir gently over low heat for 3 to 5 minutes, allowing the sauce to thicken slightly. It should coat the back of a spoon. Remove the butterscotch sauce from the heat and transfer it to a heat-proof bowl. Let it cool down to room temperature before proceeding with the next step. This cooling process is vital to prevent it from melting your whipped cream.
Step 2: Assembling and Chilling Your Dessert Masterpiece
Now that your praline is crushed and your butterscotch sauce is cooling, it’s time to bring everything together!
In a large, chilled mixing bowl, add 1/2 cup of cold whipping cream. Using an electric hand mixer (or a whisk and some elbow grease), whisk the cream on medium-high speed until stiff peaks form. This means when you lift the whisk, the peaks of cream stand upright and hold their shape. Be careful not to over-whisk, or it will turn into butter.
Gently fold in 3 to 4 tablespoons of the cooled butterscotch sauce into the whisked whipping cream. Fold until just combined, creating a beautiful, swirled butterscotch-flavored cream. Avoid overmixing to maintain the cream’s airy texture.
Take two slices of bread and lightly dip them into the remaining room-temperature butterscotch sauce. Ensure both sides are coated but not overly saturated. Place these sauce-dipped bread slices neatly at the bottom of your chosen baking or serving dish, forming the base of your pudding.
Carefully spoon the whisked whipping cream and butterscotch mixture over the bread slices in the baking dish. Use a spatula to distribute it evenly, covering the bread completely. This creates the creamy, custardy layer of your pudding.
Now for the finishing touches! Sprinkle the crushed butterscotch praline generously over the top of the cream layer. Then, drizzle a bit more of the remaining butterscotch sauce in an appealing pattern. This adds visual appeal and an extra burst of butterscotch flavor and crunch.
Cover the baking dish loosely with plastic wrap or aluminum foil. Place it in the refrigerator and chill for a minimum of 1 to 2 hours. Chilling is essential as it allows the pudding to set, the flavors to meld beautifully, and the bread to fully absorb the creamy goodness. For the best results and a firmer set, an overnight chill is highly recommended.
Pro Tips for Success
- Caramelization Caution: Always keep a close eye on the caramel. It can go from perfect to burnt in a matter of seconds. If it starts to look too dark, remove it from the heat immediately.
- Cooling the Sauce: Ensure the butterscotch sauce is completely cooled to room temperature before folding it into the whipped cream. If it’s warm, it will melt the cream, resulting in a runny pudding.
- Choosing Your Bread: While any bread can work, brioche or challah will give you a richer, more luxurious pudding. Day-old bread is ideal as it’s slightly drier and better at absorbing liquids without becoming soggy.
- Whipping Cream Perfectly: For best results, ensure your whipping cream and bowl are cold. This helps the cream whip up faster and hold stiff peaks more effectively.
- Patience with Chilling: Don’t rush the chilling process. The longer it chills, the better the flavors will develop and the firmer the pudding will become.
- Serving Temperature: This bread pudding is typically served chilled, but some prefer it slightly warmer. If you want it warm, let it sit out at room temperature for 15-20 minutes before serving.
Creative Variations to Explore
While this butterscotch bread pudding is perfect as is, don’t hesitate to get creative and personalize it!
- Nutty Alternatives: Instead of cashews, try pecans, walnuts, or almonds in your praline for a different flavor profile.
- Fruity Twist: Add a layer of thinly sliced bananas or cooked apples between the bread and cream for a fruitier pudding.
- Chocolate Lover’s Dream: Sprinkle some mini chocolate chips or a drizzle of chocolate sauce along with the butterscotch sauce for a decadent chocolate-butterscotch fusion.
- Spice It Up: A pinch of cinnamon or nutmeg added to the butterscotch sauce can introduce a warm, aromatic note.
- Coffee Infusion: Add a teaspoon of instant coffee granules to your butterscotch sauce for a delightful coffee-butterscotch flavor.
- Layering Fun: For a taller pudding, you can add another layer of sauce-dipped bread and cream mixture, ensuring you have enough ingredients.
Serving and Storage Suggestions
This no-oven butterscotch bread pudding is wonderfully versatile for serving. It’s fantastic on its own, allowing the rich butterscotch and creamy textures to shine. For an extra treat, consider serving it with a scoop of vanilla ice cream, a dollop of extra whipped cream, or even a hot cup of coffee or tea. The contrast of temperatures and flavors can be truly delightful.
To store any leftovers, simply cover the dish tightly with plastic wrap or transfer individual portions to airtight containers. It will keep well in the refrigerator for up to 3-4 days. While it’s best enjoyed fresh, the flavors often deepen and meld even more on the second day, making it a great make-ahead dessert for entertaining.
This no-oven butterscotch bread pudding is more than just a recipe; it’s an invitation to create joy in your kitchen without the stress of traditional baking. Its ease, deliciousness, and rich flavor make it an instant classic. Give it a try, and prepare to be amazed by how such a simple process can yield such a spectacular dessert. Enjoy every creamy, crunchy, butterscotch-infused bite!